


Back to Basics: 3 Simple Steps to Improve Your Mixes with Subtractive EQ
When I first started mixing, I thought the only way I could improve a sound was to add something to it. I piled dozens of plugins and EQ boosts onto every track, and my mixes sounded muddy and undefined.
I soon learned that I could achieve even better results by taking away things I didn’t need, rather than always adding more of what I thought I wanted. After this change in mindset, the quality of my mixes took a huge leap forward.
The following mix prep technique applies this subtractive method of thinking to using an equalizer, and it is sure to bring clarity and definition to your mixes.
Step 1: Set Up Your EQ
First, insert an EQ across your track.
If you have a reasonably powerful system, you may want to initiate an EQ plugin across all your tracks at once to save time and clicks later on.
(You can do this easily by holding down “option” if you’re using Pro Tools on a Mac.)
You can use any stock EQ. I like using FabFilter’s Pro-Q because:
- Its “auto gain” feature saves my ears from nasty frequencies.
- Its “band solo” feature makes it easier to find the right Q.
- It has a built-in spectrum analyzer.
To get started, add a new band, or grab an existing band.
Set the Q to 8, giving you a very narrow band to work with.
Set the frequency to 20 Hz, to start your sweep at the bottom of the frequency range.
Set the EQ to boost 18 dB, making problem areas clear. (If you hear any clipping, turn the track down pre-EQ.)
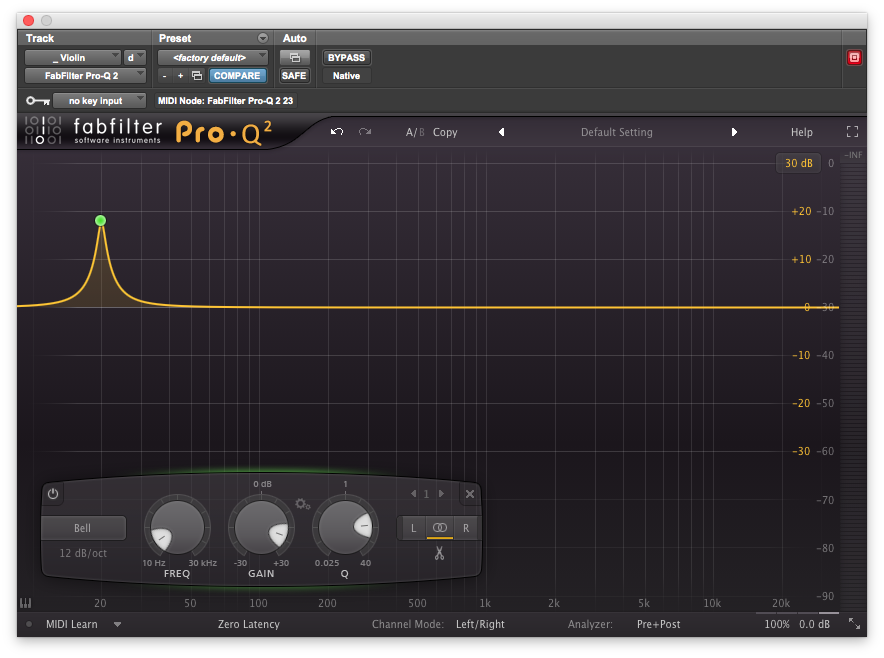
A place to start: FabFilter’s Pro-Q set to boost by 18dB at 20Hz, prepared to sweep up the spectrum in an effort to identify and eliminate problem areas.
Step 2: Sweep and Listen
Grab the frequency knob and slowly sweep up the spectrum. Listen for harsh, unpleasant frequencies that jump out and hurt your ears. You’ll know them when you hear them – they will sound ugly, harsh, and may even give you a headache.
If your EQ has a built-in spectrum analyzer, you can use it to help you find potential problem areas even more quickly. (They’ll often appear as disproportionate peaks on the spectrum analyzer’s display). However, always rely on your ears first and foremost, as there are many problems that won’t show up at all.

A potential problem frequency appearing as a peak on Pro-Q’s spectrum analyzer
Step 3: The Fix
Once you’ve found a problem frequency, stop playback and let your ears rest for a few seconds.
If your EQ has a band solo feature, engage it and slowly widen the Q until you start hearing parts of the spectrum that sound okay when boosted. Then, dial the Q back up a bit to make the band narrower again. The trick is to get as many of the problem frequencies within the band as possible, without affecting too much of the surrounding spectrum.
Play the track without the boost and try to hear the problem in context. Chances are this will be easy, as the sound of the problem frequency will still be etched in your brain. If not, try boosting it 3 or 4 dB to remind yourself what it sounds like. Once you can hear the problem in context, slowly start cutting until it sounds balanced with the rest of the track.
Once you’ve determined the right amount of cut, toggle the EQ band in and out of bypass to see if you like the result. If the track sounds better with the cut engaged, pat yourself on the back!
Add another band and continue sweeping up the rest of the frequency spectrum. (It’s not uncommon to have more than one problem per track). If everything sounds okay, move on to the next track and repeat the process. If a track doesn’t have any problems, remove the EQ and move on.
Audio Examples
To help give you a better idea of what these problem frequencies sound like, here are a few examples. I’ve included at least 3 samples from each track:
- “Flat” – no EQ
- “Boost” – the problem frequency boosted 18 dB
- “Cut” – the problem frequency cut
I’ve also included a screen grab from my EQ, so you can see the settings used.
The first sample is from an electric guitar track that had a harsh ring at 2398 Hz. When I notched this frequency out, the whole track became more pleasant to listen to (especially at louder volumes).
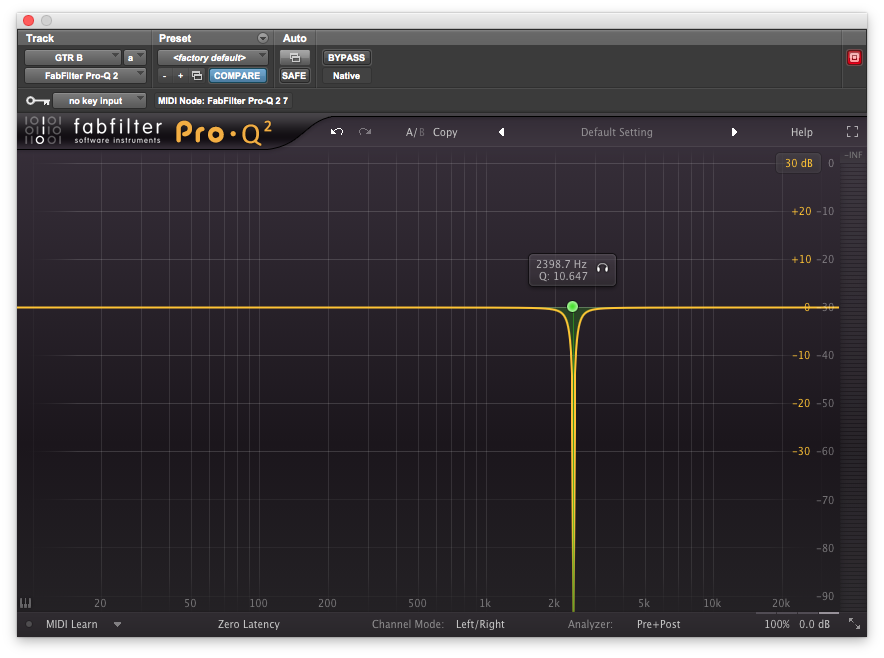
The guitar EQ described above, featuring a steep notch around 2.4kHz to eliminate an unpleasant ring.
The second sample is from a drum loop. When I swept through the track, I found two problem frequencies at 490 Hz and 1212 Hz. Cutting these frequencies a few dB smoothed out the harsh transients.
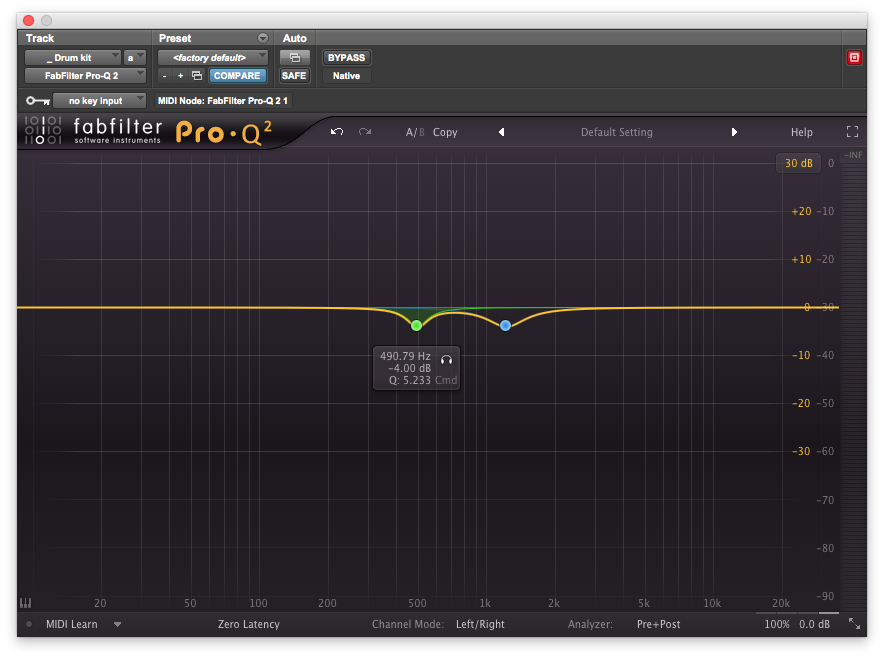
Drum loop EQ, cutting by -4 dB at 490Hz and 1212Hz
The third sample is from a synth track. Its unpleasant, nasal quality was apparent before I even swept through the track. This track benefited from a cut with a wider Q. With the cut engaged, the track sounds much more pleasant.
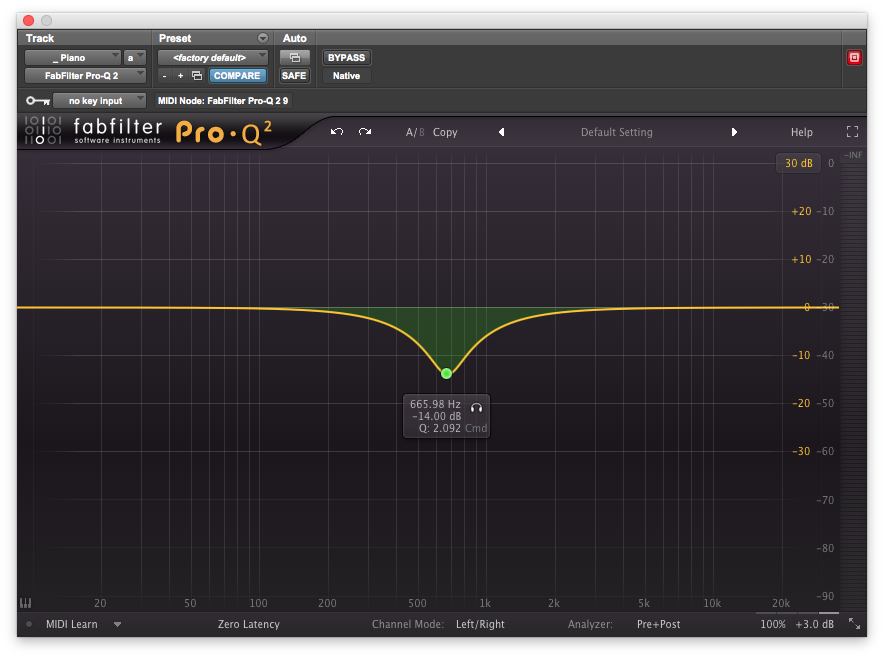
Synth EQ, scooping the devil out of the midrange at about 666Hz.
Conclusion
By taking the time to remove problem frequencies from your tracks, your mixes will sound clearer and more defined.
How are you using subtractive thinking in your mixing process? Let us know in the comment section below.
In A Nutshell
1. Before you start mixing, add an EQ plugin to every track.
2. Sweep through each track using to find the problem frequencies. A spectrum analyzer may be helpful in identifying problem areas quickly.
3. Remove the problem frequencies with subtractive EQ.
Jason Moss is an LA-based mixer and educator. Learn how to craft a clear, balanced low end by downloading these free excerpts from his premium training course, Mixing Low End.
Please note: When you buy products through links on this page, we may earn an affiliate commission.
George Piazza
April 16, 2015 at 7:40 pm (9 years ago)Mixes will also sound better when frequencies beyond the range of the instrument are cut – for example, a standard tuned guitar has a low E at 82 Hz; everything below that is muddy ‘sub-harmonic’ junk. Same thing with vocals, winds, strings, etc. Even VI & samplers can have unneeded frequencies clouding up the low end. Save that area for kick and bass! A high pass filter right at or below the lowest frequencies of each track will do wonders.
Some tracks can also benefit from the same treatment with the highest frequencies. How important is 12 kHz for an electric bass? Maybe a little clacky pick noise up there, but mostly just hiss. Careful cutting of some ultra high junk can add a sense of fidelity to the cymbals, snare and vocals. Just be careful not to cut too low or too steep.
When used with care, high pass and low pass filters can make a mix shine.
Jason Moss
April 16, 2015 at 7:42 pm (9 years ago)Great point George!
Georg Stuby
July 6, 2016 at 9:39 am (8 years ago)good read! I made the experience, that too much EQing leads to phase-problems (especially with plugins and narrow Qs). What do you think about this?
Jason Moss
July 26, 2016 at 12:09 pm (8 years ago)Hey George! Thanks for your reply! Glad you enjoyed the article.
There are many misconceptions about phase as it relates to EQ. All EQs (analog and digital) create phase shift. On its own, this phase shift is inaudible, similar to the way that adjusting the phase of a solo’d track using a tool like Little Labs’ IBP has no audible effect. However, an EQ’s phase shift can create problems when processing correlated signals (like a close-mic’d snare drum track that is part of a full kit, or one of the two mics on a guitar cabinet).
A popular solution to this problem is to use a linear phase EQ, which is not subject to phase shift (but has other problems).
For more on this, I highly recommend checking out the following resources:
https://www.youtube.com/watch?v=efKabAQQsPQ
http://ethanwiner.com/EQPhase.html
Hope this helps!
Jason
Luke Prosser
November 20, 2016 at 2:15 pm (7 years ago)A great reminder Jason! Such a fundamental process but an easy one to skip when we’re in amongst the process! Great article.
MauDee BeatS BiG Up K.
August 9, 2017 at 12:03 pm (7 years ago)<3