


The Lowdown on Low End, Part 1: Monitoring
It’s common for small studio owners to invest thousands into microphones, preamps, monitors and outboard gear. However, properly treating your listening (and tracking) space is arguably more important than any other gear purchase you can make.
Even a couple hundred dollars spent on some DIY broadband absorbers can be the difference-maker in your mixes, and help ensure you get the most out of the rest of your gear. But before you go slapping panels all over your walls, it’s best to have a plan, and to know exactly how the low frequency waves in your room are behaving.
Learn Your Space
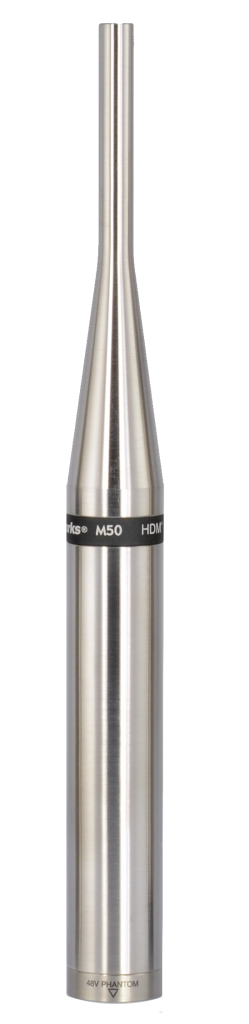
Reliable reference mics are widely available, from the $60 Behringer to the Earthworks M50 for over $1200.
If you can get access to a measurement microphone, this is your best bet for performing a decent frequency analysis of your room. There are options that can accommodate any budget, ranging from Behringer’s ECM8000 at an impressively low $60 price point, all the way up to the Earthworks M50 available for $1,300, boasting a monstrous 3Hz – 50kHz frequency range.
If you’re without a measurement mic, a condenser with a relatively flat frequency response would be the next best thing. In this case, you may want to get a hold of its frequency response chart and factor it into your readings.
To start measuring your room for yourself, begin with your mic placed at the listening position, play back some white or pink noise from your DAW, and route the microphone’s output to a frequency analyzer plugin. From here, you can move the mic around the room and monitor how it changes from one location to another. Then, play back a plethora of low frequency sine waves one at a time and walk around your room.
You’ll probably find that some frequencies disappear almost completely in certain areas, and some may become noticeably amplified in others. Moving your head even 6 inches can make a surprisingly big difference when it comes to low frequency response.
If you can spare just $100 to get a hold of FuzzMeasure, this program will play back a sine wave that will sweep the entire frequency spectrum and spit out various graphs indicating which frequencies are present at which amplitudes. For just a bit more, Sonarworks offers an entire measurement microphone and software correction package to make this process even more seamless.
Whatever your method, chances are you’ll see and hear some fairly noticeable differences across the entire frequency spectrum. Once you’ve got your diagnosis, it’s time to start looking for a cure. To do this right, you’ve got to get physical.
Go Deep

Premade traps are easier to find than ever, and some companies are now providing DIY kits for the best of both worlds.
When it comes to solving low-end problems in the small studio, broadband absorbers are one of the best tools to start with. These are usually made of rigid fiberglass (most often Owens Corning 703) wrapped in fabric and set inside a simple wooden frame, often 4′ long x 2′ wide.
The absorptive material in these panels can be anywhere from 1-6 inches thick—and sometimes even thicker in extreme applications. Panels up to only a few inches in depth will aid in dampening pesky flutter echo, but won’t do much for absorbing frequencies around 100Hz and lower. That’s a job better suited for the 6 inch-plus panels.
If you’re the kind of person who likes the DIY approach, building these is as simple as making frames out of lumber, purchasing the desired thickness of rigid fiberglass, and wrapping it all in some porous fabric—preferably with some kind of flame retardant applied.
For off-the shelf and custom solutions, popular retailers include RealTraps, ATS Acoustics and GIK acoustics. For a more hybrid approach, brands like Ready Acoustics even make cost-effective DIY kits.
Cornered

This mock-up from Ready Acoustics shows a minimal, cost-effective setup. Starting with corner broadband absorbers and adding on from there should give most small studios the most bang for their budget.
Because corners are natural a hotspot for bass frequencies, they are often your best starting point for panel placement.
If you’ve only got a couple thicker absorbers to work with, it’s best to begin by treating the corners behind your speakers rather than the corners at the back of the room. For an even sleeker look, you may want to consider buying or building trianglular-shaped corner traps.
If you’re particularly handy and there happens to be a specific frequency buildup that persists even after some treatment, you may want to consider building a Helmholtz resonator.
These custom-tuned wooden boxes tend to be implemented most often in elaborate buildouts, but they’re relatively simple in design and can help eliminate specific problem frequencies if tuned and placed appropriately. (Incidentally, this concept is also applied to automobiles’ exhaust systems to create intentional cancellation of the note the exhaust produces.)
Canned
Panels and resonators aside, if you’re mixing in a space that hasn’t been professionally tuned and treated, you may want your last line of low-end defense to be a cross-checking of your mix with some familiar commercial mixes on a good pair of reference-quality headphones.
Mixing primarily in a pair of cans is probably not ideal for a multitude of reasons, but by cross-referencing against a few great mixes in headphones, you can eliminate the variable of your room presenting you with an overly-skewed playback.
If you find yourself boosting 10dB at 80Hz when listening on speakers, chances are you’ve got a pretty serious cancellation at listening position in that frequency range. Similarly, if a particular recurring note in a chord progression is consistently jumping out or disappearing from the mix, be sure to check in headphones before you start hacking away at your automation. That note’s fundamental just may be the same frequency as a buildup or cancelation in your room.
Curved
When you’re mixing in a space that has not been properly tuned, it can serve you well to listen at low volumes in order to help minimize the effect of the room.
As you pump less acoustic energy into the room, you decrease the perceived proportion of reflected sound to direct sound reaching you at the listening position, giving you a more accurate picture of your mix at no real cost.
Add to this the benefit of exploiting the Fletcher-Munson curve to your advantage, and it’s now question why so many of the best mixers around are big advocates for listening low.
Subbed
Subwoofers can be a great resource to have at your disposal, but they can also be more of a distraction than a help—especially in rooms with serious low-frequency issues.
While subwoofers can undoubtedly serve as a useful consultant—especially when dialing in a kick drum’s relationship to the bass and other low frequency elements—the use of a sub at all times may steer you off course when addressing the rest of a mix.
To this day, it’s common to see many great mixers relying heavily on small speakers like the Auratones and Yamaha NS-10’s as their main nearfield reference—even when it comes to balancing bass instruments.
These types of speakers lack of a resonant port (which artificially enhances some bass frequencies over others) and their small cones, and fast reaction and decay times for the low frequencies they do reproduce, make these classic speakers a useful reference, even with the wide availability of more “Hi-Fi” nearfield monitors on the market today.
Summing It Up
Unless you’re doing a build from the ground up, your room will have some inherent issues in the low-end.
New studio owners often underestimate how simple (and cost-effective) it can be to address these issues, and make substantial leaps forward in the accuracy of their playback, the performance of their equipment, and the effectiveness of their decision making.
Working in a treated room will also save you a lot of time in going back and revising mixes, as your work will better translate to other playback systems with far less effort.
Ultimately, if you treat your space well, your space will treat you well.
Please note: When you buy products through links on this page, we may earn an affiliate commission.
Matt Verzola
January 7, 2016 at 6:59 pm (8 years ago)one of the biggest hurdles to acoustic treatment is the presence of a wife in the listening environment. often a great placement of a bass trap or sound absorber directly interferes with the aesthetic taste of the wife, and the use of cans is the only viable option.
Dan Cooper
January 9, 2016 at 6:18 am (8 years ago)Brilliant article.
Terry Kirby
February 12, 2016 at 1:28 pm (8 years ago)Whipped?
Matt Verzola
February 12, 2016 at 1:56 pm (8 years ago)Happy wife, happy life.