


How to Build Your Own Soundproof Rehearsal Room (When You Have No Idea What You’re Doing)
The Room.
This story first appeared in Trust Me, I’m a Scientist on March 31st, 2014.
Most paid rehearsal spaces stink, if not literally, then at least figuratively. For several years, my band rehearsed in one: A windowless room slapped together with drywall inside of a warehouse space in a sad and desolate part of town.
We played two nights a week in that rented space, sharing the room with up to three other bands. Our roommates, schedules, and the price of rent changed each time our landlord moved our room, which turned out to be four times in two years. Each member of our three-piece band often paid upwards of $100 a month for our share of the space.
Outside the room, beer bottles overflowed from rubber bins on the loading dock. If we needed to eat something after practice, our options were limited to whatever we could find at the nearest gas station. A metal band always practiced next to us at the same time we played. (ALWAYS.) My energy level dropped each time I drove to that rehearsal space at the edge of the world.
All this was before I saw The American Musical Dream in action.
A few enterprising (and lucky) friends showed me the way: I visited their houses and saw how they had converted a basement, a garage, or even a spare bedroom into a rehearsal space with little or no soundproofing. Why pay for shared space in some sketchy industrial neighborhood, when you could play in comfort in your own home for free?
Last year, I found a new home in a one hundred year-old, two-story house in Seattle’s Capitol Hill neighborhood. I rented it along with three other roommates, including my friend Ben, a fellow bass-player also intent on realizing the dream of independence from run-down commercial rehearsal spaces. The basement of the house was long, with a concrete floor, and although the ceilings were a bit low, it was certainly big enough to fit a band.
What began as an abstract idea became a six month-long construction project. Musicians became architects and builders. Boys became men, and The American Musical Dream became a reality. All without anyone losing a finger.
The Blueprint
“I’ve got 300 defective rubber kickballs from my job,” I told Scientist head honcho Justin Colletti over the phone excitedly, “I can soundproof my basement with these, right?”
“Probably not,” he answered coolly, harpooning my dreams. “The only things that can really help with soundproofing are mass and trapped air,” Justin explained.
It turns out that materials like mattresses, Styrofoam, egg crates and bedsheets don’t help nearly as much as most people think when it comes to keeping sound from getting in or out of a space. And, if you have just one place where sound can escape, you might as well have a thousand. Your only real solution is to either build an airtight interior space (with some form of ventilation) or to make every part of your existing walls thicker.
All this was information I’d end up finding in Justin’s article “Soundproofing the Small Studio”, and it would serve as our bands’ only technical background for the project. (If we failed, I would of course let Justin know that it was his article’s fault for misleading us, and not because we were musicians who had never built anything before in our lives.)
We started out by surveying just how bad the sound leakage was. For a preliminary test by ear, our band’s drummer, Aaron, played a snare drum in the basement while my roommate, Ben, and I walked the perimeter of the house. We were surprised to find that a small crack in the brick foundation made the snare drum sound like it was being played right next to us, even while we walked out five feet from the house. From where we stood, there may as well have not even been a wall at all.
Now we needed to soundproof thoroughly if we were to have any hope of playing regularly in the basement. We eventually settled on what seemed like the only plausible solution we found in Justin’s article: Building a “room within a room”. This interior room would be small, but we could theoretically ensure that all the sound created in it would stay in it, without having to do anything to the structure around it.
In the course of our building, we would learn some practical lessons about soundproofing, and some practical lessons about making a mess in the basement of a house you don’t own while four people try to live there.
Disclaimer: You Need a Mike Wong
At this point it’s fair to tell you that in order to build your home rehearsal space, you need a Mike Wong.
Mike Wong is a friend of ours, and a jack-of-all-trades. He’s a great chef, a world traveler, and a man who likes to get involved in projects like this one. Mike joined our construction crew for no money, simply because he liked the challenge it presented.
Ben and I knew what drywall was from our time in those industrialized rehearsal spaces. We also knew what studs were: You look for them in the wall when you want to hang pictures up. We were armed with Justin’s article, but that was about it. Otherwise, we were dumb as a bag of hammers when it came to building. Mike did have a background in construction but no knowledge of soundproofing. It was a match made in heaven.
Mike taught Ben and me how to measure, how to cut and screw in drywall properly, how to use a Japanese saw, how to insulate, how to mud, and what tools and materials we needed to do it all.
So, while this is technically a home construction project, unless you know a Mike Wong or are one, I wouldn’t recommend you try it at home.
The Construction Process
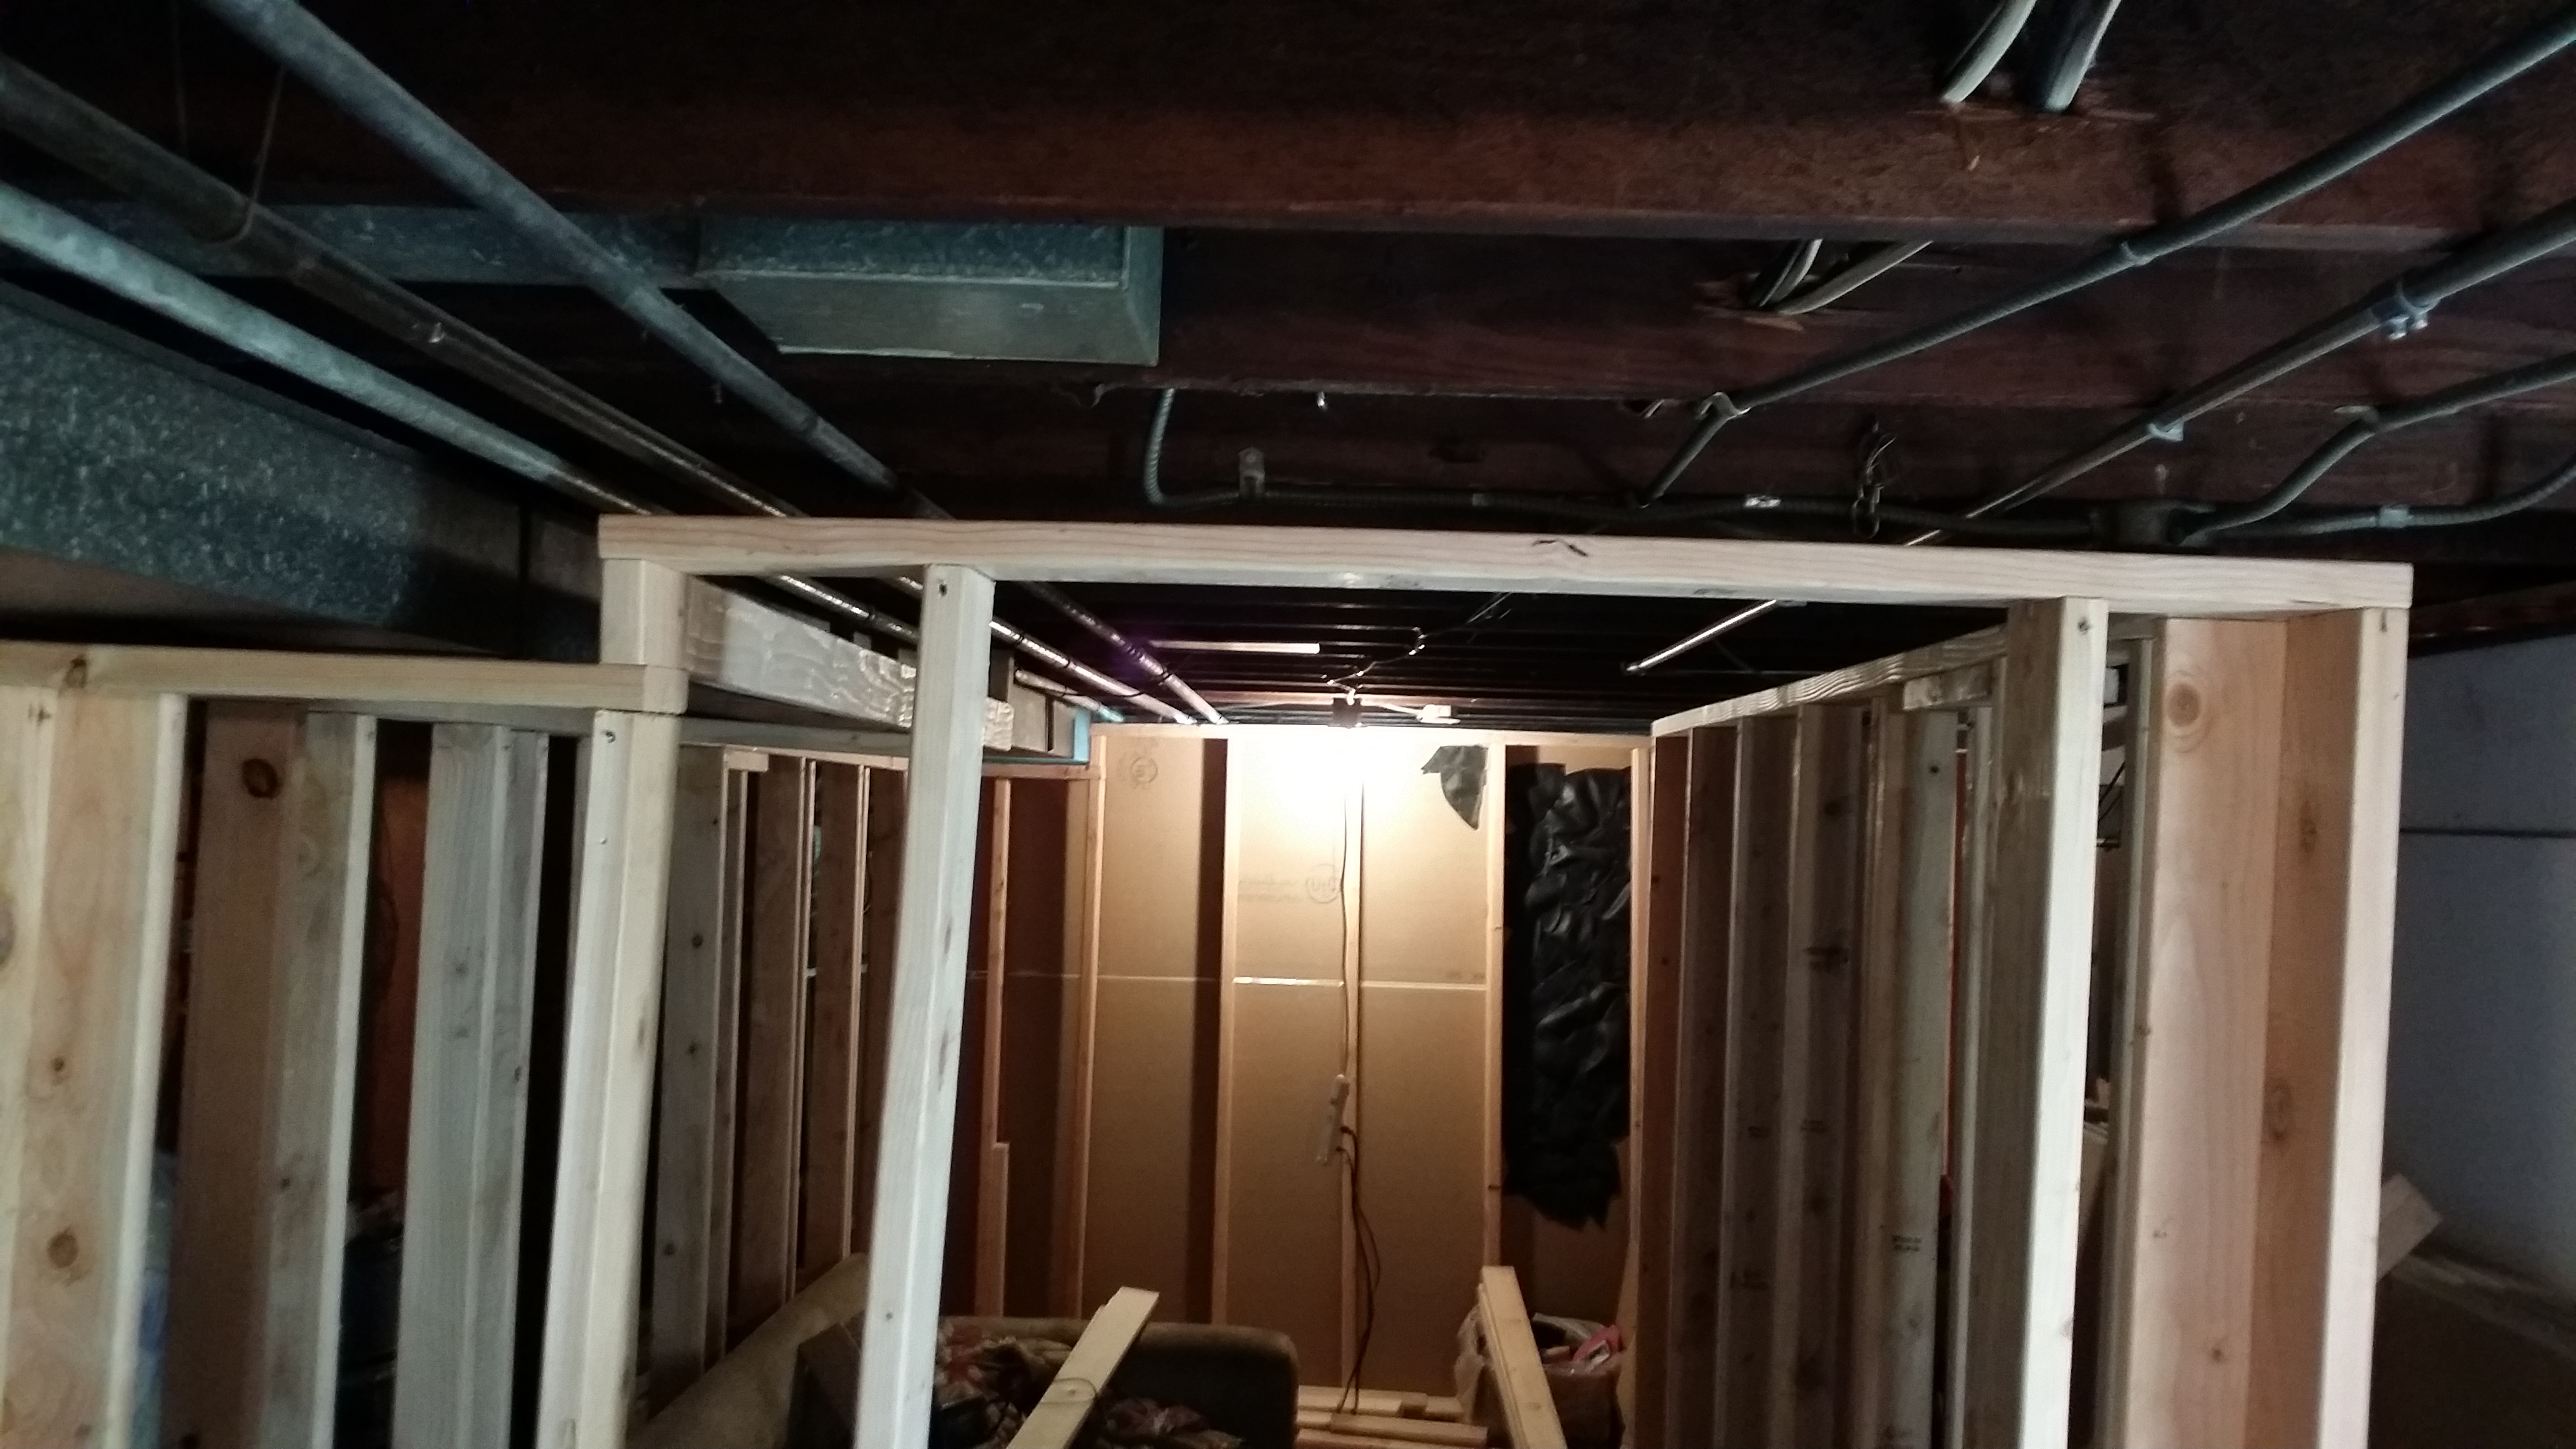
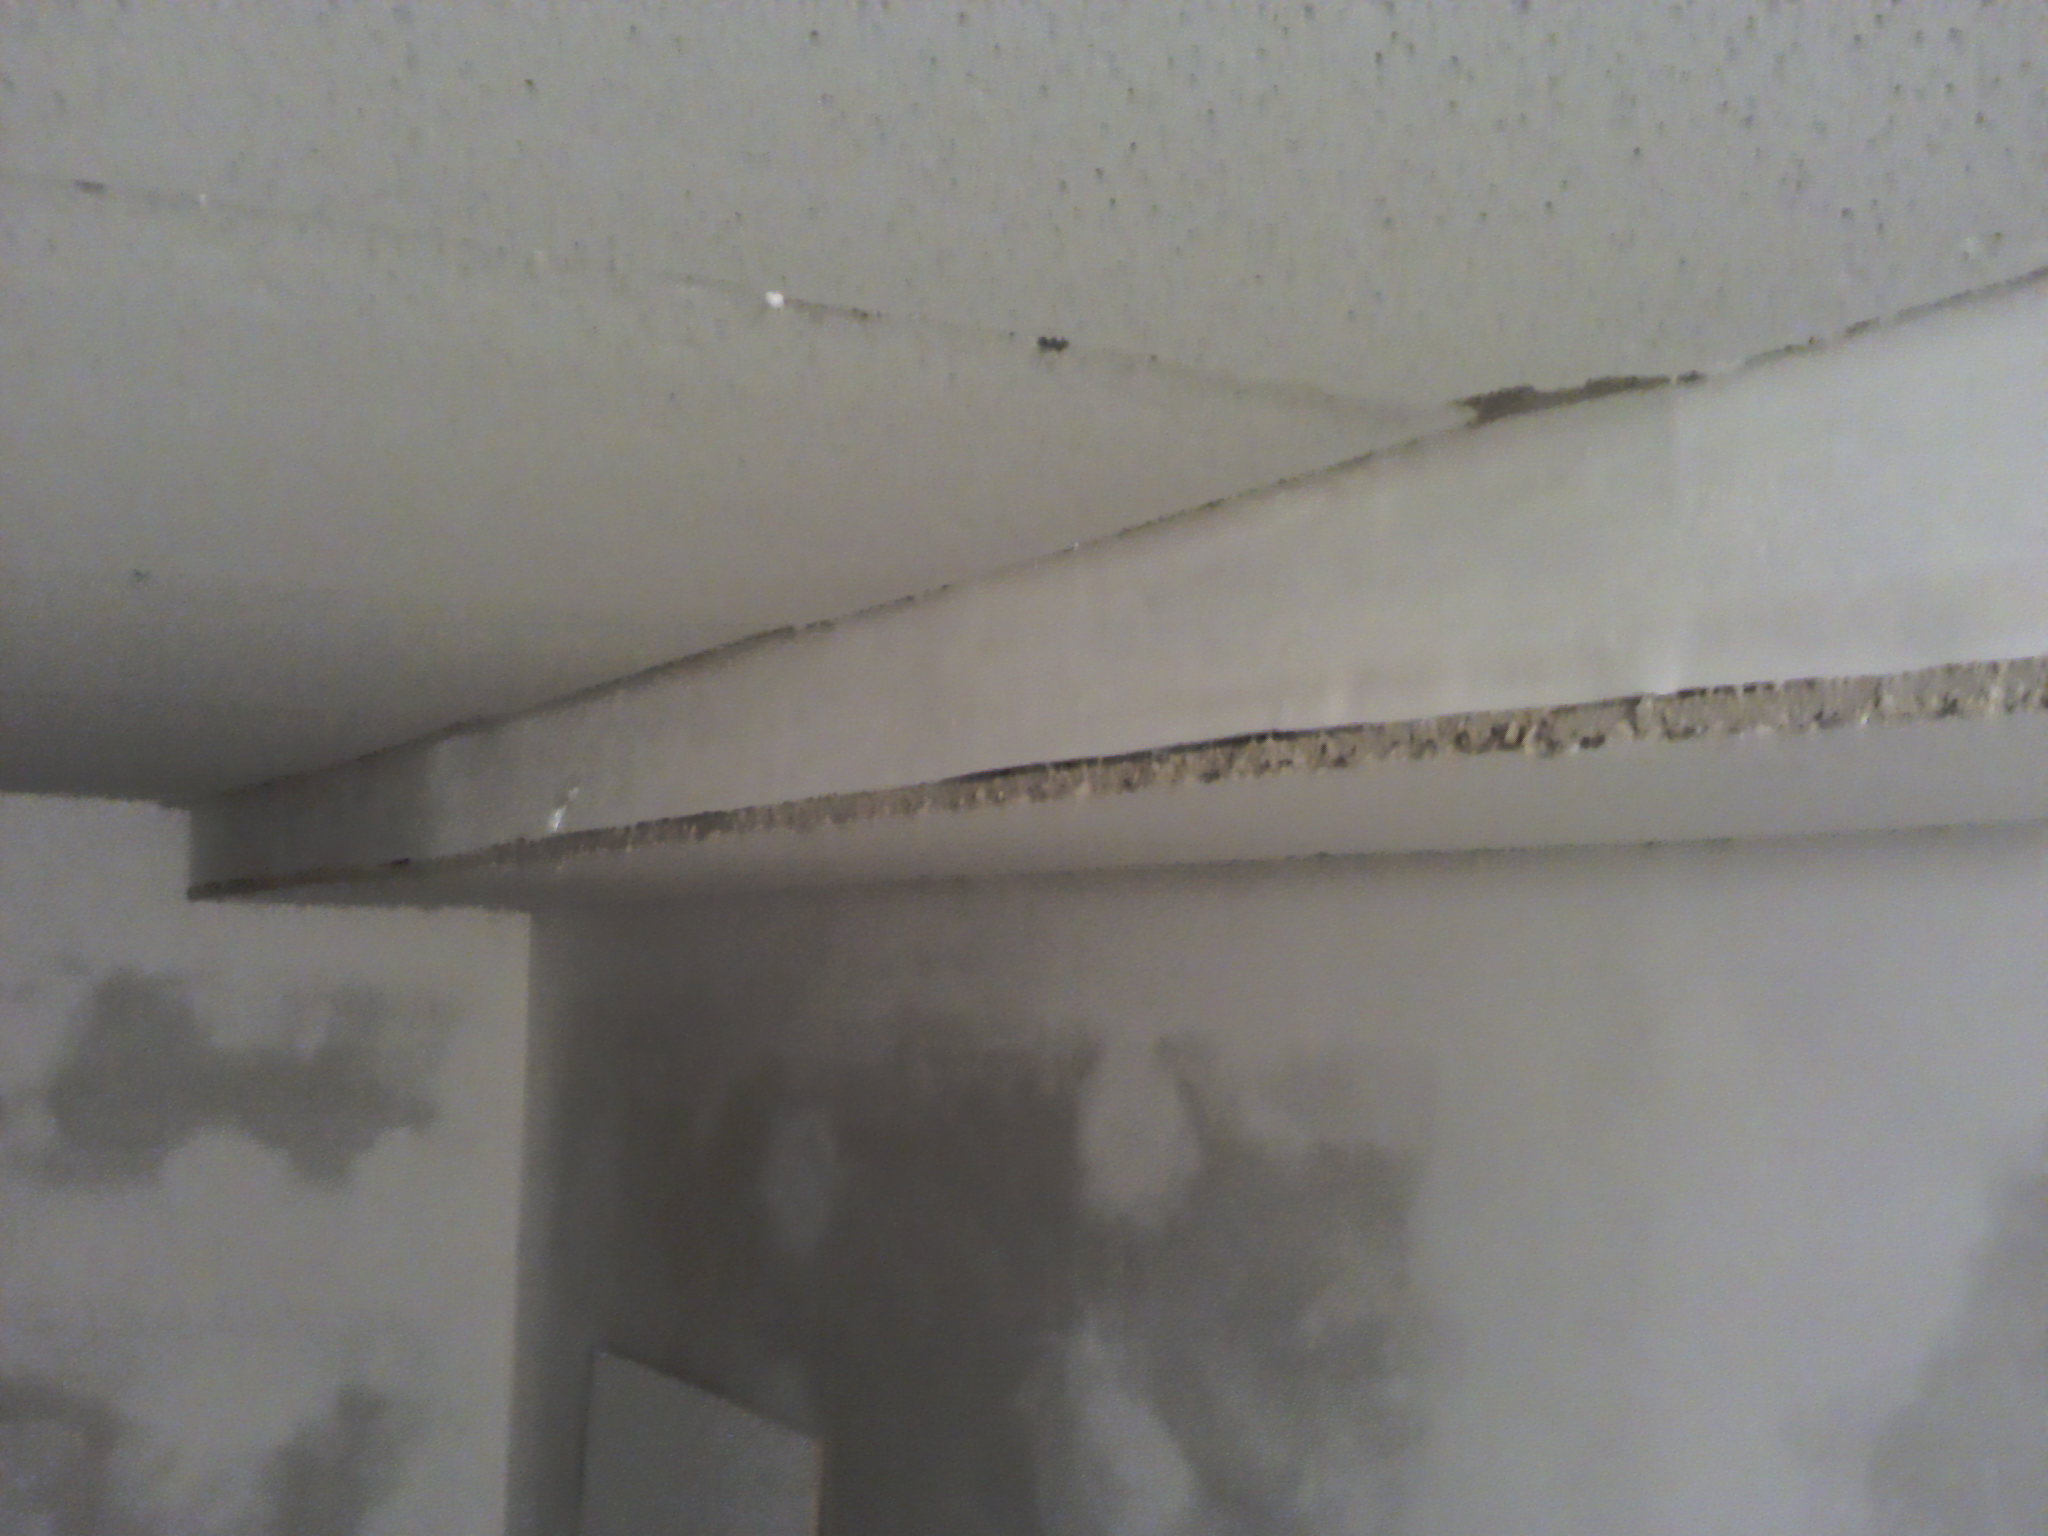
We designed our room-within-a-room in an “L” shape, about 15 feet long, 8 feet wide at the back, and 6 feet wide toward the front. This indent on the right side was necessary to conform to building code: Mike Wong informed us that we would need 3 feet of space between any other wall and our fuse box. Without that space, our room would be a fire hazard. We also had to drop a portion of the ceiling about 8 inches on the left side of the room to allow for the heating vent overhead.
After determining our design, we began constructing the wooden frame for our new interior walls: 2” x 6” planks for our bottom and top edges, with offset 2” x 4” vertical studs every 12 inches.
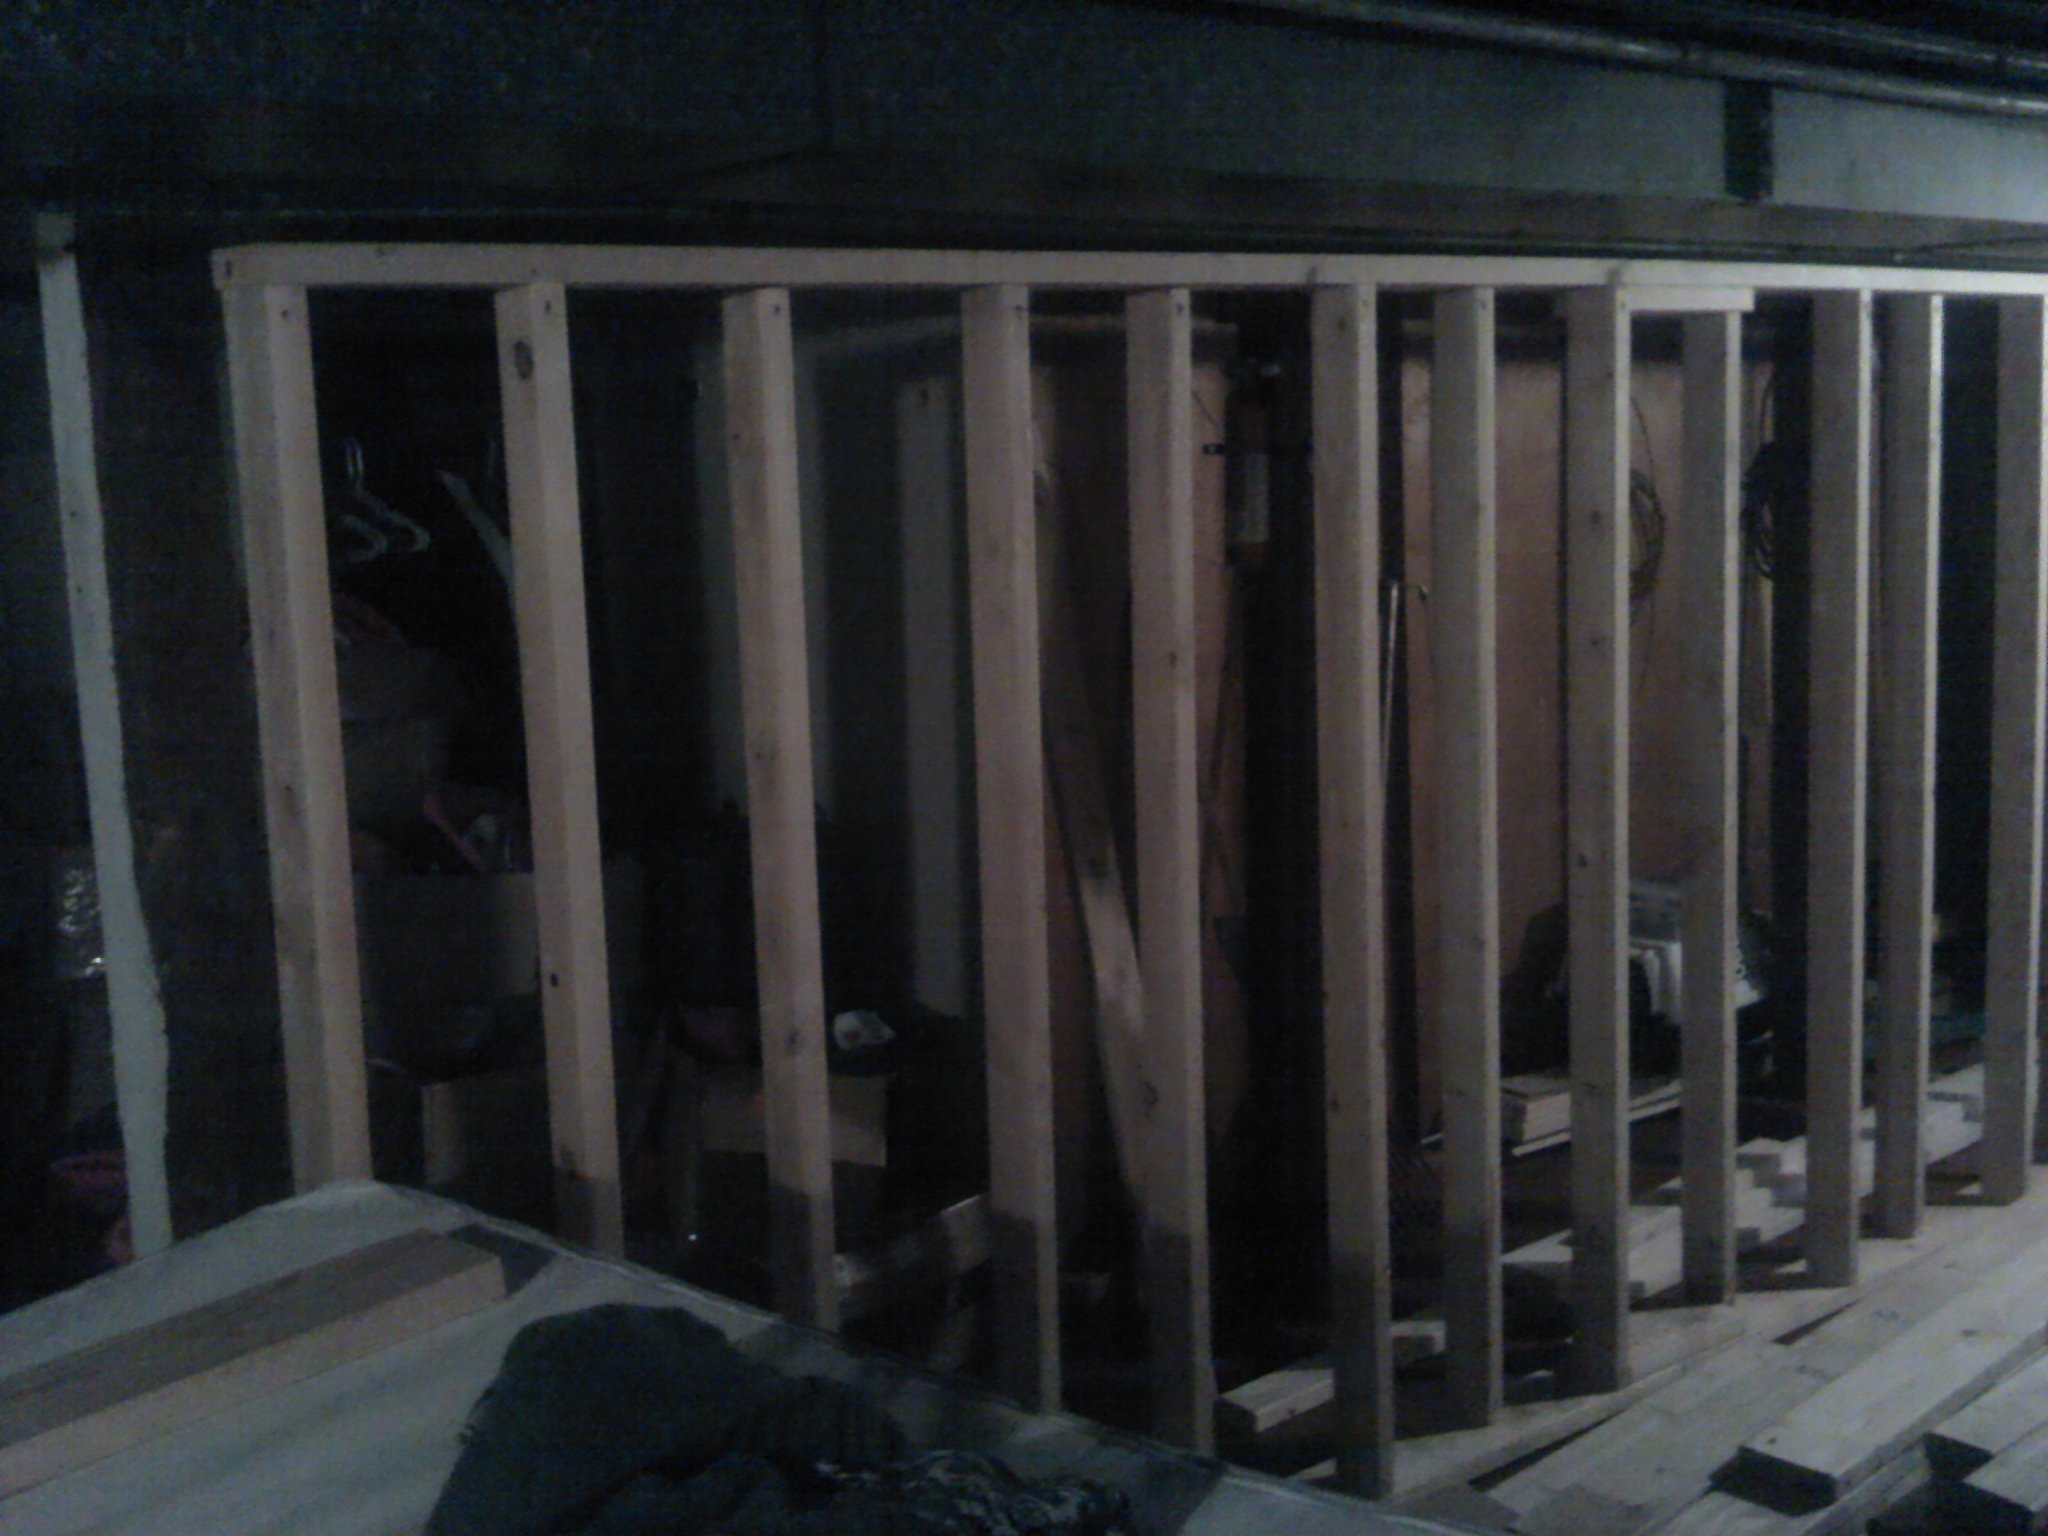
Framed.
Once our frame was in place, we added a single layer of 5/8-inch drywall on one side of the frame. Of course, we got overzealous and did one drywall layer on a single wall before our full frame was even done…
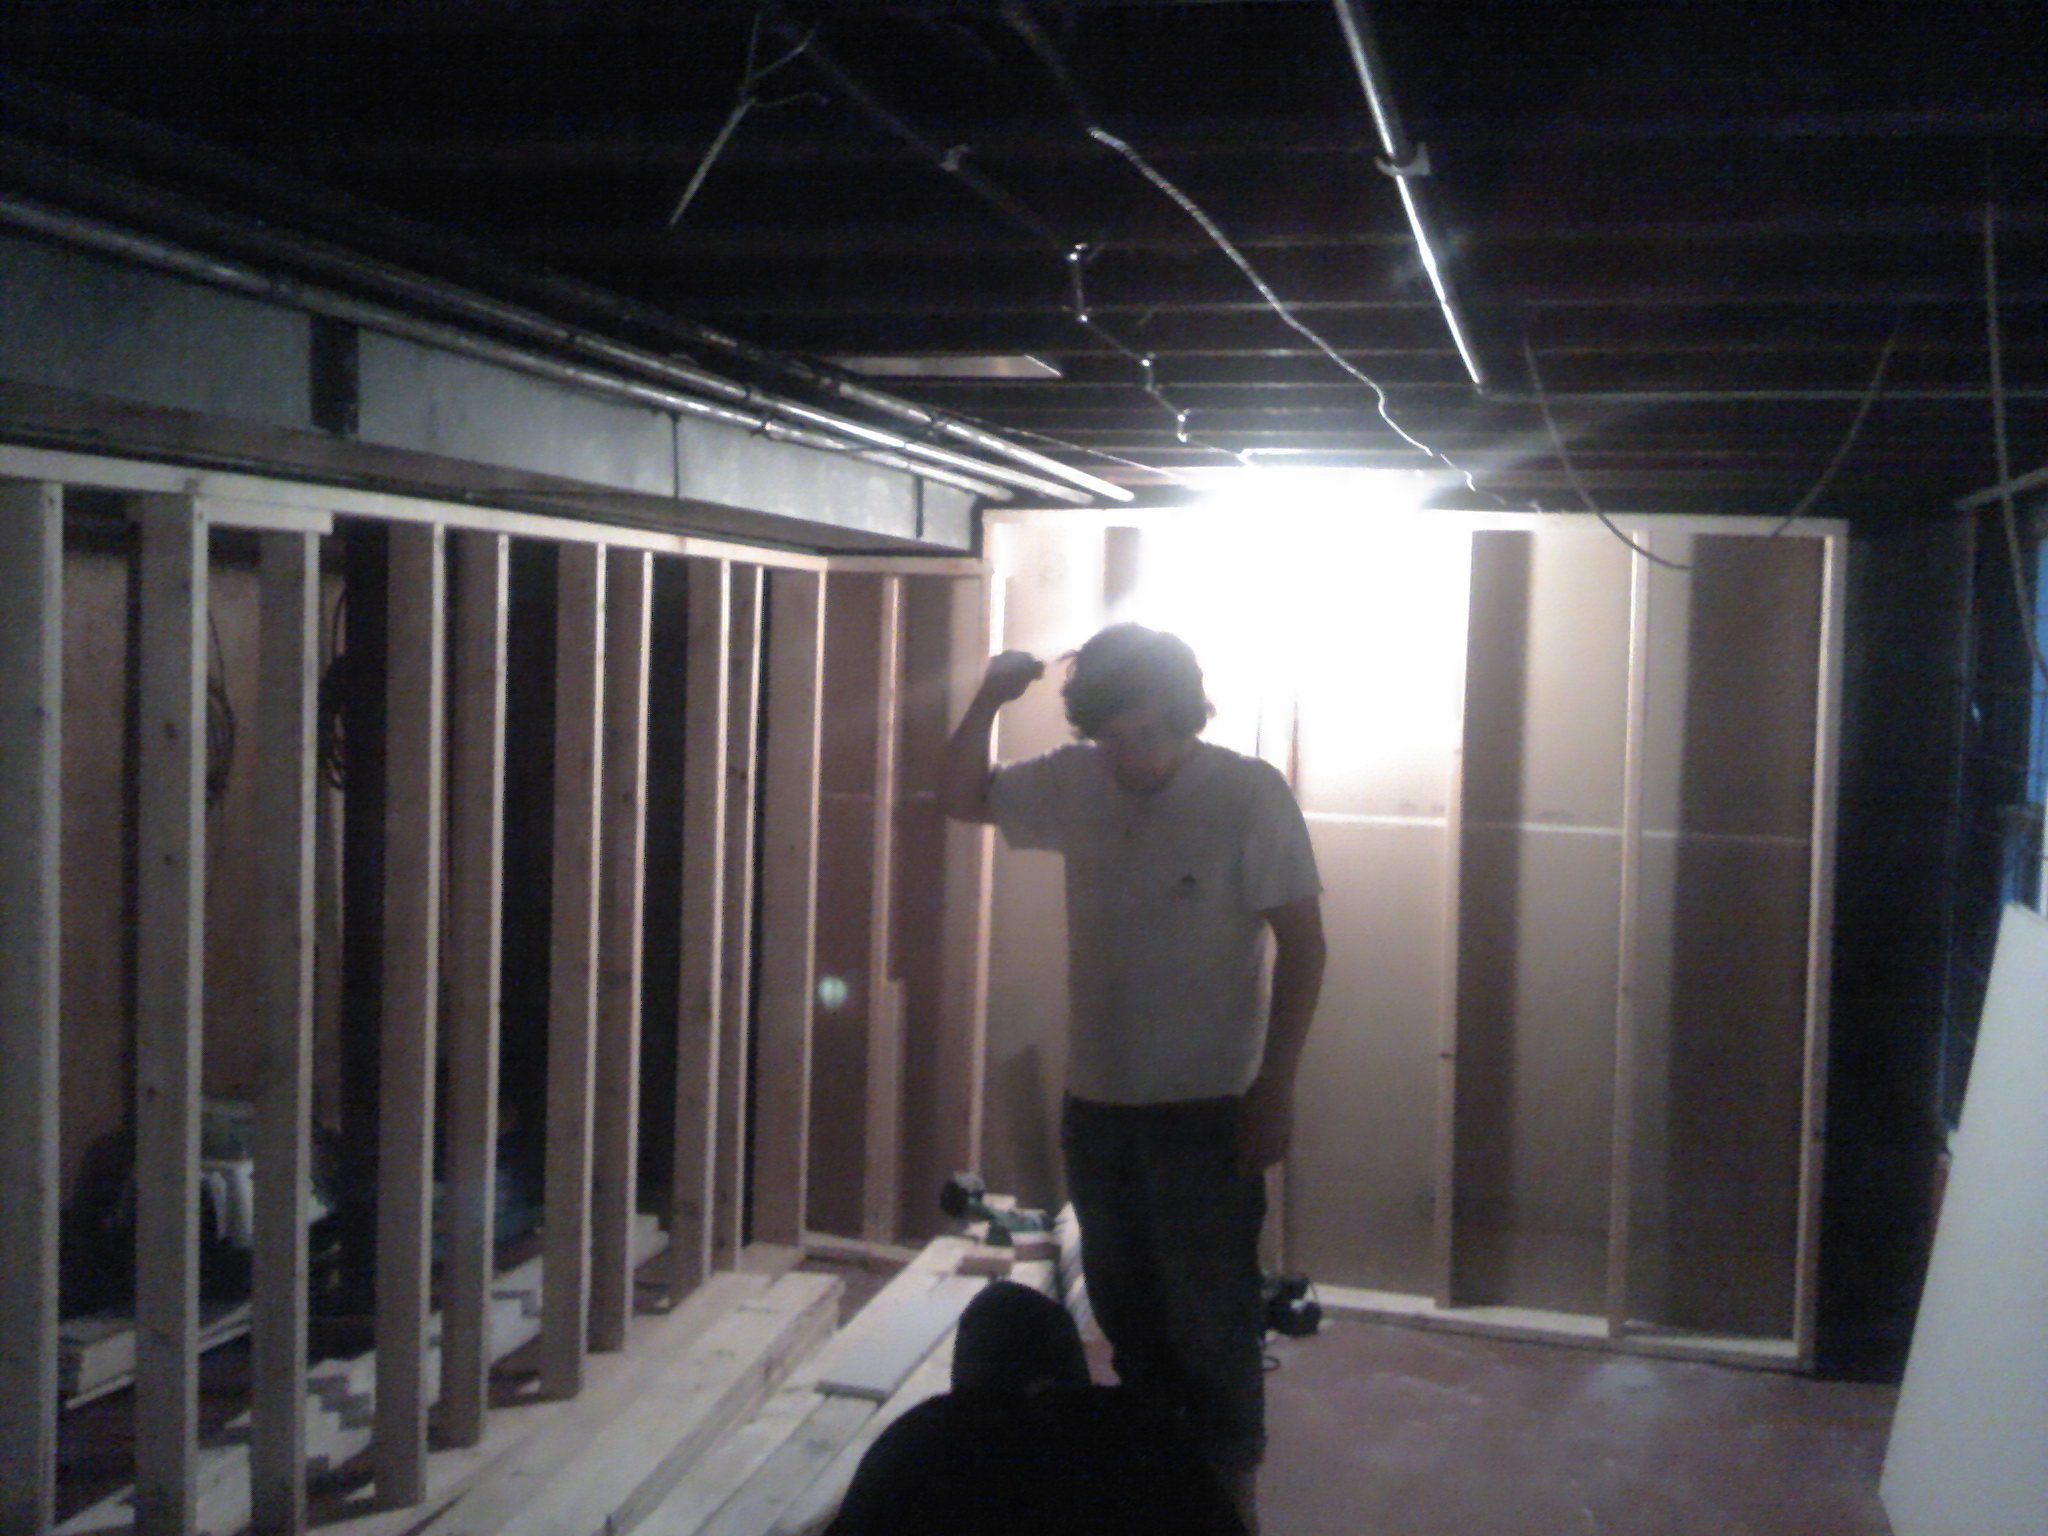
Wong, Wood, and Wall
We soon got back on track and finished the full frame.
An uneven floor added a level of difficulty to getting our frame’s proportions right
Once we got our first full single layer of drywall up, we began stapling insulation to it in between each of our vertical studs. This would provide further dampening between our drywall layers.
You can spend some bigger dollars on an insulation made specifically for soundproofing, but we found a standard brown insulation for about $16 a roll that worked fine. Note: Don’t plan on going anywhere, doing anything, or talking to anyone after you’ve been handling insulation for an hour. It’s best to get directly in the shower, perhaps setting your clothes on fire first.
After adding our insulation, we added two more layers of drywall on the inside, making for a total of three layers: Two layers on the inside, then studs and insulation, then one more layer on the other side. We might have added a fourth layer by doubling our outside wall, but we were concerned about our budget.
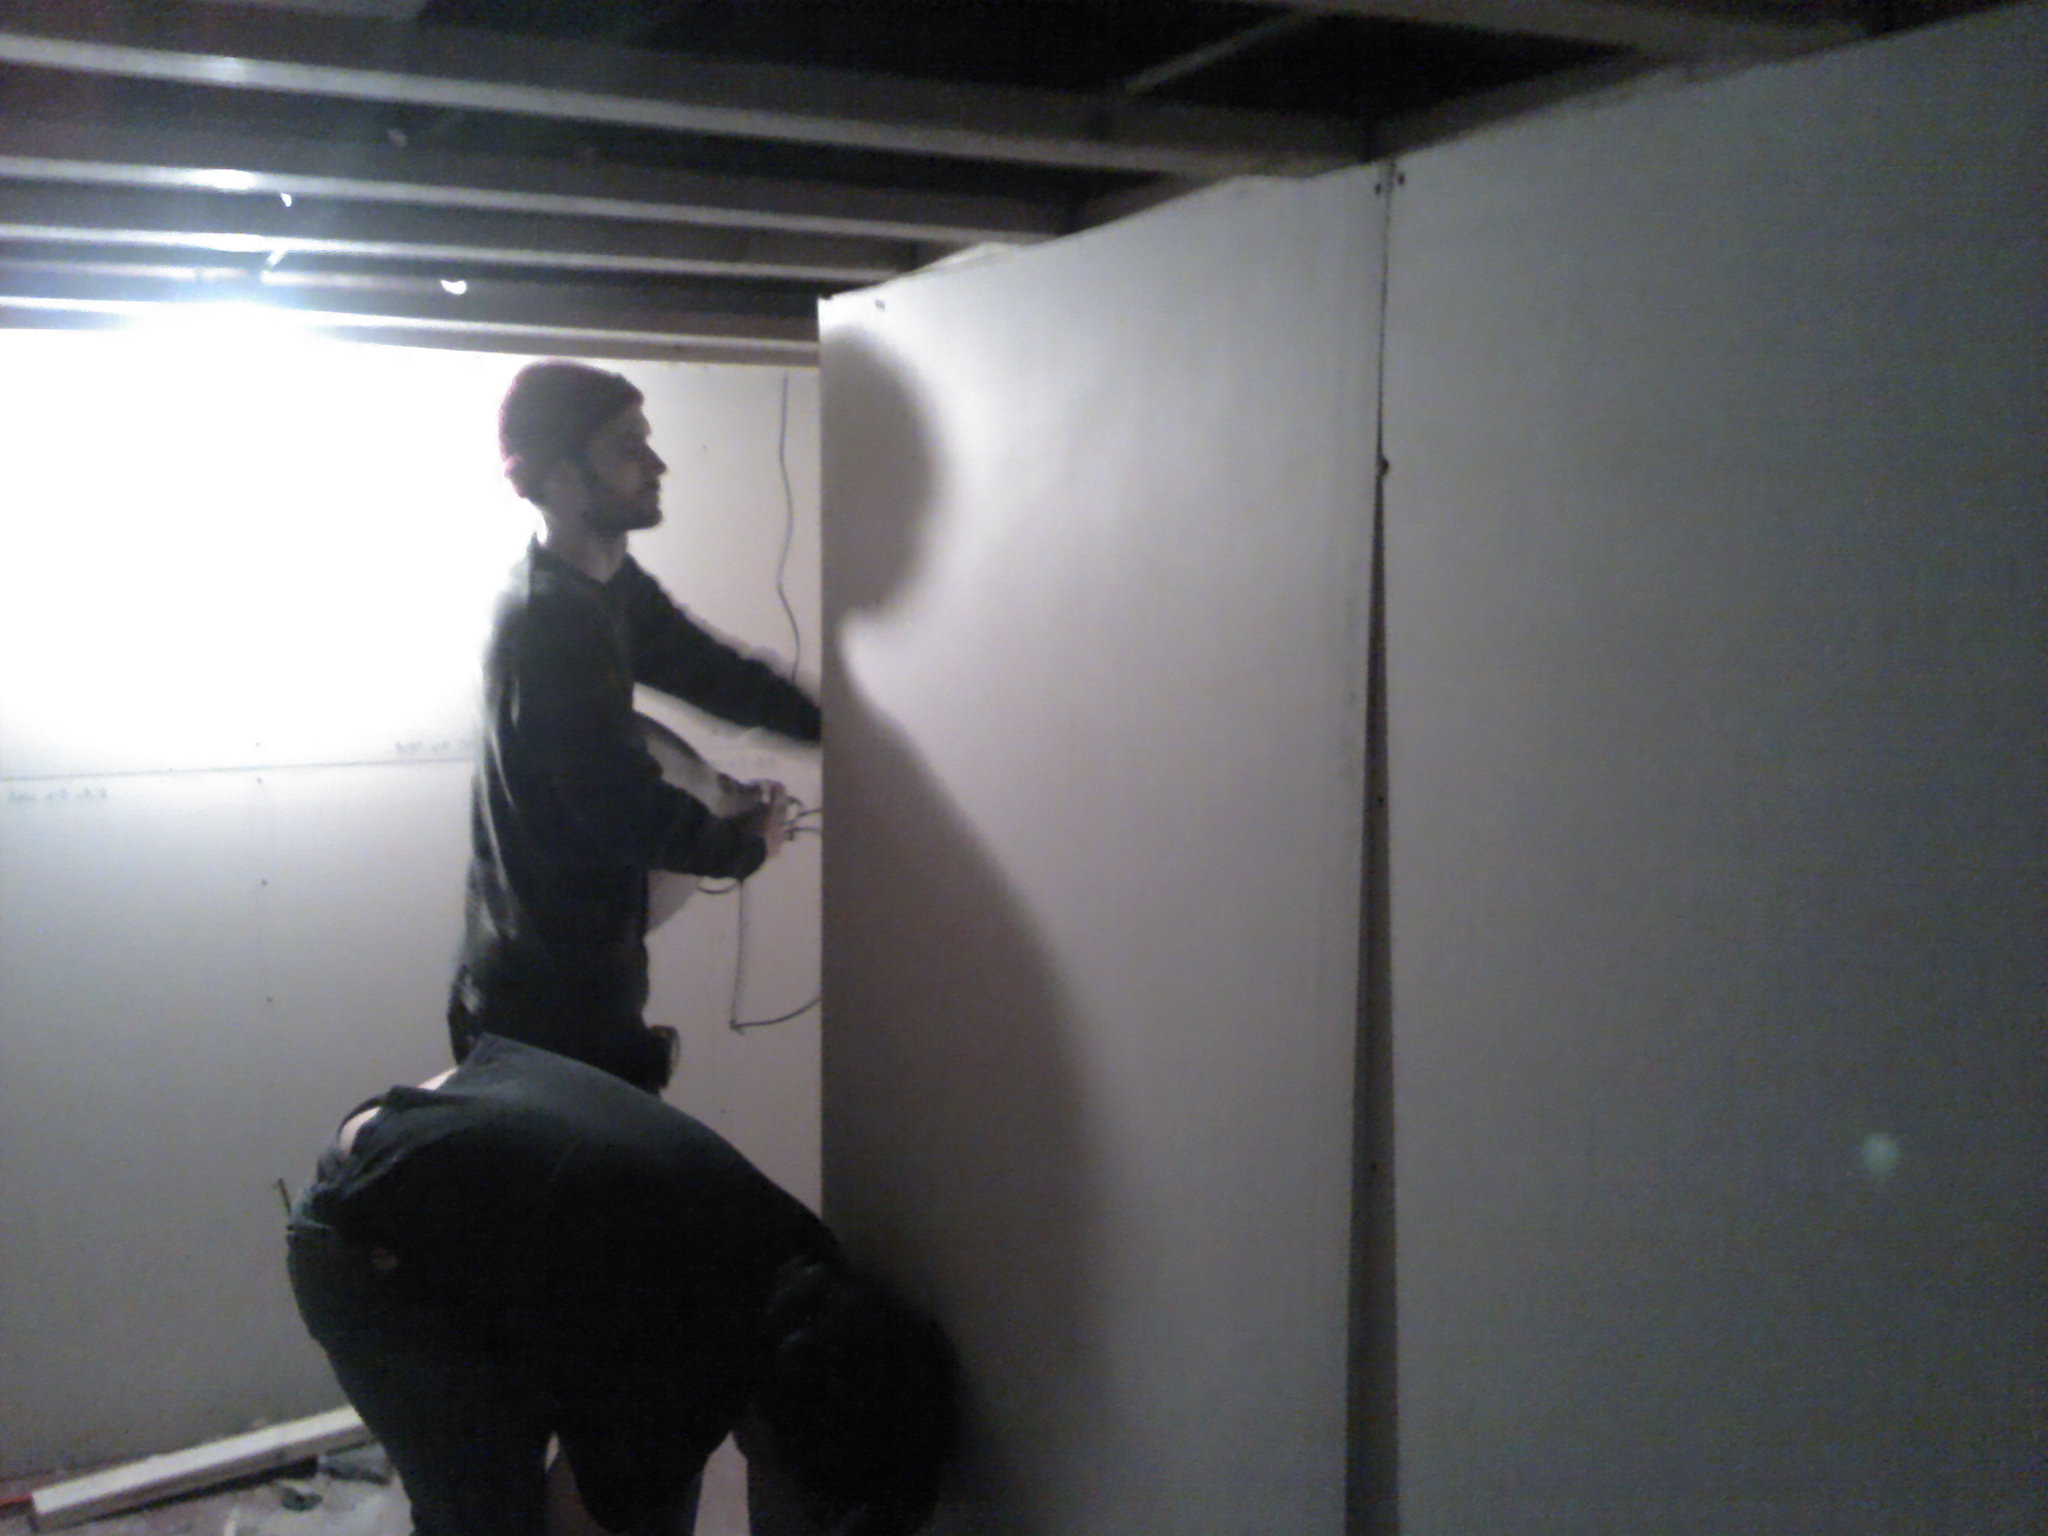
Ben and Mike Wong setting drywall
With our walls done, we turned our attention to the ceiling, first putting up extra nailers in between our studs so that our drywall layers would have more support to screw into.
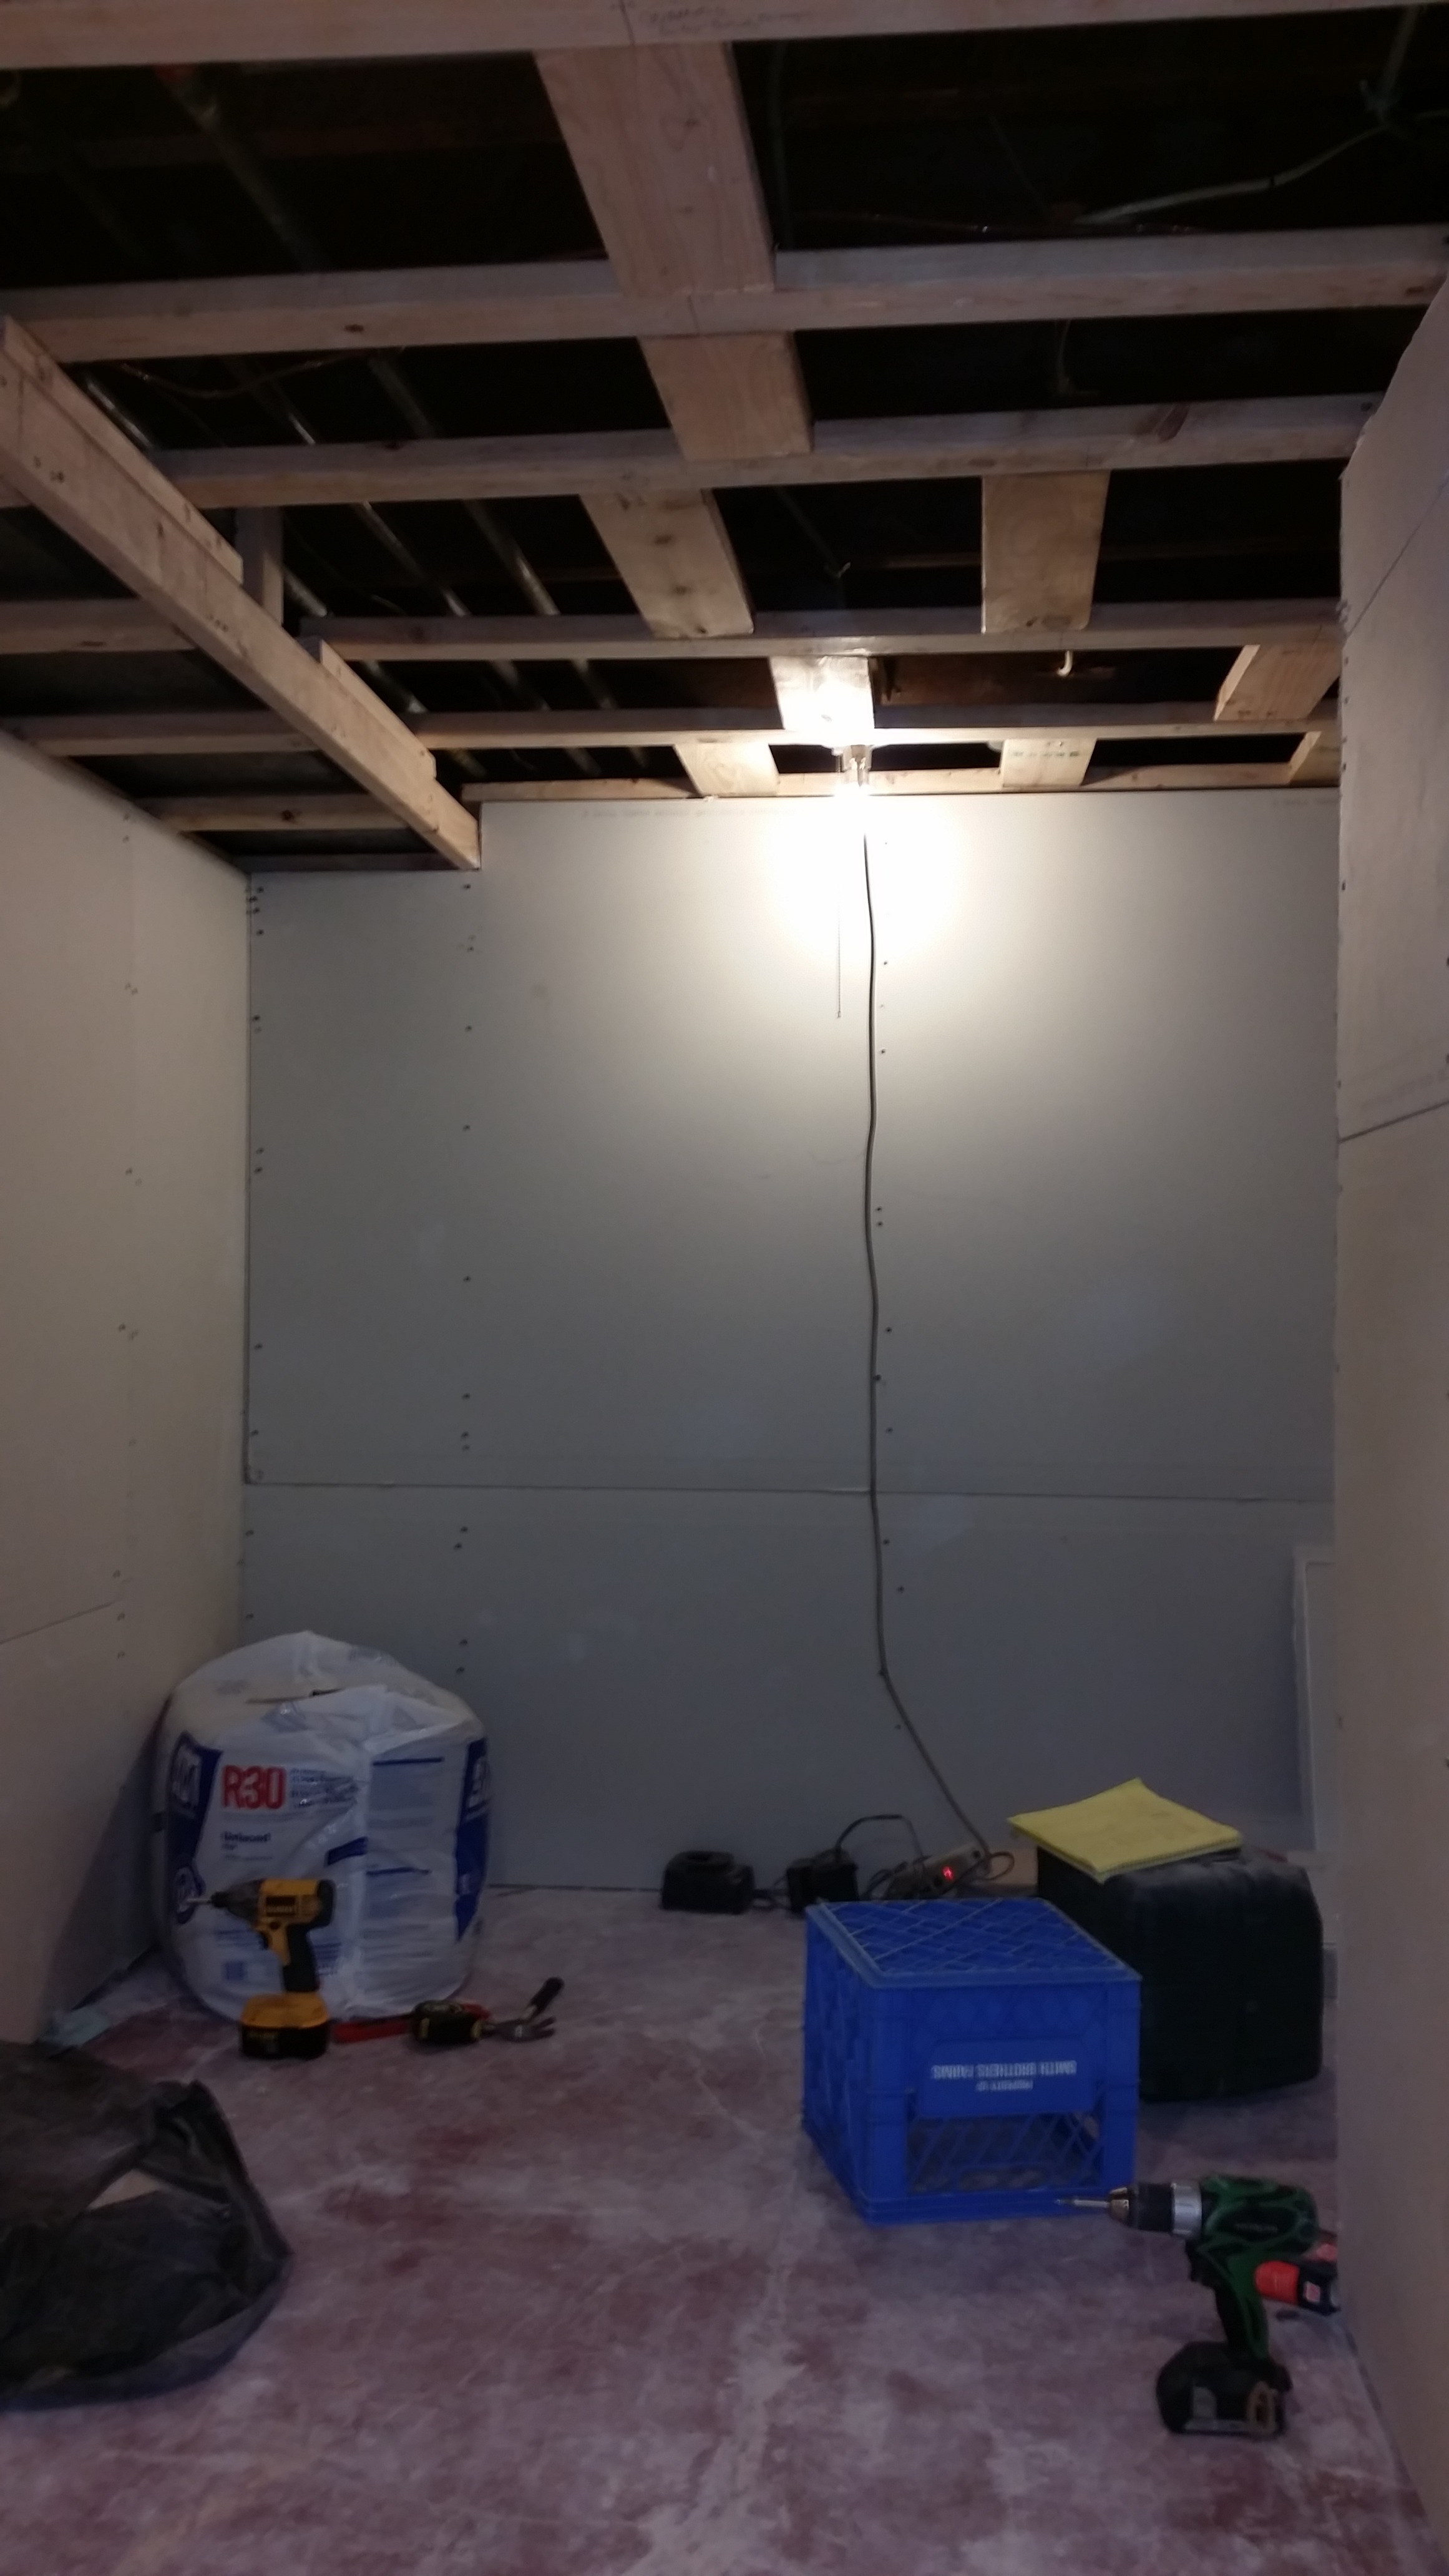
At 6’2, Ben already had to duck a little bit just to stay under our wood ceiling studs. If we tried to construct our ceiling like our walls, we probably would have lost another foot and no one would be able to stand in the room. In the end, we went with two layers of drywall and a layer of ceiling tiles directly underneath that.
Ceiling Tiles: Effective if not Aesthetically Pleasing
We cut and hung a solid core door for an entrance. Concerned about leakage compromising the effectiveness of the whole room, we insulated the outside of the door frame with spray foam. We also added weather stripping and a “sweep” to the inside frame to help make the seal airtight, and even added extra ceiling tiles to the inside surface of the door, because why not?
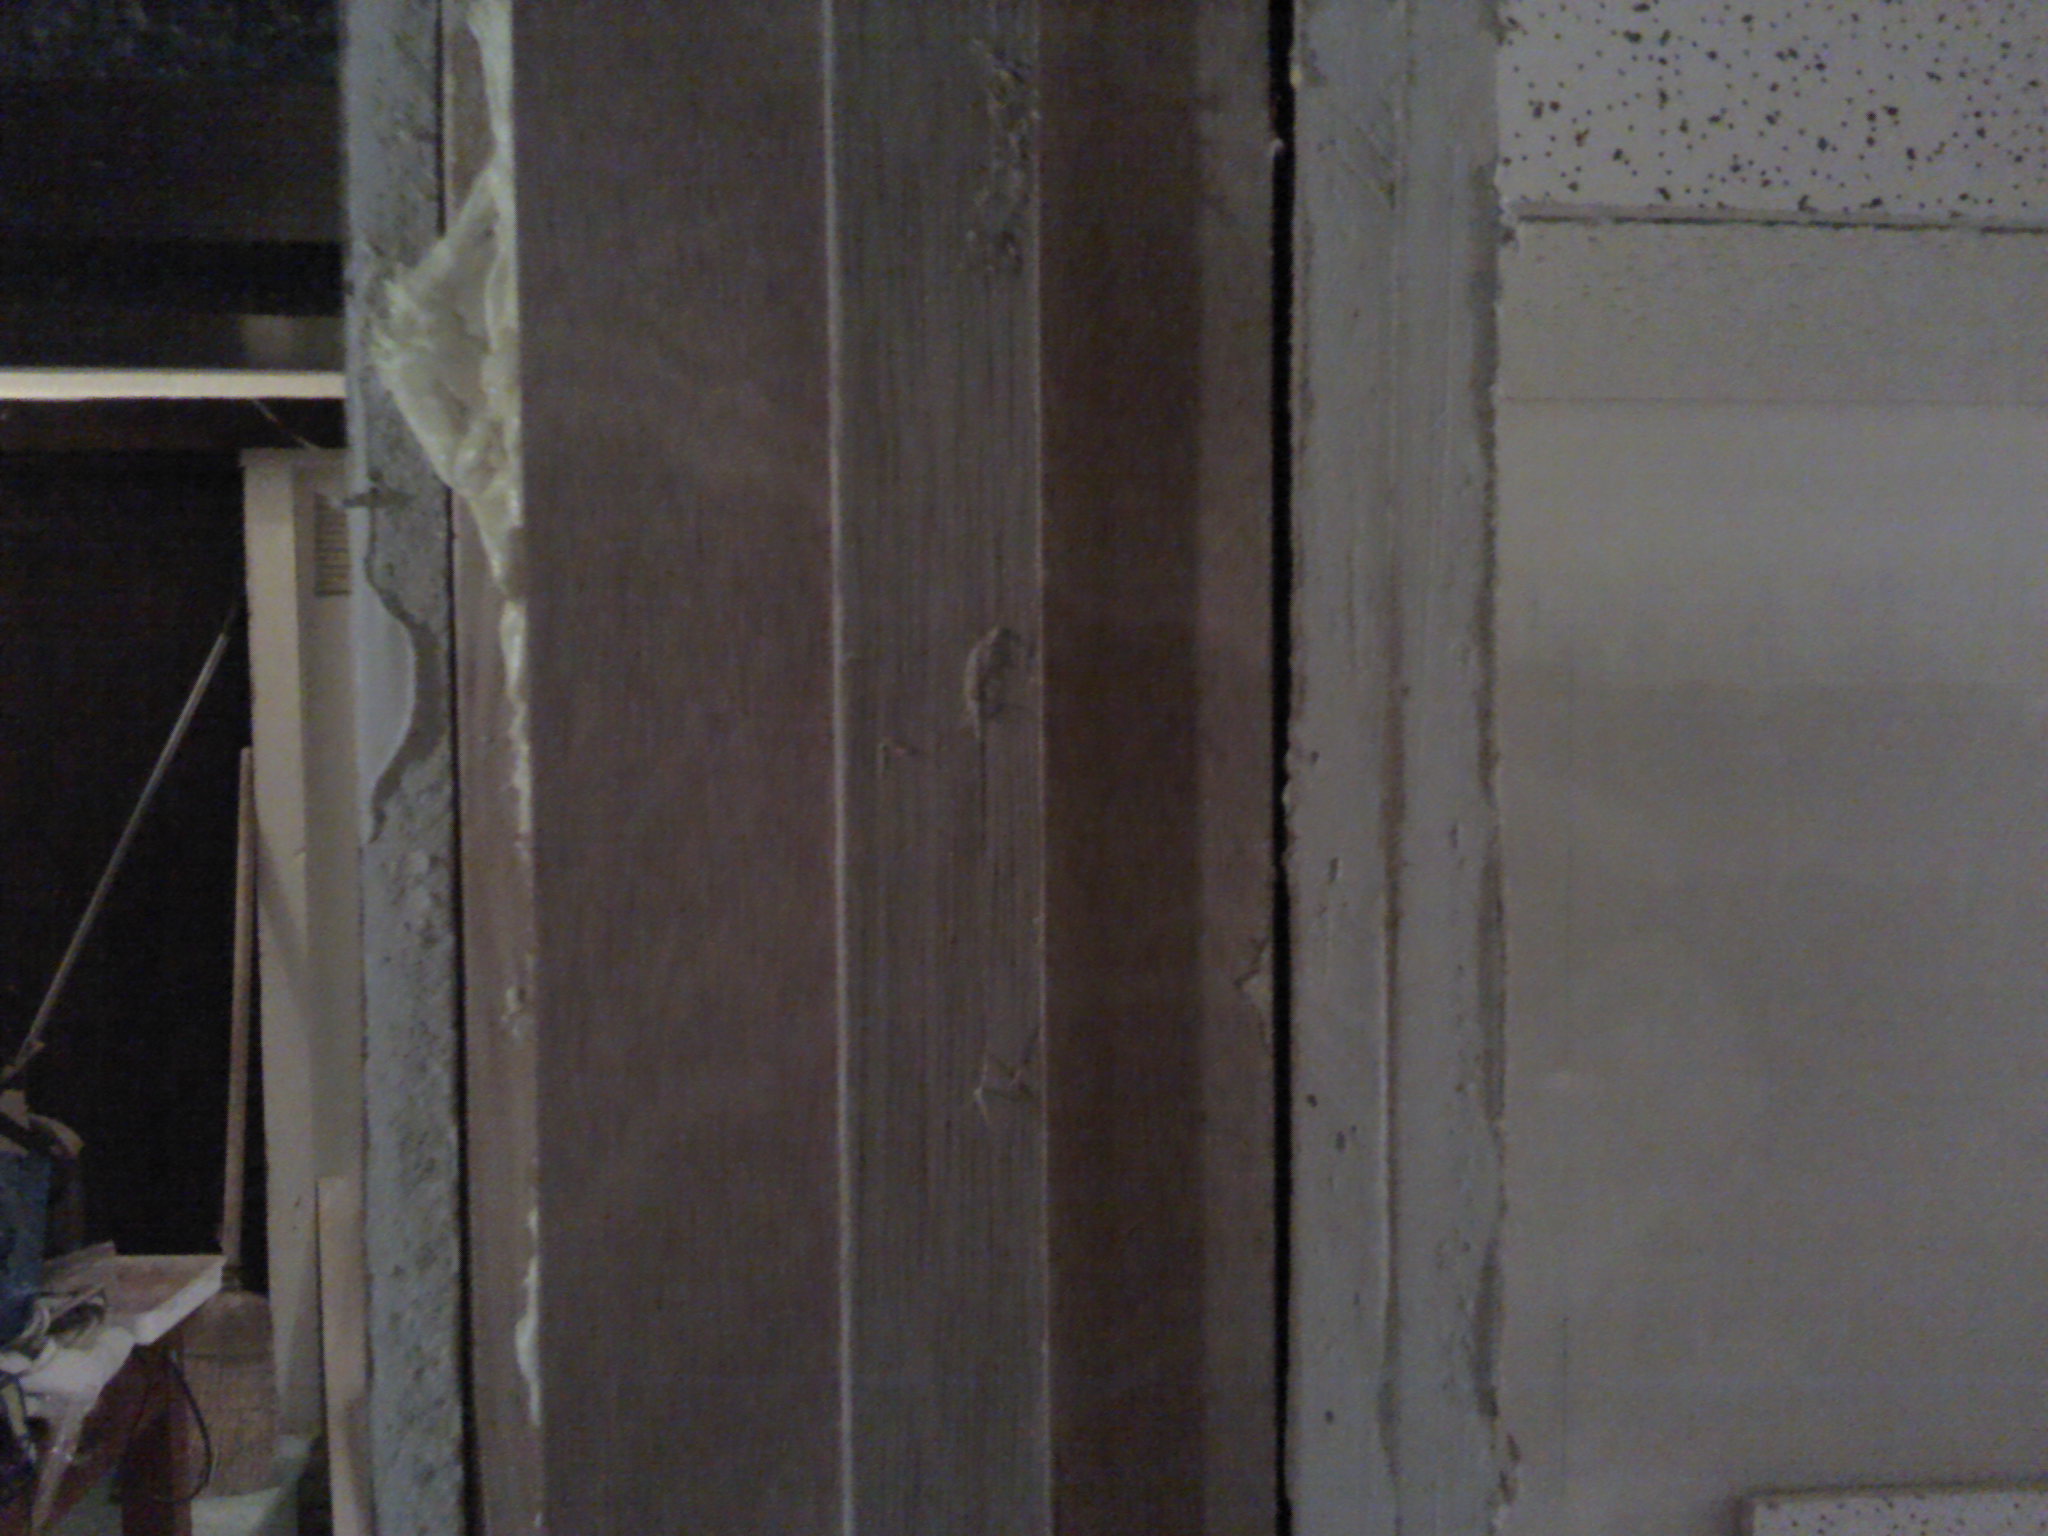
Door Frame in Profile: One layer of drywall outside, two layers inside, wood and insulation in between
Finally, we added two layers of “mud” to our drywall to fill in any cracks, and to cover stray holes left by our drywall screws. We also added two coats of blue paint, and some vinyl covering for the floor.

Blue Blue Electric Blue, That’s the Color of Our Room
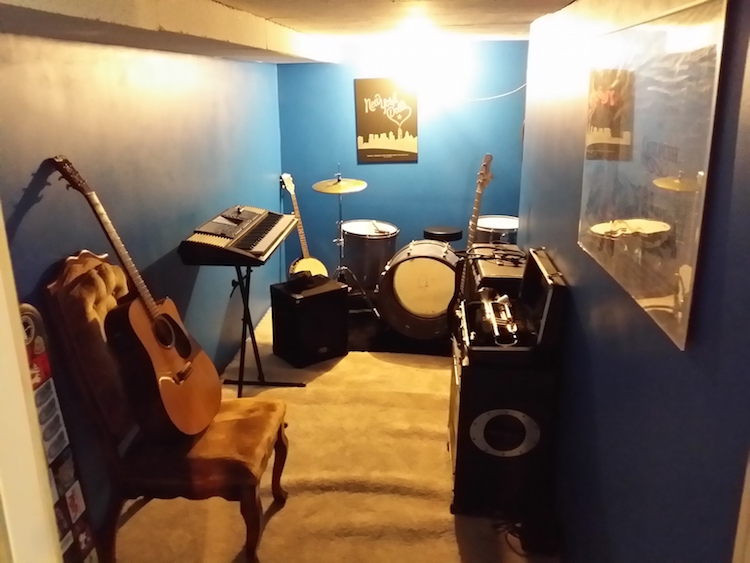
After adding a few layers of carpet on top, our “room within a room” was finished.
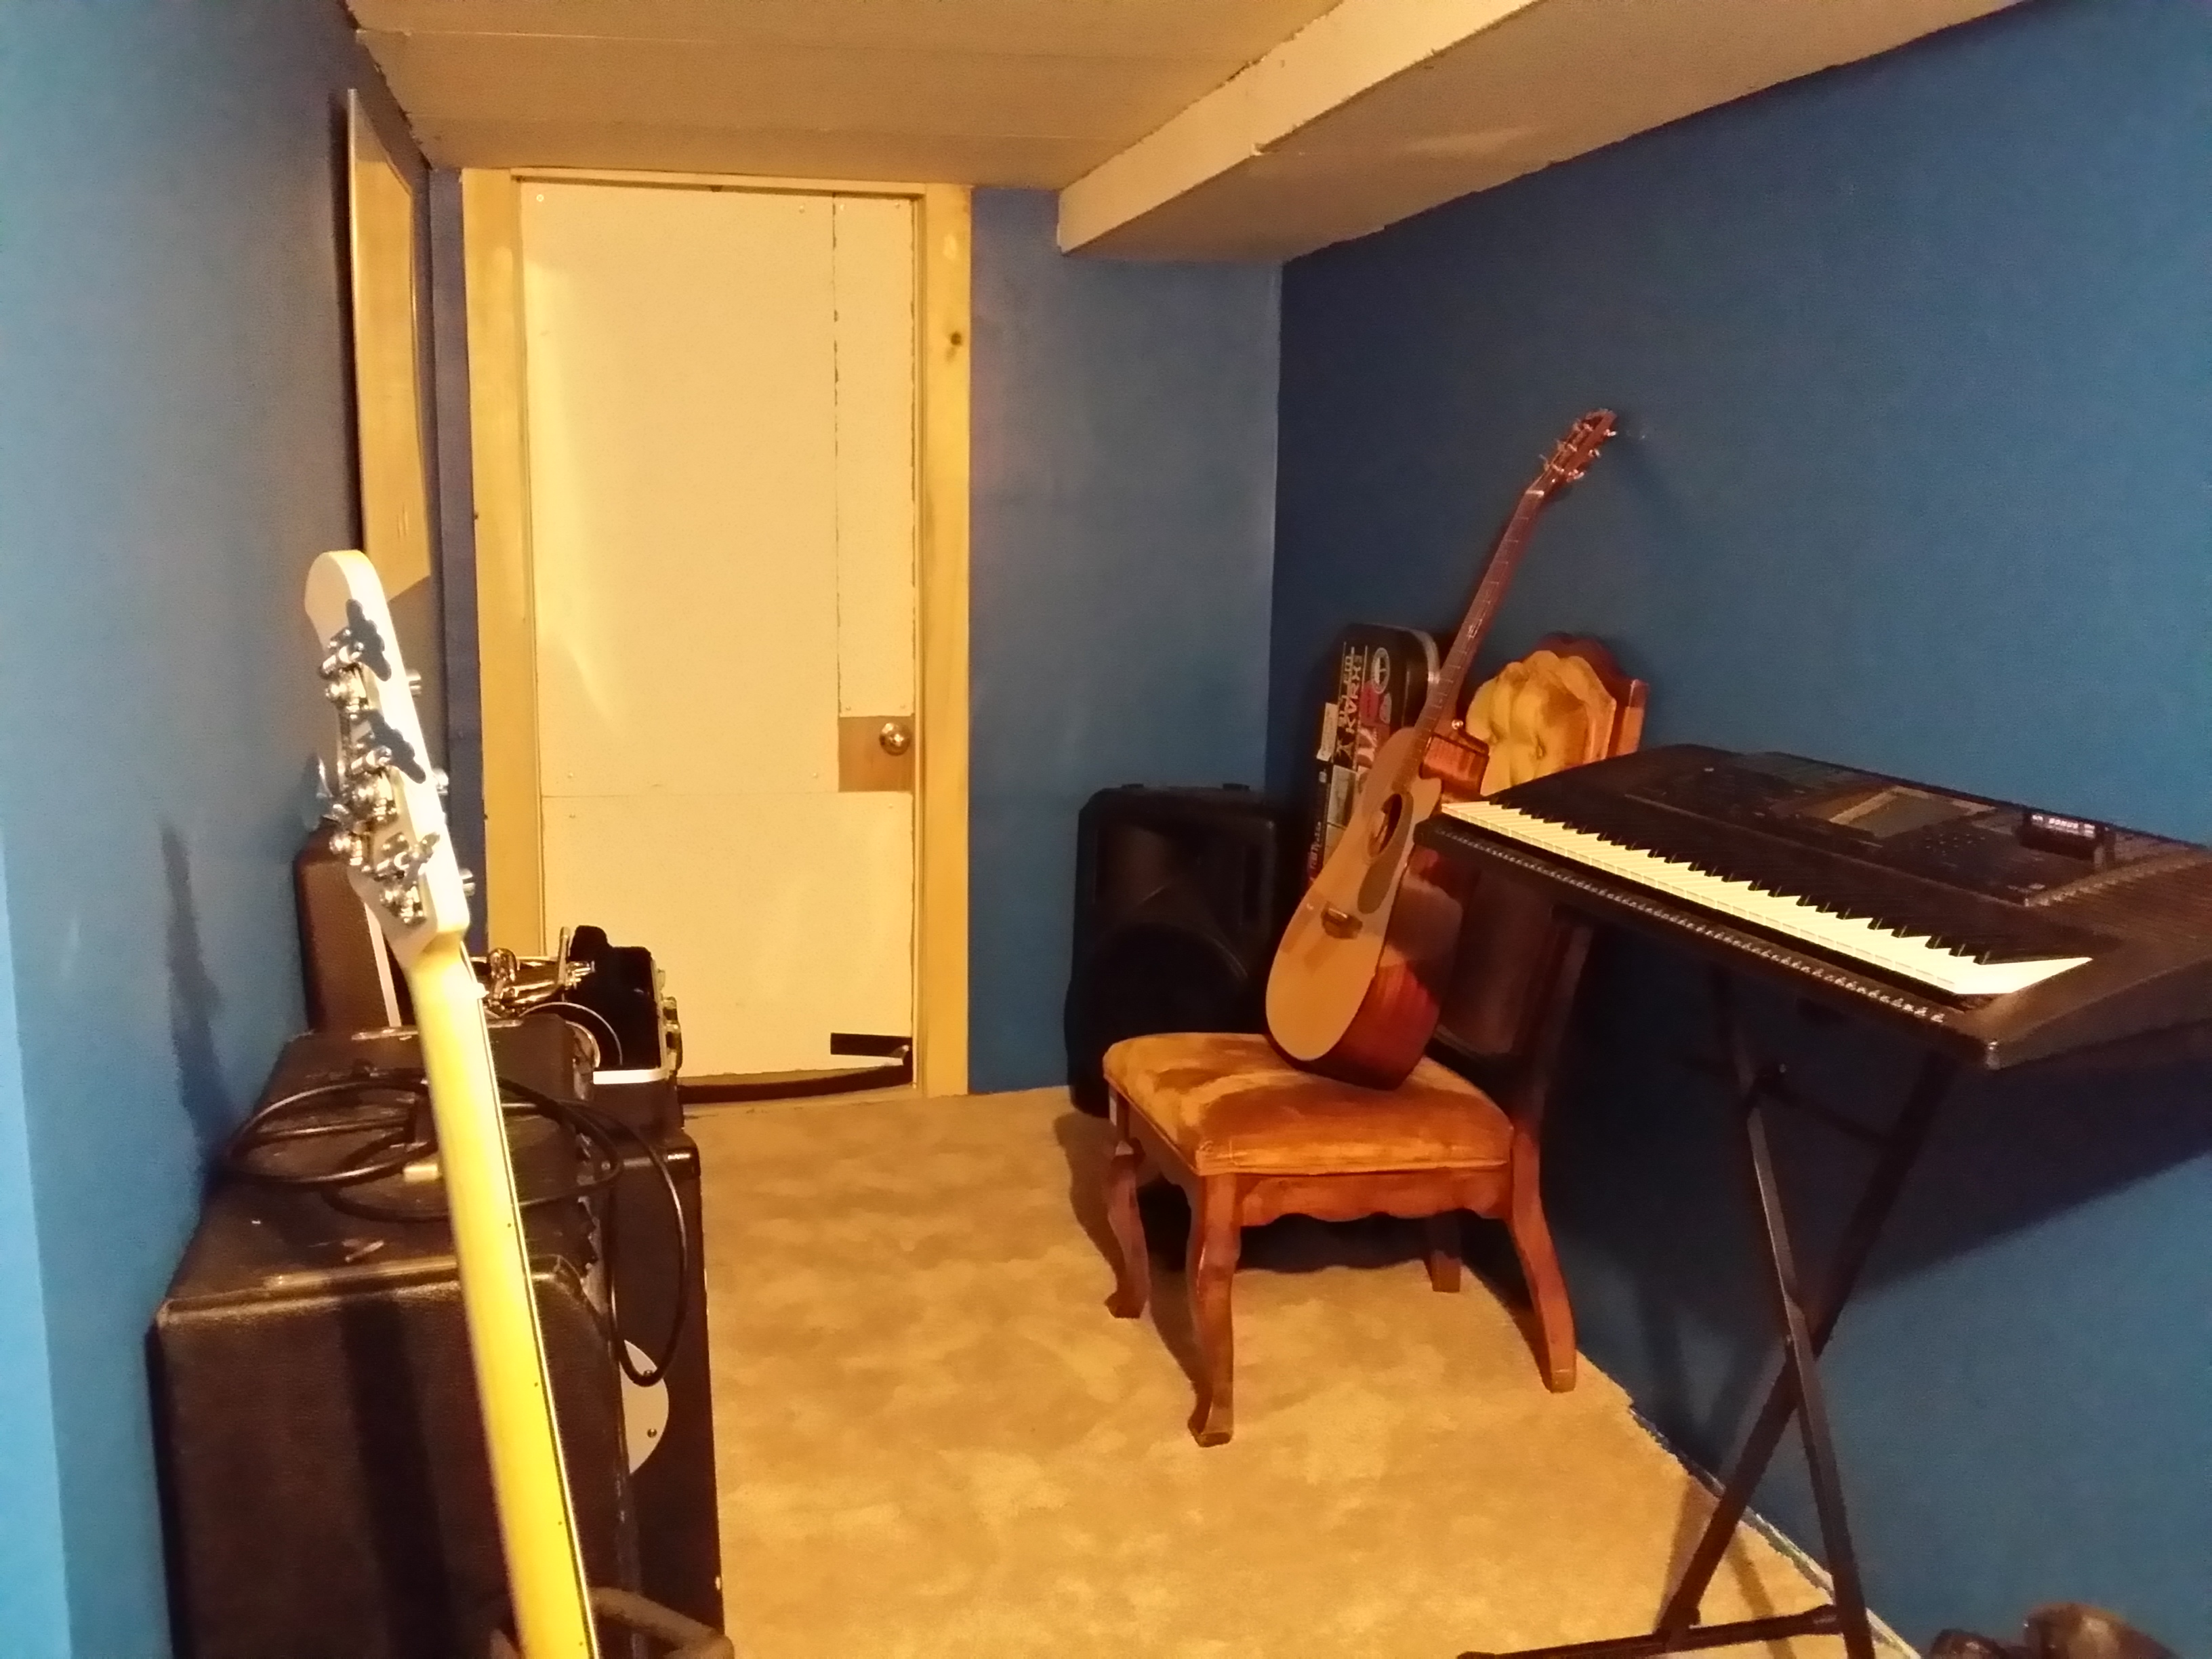
In a rehearsal space, no one can hear you scream
What We Did Wrong
Our rehearsal space took about 6 months and somewhere between $1000 and $1200 to complete. During a post-mortem evaluation over beers, Mike Wong, Ben, and I came to the conclusion that our biggest problem was not following the cardinal rule of construction from the beginning: Always overestimate the time, materials and budget needed for a project.
In an ideal world, we would have been honest about our budget up front, ordered all of our materials ahead of time and had them delivered all at once. Then, we might have taken a week off of work to knock the whole project out quickly in one go.
But in practice, we took shortcuts, and we ended up paying for all of them. Underestimating our material needs led us to take too many separate trips to Home Depot and Lowe’s, bleeding away our work time and our budget little by little. We probably spent $100 more than we needed to on van rentals alone to accommodate these extra trips.
Because our crew was small and variable (my bandmates helped out when they could) and because we could usually only work on weekends, and a handful of hours at a time at that, our project dragged on for far too long. This dampened our morale rather than sound. It also pissed off our non-musician roommates, who just wanted to be able to do their laundry without stepping in between piles of wood, drywall, and construction debris.
Mike Wong points to how much easier and quicker our work would have been if we could have just drilled into the foundation for extra support and as a way to compensate for the uneven floor. Being renters, though, we agree it’s a moot point, which brings us to our most controversial move.
We were already well into our construction of the room before we seriously debated the issue of when and if to tell the landlord, ultimately deciding to show her a finished product along with smiling faces and apologies. We still don’t know if this was the “right” thing to do, but we don’t know if we would have been allowed to create this space otherwise.
Our landlord knew we were musicians, and knew we planned to play music of some kind in the house, but it seems doubtful that any landlord would consent to having a separate full-blown room built in their basement by amateurs. If she had said no from the outset, we would have been dead in the water.
On the other hand, while she was initially upset by our clandestine construction, once we explained that a) the room was completely free-standing, b) we made no alterations to the foundation of the house, c) we built it with our neighbors in mind, d) we built it because we planned to stay in the house for a few years, which was something she said she wanted in her tenants, and that e) we would pay an extra security deposit and sign an addendum to the lease promising to tear down the room and clean the basement before moving out, she was at least amenable to the situation, if not thrilled by it.
We also researched our Washington renter’s law a bit, to see where we stood. It turns out that where we live, if our landlord was completely offended by the idea of our readymade room, the worst she could do was make us tear it down before the end of our lease, which is what we had planned on doing anyway.
It’s also important to note here that we like our landlord and were not looking for a legal fight. We had several discussions with her before moving in about how the house would make a great artist’s space, and we framed our room as just that when we presented it to her, gambling on the idea that she would be understanding.
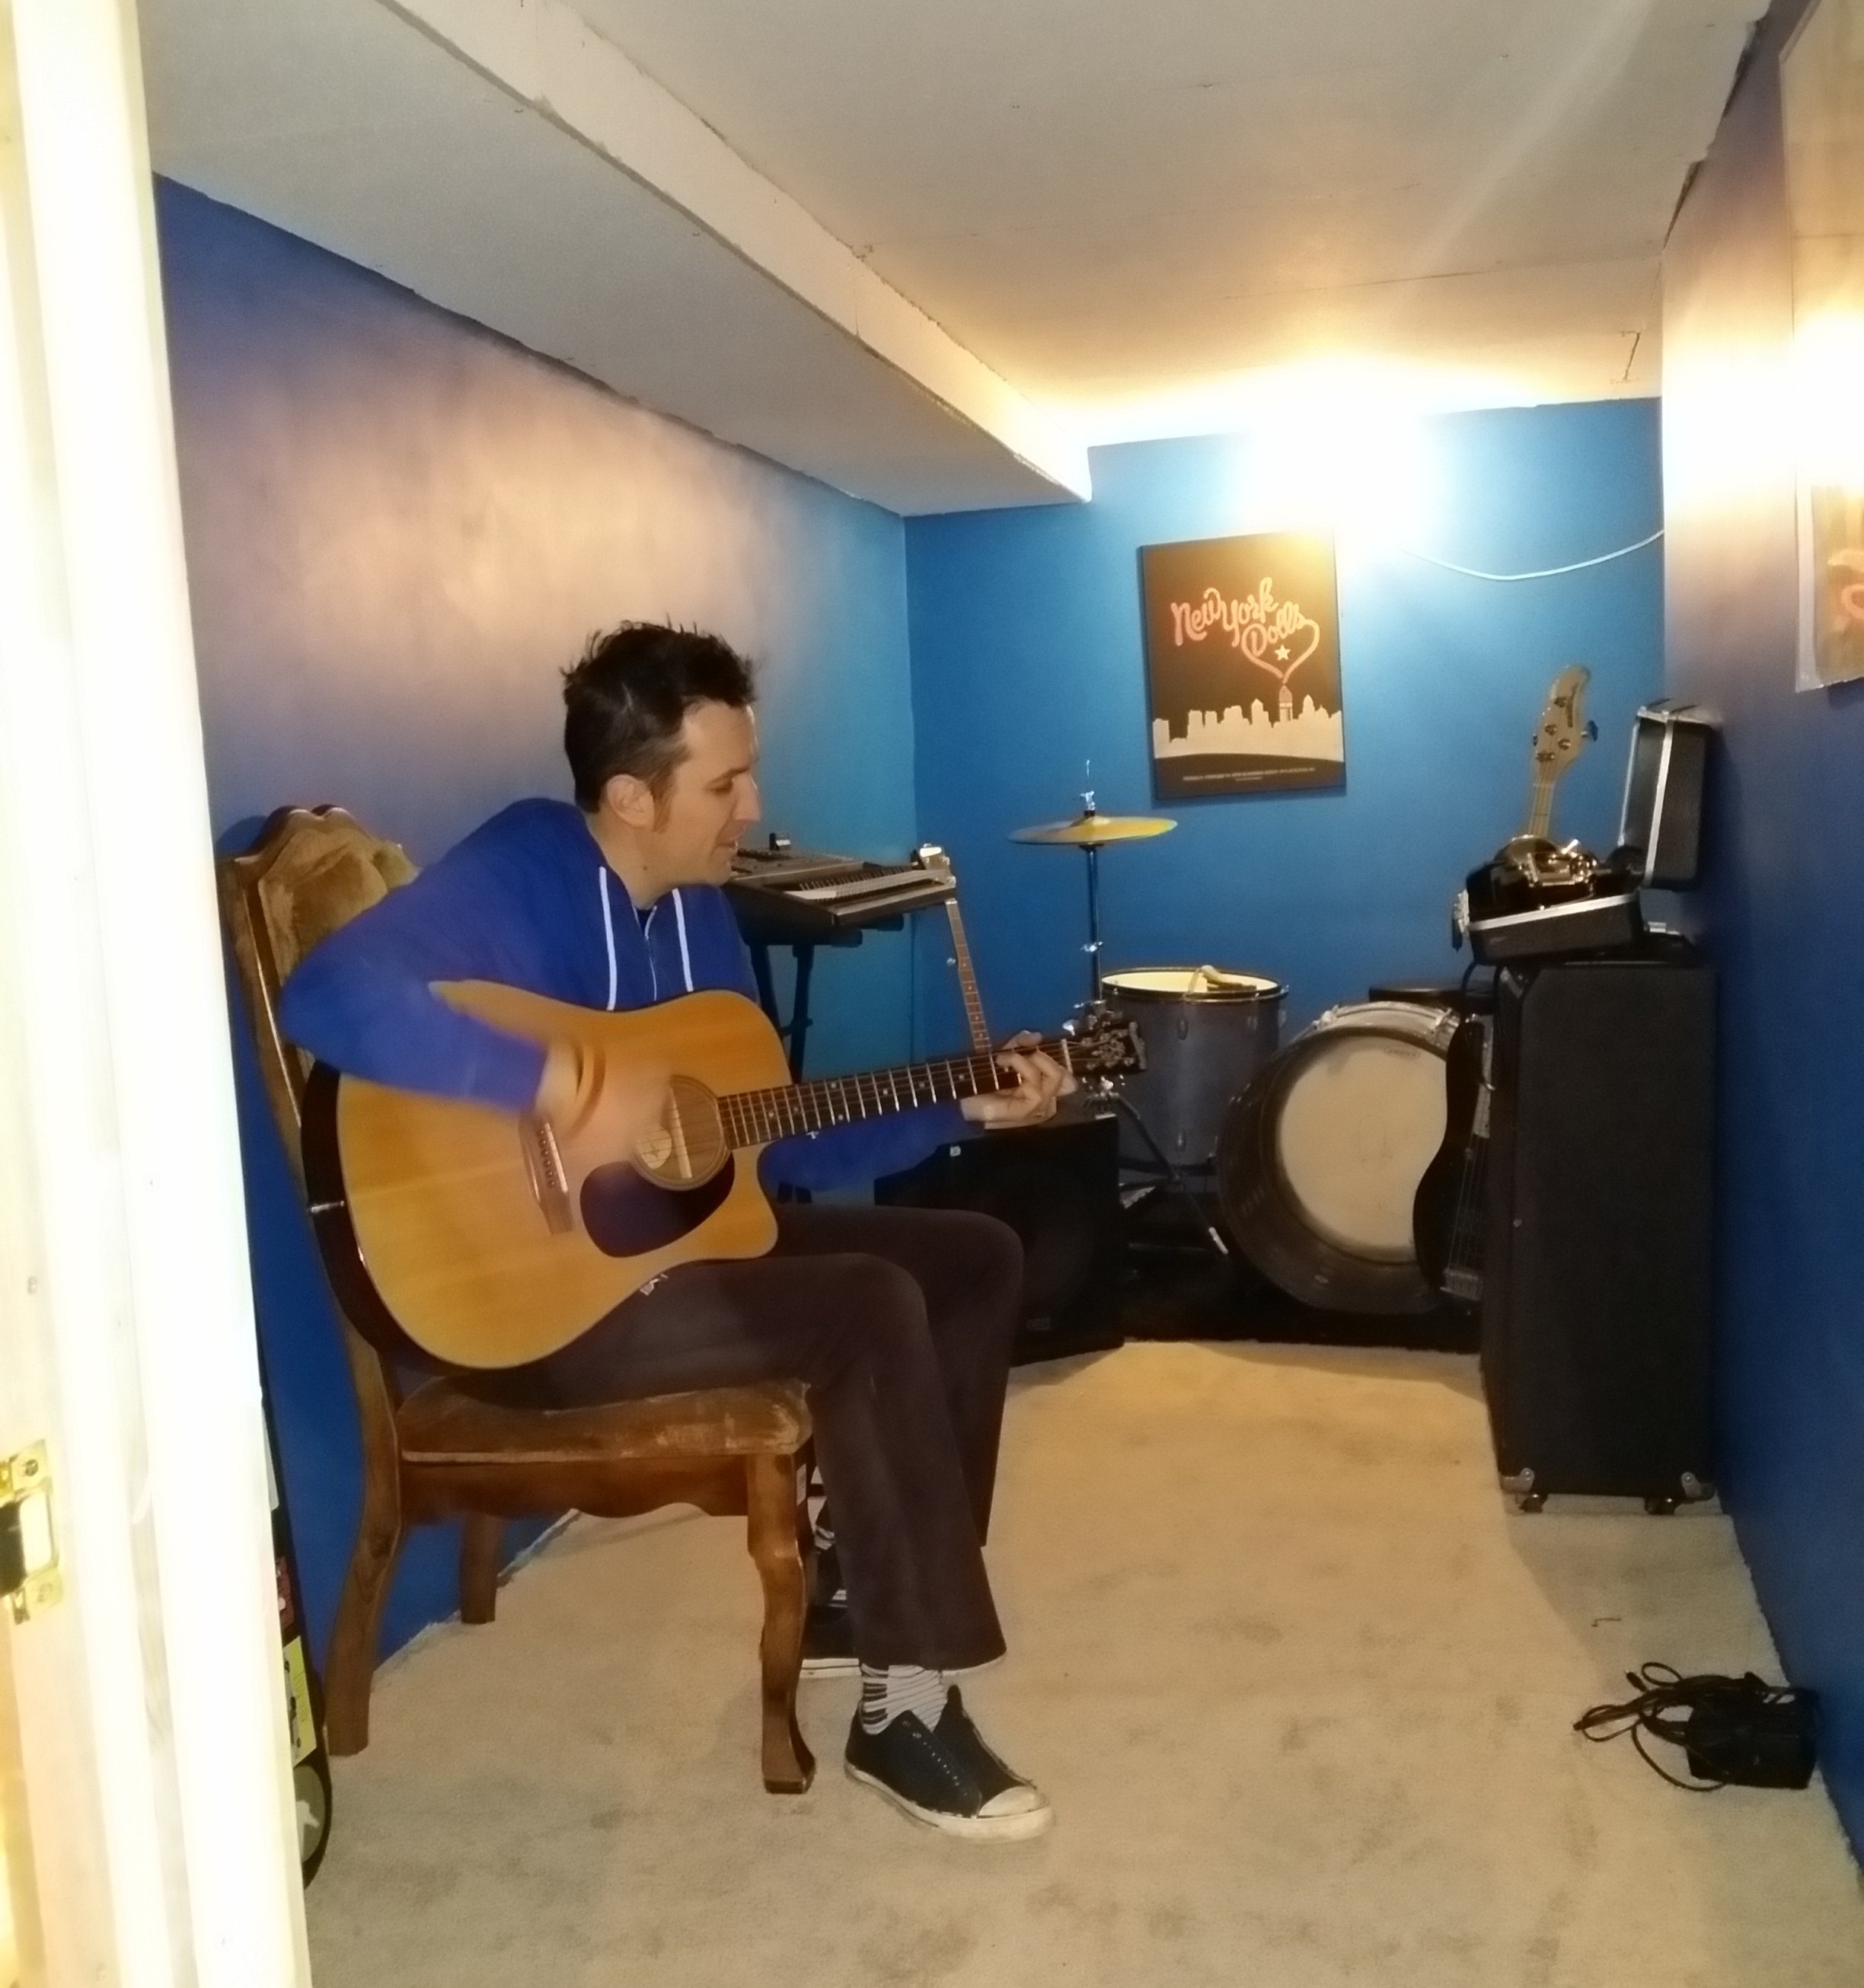
We sent our landlord this image because acoustic guitar is the most jolly and least threatening guitar
If you are renting a home from someone else, and want to build a room-within-a-room there, it’s really a judgment call as to how to broach the subject with your landlord. The laws may also be different in your area. Ben believes we did it the best way, if not the ‘right’ way: “Better to build it first and ask forgiveness later, than to ask first and never get off the ground.” I rationalize it to myself by thinking it’s just like if we built a doghouse in the backyard. A really really big doghouse.
What We Did Right
With minimal experience and planning, an inconsistent work schedule, and a small and ever-revolving crew, we still managed to create a fully functioning, structurally sound rehearsal space. Despite our surreptitious building, we came to an agreement with our landlord, and both the future of our room and our tenancy seem secure.
After we finally finished the room, we put Aaron in with his full drum kit and told him to let rip as we walked around the perimeter again: The moment of truth. Whereas once his single snare drum was too loud outside, now his whole kit sounded like someone listening to a radio in a bathroom. Two feet from the house, you could still sense a little of the muffled force, but five feet away, it was barely audible. Ten to fifteen feet away, where the walls of our nearest neighbors’ houses stood, we doubted you could hear anything at all.
Our sense of accomplishment was palpable, if not audible. The only thing left was to start using the damn thing.
Enjoy the Silence
Our 3-piece band now rehearses regularly in the new space. We stay within acceptable hours of city ordinances to keep from tempting fate, but our schedule is wide open, allowing us to have lazy Saturday afternoon writing get-togethers, and even recording sessions.
At a total personal cost of about $600 for materials and transportation, the money I put into the room will be recouped in about 6 months from the savings I’ll have from not paying someone else to play in their space.
Our rehearsal space is everything we hoped it would be and one thing we didn’t even consider: It’s a place that keeps outside noise from getting in as much as it prevents inside noise from getting out.
I didn’t anticipate just how quiet and calming the room would be. The distractions of the world simply can’t get to me in a space that small and isolated. Going in and closing the door is my trigger, telling me it’s time to stop stalling and practice. As a result, I’ve recently done some of my best, most-focused practicing, and enjoyed it more, too.
And I can practice in my pajamas.
And I built something. Not something out of an IKEA catalog, but a real thing I built with my own hands, sweat, and blood. (Yes, we did bleed, although fortunately, there were not many tears).
We didn’t just build a room. We built musical freedom.
I am The American Musical Dream: Horatio Alger with a hammer and some nails and a Rickenbacker bass. You could be, too.
Blake Madden is a musician and author who lives in Seattle.
Please note: When you buy products through links on this page, we may earn an affiliate commission.