


Pro Tools Shortcuts Bible Part 2: Editing Like a True Pro Tools Master
We are back with a new collection of Pro Tools shortcuts that will make your clients look at you like a badass Pro Tools sorcerer, flying over the keys and making things happen in no time.
In case you missed it, you should read the first installment in this series before continuing. We’ll build upon some of the shortcuts mentioned there, so it’s a good idea to have them fresh in your memory.
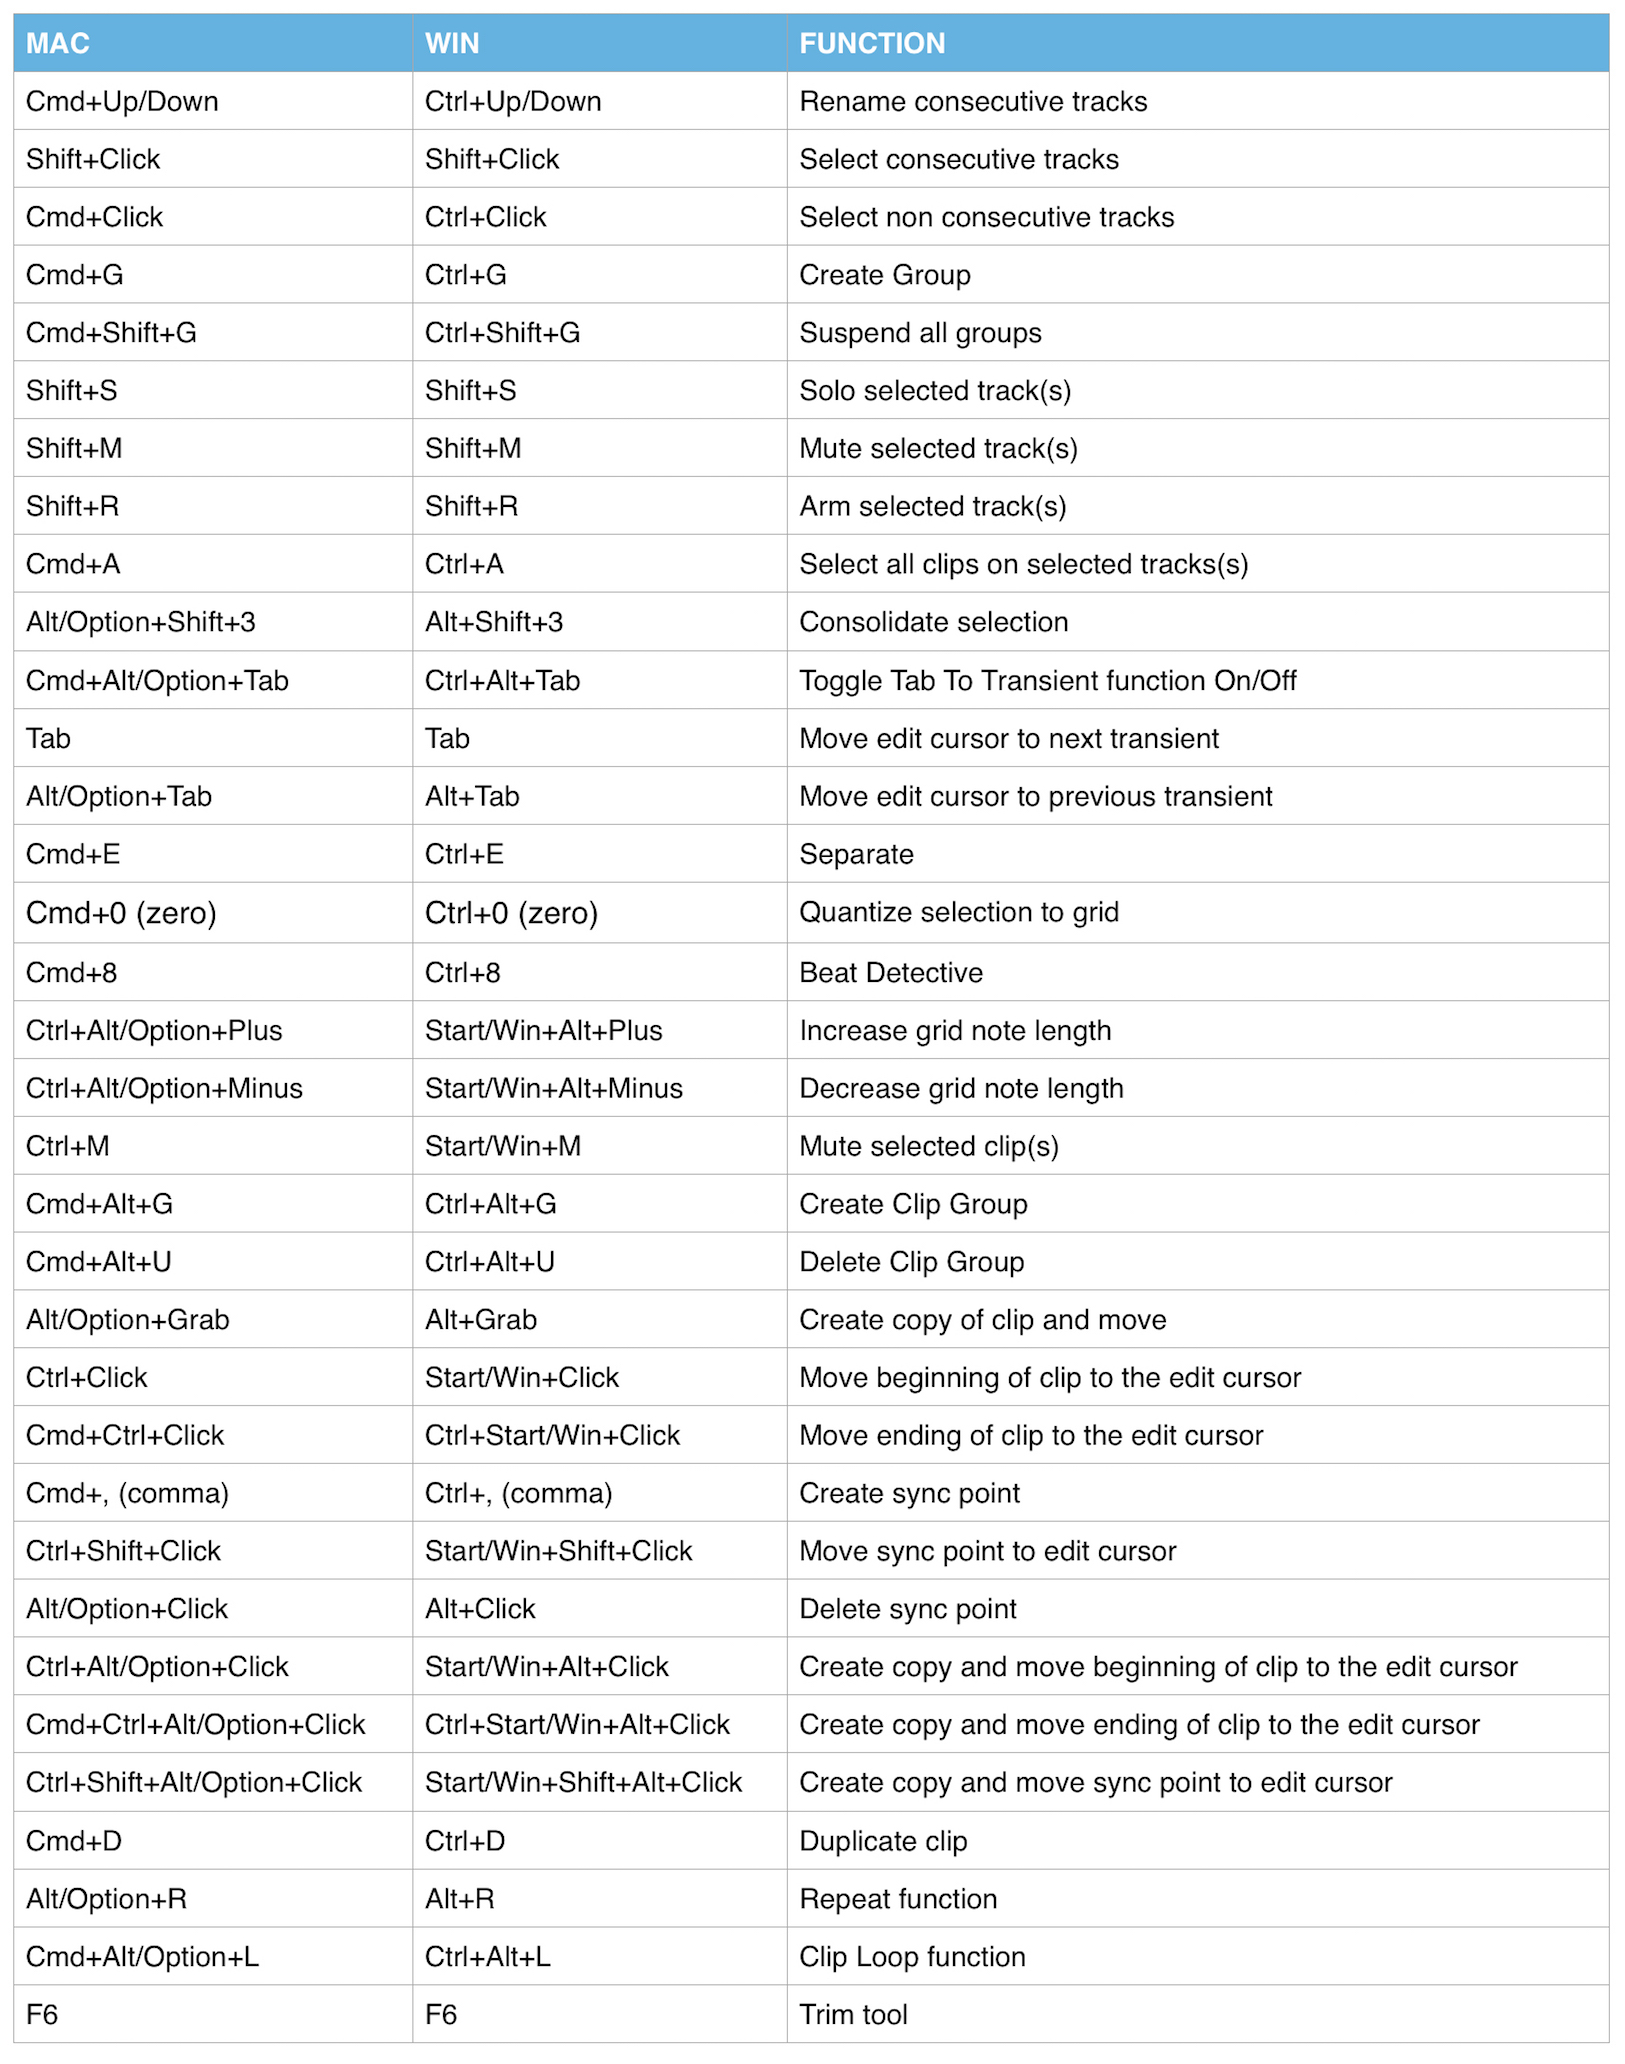
Once again, we’ll only be include the Mac version of each shortcut in the main text to cut down on clutter, but you can find a complete summary table at the bottom with both the Windows and Mac keystrokes.
For quick reference, if you’re on a Windows machine, simply replace “Cmd” with “Ctrl” and “Ctrl” with “Start”, and you are good to go. All shortcuts are valid for both HD and non-HD flavors of Pro Tools version 8 and up.
Playing the playlist
In the previous article, we explored how to quickly create all your tracks and set up alll your routing in a new session using shortcuts, leaving us ready to start recording.
As you know, renaming the audio tracks before recording is always a good idea. Just double-click on the track name, and move from one to another using Cmd+Up/Down. The next neat thing to do is to take advantage of the super-convenient Pro Tools playlists, and the key commands that make them even more convenient still.
Let’s say you are recording live drums, along with two tracks of bass (DI plus mic) and a couple of electric guitars. You’ve named all tracks accordingly, and your session looks something like A in Image 1 below:
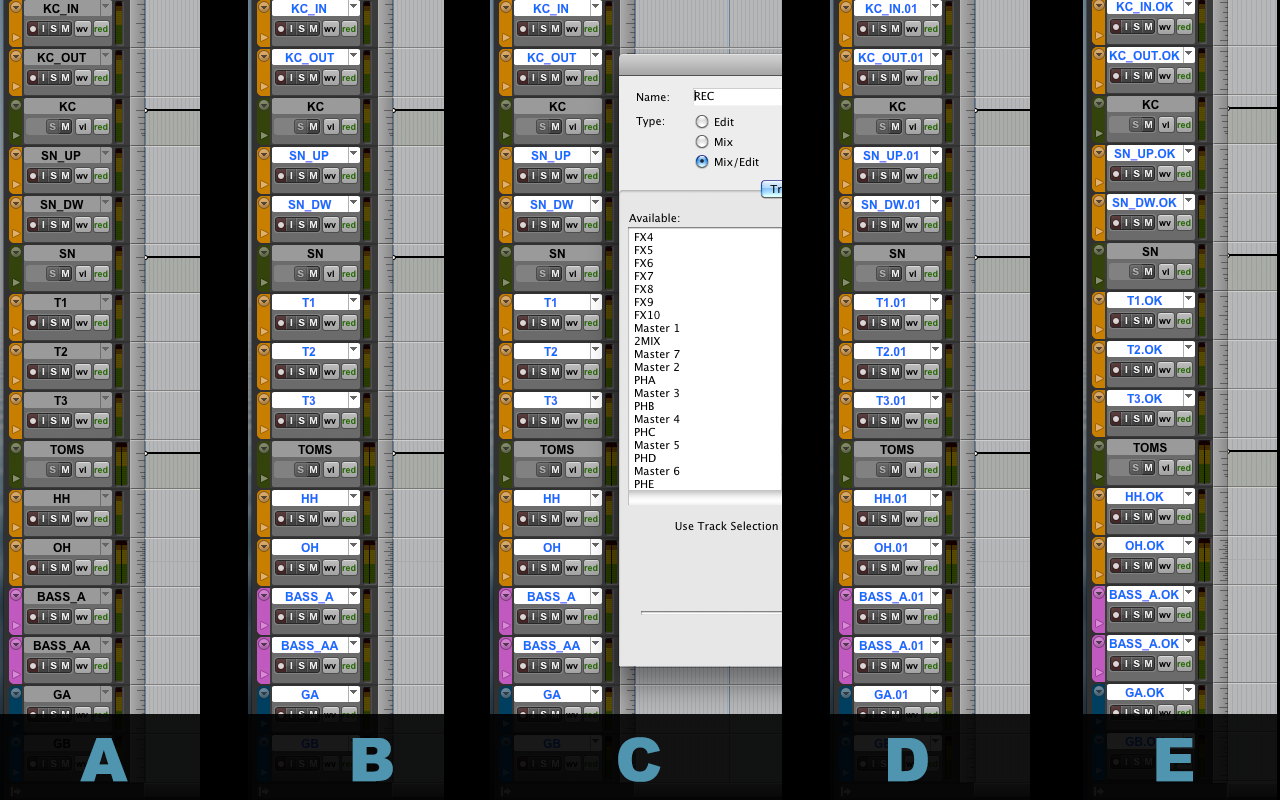
Image 1
Before you start recording, select all tracks (Shift+Click for consecutive tracks, Cmd+Click for non-consecutive tracks), and create a group with them by pressing Cmd+G. We need the group type to be either Edit or Mix/Edit, which is the default. (See previous image B.)
At this point, note that the auxiliary tracks were deliberately not included in the group. In some versions of Pro Tools, including the Aux tracks inside this “REC” group may lead to some problems down the road, with not all tracks following the different playlists correctly. (This may not be a problem on all systems, but I keep following that piece of advice just-in-case.)
If you click on the triangle next to the name of any of the grouped tracks and select “New”, a new playlist will be created, and the suffix .01 will be automatically appended on all tracks (see D). How convenient is it to record take number one on the playlists numbered .01?
If you keep creating a new playlist for each new take, Pro Tools will rename them accordingly (.02, .03…), and you’ll end up with each take stored in a playlist showing its number, with all audio files also wearing the corresponding suffix. You can now access each take using the same drop down menu used before.
At this point, all audio files and takes will be thoroughly labeled and documented, with minimum to no extra effort or steps.
Let’s say you recorded three passes, and the producer and artist decide that number two is the keeper. Go back to playlist .02 and choose “Duplicate”. Now, you’ll have a new playlist, labeled “.04” that is an exact copy of your keeper. Rename this playlists to “.OK” or something similar to signal that this is the approved take (Image 1 E).
Usually, some minor corrections need to be done, a couple of edits, perhaps a punch-in somewhere. If you recorded using a reference or click, the audio on each playlist will be aligned at the exact same point, so creating a composite or flying parts around will be a breeze.
While making edits, you’ll probably want to temporarily suspend the REC group so you can edit individual tracks. A quick way of doing so is suspending all groups with Cmd+Shift+G. Press them again to re-activate. To solo the track(s) where the cursor is located, press Shift+S. By the way, Shift+M will mute and Shift+R arm them.
When you’ve finished, place the cursor on any of the regions (with the REC group active), press Cmd+A to select all of them. Then, type Alt/Option+Shift+3 to consolidate all edits. Now, you’ll have a single audio file with .OK on its name for each track, signaling these are the ones to be used from now on.
This suffix nomenclature can be extended further down the line if your workflow is more complex: Let’s say you’re planning to do some further editing/pocketing on these tracks. Creating a new “.ED” playlist in which to do all the edits will allow you to create .ED audio files when you’re finished, so that you or anyone working with you will implicitly know those tracks have already been edited. If you want to go a step further, you can also even create “.ED01” playlists to do the edits, an “.ED02” playlist to consolidate them and so on.
Using playlists in this way also speeds up the process of sharing sessions because, you don’t need to share complex, heavy sessions, you can share just the appropriate audio files. Go to the Audio Files folder, search for .OK or .ED suffix, and there you have all the files ready to go.
Besides, you’ll always be able to go back to the .OK and individual playlists (.01, .02, .03…) to check anything, in case that loud scream no longer fits the mood of this ballad.
As a general rule of thumb, anytime you’re going to do anything that cannot easily be undone, it’s wise to create a new playlist so you can go back to the previous state in case it is needed. If the changes are session-wide, File -> Save As is your best friend.
Quick Editing
Quick keys can also help you make quick edits. You probably already know about the “Tab To Transient Function”. This mode is activated/deactivated with Cmd+Alt/Option+Tab. When active, the tab key makes the edit cursor jump from one transient in the waveform to the next one. (Alt/Option+Tab jumps to the previous transient).
Along with the “separate” command (Cmd+E), this is often the fastest way to slice and dice and get ready to move things around. However, in some cases, there’s an even quicker way to do these kinds of edits. Let’s say you want to align these hits to the grid:
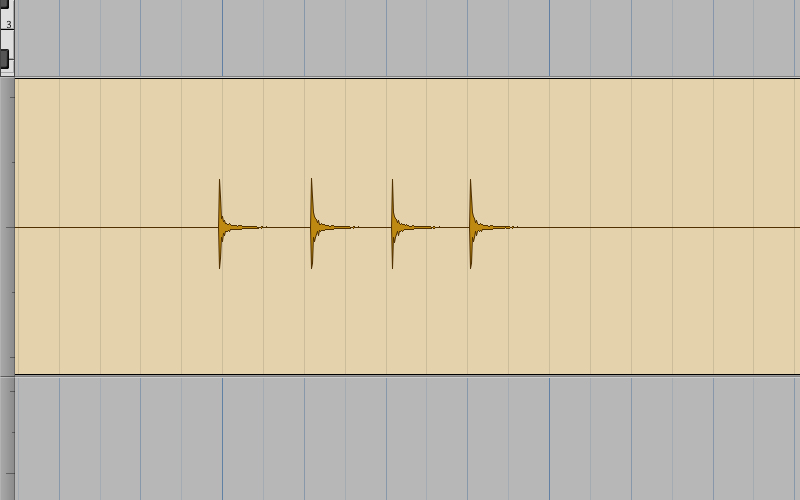
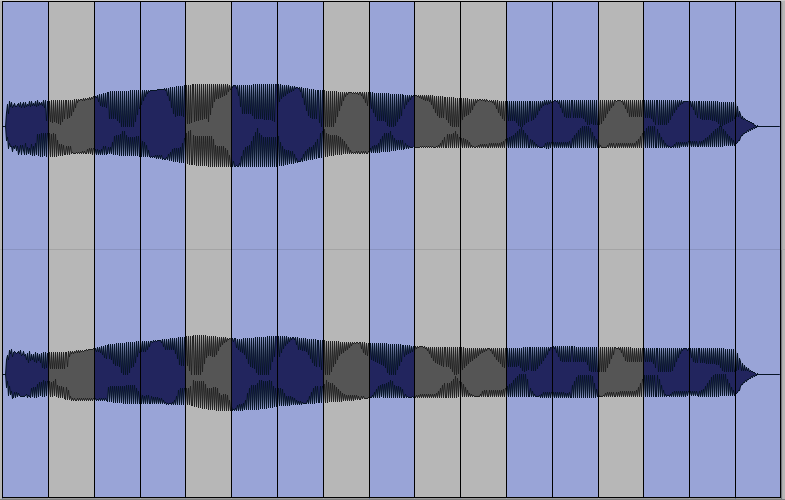
First select the region, then go to Edit -> Separate Clip -> At Transients. You’ll be asked if you want to insert a certain gap before the actual transient, and once you press Ok, all hits will be isolated at their transients.:
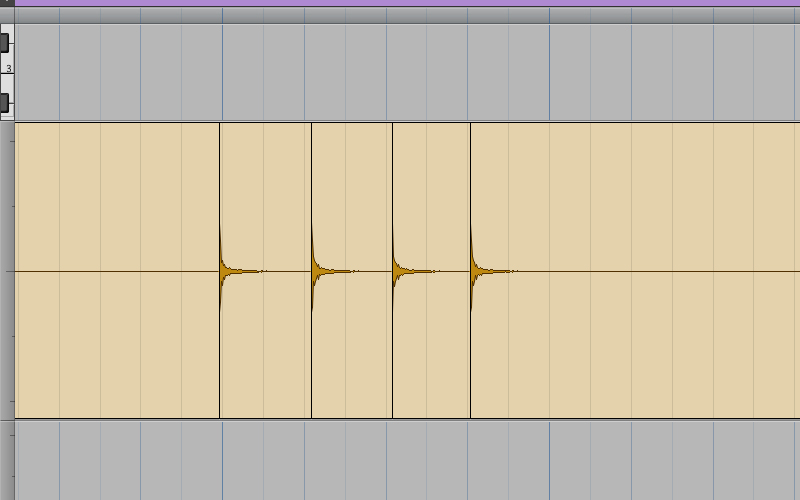
You could now move each of them by hand, but with the regions still selected, how about typing Cmd+0 (that’s the zero number on the keypad) to automatically quantize them?
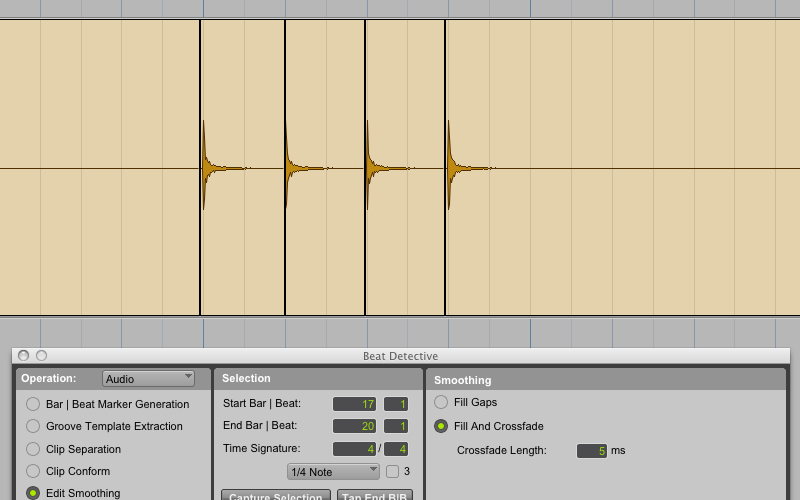
To fix those problematic gaps, you can now open the Beat Detective Window with Cmd+8 (eight on the keypad), select Edit Smoothing -> Fill and Crossfade, and press “smooth”. (More tips and trick with Beat Detective here).
While we are at it, the sister option “Separate On Grid” is great for creating chopped/stutter effects on long notes. Just adjust the grid to the desired chunk size (Ctrl+Alt/Option+Plus/Minus on the keypad to increase or decrease note length), select the clip, and choose Edit -> Separate Clip -> On Grid. You can now mute (Ctrl+M) or delete segments at your taste.
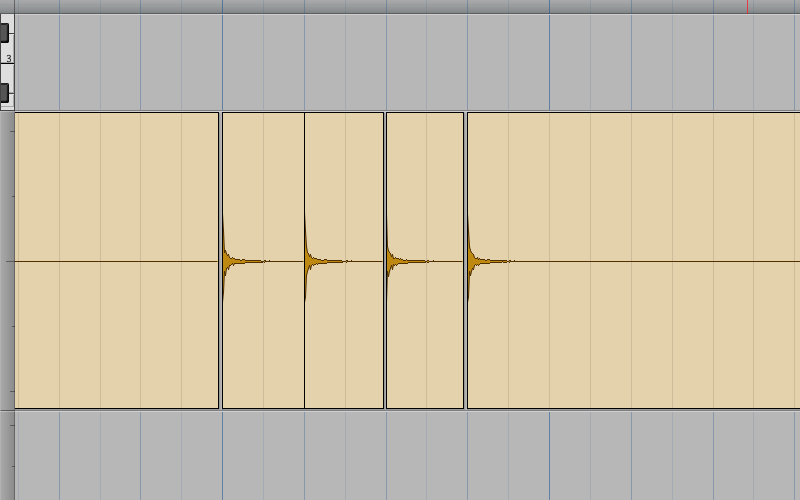
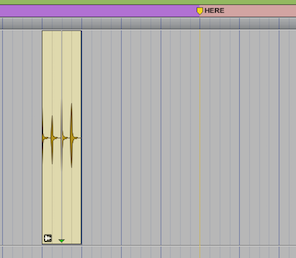
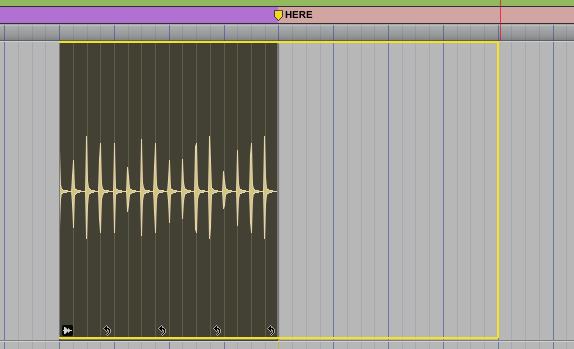
Back to our previous example; you could consolidate the region with Alt/Option+Shift+3 to commit the edits, but there’s a way to tidy things up and still retain the possibility of adjusting the edits in the future: By creating “Clip Group”. Select the bar containing the four hits, and press Cmd+Alt/Option+G:
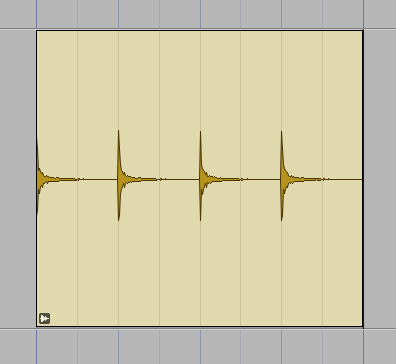
The little icon at the bottom left of the region indicates this is a Clip Group, which can be easily un-grouped with Cmd+Alt/Option+U.
You can nest these kinds of clip groups within other clip groups, so they are a great way to both visually declutter complex sessions and move parts to quickly create arrangements, as they behave as a region or clip would do.
Need to make the last chorus last double? Select all tracks, create a clip group, and copy and paste. Or, even better than copying and pasting…
Snapping to the point
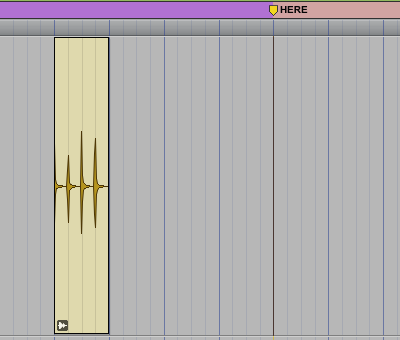
Let’s imagine we want to make a copy of this region and place it on the marker:

One way to do that would be to press Alt/Option while grabbing the region to create a copy and move the new region to the desired spot.
But a way cooler method would be to place the edit cursor at the desired spot, and click the clip using the Grabber tool while pressing Ctrl+Alt/Option. The Alt/Option key tells Pro Tools to create a copy of the clip, and the Ctrl key indicates it is the beginning of the region that needs to be snapped to the desired point.
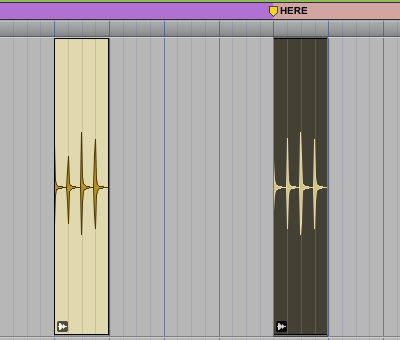
If you’d like to move the end part of the region to the marker instead, you would press Cmd+Ctrl+Alt/Option while clicking with the grabber.
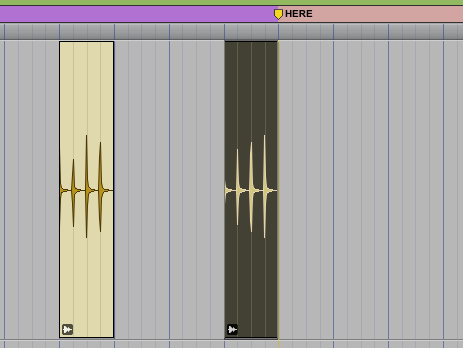
In case we would like to (for example) snap the third hit inside the clip to the marker, you would first use the Tab key to move the cursor to the desired transient, and then press Cmd+comma (Cmd+,) to create a Sync Point. (A small green triangle will appear to indicate you were successful). Now, placing the edit cursor at the marker, use the grabber and Ctrl+Alt/Option+Shift click.
So, to recapitulate: “Ctrl” synchronizes the beginning of the clip, “Cmd+Ctrl” syncs the end, and Ctrl+Shift uses your manually selected sync point.
(And, just like with dragging clips, if you leave out the Alt/Option key, it would be the original clip that would be moved, not a copy of it.)
Although this example is very simple, getting used to moving clips with these shortcuts is a powerful way to edit clips and modify arrangements.
By the way, if you need to delete a Sync Point, just Alt/Option+Click on it.
Duplicate, Repeat, and Loop
To end this new installment, let’s take a look at three more useful techniques to create or modify an arrangement.
Let’s say we would like to create four copies of this region so that it repeats itself until the marker. Since we already know the clip group is exactly 1 bar long, we could just select the clip and press Cmd+D three times to create three duplicates.
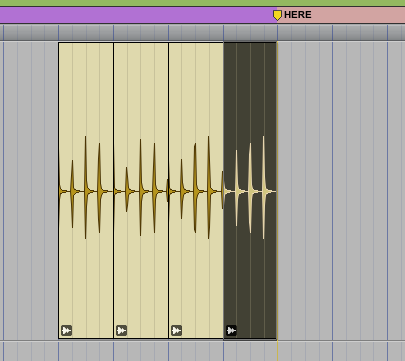
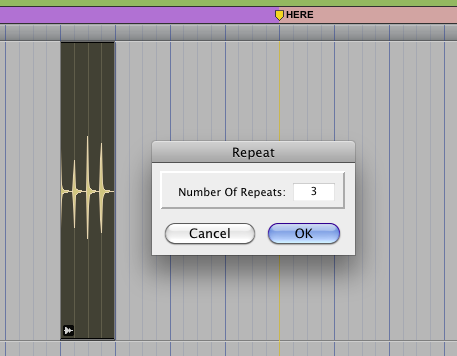
This is useful when we want just a small number of duplicates, but when a larger number is needed, it is easier to use the “Repeat” function by pressing Alt/Option+R. A window will appear, asking how many copies we would like to create, and clicking “OK” will create them all instantly.
These two methods create independent copies of the original clip. As a result, if we need to move them as a whole, we would need to either move them individually, or create a new Clip Group with all these new copies included.
A new option comes handy in to deal with this: Going back to our original clip, we could type Cmd+Alt/Option+L to bring up the “Clip Looping” function, where you can create a new type of clip: a “Loop Clip”.
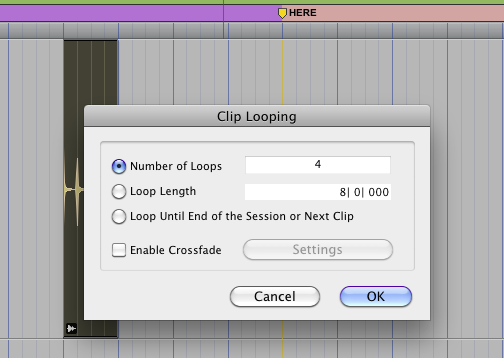
With Clip Looping, you can choose to create the loop by indicating the number of repetitions, the total length, or repeat the clip until the end of the session or the start of the next clip.
An additional option allows you to create a crossfade between each duplicate. (Here is where the gap/pad parameter in both Separate At Transients and Beat Detective comes in handy, to avoid softening the transients with a fade).
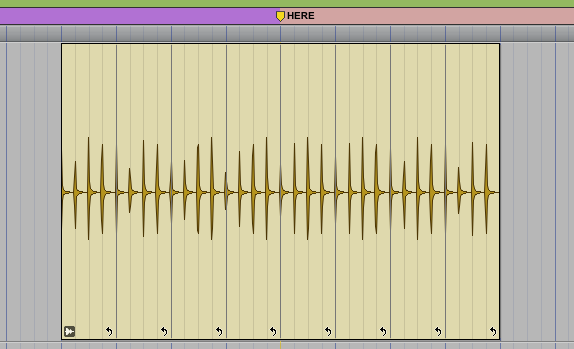
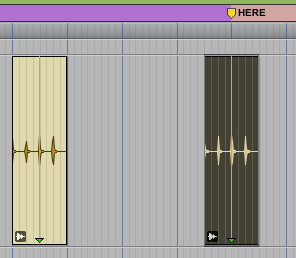
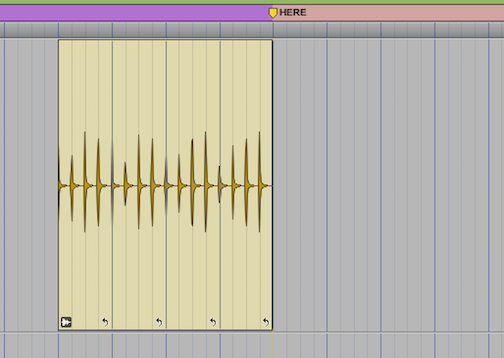
Notice the end result is a little different here. There’s a small arrow at the bottom right of each instance of the clip, indicating the whole clip is a loop. This means it can be grabbed, snapped, duplicated, etc. as a whole, and we can easily modify the length of it with the Trim tool (F6).
Conclusion
We’ve looked at some of the most versatile editing tools Avid’s audio software has to offer.
The playlists in Pro Tools are one of the things I always miss when working with other DAWs, and the editing shortcuts described will literally allow you to fly things around with Pro Tools.
If you master these, you’ll be a true PT Wizard.
Windows and Mac correspondences
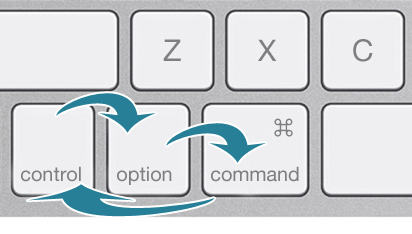
If you use Pro Tools regularly on both Mac and Windows machines, you probably already know that Mac keys Cmd, Alt/Option and Ctrl, correspond to, respectively, Ctrl, Alt, and Windows/Start on Windows.
There’s a great mnemotechnic way to remember this correspondence (and thus, all the shortcuts):
If you look at those three keys on a Mac, their position on a Windows keyboard would be as if they were moved a position to the right, with the Cmd sliding to the most left position (and vice-versa if you want to move from Win to Mac).
Roger Montejano is a producer, mixer and engineer based in Singapore. He works out of a variety of studios, and offers online mixing services at rogermontejano.com.
Summary Table
Please note: When you buy products through links on this page, we may earn an affiliate commission.
Adrian Tello
August 20, 2017 at 2:35 am (7 years ago)Great tips! I didn’t remember about the command Separate Clip at Transients, it’s gold