“Spotting for Sound”: The First Step in Getting Great Audio Mixes for Film & Video
George Lucas once said that “sound is 50% of the movie-going experience”. It’s a statement that holds true even moreso today, now that we have so many new and immersive mediums through which audio can complement picture.
Whether it’s a standard 5.1 surround system, 7.1, Dolby Atmos, IMAX, or the new ever-expanding worlds of 360/VR, the role of sound has become crucial to film, thanks to contemporary standards and expectations when it comes to entertainment technology.
In light of this, it is perhaps more imperative than ever that a movie, TV, or other form of visual media have proper sound to match what is on screen. And in order to know what sounds we must add to the picture, we must perform the task of “Spotting for Sound”—arguably, one of the most important parts of the sound design and audio post-production process.
The Importance of Sound “Spotting”
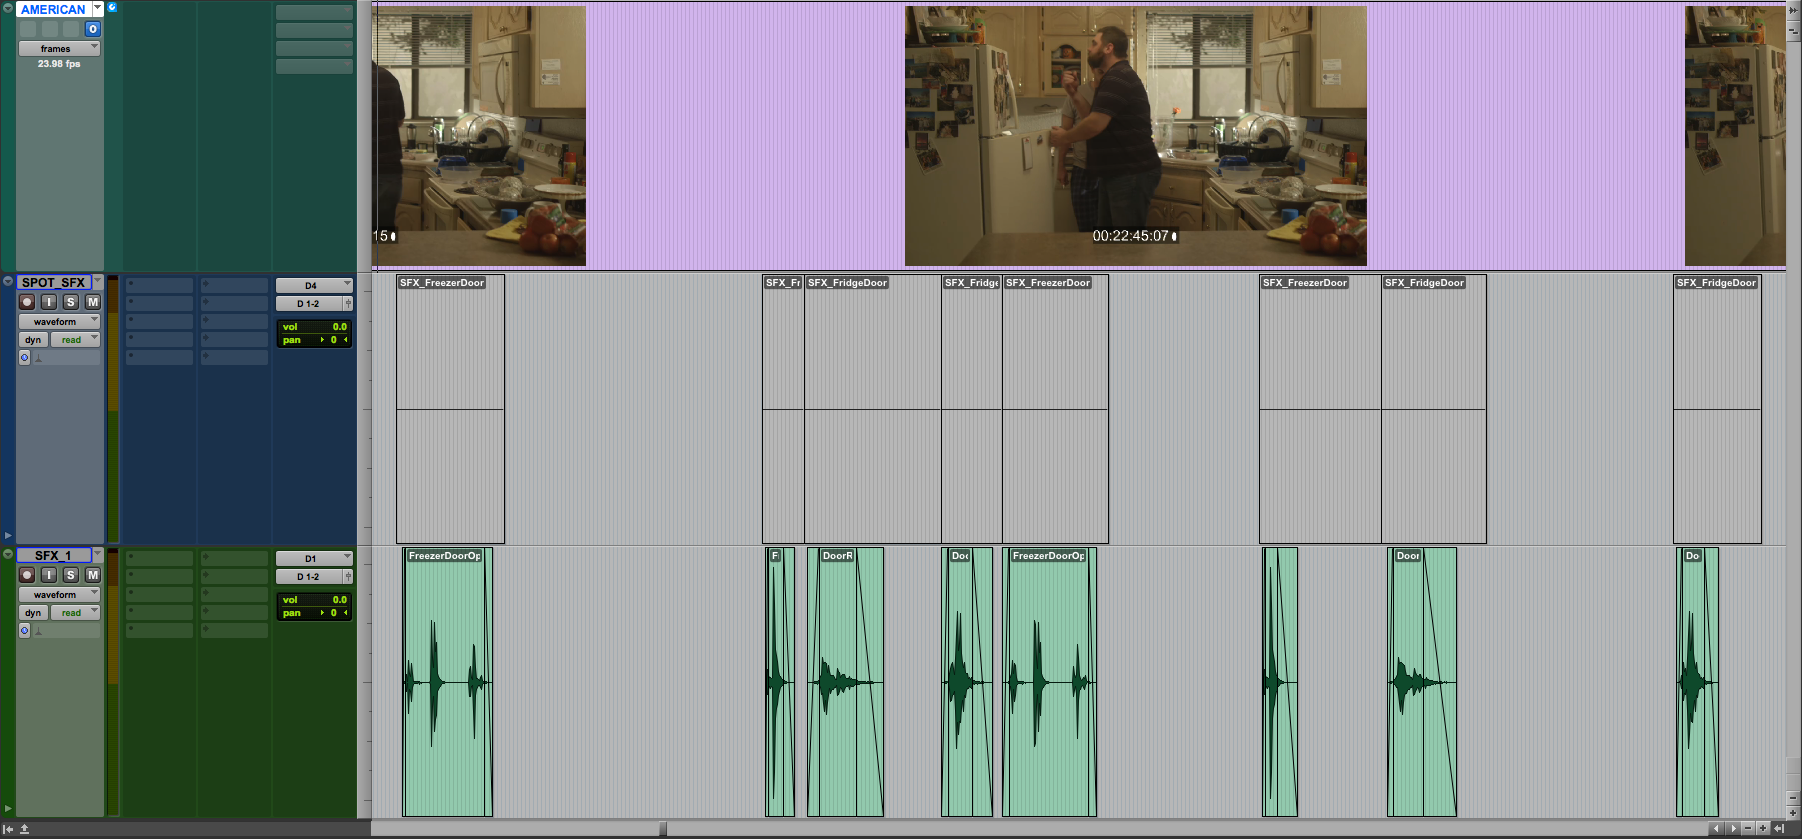
Spotting for sound is the part of the audio post-production process where the pertinent members of the audio crew watch the film all the way through and create “Ghost Regions” (blank audio regions or clips) that they place in a timeline where missing sounds need to be added in.

To create a compelling world for your story, even the most mundane sounds must be spotted and then added, from sounds like the refrigerator door in this simple scene from American Dream, to massive explosions, high technology, and otherworldly monster sounds.
The reason Spotting is so important is that modern sensibilities require that we have a sound for every action that occurs on screen in order to give the viewer the most immersive experience possible.
The whole purpose of a visual medium is to take viewers away from their everyday lives and give them an hour or two of excitement on a roller-coaster ride of emotions. If the movie sounds weak, unconvincing, or is missing sounds for actions we know to have sound (for instance, the slam of a car door), the experience is weakened and the viewer is taken out of the film.
Although there is no written rule, it is fairly safe to say that today, Pro Tools is the industry standard for audio post production, and is probably the most commonly used DAW for spotting in a professional environment, with the majority of commercial post-production facilities using it. This article may contain terms and practices specific to Pro Tools, but these practices can easily be carried over to any other DAWs that allow the same functions. (Which is most of them.)
Just like anything in audio, there are a million and one different ways to complete a task, and the same goes for Spotting. The following are some basic guidelines I’ve found super helpful and efficient and have made my workflow (and my life) a whole lot easier.

Once you have completely spotted a scene with “ghost” regions, it will serve as a roadmap for yourself, a Foley artist, and for other sound editors, allowing you to quickly and easily get audio into the right places without missing any cues.
The Process
After a film has achieved “locked cut”, meaning that you have a final edit in hand, restricted to a timeline, a cast of characters which may include the Director, Editor, and Sound Supervisors will sit down and begin the spotting process by watching the edited film in its entirety. As they watch, they’ll be looking for:
- Problems with dialogue where ADR might be necessary.
- Elements that need Foley sound added. (Live action audio recordings of footsteps, hand movements, pencil writing, clothing rustles, etc)
- Passages that need sound effects from a sound library. (Car doors, microwaves, generic explosions, etc)
- Passages that need background sounds or ambiences added. (City street noise, office noise, forest ambience, etc)
- Elements that require sound design. (The creation of a unique aesthetic or sound to enhance the mood of a scene)
- Scenes that need music. (Wherever musical score, source music, and licensed music may be placed)
It is then a sound editor’s job to place markers and appropriately named “Ghost Regions” throughout the Pro Tools timeline corresponding to all of the sounds the film will need.
Sound Spotting Best Practices
For Spotting, you’ll want to develop a naming convention for your Ghost Regions that will include specific information about the sound that may need to be recorded, sourced or created.
For example, Foley regions for footsteps might be named “FOL_Footsteps_
It’s a good idea to create different Pro Tools session files for different Spotting sessions. If you’re only Spotting for Foley, have a Spotting .ptx file specifically for that. Same goes for if you’re spotting for dialogue/ADR, sound effects, or music. It could be distracting if you’re looking for clothing rustles and accidentally scroll down into the section of the session with dialogue tracks.
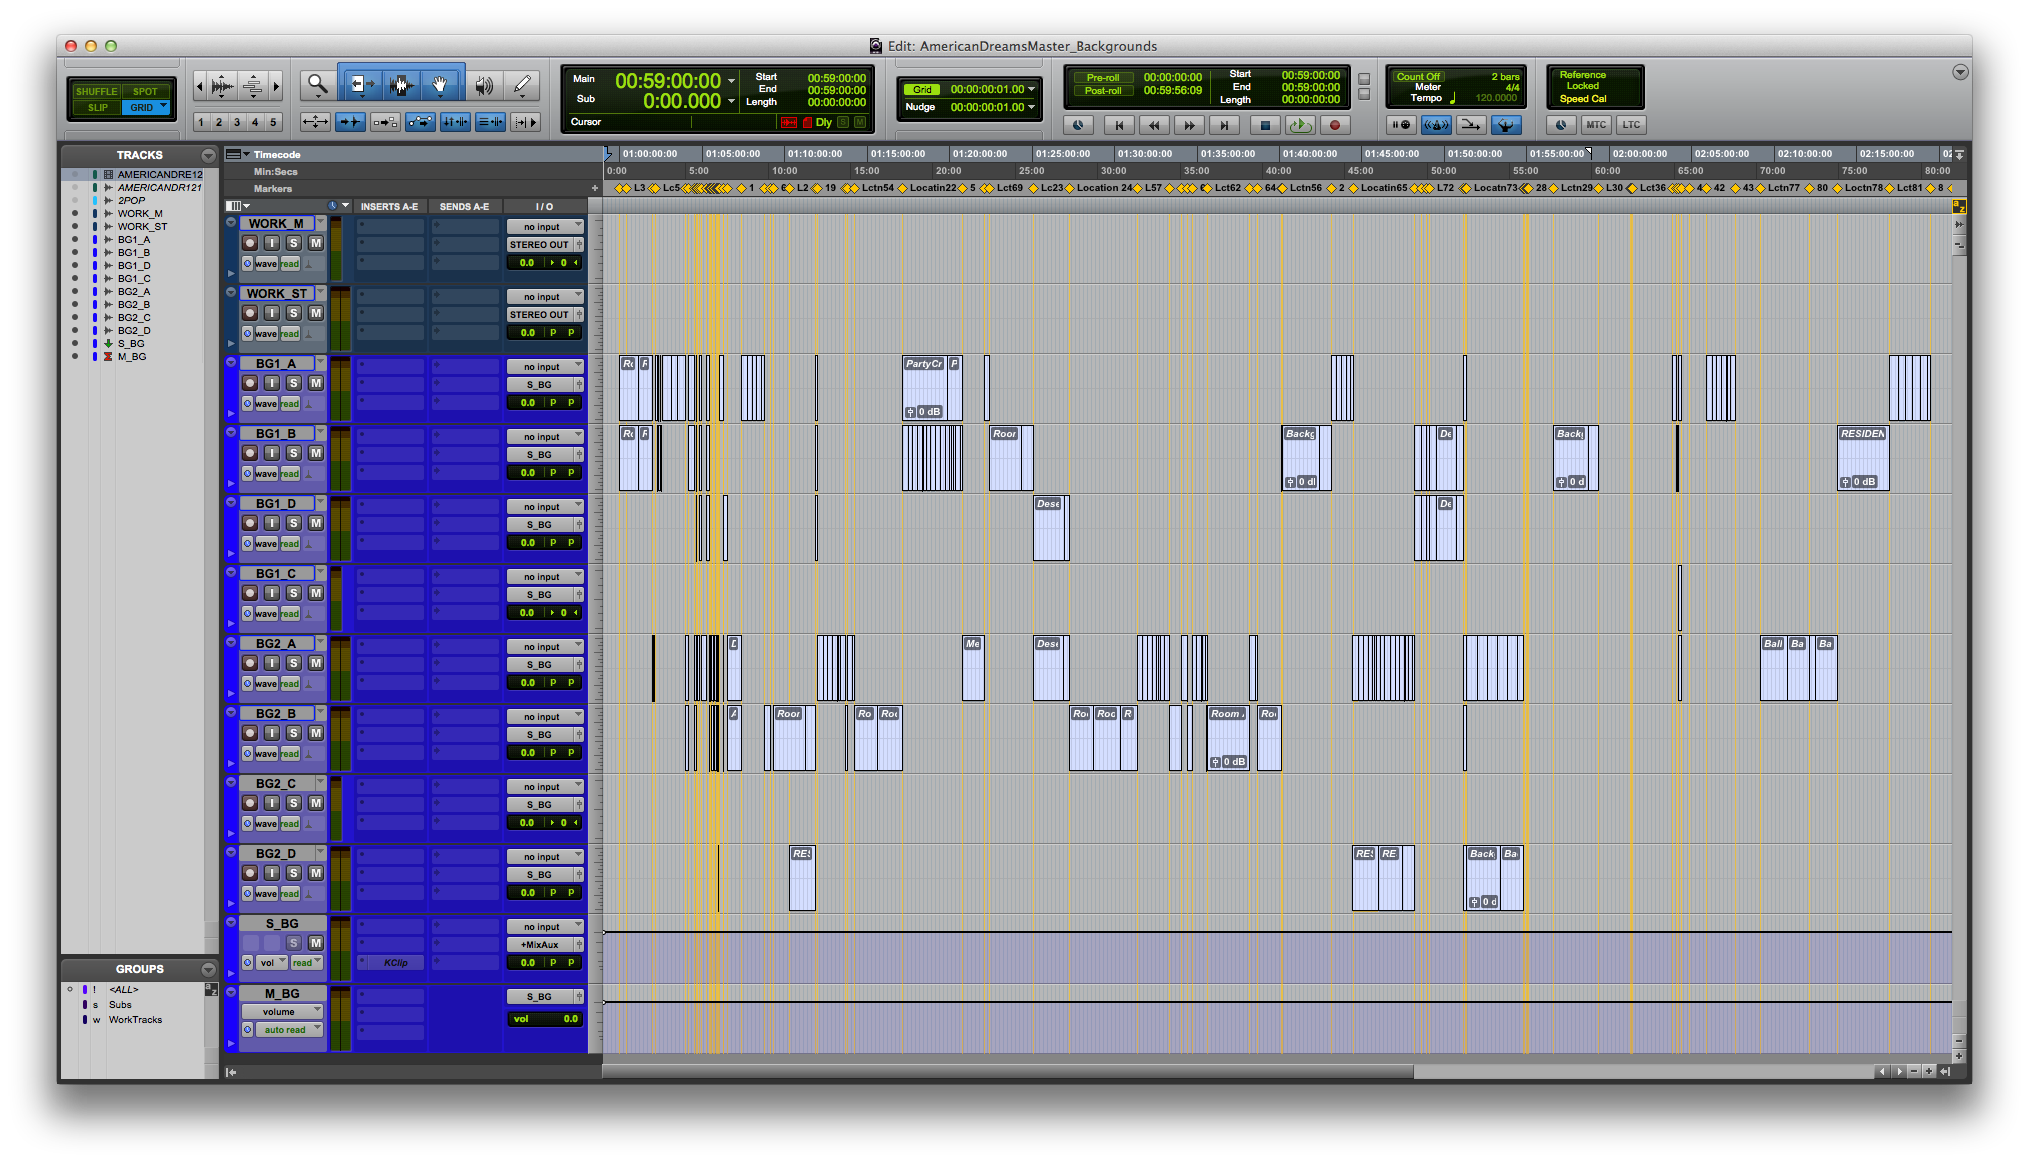
It’s a good idea to have a handful of mono tracks with Ghost Regions readily available for scenes that will need heavy amounts of sound added like a fight scene in the woods or a car chase in the city. Keeping elements separate will help with organization and your focus on what exactly needs to be supplied for the visual medium at hand.

Organization and labeling are key when it comes to good sound spotting. Carefully placed markers allow you stay on track and for sound effects editors to jump directly to the appropriate section and lay in new audio.
In larger group projects, you’ve also got to know what you’re spotting for and stay focused on that. If you’re the Dialogue Editor, have a spot track for any on-set lines that might need to be ADR’d. If you’re Spotting Foley, look for body movements, clothing, footsteps, anything relative to an interaction with the human body that might make a sound.
A lot of times we take our ears for granted, not realizing how much information they process 24/7. With so much sound happening in the real world, it’s crucial that we add at least the same amount—if not more—sound to our “fake” world.
We can’t know what to add unless it’s spotted first, and part of that process is being cognizant of the many sounds in the world around us, from the sounds of a drink from a glass of water, to footsteps on a carpet floor, to a breeze through the trees, the clearing of a throat, or the forgotten ambiences of the everyday spaces we inhabit.
After the entire film has been Spotted, it’s time to start replacing Ghost Regions with actual sound effects! Dialogue will be ADR’d, Foley will be recorded, sound effects will be pulled, and scenes will be scored will beautiful music.
For this process, I would recommend a new “Save As”. It doesn’t hurt or take up space to have multiple .ptx files along the way to maintain organization and track your progress.
Because you named your Ghost Regions earlier, all you’ll have to do is find the region, look at the name, and line up the sound effect. Once all of the sound effects are loaded in and all of the ghost regions are replaced, it’s not a bad idea to level everything out a bit. You don’t want to put your Re-Recording Mixer in a position where a loud explosion might pop out of nowhere. This will also help your mixer in the long run when the dialogue, Foley, sound effects, and music are all compiled into a master session.
Once all of the sounds are added, they must be reviewed and approved by whoever is the top dog of the post production food chain. (Possibly the Director, the Supervising Sound Editor, or the film’s Producer). Finally, once the approval process is done, the job of the sound editor is done, and it is time to pass everything along to the Re-Recording/Dubbing Mixer for the final touches.
Good luck in spotting sound on your projects, and keep those ears open!
Vinny Alfano is a composer/engineer/sound designer who works at Plush and Red Iron in NYC. Visit vinnyalfano.com for credits, work, and contact.
Please note: When you buy products through links on this page, we may earn an affiliate commission.


[…] Origen: “Spotting for Sound”: The First Step in Getting Great Audio Mixes for Film & Video &… […]
[…] 原文 Vinny Alfano from sonicscoop.com […]