Make The Switch: 5 Ways to Get the Most Out of Ableton Live
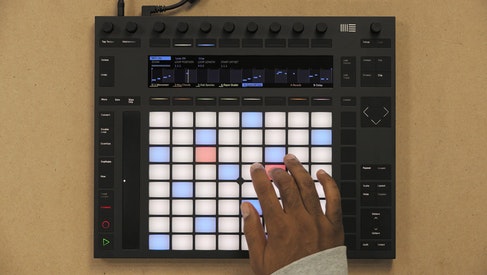
Ableton Live is a DAW that is designed to feel more like an instrument than any other. Even without a physical controller, like the Push interface pictured here, it can lead to creative breakthroughs that may be unlikely on other DAWs.
If you use a DAW to record or mix music, it’s likely that your choice is largely predicated by your history and familiarity with that piece of software.
This makes sense when you consider the largely overlapping feature sets of most DAWs. We often end up using what we started with, simply because of our huge backlog of previous sessions and ideas.
In some ways, it might feel like a step backward at first when you switch to a new platform, especially if you rely on built-in plugins, as opposed to third party processing. If you’re ever going to learn a new program as a backbone of your audio practice, then there must be a good reason. In the case of Ableton Live, there are a whole slew of them.
Born in Berlin, Germany, in 2001, Ableton immediately set itself apart in a crowded field by offering a different take to digital audio manipulation, utilizing a then-revolutionary “clip” view that allows you to play back different bits of audio according to quantization rules that you can custom-set for each snippet of sound. Even today, no other program has integrated this approach quite as seamlessly and intuitively as Live.
Coupled with its truly advanced MIDI capabilities, over the past decade-plus, Ableton has found a massive audience and a devoted user base—especially in electronic music production, where this program is often seen as the quintessential instrument, both in the studio and on stage.
The recent release of Ableton Live’s newest incarnation, version 10, finally finds the program adding a host of often-requested features, making it even easier to jump into for novice users, and making it an even more capable tool for those who have been there for the whole journey.
Here are five crucial tips for jumping into the world of Ableton and making it your own, right away:
1. Understand the Relationship Between Clip View and Arrangement View
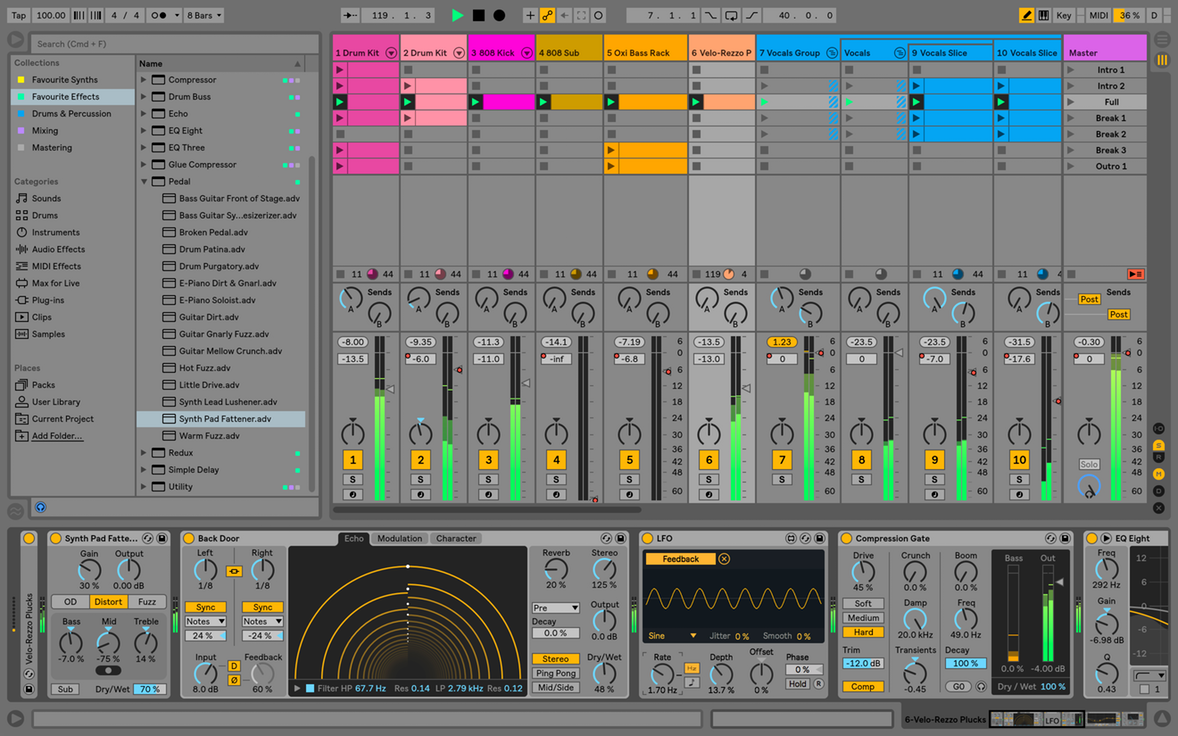
Live’s “Session” view allows you to intuitively manipulate audio, and is what still sets it apart from most other DAWs. The “Arrangement” window should be more familiar to conventional DAW users.
The minimal interface of Ableton Live often leaves first-time users scratching their heads, and for good reason.
There are two “views” available in Live, and understanding how they interact is the basis of grasping the workflow behind Ableton.
“Session View” (typically nicknamed “Clip View” by longtime users) is a series of vertical and horizontal rows that can be thought of as a bank of possible ideas—each available to be triggered at will.
This system is the heart of what makes Ableton Live “playable”, like the instrument it really is. By using a MIDI grid controller like the Novation Launchpad, in which each pad is made to represent a different clip, there are 64 snippets of audio available to be triggered by hand.
This grid-based clip-launching system is made especially powerful when you take into account that each clip can be triggered at any one of 12 pre-set quantization amounts.
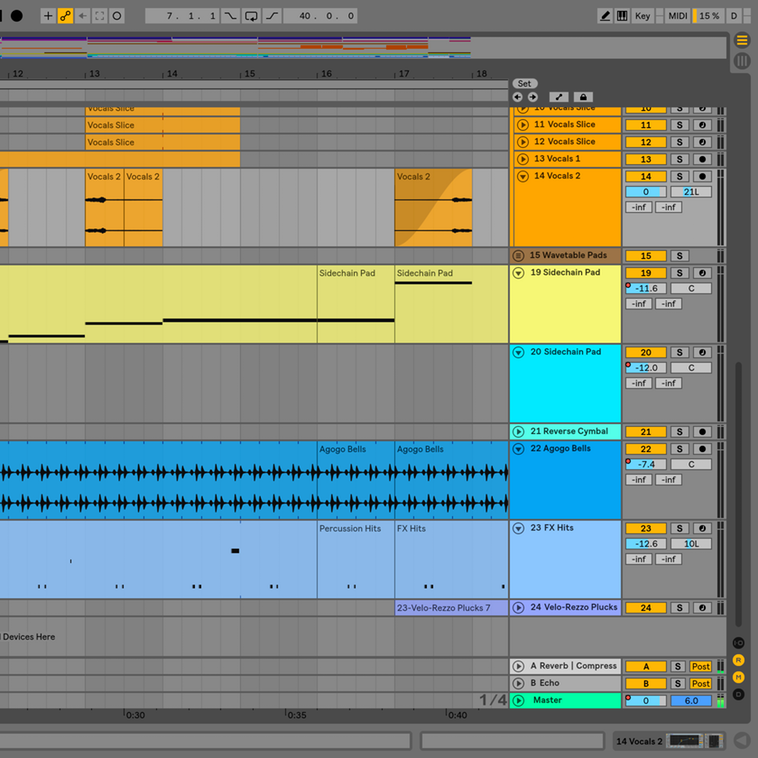
“Arrangement” view is more like a conventional DAW and should be fairly easy to grasp for those migrating from other software.
For instance, a one-measure drum loop can be set to only play on the downbeat, short vocal samples can be made to play back on trigger with no quantization at all, a syncopated bass riff can be set for quarter note quantization, and so on for every clip used.
In this way, Session View effectively acts as one giant sampler, albeit one with incredibly detailed editing available.
Rounding out the program “Arrangement View” is the more familiar time-based DAW screen that we’re all used to, with track labels to the right side of the screen, a list of plugins and instruments to the left, and the bottom of the screen devoted to providing a detailed view of whatever track is currently selected, be it a MIDI or audio track.
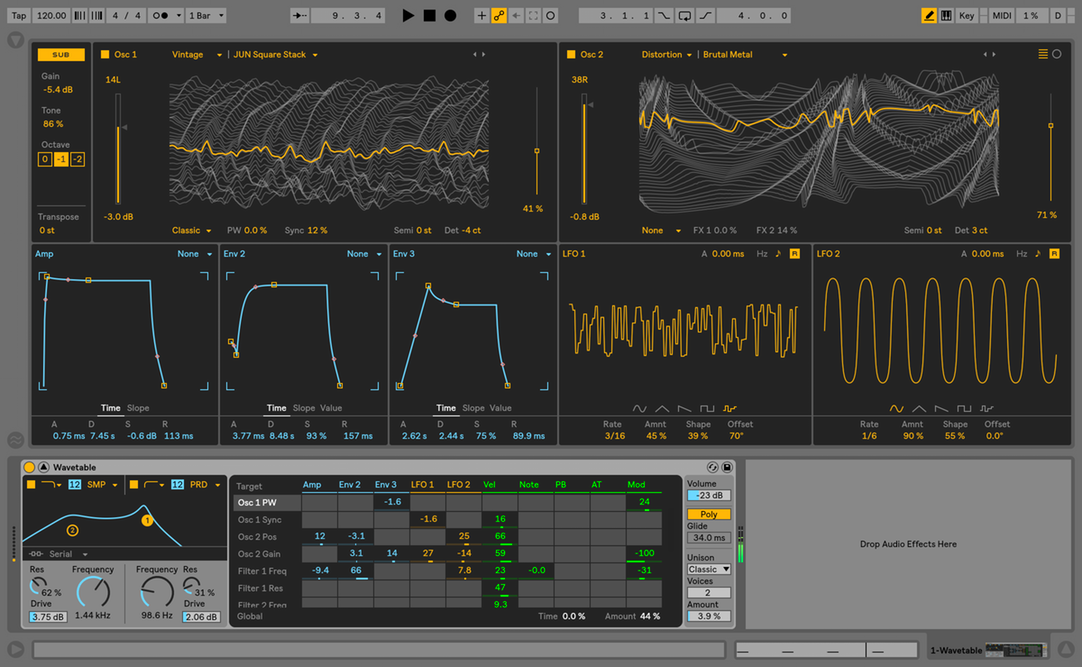
Ableton 10 finally expands on that visual template with the addition of Wavetable, a built-in synth that allows the you to expand the bottom window to a full-screen view—a welcome addition when working with complex patches.
2. Capture Your Tweaks In Real Time
The relationship between Session View and Arrangement view becomes immediately apparent when you hit “record”.
Any action that you take on the Session View page—be in it recording incoming audio, playing back clips, or sending MIDI information—is captured on the Arrangement page. Tweaks on effects and VST instruments are recorded as well, allowing an improvisational jam to quickly be captured into a final track structure.
It is this ability to immediately record any action you undertake that makes Ableton’s workflow so intuitive—especially when using their bespoke controller, Push 2, which pairs 64 pads with 8 knobs and a bright, informative screen that makes it easy to perform nearly any task in real time.
Version 10 brings a few small but important updates that users have been asking for for several years: All “Automation Lanes” are now viewable immediately by simply clicking “A”, and zooming between small and large portions of your project is now much quicker due to the newly-added ability to select a portion of the screen and hit “Z”, automatically zooming into the selection.
These are small changes, no doubt, but over the course of countless long production sessions, they really do speed up the music-making process.
3. Use “Warp” Markers to your Advantage
One of Ableton’s strong points has always been its ability to seamlessly shift tempos while keeping everything locked to the grid. This function (similar to Logic’s Time-Stretch) employs what Ableton calls “Warp Markers”, so it can find transients and stretch or shrink the track accordingly, keeping it on beat at any tempo.
Every audio clip in Ableton has the option to be warped. Further functionality comes from your being able to choose from one of six Warp algorithms: Beats, Tones, Texture, Re-pitch, Complex, and Complex Pro.
“Beats” is highly suited for rhythmic material, and allows you to manipulate a simple but effective gate setting, whereas “Complex” and “Complex Pro” are typically used for more (you guessed it), complex audio, including full tracks. “Re-pitch” will, as you’d expect, raise or lower the pitch according to any tempo changes, similar to speeding up or slowing down a record.
While each of these algorithms has suggested uses, there’s much to be explored by breaking those “rules” and trying each one on whatever clips you please. Try using the Beats algorithm on an ambient pad and suddenly you’ll find it gating where Ableton has detected anything resembling a transient. Or, put a drum loop to task using the Re-pitch option, creating the kind of slowed-down sound that was typical of old samplers like the Akai MPC-2000xl, that surely are the forebearers of Ableton’s workflow.
4. Route Audio and MIDI Wherever You Please
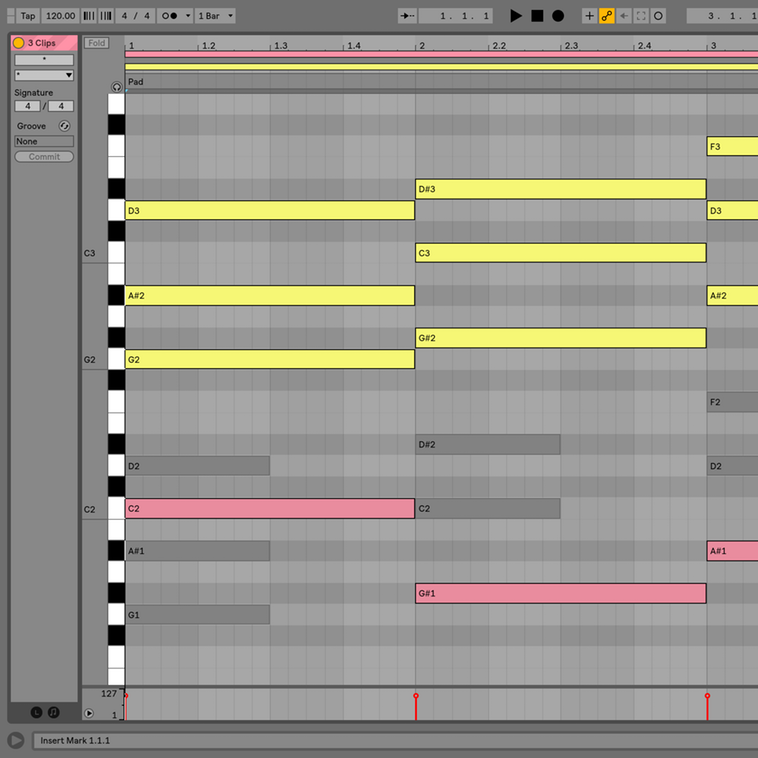
Robust MIDI capabilities and the ease of creating complex routing paths are a key point of differentiation for Live.
Another area where Ableton shines is Live’s malleability in the routing of both audio and MIDI.
You can record audio tracks from an external source, as is typical in any DAW, or quickly and easily record the output of another track, making resampling and applying effects a breeze.
In addition, the output of tracks can be set to go to the main stereo buss output, sends only, the input of another track, or an external output more simply than in a program like Pro Tools, making setting up complex mixes using external hardware quick and easy.
MIDI tracks feature a similar ease of use. Here you have the option to choose what input source will effect that track, as well as the ability to route MIDI out of that track to another MIDI track for processing.
In Live, several tracks can also be sent to the same MIDI channel at once, making it easy to create polyrhythmic loops. Ableton’s MIDI effects are also deep and flexible, and include an arpeggiator, a chord function, and plugins to set note length, pitch, scale or velocity.
There’s also a “random” effect, which lets you set the number of possible choices and the chance that the effect will be in use. Utilizing all of these in tandem can turn a simple, repetitive eighth note bass line into a multi-layered splash of notes and chords, all set by programming via MIDI effects.
5. Use “Max” For Live for Modulation Heaven
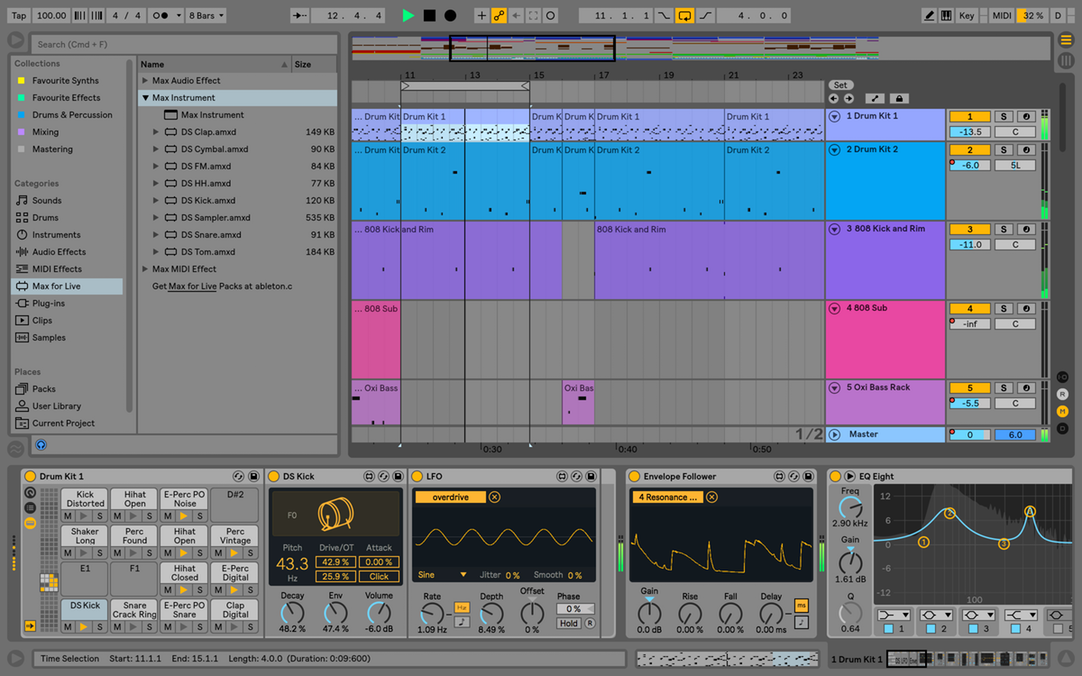
Advanced Max integration makes Live particularly powerful for those who like to use the studio as an instrument—especially in live performance settings.
Version 10 of Ableton Live came with many small workflow upgrades, but one of its major ones was the inclusion of Max for Live as part of the Live bundle. (It previously was a paid-for add on.)
Max for Live now loads immediately upon startup and is woven even more tightly into the fabric of Ableton. Max patches are user-customizable and include an incredibly wide range of functions and tasks.
One of the most useful and commonly used is the LFO plugin, which allows you to apply an LFO to any audio or MIDI parameter, allowing control for rate, depth, offset, and phase. This can be useful to create a “human” feel on a static sound or loop, whether that’s modulating a filter’s cutoff, a drum sound’s decay, or even a track’s send knob. Several LFOs can be used in combination to create complexity where there was once stasis, allowing your sessions to quickly take on new shapes.
Understanding the details of the workflow unique to Ableton Live is essential to making the program fit into your production process; as soon as these basic tools are under your fingers, you’ll find that your ideas are able to be executed with incredible speed. And perhaps Ableton will send you down a few roads you never would found without it’s clip-based approach. Here’s to finishing some of those tracks!
Leo Maymind is a producer, DJ, and writer living in Los Angeles, CA. He is obsessed with sound, and you can reach him at lmaymind@gmail.com.
Please note: When you buy products through links on this page, we may earn an affiliate commission.


