Everything You Need to Know About Audio Cables for the Home Studio: The Essential Guide
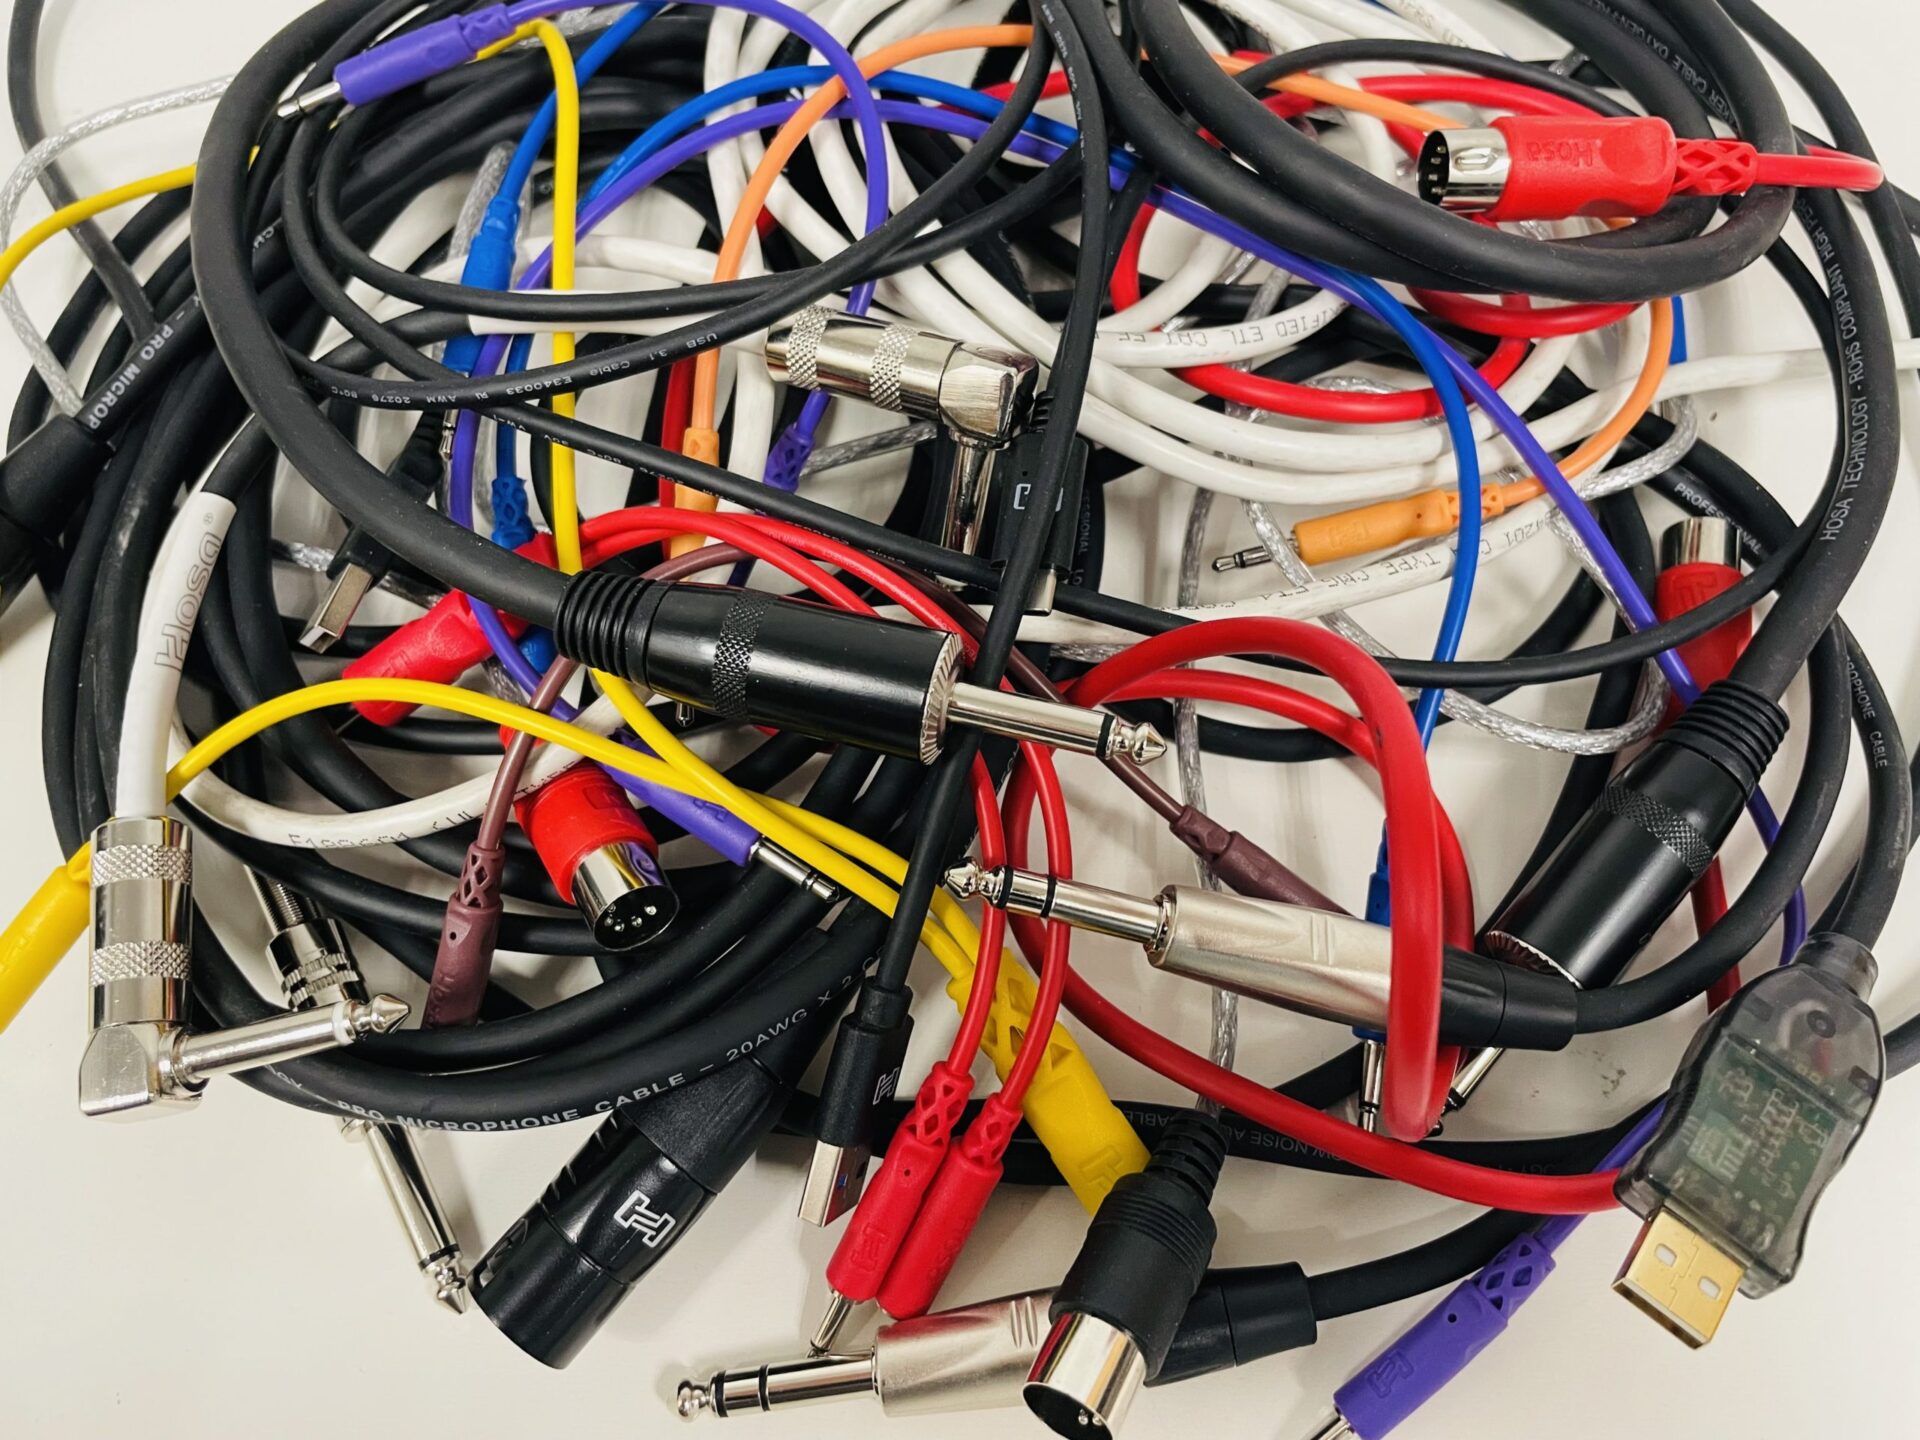
Choosing the right cable for the job is essential. Unfortunately, it’s not always as simple as grabbing the one that fits. Let’s untangle this subject for good.
Trying to choose the right cables to wire your studio gear together may seem a bit overwhelming at first. There are so many new names and acronyms to learn:
What’s the difference between a TS cable and a TRS? Or an XLR and an RCA? Do you need a 3.5mm or 1/4″ connector? And that’s just the basics.
When you start learning more about cables, you’ll soon come to find that looks can be deceiving.
For instance, although they can appear almost identical, the kinds of cables you use to connect a guitar or a synth to an instrument input are fundamentally different from the cables you’ll need to connect your interface to your speakers.
It seems like it should be such a simple job, but the stakes of getting it wrong are all too real. Choose the wrong kind of cable or connector and you could run into some significant problems: Noise, hum, signal dropoff, unexpected changes in tone and more.
Don’t worry. With the right information under your belt, all this becomes pretty easy to remember, and grabbing the right cable every single time becomes a relatively straightforward task.
Thanks to our friends at Hosa, today we’re doing a deep dive on everything you need to know about cables for your home studio. Get through this quick, free primer and you’ll be set.
And, if you do discover you do need something new? Check out all the cables Hosa offers, from their budget friendly Essentials series, to their ultra reliable Pro series, to their totally uncompromising, top-of-the-line Edge cables. They’re one of the best selling brands out there for good reason.
The Difference Between Analog and Digital Signals
Before we get too deep, it’s important to recognize that there are two primary types of signals in the home studio that are never interchangeable: Analog and digital.
This can be a little confusing at first, because you’ll sometimes find the same types of connectors used on both analog and digital cables—and mixing them up isn’t ideal. Fortunately, we’re here to straighten all that out below.
An “analog” signal is essentially comprised of continuous electric current running through a cable. This type of signal is produced by microphones, synthesizers, electric guitars, electric basses, outboard processing gear, and your audio interface’s line outputs.
But computers are very different. They process data internally and transfer that data to other digital devices in super-short pulses of 1s and 0s. A data stream like this is known as a “digital” signal.
The connection between your computer and audio interface is a digital one. There are many other places you’ll run into them as well: on digital mixers, digital outboard processors, control surfaces, converters, MIDI instruments and more.
Digital cables do have some key benefits. For starters, they are practically impervious to noise. And they can transfer a lot more than just audio information. Depending on the audio interface that you own, you might be able to control the device’s bit depth, sample rate, preamp levels, and output level right from your computer.
In contrast, an analog cable can only transfer basic electric signals. These analog signals can be a lot easier to work with in some ways.
For the most part, analog connections are plug-and-play. You don’t need to worry about installing device drivers, firmware, or any of that.
But one of the downsides of analog signals is that they can be very susceptible to noise if you’re not careful.
One common source of noise is the electromagnetic field created by power cables. If you have a power cable running along side an analog audio cable, some of the electrical charge can “jump” from the power cable into your audio cables, resulting in some pretty dirty sounding audio.
Because of this, it’s a good practice to avoid laying analog audio cables parallel to power cables. If power cables and audio cables absolutely must cross paths with one another, they should cross over at right 90 degree angles—perpendicular to one another—to reduce potential noise.
There are other ways to keep noise down in analog cables too. The longer an analog cable run, the greater potential there is for the signal running through the cable to pick up noise. So it’s usually a good idea to use the shortest cable that you need for the task at hand.
This is especially true with the “unbalanced cables” used consumer audio gear and for instruments like electric guitars and basses. Certain types of cables—notably “balanced” cables—are much more resistant to noise. More on that in a minute.
A/D and D/A Conversion
Often, you’ll need to change your signal from analog to digital or vice versa. Unfortunately, there’s no type of cable to do this for you. You have to use an “analog to digital converter” (A/D) or “digital to analog converter” (D/A) to go back and forth between one format and the other.
When you convert an analog signal into a digital signal through the process of A/D conversion, the analog signal’s amplitude is sampled at set intervals. You end up with a digital file inside your computer, such as a WAV file, that serves as a representation of an analog sound wave.
To play back the digital signal, it must be converted into an analog signal (D/A conversion) and then transformed into sound waves using a pair of speakers. If all goes well, you should end up with a near-exact replica of the analog signal that you recorded earlier.
Thankfully, the sound card in your audio interface takes care of all of this for you, and is responsible for both A/D and D/A conversion.
The 4 Analog Signal Levels
Analog signals can differ in terms of their signal strength. In order of weakest to strongest, the common audio signals that you’ll want to become familiar with are mic-level signals, instrument-level signals, line-level signals, and speaker-level signals.
Line-Level Signals
Let’s start by taking a look at line-level signal. This is the “standard” signal level that you’ll find within studios. Most hardware EQs, saturators, and compressors only accept a line-level signal.
If you run a signal that’s too weak into a threshold-dependent device like a compressor, the signal may not be strong enough to engage the compressor. To boost a weak signal up to proper line level, you need to use a preamplifier circuit of some kind.
There are actually two different types of line-level signals. Consumer gear produces a -10 dBV line signal, while pro audio gear produces a +4 dBu line signal.
Connecting a -10 dBV output to a +4 dBu input is generally okay; the signal may sound a bit quiet and require a good bit of boosting, but it’s not necessarily the end of the world.
On the other hand, connecting a +4 dBu output to a -10 dBV input can overload the input and lead to some pretty serious distortion, unless you have some way of “padding” it down first.
Another issue is that most pro level equipment uses balanced connections, while consumer equipment uses unbalanced connections. This is another potential incompatibility that we’ll explore in more detail in just a moment.
Mic-Level Signals
Mic-level signals are produced by…… you guessed it, microphones!
Before attempting to record or process a mic level signal, it should be brought up to line level, using a microphone preamp.
This is pretty easy, because your audio interface almost certainly has at least one microphone input with an associated preamp built into it.
There are also external preamps that you can purchase as standalone products, and you will sometimes find them as part of studio “channel strips” which combine a mic preamp with other processing options—for example, EQ, compression or de-essing.
There’s also an increasing number of “digital mics” out there. At a fundamental level, these are just analog microphones with the preamp and an interface built right in!
Under the hood, the microphone itself is still putting out a mic level signal. It’s just that the whole “preamp” part is taken care of inside the body of the mic.
Instrument-Level Signals
Instrument-level signals are generated by electric guitars and basses. They put out stronger levels than microphones, but still need to be boosted to line level for recording and processing.
You can record the low impedance instrument-level signal produced by an electric guitar through a high impedance (Hi-Z) input on your audio interface, which will boost the signal.
If your audio interface doesn’t have a Hi-Z input (which would be quite odd in this day and age), you could convert a guitar’s instrument-level signal into a mic-level signal using a “direct box” that changes the signal from instrument to mic level, and then record the resulting mic-level signal through your audio interface.
Of course, you can also route the guitar’s signal through pedal effects and boost the signal to speaker level using a guitar amplifier. You’d then record the sound of the amplifier using a microphone.
Be aware that instrument level signals almost always uses a 1’4″ TS cable, which looks pretty similar to the connectors you’ll find on your pro audio gear or on speaker cabinets… but it isn’t interchangeable! We’ll get to that in a moment.
Also note that a lot of modern synthesizers and digital keyboards will put out line level output and don’t often need to go into a special instrument input at all.
Speaker-Level Signals
Finally, there are the speaker-level signals that are used to move the drivers in your studio monitors.
You might assume that the signal running from your audio interface to your studio monitors is a speaker-level signal but that’s not the case. It’s actually a line-level signal that comes out of your interface.
The “active” studio monitors you’ll find in most home studios boost that line-level signal to speaker-level signal internally, using a built-in amplifier, so you may never encounter a cable running speaker-level signal within your studio!
“Passive” studio monitors on the other hand, sometimes found in higher end studios, rely on an external amplifier to boost the incoming audio signal to line level. In that case, the cable connecting a studio amplifier to passive studio monitors carries a speaker-level signal.
The wire used in speaker cables tends to be quite thick. It needs to be able to handle the powerful signal running through it without melting. And, unlike instrument and line level cables, it will generally be “unshielded”, meaning that it doesn’t have an internal metal barrier to help reject noise.
Note that the cable used for speakers looks a lot like instrument cable and line level cable. But again, it’s not interchangeable. Use a speaker cable as an instrument or line cable and you’re likely to get a lot of noise, due in part to the lack of cable shielding.
Balanced vs. Unbalanced Analog Cables
A unique (and honestly, pretty brilliant) type of cable design is found in the “balanced cables” you’ll use for pro audio gear and microphones, in order to help to prevent noise.
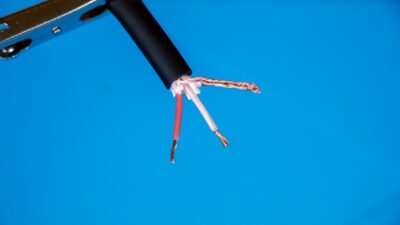
Balanced cables contain at least three internal wires instead of the two wires you’ll find in “unbalanced” cables. A balanced cable will generally have a hot wire (red), cold wire (white), and ground wire (brown).
The ground wire prevents the build up of electric charge in your musical equipment that could otherwise cause you to zap yourself, or have to deal with additional unwanted hum.
Bur the really interesting part is the other two wires: The positive polarity (hot) wire carries a signal from point A to point B, while the negative polarity (cold) wire does the same thing… but with the “polarity” of the signal inverted.
This makes the signals in these two wires “out of phase” with eachother, meaning that if nothing was done, the two signals would cancel eachother out at their destination, resulting in silence.
Not what we want, right? But here’s where it gets interesting:
As these the two opposite-polarity signals run through the balanced cable, they’ll both pick up noise along the way.
Then, when the two signals arrive at their destination, the polarity of the inverted signal is flipped back into phase, so your signal comes through loud and clear.
At the same time, the noise that was picked up along the way is flipped out of phase, meaning that practically all the noise that was picked up will be instantly removed through the process of phase cancellation!
This way you can get very quiet operation even at very long cable runs.
(I told you it was pretty brilliant, right?)
When forming connections between balanced outputs and inputs, make sure to use balanced cables with balanced connectors like TRS or XLR. (More on that soon.) Doing so can help eliminate many potential noise issues.
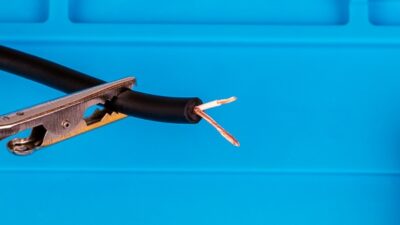
Unbalanced cables are different in that they contain only a positive polarity (hot) wire and a ground wire.
In the following image, you’ll notice that the hot wire has white casing, as opposed to the previous image in which it has red casing. Depending on the cable manufacturer, wire casing colors can differ.
Since there’s no negative polarity wire, phase cancellation can’t be used to cancel out noise. The byproduct of this design is that unbalanced cables are very susceptible to noise and should not be used to run long distances.
So why would you use an unbalanced cable? Well, some devices like electric guitars and basses produce an unbalanced signal so you may not have an option.
You can either use an unbalanced cable under 10′ to record directly into your audio interface’s Hi-Z input, or you can convert the signal into a balanced mic signal using a DI box and run it a longer distance—this is good to know when performing live.
Shielded vs. Unshielded Cables
The internal wires of shielded cables are wrapped in a material, like foil, to prevent electromagnetic interference, which can manifest itself as noise.
In comparison to unshielded cables, shielded cables tend to be more expensive but help reject noise and keep electromagnetic interference is causing issues in your studio. These are generally used for most high quality instrument and mic cable designs.
Common Analog Studio Cables
Cables are often referred to by their connector type(s), as opposed to the type of cable used.
For example, if you walk into a musical instrument shop and ask for a male to female XLR cable, you’re going to get a balanced cable with a male XLR connector on one end and a female XLR connector on the other end.
With that in mind, let’s get started breaking down the most common types of connectors you’ll find in the studio.
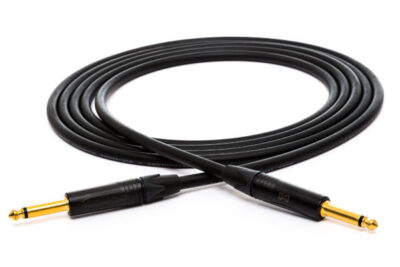
Male to Male TS Cables
A male to female TS cable has a male tip-sleeve (TS) connector on one end, and an identical connector on the other end.
The cable that’s used here is an unbalanced cable, with two wires inside, corresponding to the two connection points on the connector: The “Tip” and the “Sleeve”.
Internally, the cable’s hot wire is connected to the tip of the TS connector while the ground wire is connected to the TS connector’s sleeve.
TS cables are used to connect electric guitars and basses to pedalboards, amplifiers, DI boxes, and audio interfaces. These will generally be shielded cables.
Thick-gauge TS cables designated as “speaker cables” can be used to pass speaker-level signals to speakers. These cables will generally be unshielded.
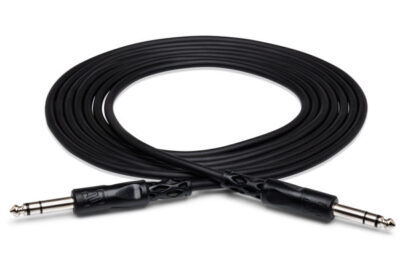
Male to Male TRS Cables
Male to male TRS cables have a tip-ring-sleeve (TRS) connector on both ends. The cable that’s used is balanced.
Similar to a TS cable, the hot wire is connected to the tip and the ground wire is connected to the sleeve. But here, there’s a third connector available, known as the “Ring” which attaches to the cold wire.
TRS cables are incredibly common within studios because they’re used to run line-level signal between devices. For example, it’s common for an audio interface to provide TRS outputs that you can use to connect to outboard processing gear or studio monitors. To form these connections, you’ll often use male to male TRS cables.
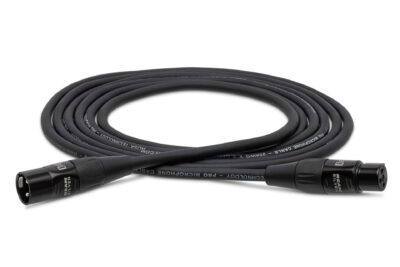
Male to Female XLR Cables
A male to female XLR cable has a male XLR connector on one end and a female XLR connector on the other end, with a balanced cable in between.
Typically, you’ll use a male to female XLR cable to connect microphones to your audio interface, and in some cases, connect your audio interface to a subwoofer, studio monitors or other equipment.
Technically, balanced interconnect XLR cables and mic cables are significantly different in their construction. The unshielded interconnect that you could use between devices carrying line-level signal wouldn’t be ideal for carrying mic-level signals. It will pick up a significant amount of noise due to a lack of shielding.
“Mic cables” are more expensive and robust than cables that are labeled “balanced interconnect”, with larger conductors and braided shielding to minimize interference.
Fortunately, you can use mic cables as line-level interconnects, so if you only have those in your studio, you’ll never run into this problem. But it’s often overkill to do this. If you want to save a little bit of money, using balanced interconnects where you can get away with them will help. Just don’t use them to plug in your mic!
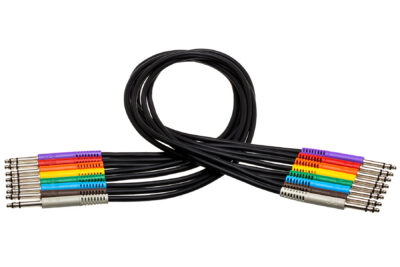
Male to Male TT Cables
TT cables use tiny telephone (TT) connectors, which are sometimes referred to as “bantam” connectors.
They may use a tip-sleeve design or TRS design but the connector assembly is much smaller than a typical TS or TRS connector and the tip is a slightly different shape. This design reduces the risk of shorting when plugging in TT cables.
Professional audio patch bays often require you to form connections using TT cables, which makes sense because the connectors are small and the cables are relatively cheap to replace.
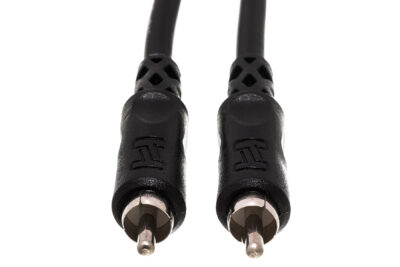
Male to Male RCA Cables
RCA cables usually have a male RCA or “phono” connector on both ends, but you’ll sometimes come across male to female RCA cables as well.
Analog RCA cables and digital RCA cables exist—both of which use RCA connectors. But the cabling inside of each is different. We’ll get into the digital style RCA cables a little later on.
Some pro audio gear provides an additional analog “auxiliary” RCA connection for connecting consumer audio devices, as analog RCA cables are typically used on consumer audio gear like turntables, subs, amps, hi-fi systems, Blu-ray players, and receivers.
Before the days of HDMI cables, Smart TVs and Netflix, you would connect your DVD or VHS player to your TV using at least three RCA cables.
In the earlier versions of this type of “composite” Audio/Video wiring, one cable transmitted left audio channel information (red), one transmitted right channel audio information (white), and one transmitted video (yellow). Later DVD players often included the option of additional cables for video for improved picture quality.
Common Digital Studio Cables
Digital cables transfer data, meaning they aren’t limited to transferring a single channel of audio. Depending on the type of cable, it may be able to transfer multiple channels of audio, video, MIDI data, and more.
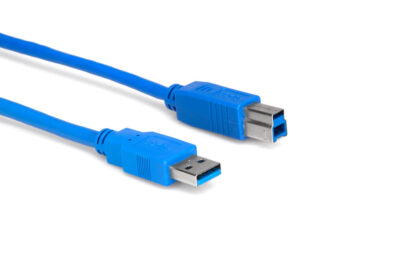
USB and Thunderbolt Cables
USB cables and Thunderbolt cables are often used today to connect MIDI keyboards, digital mixers, and audio interfaces to your computer.
USB 2.0 cables can transfer data at a rate of 480 Mbps, while USB 3.0 cables can transfer data at 5 Gbps, USB 3.1 cables can transfer data at a rate of 10 Gbps, and USB 3.2 cables can transfer data at 20 Gbps. USB 4.0 connections are still somewhat uncommon but they allow for data transfer rates up to 40 Gbps.
Thunderbolt 3 cables can transfer data at a rate of 40 Gbps and have seen moderately widespread adoption in the pro audio world so far. The reason that data transfer rates matter is that high data transfer rates can allow you to record and playback audio with low roundtrip latency.
Apple has happily embraced Thunderbolt connectivity but the PC world is lagging behind. There are very few PC motherboards that provide a Thunderbolt 3 option, which is why some audio interface manufacturers provide an optional USB connection with their Thunderbolt 3 interfaces.
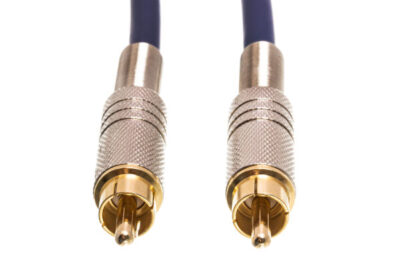
Digital Coaxial Cables
Digital coaxial cables are digital cables that use RCA connectors and transmit S/PDIF-formatted signals.
In comparison to analog RCA cables that can carry just one channel of audio, digital coaxial cables can transfer two channels of uncompressed PCM audio or compressed 5.1 surround or 7.1 surround sound.
Many audio interfaces provide a S/PDIF input or output that you can use to either add on 2 additional input channels of A/D conversion from an outboard converter, or send your signal out to a surround sound system or other consumer gear—all using a digital coaxial cable with RCA connectors.
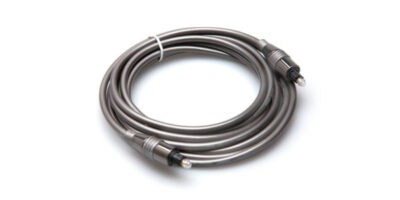
TOSLINK Cables
Fiber-optic cables with TOSLINK connectors transmit S/PDIF-formatted or ADAT-formatted digital audio signals. Data transfer occurs using pulses of light. Like digital coaxial cables, you can send multiple channels of digital audio through a fiber-optic cable simultaneously—this can help reduce cable clutter.
Most top-end audio interfaces provide Alesis Digital Audio Tape (ADAT) inputs and outputs that you can use to connect to multi-channel preamps, like the Focusrite Clarett+ OctoPre 8-channel ADAT preamp.
This is significant because a single ADAT input is capable of drastically extending the number of channels you’re able to record at once, allowing you up to 8 additional inputs with a single cable.
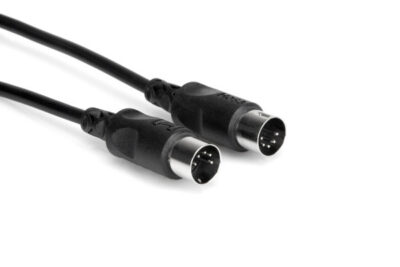
MIDI Cables
Musical Instrument Digital Interface (MIDI) cables are used to communicate information like notation, pitch, velocity, vibrato, panning, and tempo between musical devices.
Most MIDI keyboards now use a USB cable to transmit this type of information to your computer.
Sometimes, a MIDI keyboard will provide a dedicated MIDI output that you can use to control synth modules that don’t include a built-in keyboard.
You’ll also find a MIDI input and output on certain audio interfaces, allowing you to send and receive MIDI data from your DAW.
Word Clock Cables
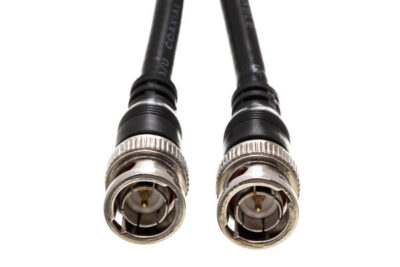
Word clock cables are used to sync the word clocks of multiple digital devices. They’re coaxial cables with a BNC connector on each end.
Every digital device uses an internal clock to keep time while playing and processing audio. Digital devices need a way to communicate with each other to sync their internal clocks. That’s where these cables come in.
When you connect devices together using word clock cables, you can choose one device to act as the “master” clock, and set the other devices to behave as the “slave” units. The result is that all the slave units will sync to the master clock, preventing the devices from drifting out of time with each other, or causing audible clicks and pops.
Word clock cables come in 75-ohm and 50-ohm variants, so make sure to match the cable’s ohm rating with your gear.
How to Identify the Cable You Need
Identifying the cables that you need to form common connections within your studio is usually pretty straightforward. Inputs and outputs on audio gear are typically labeled, making the process that much easier.
TS connectors and TRS connectors both fit into jacks of the same size so be mindful of that.
As mentioned earlier, TS cables are typically used to pass instrument-level signals (and sometimes speaker-level signals), while TRS cables are often used to pass line-level signals.
Analog RCA cables and digital coaxial cables with RCA connectors look similar, but one passes an analog signal while the other passes a digital data stream.
Despite being equipped with the information in this article, you may still run into situations where you don’t know which type of cable you need.
There are plenty of less common connectors that we didn’t take a look at, which become more relevant for larger scale studios or live sound installations. Speciality connectors like DSUBs, Digilinks and Dante, and multichannel cables, called “snakes”, all make sense to learn about as your needs scale up the high end professional level.
But for now, all the cables listed above should cover all the most essential types you’re ever likely to ever need in the modern home studio. These are the essentials for beginner and intermediate producers to know inside and out.
For when you’re not quite sure what you need, Hosa has a fantastic Cable Finder built into their website that you can use to visually identify the connectors you require. Once you’ve made your selection, a list of cables using those connectors appears. Bookmark Hosa’s Cable Finder and never buy the wrong cables again!
Charles Hoffman is the owner of Black Ghost Audio. Learn how to produce music online with free tips, tutorials, gear roundups, and premium video courses. Take his Music Production for Beginners course and produce your first song today!
This article is sponsored by Hosa.
Please note: When you buy products through links on this page, we may earn an affiliate commission.


