The 7 Biggest Causes of Noise in the Studio and How to Kill Them
There’s nothing more frustrating than trying to chase down the causes of noise in the studio. It can be hard to identify the point of concern, because there are so many points along the signal path and different ways that noise can be introduced.
In this article we address some of the biggest causes of noise and how you can make sure you’re getting the cleanest sound all the time. While this is mostly focused on the recording studio, these tips also translate to live sound.
Big thanks to Hosa Technology for partnering with us on this post. Their cable finder tool makes it easy to find exactly what you need to eliminate noise issues in your studio.
So whether you’re running a professional or project studio, are a guitarist on the road, or a front-of-house engineer looking to make sure every show has the cleanest sonic picture, these are five of the biggest causes for noise and how to avoid them.
#1 Poor Cable Management: Power Cables and Audio Cables Don’t Play Nice
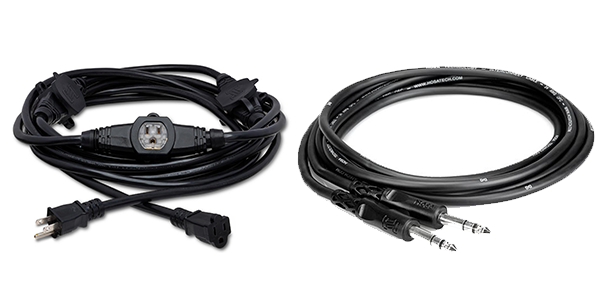
Power cables can cause interference in audio cables. If they have to cross it’s best to do it at a 90 degree angle.
One of the most immediately impactful things I learned in school for audio engineering was how power cables and audio cables can negatively interact with one another, causing noise.
The fact that interference could be introduced by running power and audio cables side-by-side in a parallel configuration had never really occurred to me before.
It makes sense though, since any type of cable design is all about conducting electromagnetic fields. When they are right on top of one another, the field from power cables can leach into audio cables, causing all sorts of nasty problems.
To reduce noise, power and audio cables should avoid touching one another whenever possible. But the most important thing is to keep them from running in parallel to one another in close proximity for any distance. If power and audio cables do have to touch, they should intersect at a 90 degree angle to keep transference to a minimum.
Other elements can create noise problems on contact as well—like power transformers. They’re in a lot of studio gear, from mixing consoles to outboard gear, monitors, and power supplies to name a few. Even data cables can (though don’t often) create interference.
When it comes to how your rack is set up, the best practice is to keep power cables bundled together, and audio cables bundled together, secured on separate sides of the rack.
In a studio full of gear it may seem like a lot of extra work, but a little bit of time devoted to good cable organization in the beginning can solve a lot of noise problems down the road.
#2 Cable Length
There are two main types of cables that we use in the studio: balanced and unbalanced.
Fortunately, most pro audio gear uses 3-conductor “balanced” cable, which has the benefit of being able to withstand extremely long cable runs without much issue. You’ll be able to recognize this style of cable thanks to their XLR or TRS style connectors.
However, many instruments like guitars and basses still use unbalanced cables. (And sometimes, home studio producers will use unbalanced cables where they should be using balanced cables without realizing it.) The general consensus is that unbalanced cables start to experience the issues of “capacitance”, or “tone suck”, after 20 feet.
Whenever you’re using unbalanced cable, try to keep cable lengths shorter than 20 feet. On the other hand, balanced cables like XLR or TRS can be run at much longer lengths—even hundreds of feet—without significant noise or tone issues.
The quality of cables plays a role as well. How good the shielding is can vary drastically from brand to brand. Cables with better shielding cost a little bit more, but in extreme conditions, their ability to reject more noise can be worth every penny.
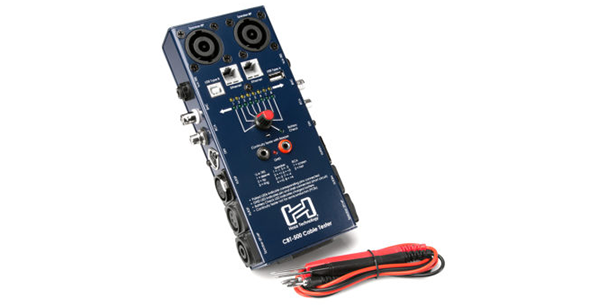
A power outlet testers, multimeters and cable testers are great tools for tracking down issues with power and audio.
#3 Dirty Power
Clean power isn’t a sexy subject, but it’s crucial for any recording studio or live situation. And dirty power is one of the biggest causes of noise in the studio. As engineers, almost everything we do relies on electricity. And if what you’re getting at the outlet/source is “dirty”, it can affect everything down the signal chain.
Dirty power presents itself in a number of ways, often as humming or buzzing, and sometimes as clicks and pops, or even audible radio interference.
So what defines clean power? It means power that is properly grounded with no electrical noise in the high frequencies, no radio frequency interference, and no power spikes from mechanical appliances like heating and air conditioning introducing intermittent complications.
If the electrical system you’re on exhibits any of these issues, keeping your audio noise free can be a real task. And it’s not just noise itself—if your gear is getting hit with random transient power spikes, it potentially puts your tools at risk of a shortened lifespan.
When you’re building a studio from the ground up you can make sure everything is wired and set up properly by a licensed electrician. This isn’t as easy if you’re working out of a project or bedroom studio in a rented apartment,, and all touring guitarists know the power quality at venues is all over the place.
It’s a good idea to keep a power outlet tester in your kit along with your cable tester. They’re inexpensive, easy to use, and give you a quick readout. Power quality can even vary substantially from outlet to outlet in some cases, and this tool is a great way to make sure you’re plugging into the best outlet available.
Power conditioners and power regulators may help with noise issues in some cases. When they don’t, they can at least help protect your gear from voltage spikes. But the best bet is to avoid outlets that put out dirty power to begin with. For best results, you’ll want to make sure you avoid plugging into power circuits with grounding problems, or that also supply power to mechanical devices or dimmable lighting. More on those issues below.
#4 Dimmer Issues
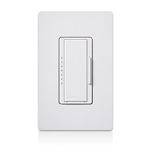
Low voltage dimmers like those made by Lutron cost a little bit more, but can offer significant noise reduction.
Lighting dimmers—yes, the kind that helps set the all-important studio vibe—can be one of the biggest causes of noise in the studio if you don’t use the right kind.
If you’re implementing dimmers into your wiring scheme, make sure to use the kind that are isolated by a transformer. Widely available brands like Lutron make MLV or ELV (“magnetic” or “electronic” low voltage) dimmers that will keep noise low.
Dimmers that aren’t properly isolated like these may cost half as much, but they can cause some major noise issues, so you will want to keep audio gear isolated from power circuits that are directly connected to conventional dimmers.
This is potentially even more important in a live sound reinforcement setting than in the studio. In a live environment, venues should have separate power circuits available exclusively for lighting gear and exclusively for audio gear. Make sure they don’t get mixed up!
#5 Grounding problems
Grounding issues can be one of the most frustrating sources of noise. These kinds of problems can cause nasty hum that can sound shockingly loud.
Grounding issues can be caused by faulty audio cables, ungrounded power outlets or malfunctioning recording gear, so sorting out these problems can be time consuming.
Some connective gear comes with a ground switch to help address hum if you’re hearing it. Items like DI boxes, cabling snakes and cable boxes are prime examples. Simply flipping a switch to connect or disconnect the pin 1 audio ground can solve the problem instantly.
You can also buy gear such as basic audio ground lifters and transformer isolated lifters with the sole purpose of eliminating ground loops from a specific audio line. There is also the option of isolation transformers that can eliminate grounding issues at the level of the power supply.
If you’ve confirmed you have properly grounded power, and have tried manipulating any ground switches you have access to with no luck, the problem could simply be a faulty cable, so remember not to overlook the obvious.
Some people will try to solve grounding issues by simply using a 3 prong to 2 prong ground lifting power cable, but this is NOT advisable in most situations. With high voltage equipment, this potentially lead to fire, property damage or electrocution.
In some hard-to-solve cases, the best solution is to have an electrician come in and help ensure your power is properly grounded.
#6 Wrong cables
This one is simple, but can be confusing if you’re just starting out on your audio engineering journey.
Learning about the different types of cables you’ll be using is important to eliminating potential causes of noise in the studio. Using a tool like Hosa’s cable finder is a great resource to make sure you have the perfect type and length of cable for your setup. It’s not overly complicated:
1. Don’t use ungrounded, unshielded speaker cables as instrument cables or vice versa. This is one of the most common mistakes guitarists and other instrumentalists will make. Always read the writing on the jacket of the cable to be sure.
2. Don’t use an unbalanced cable where you should use a balanced cable—phase inversion can potentially occur and lead to reduced signal.
Fortunately, you can tell whether your able is balanced or unbalanced by its connector. If it’s got one ring it’s unbalanced, the type of cable you use to plug a guitar into an amp. Balanced will have two rings, one for shield and one for ground.
With pro audio gear, you’ll mostly use balanced cables, so this makes things easier. Luckily balanced cables are the same principle, whether it’s XLR or TRS.
3.This one is a bit more esoteric, but don’t use analog XLR or RCA cable where you need a digital AES or S/PDIF cable. Although these cables look basically the same, standard analog cable isn’t spec’d to run digital signals and loss can occur.
#7 Computers
We’re in the golden era of digital audio. Everything runs on computers. Even if there’s tape involved at some point of the process, eventually your audio will go through a computer except in the rarest of analog recording situations.
And while computers have made the recording process much easier, they’re not without their own set of possible problems that they introduce. For starters they’re machines, so they make noise.
Processors still need fans to keep them cool, power supplies need to provide juice, and spinning hard drives make noise of their own.
If your computer is in the same room you track in, the mic can pick up fan noise. Luckily, computers are quieter than ever. But older machines and even current laptops can exhibit fairly loud fan noise.
Hard drive noise isn’t as big of an issue as it used to be, thanks to the onset of super quiet solid-state drive technology. But because noisy old school spinning hard drives still give you the most cost effective storage, a lot of people still buy them.If they are in the same room with a vocalist or an acoustic instrument during a sensitive take, they can be noisy enough to impact the recording.
And it’s not just their noise of computers and harddrives through the air that can be a problem either. A noisy fan or spinning hard drive sitting on a desk can transmit sound through the desk’s surface, causing any mics or mic stands in contact with that desk to pick up vibrations directly.
While this is becoming less of a problem as newer computers become quieter and quieter, it’s still a common enough issue that many new recordists don’t even think of until they experience it for themselves.
Conclusion
These aren’t the only causes of noise that you might come across. But they are some of the most common, and luckily, the easiest to work around. While it’s best to design your signal flow with these considerations in mind from the very beginning, noise pops up when it wants to, so handling it after the fact is just as common as addressing it head on.
Brandon Stoner is a lifelong musician who owns more guitars than anyone needs. Having toured nationally, he is a trained audio engineer that has worked in studios and on stages across the United States. As a lover of all things writing and music technology, he crafts every piece with his dog Max on his lap.
Please note: When you buy products through links on this page, we may earn an affiliate commission.


