Single-Mic Techniques for Capturing the Perfect Acoustic Guitar Tone
What’s your preferred mic technique for recording acoustic guitars?
If you’re anything like most engineers, your answer may vary a bit depending on the arrangement, the purpose, the guitar player, the instrument and the song, but there are really just two or three commonly-used approaches that crop up again and again.
Perhaps one of the most tried and trusted techniques is to aim a condenser mic near to where the neck meets the body, around the 12th or 14th fret. This technique—and a couple of variations on it—can get the job done in most situations.
However, when you want to get some more nuance and detail, or if you’re just looking for something a little different in acoustic guitar sound, a whole world of possibilities opens up, and a little bit of experimentation can go a long way.
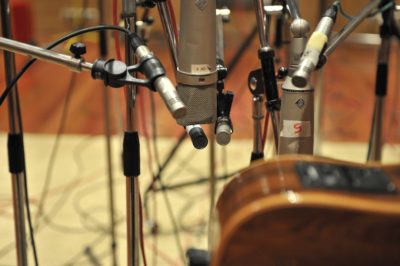
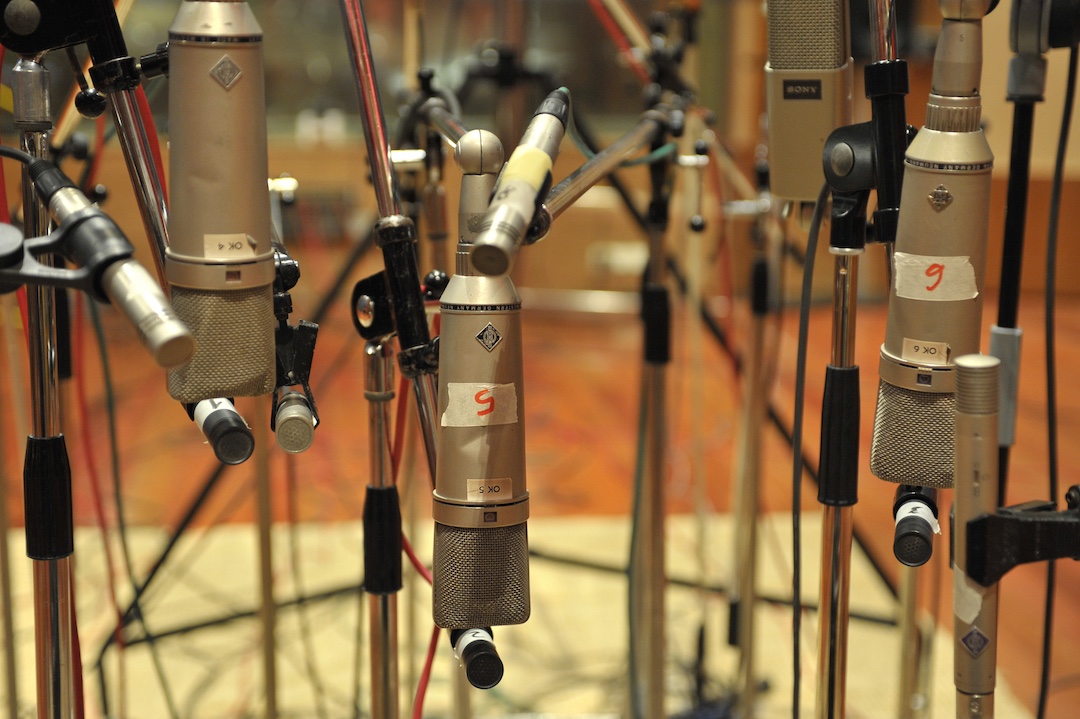
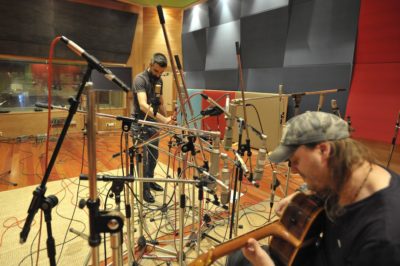
And that’s what you’ll find here: Experimentation in droves. We set up a session with a truly crazy number of microphones in order to test a whole slew of placement techniques and let you hear a few of the best alternative options for mic’ing up an acoustic guitar.
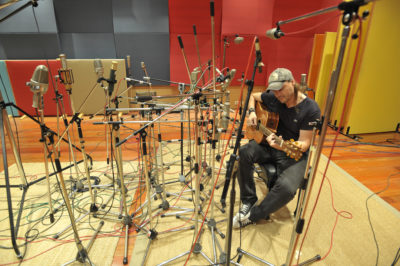
In part one of this mic technique roundup, Roger Montejano compares 14 different single-mic techniques on a single performance. All images by Jose Antonio Pajares.
So, grab a cup of coffee along with your favorite speakers or headphones, download the audio files from 18 different microphones, and get ready to depart from the usual tried-and-trusted techniques to experience some not-so-common alternatives that are preferred by some truly great engineers.
The next time you’re in the studio hunting for the right acoustic guitar tone, you’ll be able to throw several great alternatives that will confirm—once again—that you are the best guy or gal to work with.
Red Light On
This recording was done at the world-class PKO Studios in Madrid, Spain. The list of mics and techniques on display here was curated in collaboration with Caco Refojo, Latin GRAMMY Award-winner and chief engineer of the studios, to ensure we would squeeze the most out of Studio 1 at PKO.
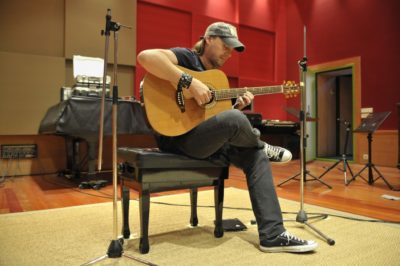
A good recording always starts with a good player and instrument. For the occasion, guitar player David Palau (also winner of a Latin GRAMMY, and regular player with Alejandro Sanz, Joan Manuel Serrat, Bobby Kimbal and Bill Champlin, to name just a few) brought his tasteful style and a beautiful-sounding custom-designed guitar by luthier Manuel Rodriguez.
Three different arrangements were recorded, each with a different playing techniques (finger-picking, strumming, etc.). This allows us to check the benefits of the different mics and techniques for each playing style.
For each arrangement, all mics were recorded simultaneously through the SSL 9000J, with no compression, EQ, or other processing applied at any time, meaning that any appreciable differences in the audio files are due to the mic used and its position.
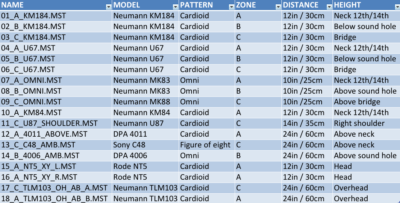
You’ll find short audio excerpts throughout the text, but as promised, you can also download the complete 24/96 audio files by clicking here. This chart, noting the exact mic position and type for each sample, should also be useful.
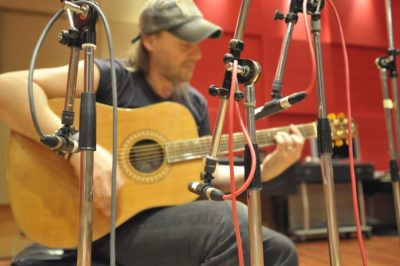
From right to left, mics #01, #02 and #03, each at A, B and C positions. Mics #01 and #02 are directly in front of the guitar.
Mono Techniques with One Mic: Positions A, B, and C
Let’s start with the three most common methods and then build from there.
Type “A”
The technique described at the beginning of the article is probably the most commonly used: A condenser mic placed where the body meets the neck (12th or 14th fret, depending on the guitar), about 8-12 inches away. We’ll call this position ”A”.
This is a sweet spot where many of the elements that comprise the sound of the guitar are present: The strings, neck, soundboard, sound-hole, pick/right-hand, and so on. Accordingly, small variations in the angle of the mic allow you to change the balance between each of these elements.
In general, pointing the mic towards the sound hole will get a little more body and pick sound, while aiming it towards the neck will provide more string sound and left-hand fingerboard detail.
Here is the sound of a Neumann KM184 —a usual choice for this task—at this sweet spot on the guitar:
This position provides a nice, balanced sound that works well in busy arrangements where the acoustic guitar must get along with a good number of other instruments. The additional advantage of having a variable tonal palette simply just changing the angle of the mic a little is always welcome.
Plan B
The next position in the rank of most-used, is our position “B”, which is useful when a more rounded and full-bodied tone is needed.
In this approach, the mic is placed in front of the guitar, above or below the sound hole to avoid its strong resonance. This position offers more body and a little less right-hand-against-strings sound. This is another KM184, at position B:
As you can hear, this technique is also useful in many applications, and is often favored for recordings where the arrangement is more sparse, or the acoustic guitar demands more prominence or “size”.
Position C
In position “C”, the mic is placed near the bridge of the guitar, pointing towards the zone between the bridge and the sound hole. Although in this position it is usual to use an LDC (there’s one later), here is another KM184 for a more direct comparison with the two prior positions:
This position captures much less string and finger noise from the neck, and can end up accentuating the sound of the pick against the strings, depending on the angling of the mic.
In this spot, the resonances from the soundboard are critical in determining the sound obtained, so the differences between guitars and woods play a larger role. Because of this, position C can sound a little honky/nasally depending on the choice of guitar and mic.
Variations on the ABCs
Now that we’ve established the sound of these three positions, how about some variations?
For starters, instead of an SDC, many engineers prefer the sound of a large diaphragm condenser. This is the sound of a Neumann U67—another common choice for recording acoustic guitars in the studio—at positions A, B, and C:
Here, both the size of the diaphragm and the tube in the mic affect the end result. As you might expect, each mic preserves characteristics from its placement, but also imprints the sound that makes the U67 an all-time favorite for many producers and engineers.
Another good variation to try is using a mic in omni mode. Until now, all the mics used were in a cardioid pattern, and this means they are affected by the proximity effect.
Using an omni pattern allows the mic to be positioned much closer to the instrument, which can yield a more detailed or intimate sound. Also, the omni pattern tends to sound more natural, with a more even frequency response.
This is the sound of two Neumanns U83 and one U88, at positions A, B, and C respectively:
These are three new—and very usable—options, especially for the techniques strummed parts.
Here, we positioned the mics about 10 inches from the guitar. This was a little closer than in the previous example, but not too much so, in order to allow comparison with them. You can get a lot closer still to exaggerate the intimacy and detail.
The sound of the room plays a more important role with this pattern, so some gobos may be used behind the mic if necessary to cut down on ambience or bleed.
At this point, there are two interesting exercises. The first one is comparing how the same mic behaves at different positions (i.e. #01 vs #02 vs #03), and the second one is comparing the three mics at each position: #01 vs #04 vs #07, #02 vs #05 vs #08, and #03 vs #06 vs #09.
Apart from different tones, look out for how each mic and position behaves with the main characteristics of each type of performance. You’ll probably find you prefer some mics for the main guitar because it enhances or mitigates the percussive characteristics (or other aspects), while other mics sound great for the finger picking for different reasons, and the same with the strumming part.
Additional Options
One microphone mentioned time and again when speaking about recording acoustic guitars is the classic Neumann KM84, an older and somewhat smoother-sounding precursor to the current KM-184 model. PKO had one of them available, this is the sound of a KM84 at the sweet spot, so we have another mic to compare at position A:
A cool variation on the “C” position is to place a mic at the height of the guitar player’s right shoulder, pointing down. As we’ll see later, this mic is usually blended with an additional mic at position “A”, but it also sounds good on its own. This is how a Neumann U87 sounds at the shoulder position:
Because the mic is outside the main front dispersion of the guitar, it gets a more ‘relaxed’ sound, while still being present and close.
A similar variation, but in position A, is example #12, which is sometimes used when recording classic flamenco guitars. Here, we used a small diaphragm mic placed at a medium distance above the neck and pointing downward, intending to offer more space and detail around the guitar. Here is how a DPA 4011 sounds in this position:
Like example #11, this position is often combined with others, but it offers a usable option on its own when you need a thinner and leaner acoustic guitar sound with a bit more space and distance.
Moving a little farther away, and provided you are in a good sounding room you can achieve a very natural sound by placing the mic in front of the guitar, a little toward the bridge like in position “C”, but about 2 feet away.
This is the perspective of a Sony C48 here in a figure-eight pattern:
Another beautiful option. This kind of placement sounds very natural due to the increased distance, and because the rear lobe of the figure-eight pattern incorporates some more room tone into the signal.
To close out this section on single-mic techniques for acoustic guitar, here is a DPA 4006 in omni mode, also placed about 2 feet from the guitar, but right above it, in something resembling the “B” position:
In this case, we used an omni mic, but it is also very common to find a Neumann U67 (or similar) in cardioid mode at this position. Farther mics are useful when recording big-sized guitars, can be especially useful for strummed parts.
If these positions are too roomy for the arrangement you need to record, try placing the mics a little closer in, or using some gobos to tighten up the sound and reduce ambience.
There’s also another approach here: You could combine the sound of this distant, “roomy” mic, with a closer mic technique to get the best of both worlds. For more on this method—as well as a look at some of the most useful stereo mic techniques for acoustic guitar—stay tuned for our next installment in this series on multi-mic’ing approaches for acoustic guitar.
Please note: When you buy products through links on this page, we may earn an affiliate commission.


