The Essential New Pro Tools 2018 Shortcuts and Tricks You Need to Know
The sweet memories of NAMM 2018 are still fresh in our minds, with lots of interesting pieces of gear and software being unveiled one after another. (If you couldn’t attend, we’ve got you covered with our detailed Photo Recap.
One of the more unexpected new products from the show was Pro Tools 2018.1. Yes, that’s right: There won’t be Pro Tools 13.
This new naming scheme has been adopted to reflect the fact that from now on, there will be more new Pro Tools releases more often. “2018” is obviously the year of the release, and the “.1” part indicates that this is the release of January. (“2018.2” is February’s release, and so on.)
Pro Tools 2018.1 comes with more than just a name change, however. There are some powerful new features like Track and Insert Presets, new and improved comping features, several MIDI enhancements and more.
So without further ado, let’s dive in. As usual, all shortcuts mentioned are for Mac. If you use Windows, just replace “Cmd” with “Ctrl” and “Ctrl” with “Start”, and you’ll be good to go.
Track Presets
Yes, finally. This feature (along with “Track Freeze”, introduced in Pro Tools 12.4) has been one of the most requested Pro Tools additions for a long time.
The good news is the wait has been well worth it, because the new feature brings along some clever and versatile new workflows.
With Track Presets, both a single track or a group of tracks can be stored in a preset, complete with all the information about plugins, names, inputs, outputs, sends, automation and more. (Even clips and other media can be included). These presets can then be recalled from the same or any other session, and in several different ways.
Let’s say you always label and color-code your drums in the same way. (Let’s be honest, we all do.) Maybe some of your tracks are routinely grouped, sent to common auxes, include some blank plugins, and maybe a couple of sends.
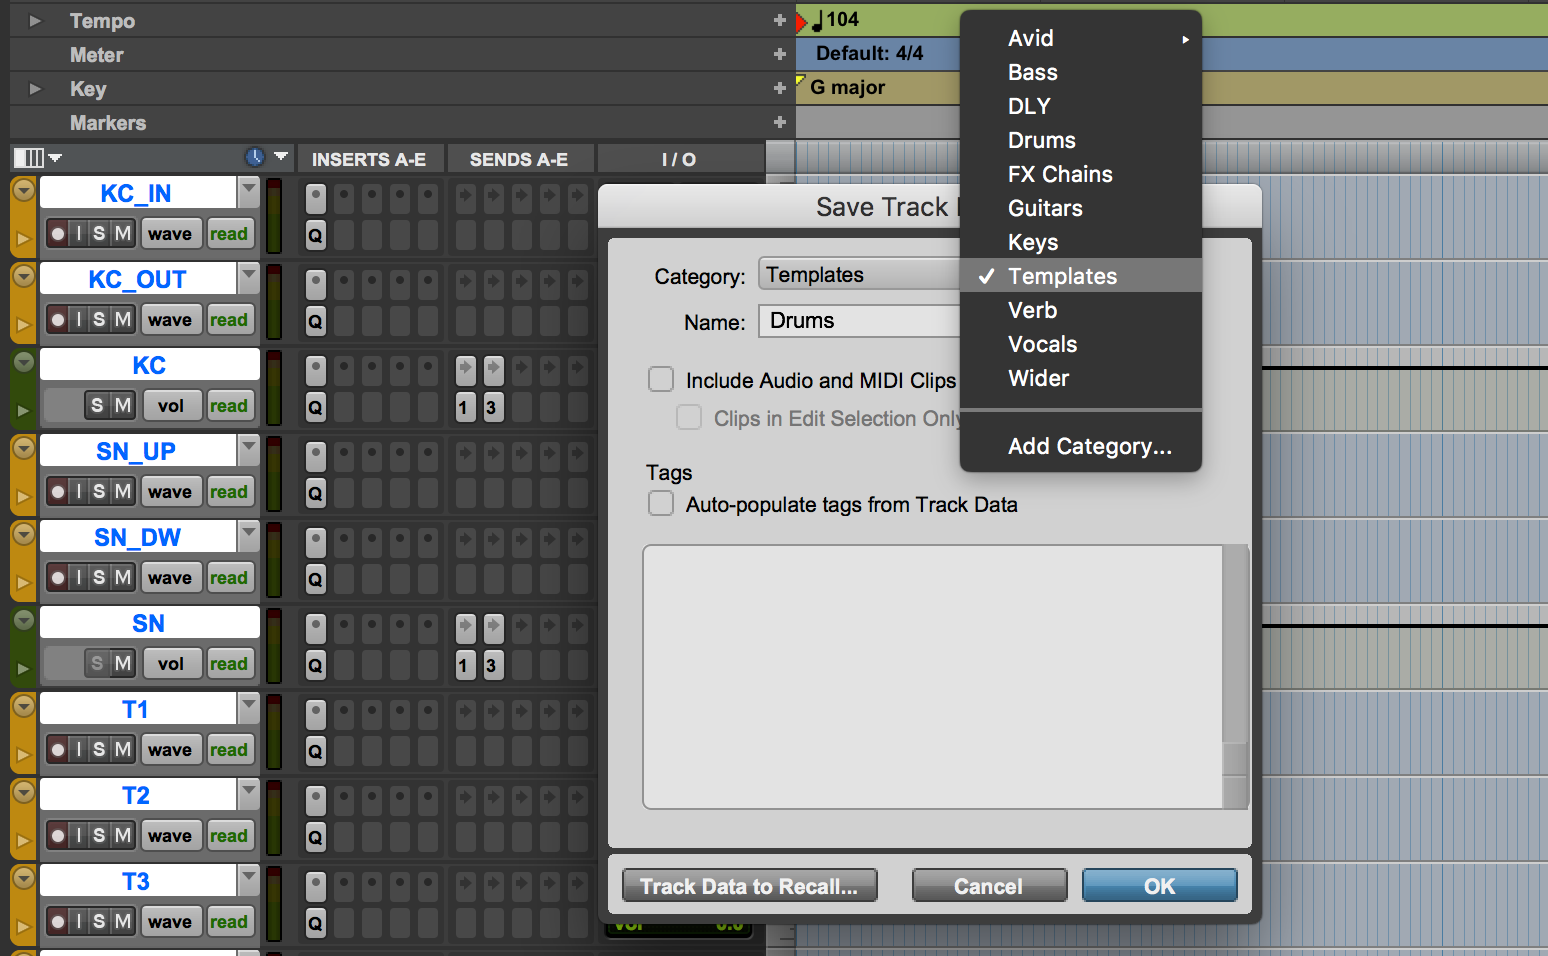
Want to save these settings and save a whole lot of time? Just select all the tracks and press Option+Shift+P to open the “Save Track Preset” dialogue.
Here, you can name the preset, choose the category (or create a new one), and even check the option “Auto populate tags from data” to automatically create tags from the names, plugins, and other information from the tracks. You can later search through your presets using these tags, so taking the time to ensure the presets are properly tagged will pay off in the long term.
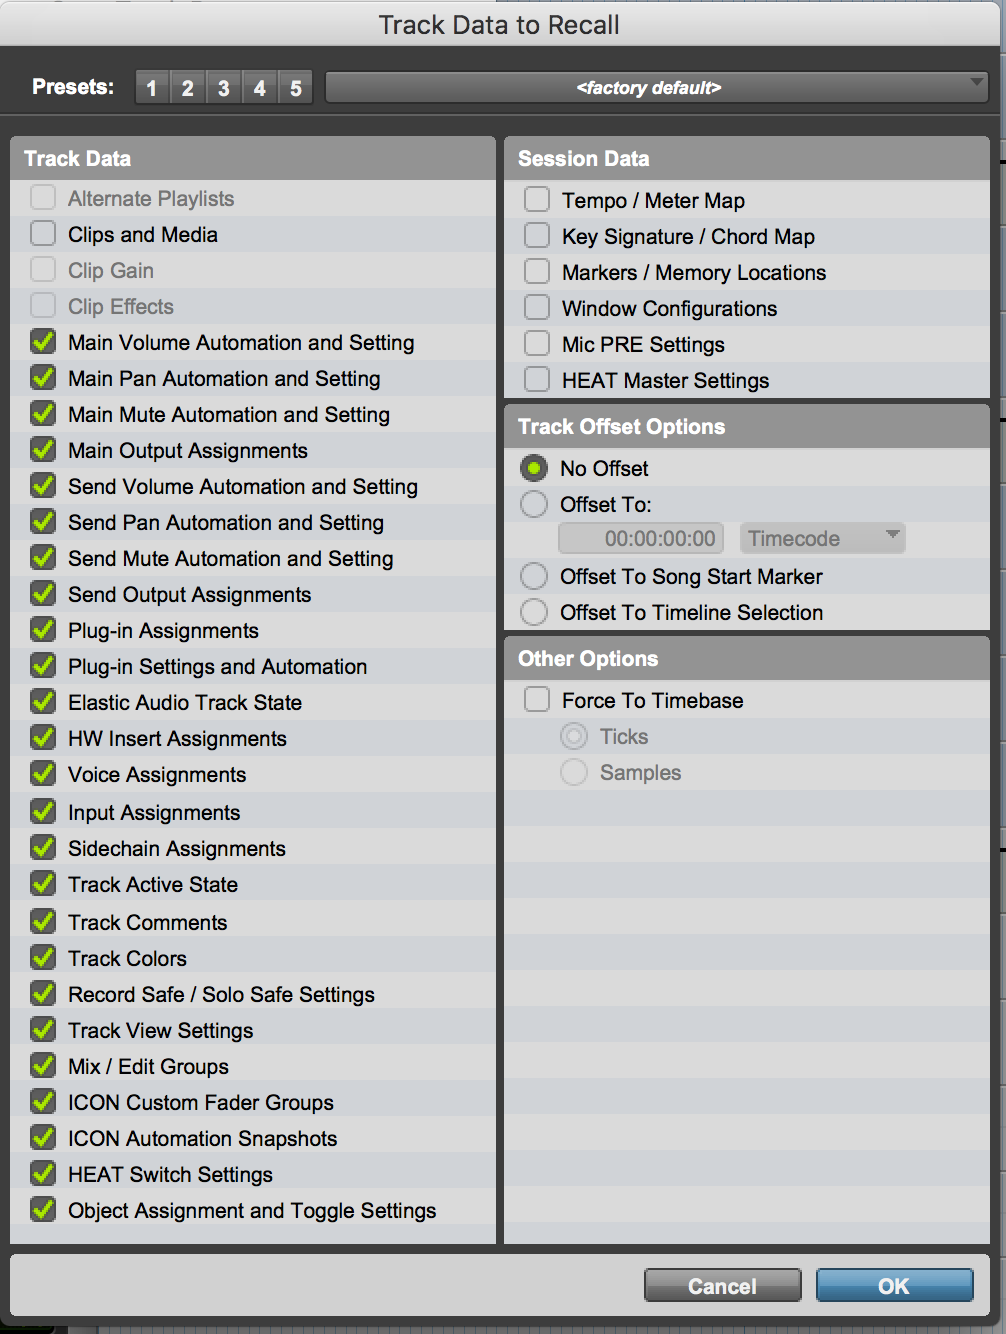
To further fine-tune the preset, you can press the “Track Data to Recall” button (or type Cmd+R) in order to decide the exact parameters you want to store in the preset. The number of possibilities here is huge, including the option to store additional information from the session. Take a look at all these options, because some of them are sure to spark a handful of good ideas.
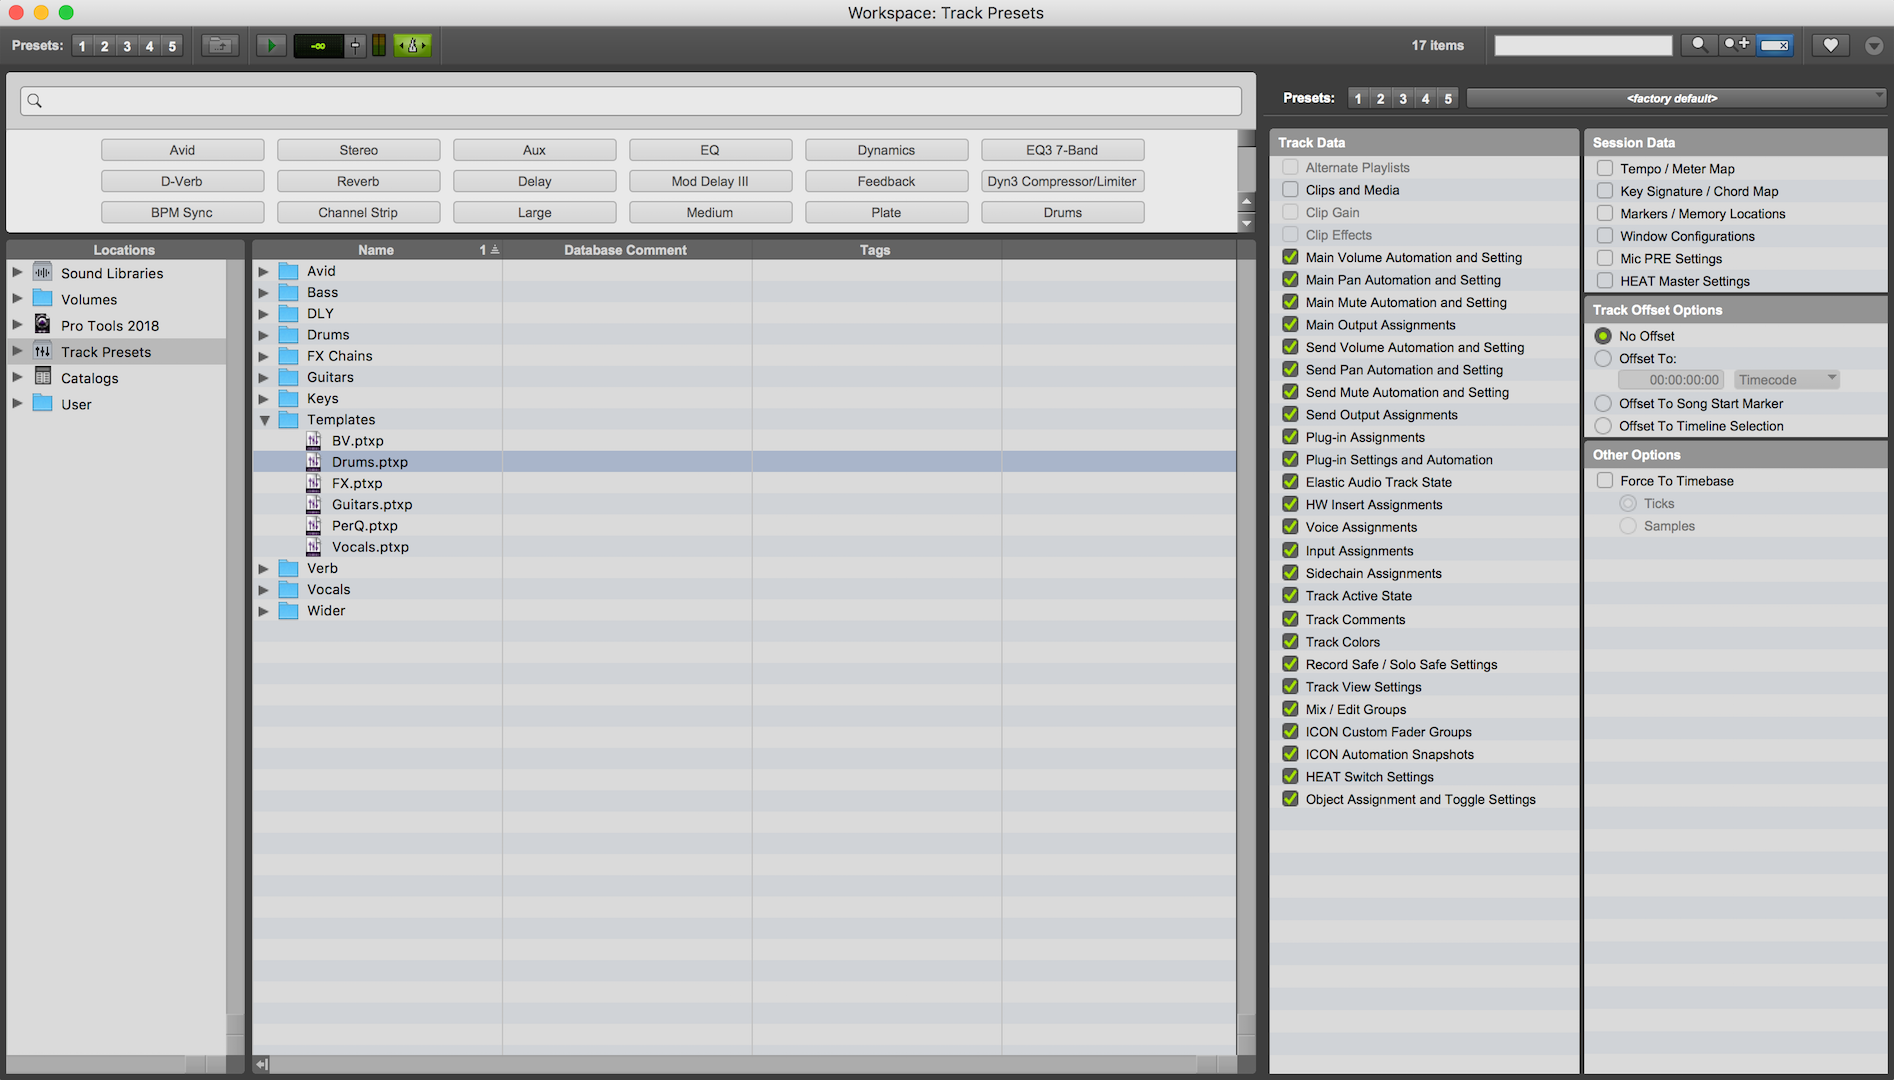
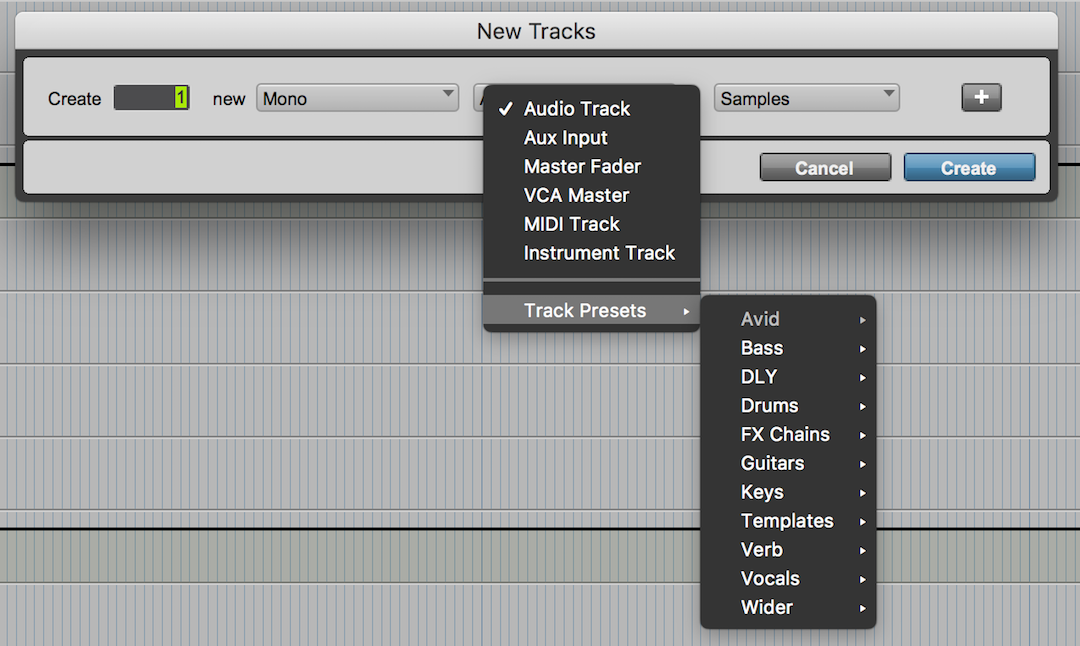
To recall a preset, you can either drag and drop from the Workspace (accessible using Option+I), choose the preset from the New Track Dialogue (Cmd+Shift+N), or right click a track and choose “Recall Track Preset”. (In this last case, if the preset contains more than one track and your track selection doesn’t, only the first track of the preset will be recalled to the selected track.)
The Workspace is also the place where you can modify and organize your exiting presets.
The use of Tracks Presets can significantly speed up your studio workflow and because of the number of parameters that can be stored and recalled the possibilities are endless.
One neat trick is that several presets can be dragged and dropped at the same time from the Workspace, so you can create complex sessions by combining presets. You can also save combinations of tracks, tracks with media (like risers, reverses, drops and FX), even complex sends arrangements, window configurations and mic pre settings.
One of the obvious uses of Tracks Presets is to store any combination of plugins. Until now, there were some workarounds using “Import Session Data”, and some of the manufactures allowed to create combinations of their plugins and recall them, but these presets couldn’t store preset plugin combinations from different manufacturers.
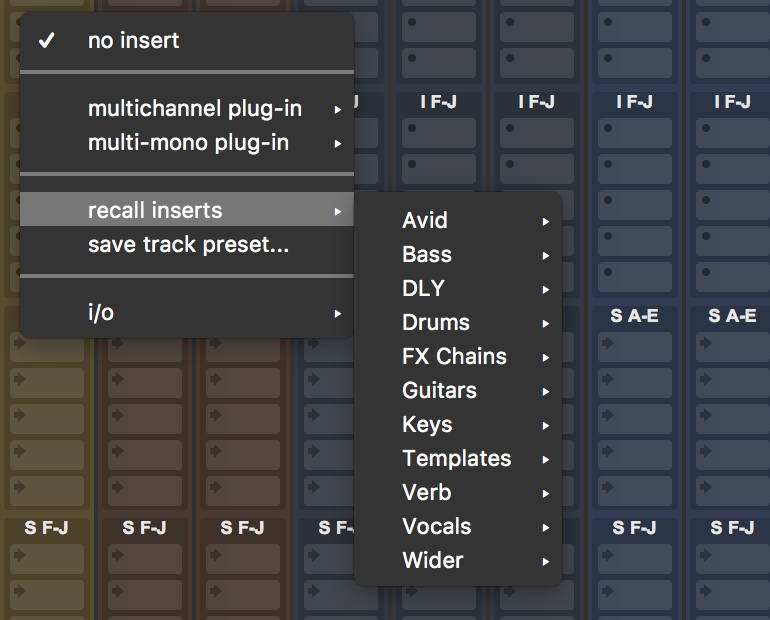
This is one of the main intended uses of Tracks Presets, so much so, that you can even recall and store presets from any of the insert slots. Just click as if you were inserting a new plugin, and you’ll see two new options: “Recall inserts” and “Save track presets”.
The great thing about this option is that, when recalled from the insert slot, only the insert portion of the track preset will be loaded. If the preset contains other types of information such as automation, level, I/O, and pan, it will be discarded. To load the complete preset onto a track, you must use any of the other three options mentioned earlier: Workspace, New Track, or right clicking of the track.
By the way: Sends can be recalled in a similar way, from the insert send menu.
If you’ve been involved with Pro Tools for some time, you probably have several session templates that you recall information from. With the new Track Presets function, this can now be done in a more convenient and more flexible way.
So from now on, every time you come up with some cool processing or routing solutions, remember to store it all as a preset and you’ll have great starting points for other instruments down the road.
Track Comping Enhancements
Another big area of improvement has been in the new additions to the comping workflow. These should considerably reduce the time you spend assembling a composite master take.
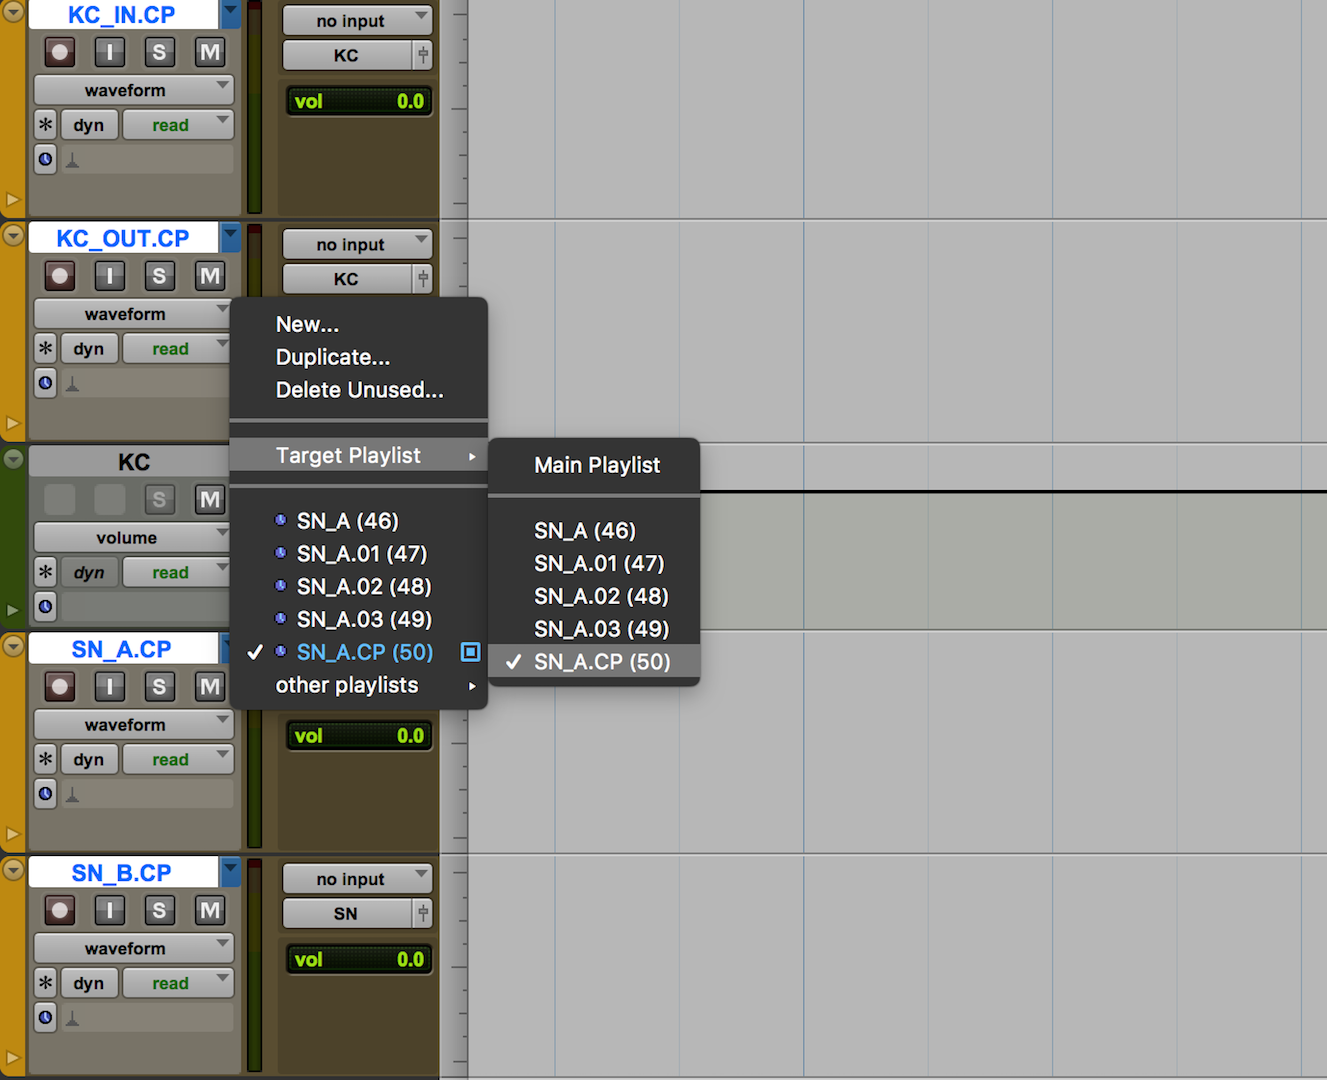
For starters, you can now decide which playlist will be your Target Playlist—that is, where all fragments of audio will be assembled to create the master take. To do this, just click on the track name menu and go to “Target Playlist”.
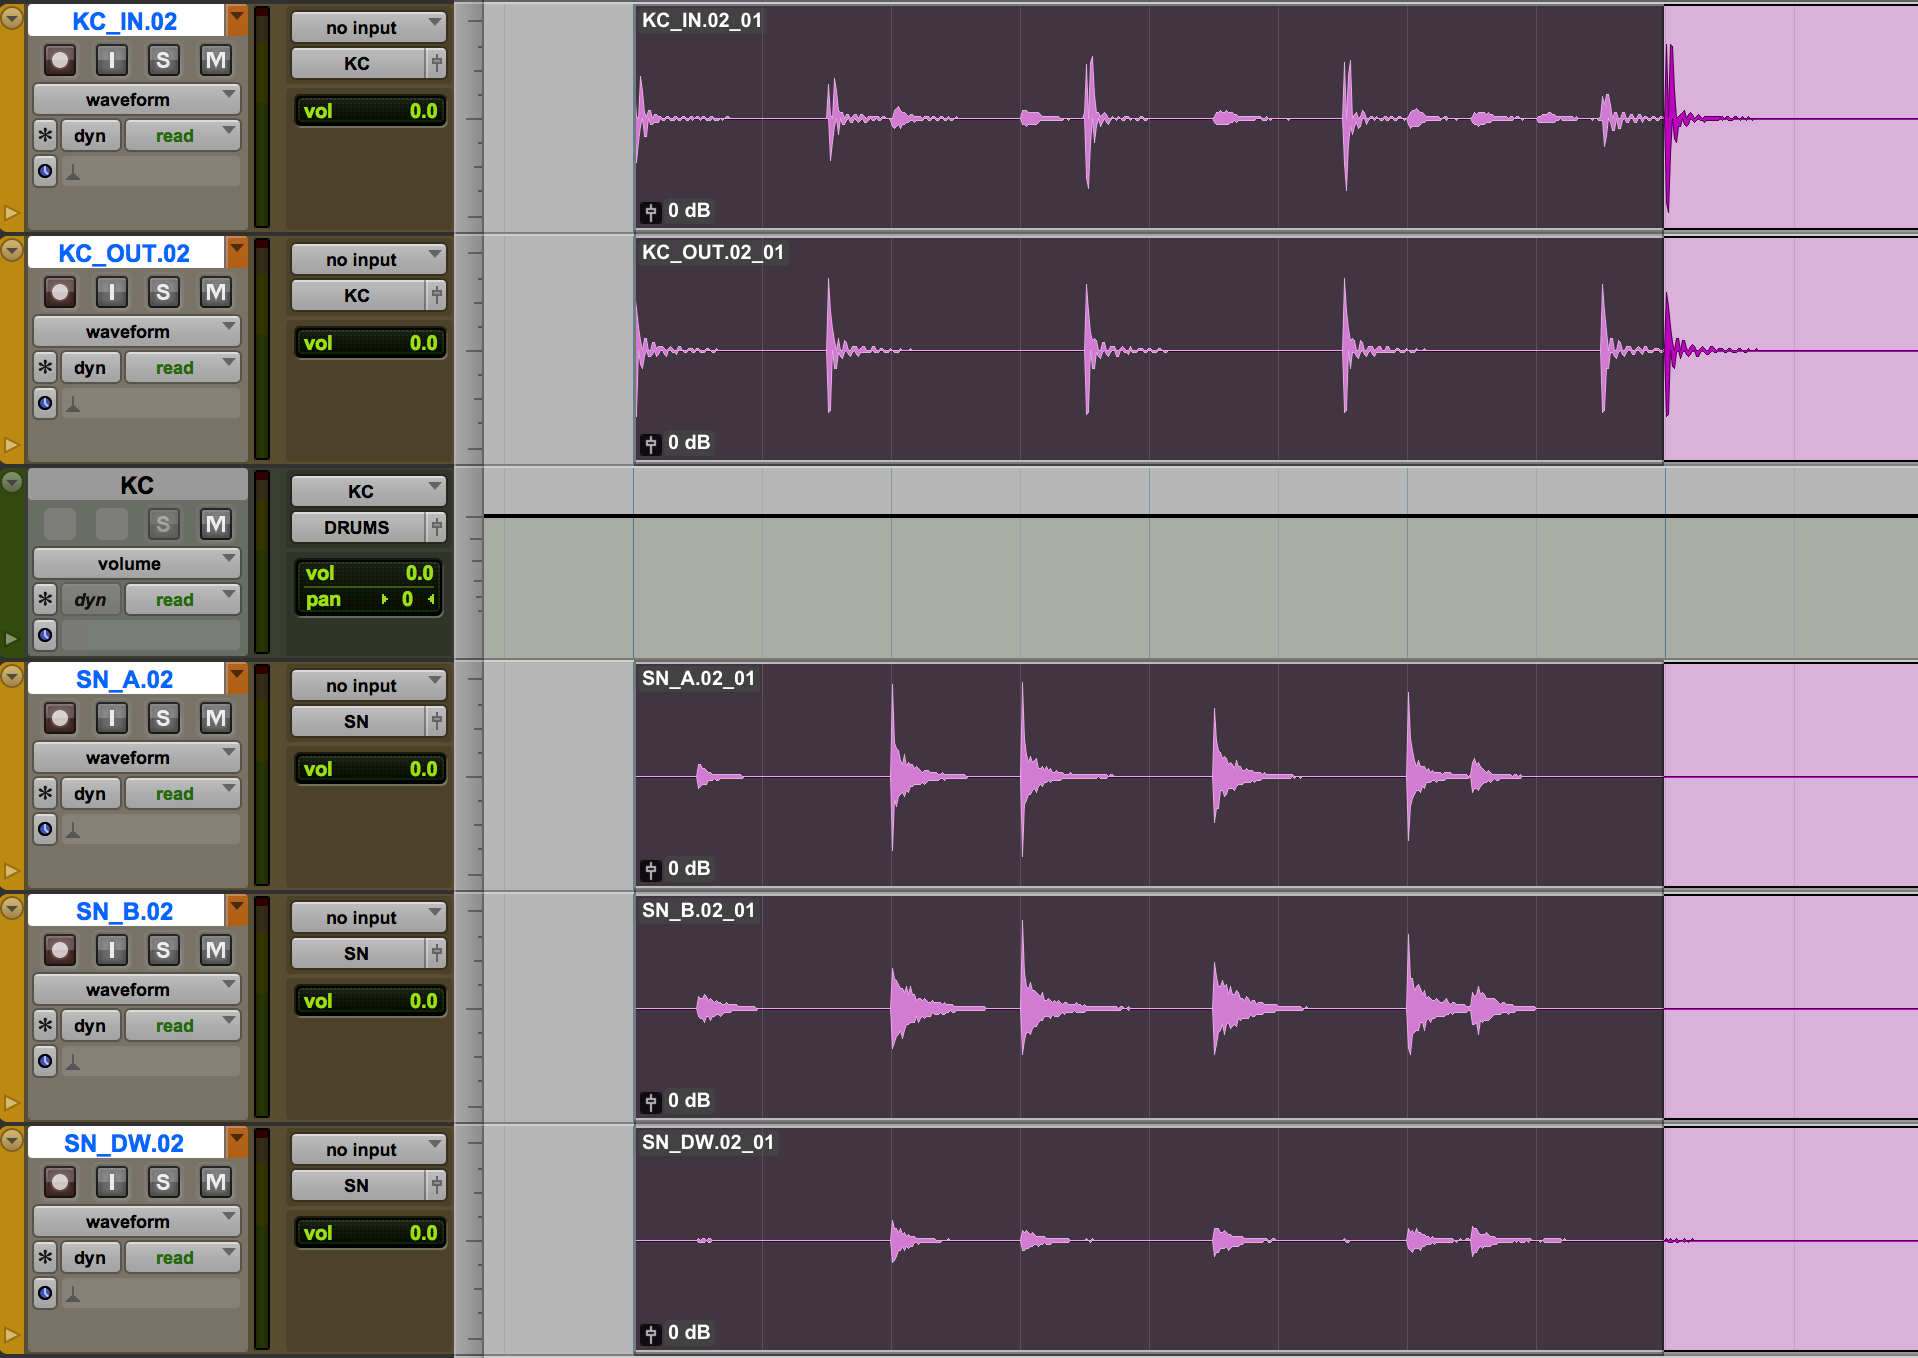
From this menu, just select the playlist you want to use as Target Playlist. In the example below, there are three playlists with audio (.01, .02 and .03), and we’ve created a .CP playlist that we’ll use as target or master playlist. A blue square appears to the right of the playlist name, and all track name triangles are colored in blue to indicate that the visible playlist is the target playlist.
To quickly move from playlist to playlist, just use Shift+Up/Down. Notice how the triangle is now colored in orange, to indicate we are not seeing the main playlist.
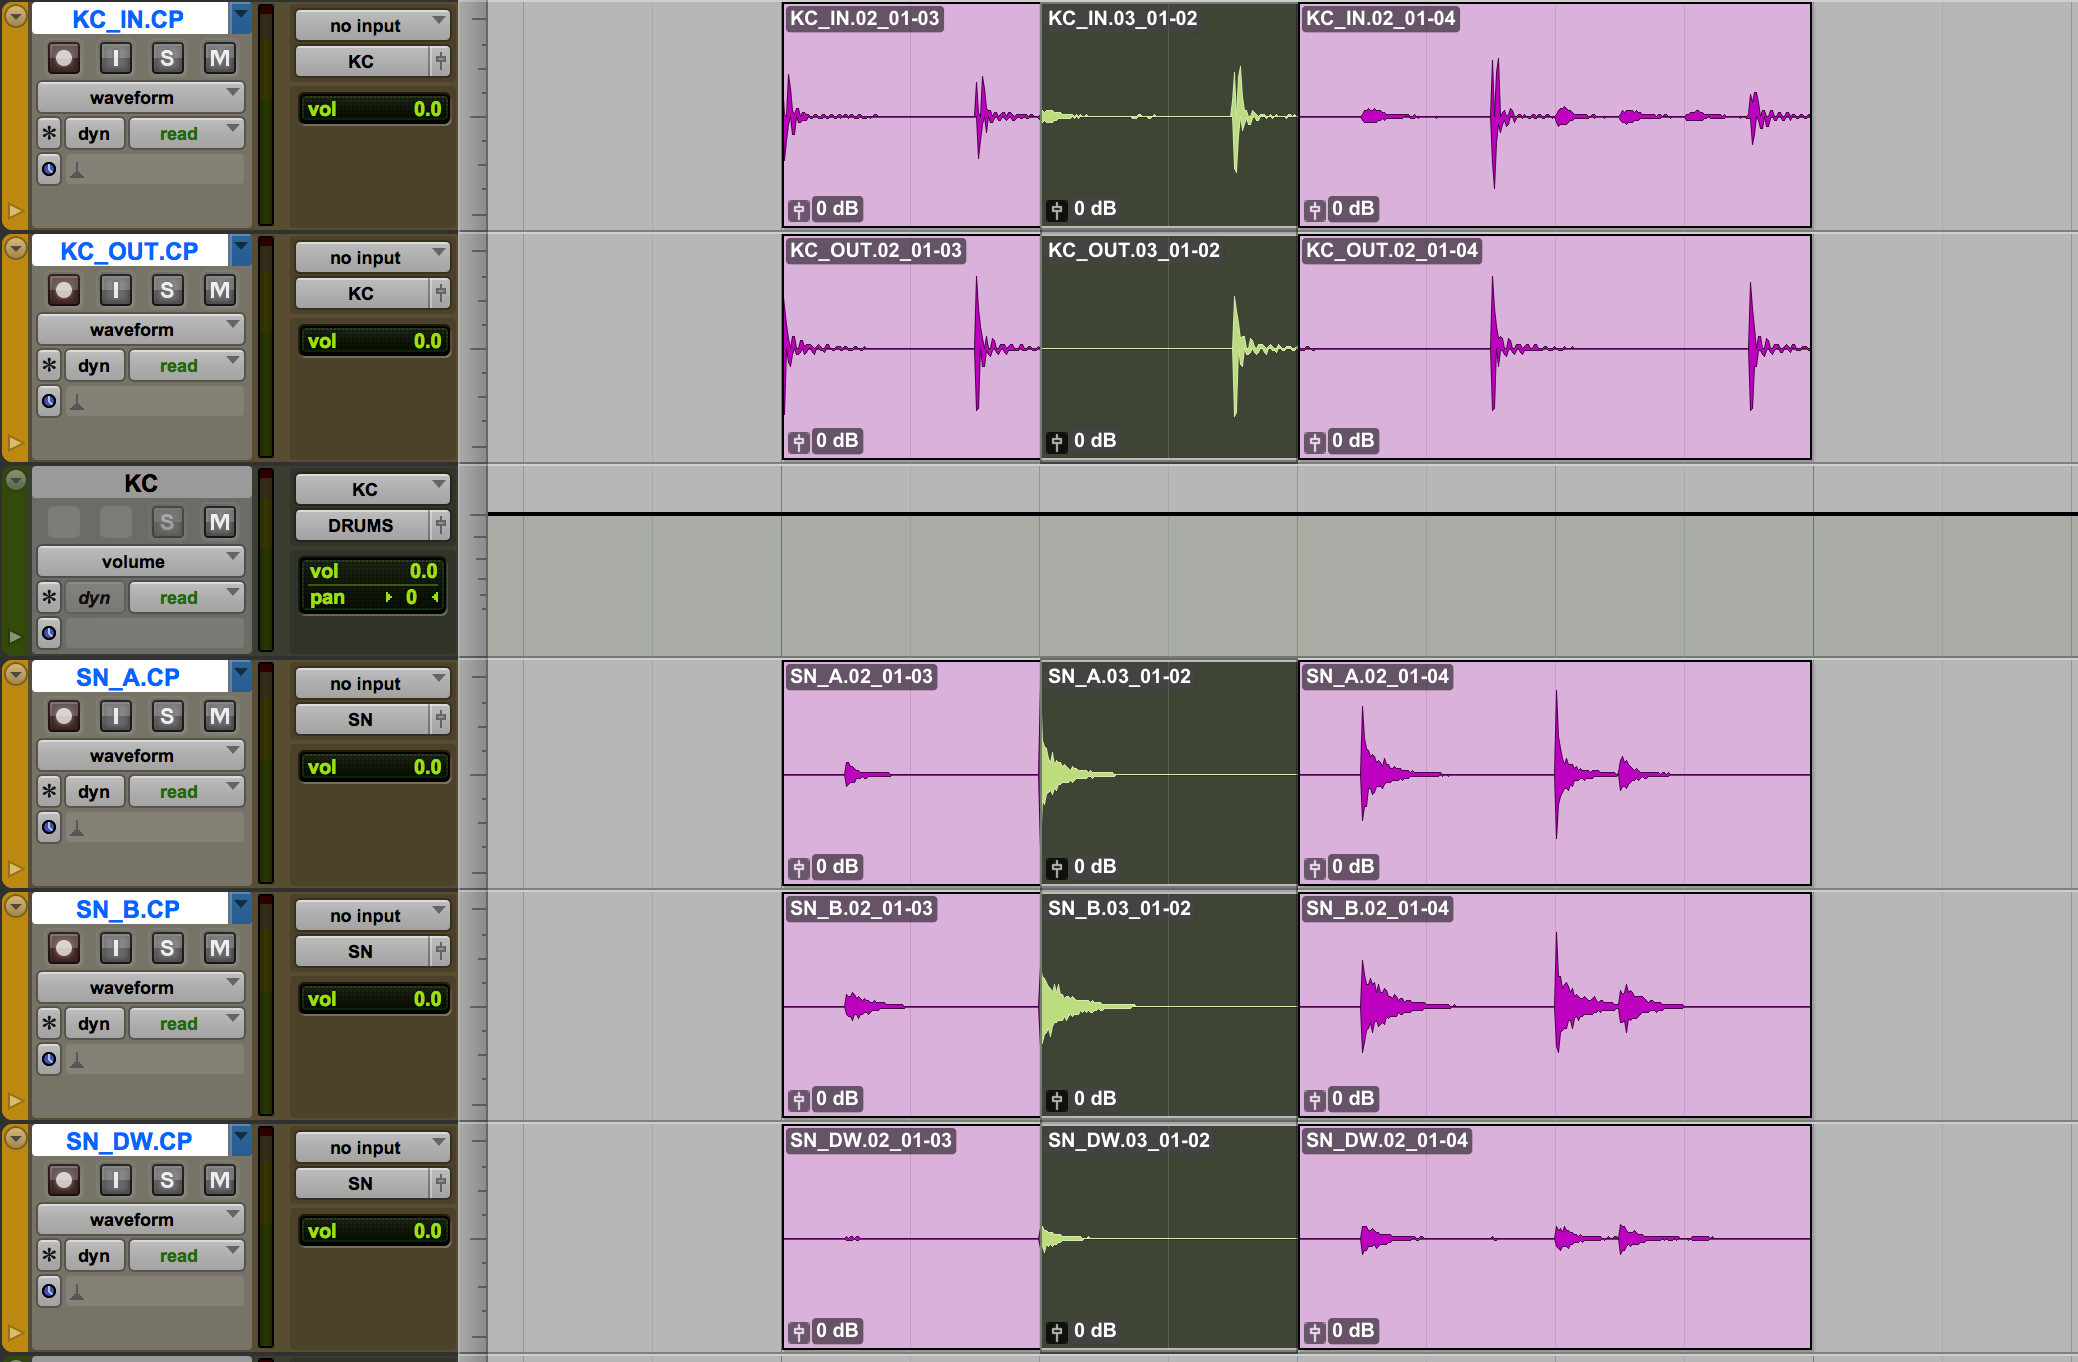
Let’s say we decide the first four bars of take .02 are the ones we want to use. Just select them and copy them to the target playlist using Option+Shift+Up or, if you prefer, Ctrl+Option+V. (Both shortcuts do the same thing).
You’ll see that a checkmark icon flashes on top of the selected clips, to signal that they’ve been copied to the target playlist. Now, if you want to jump to the main playlist, you can use the shortcut Shift+Right.
To toggle between the last two visited playlist, you can use Shift+Left. This is useful when you’ve gone to the main playlist and want to come back to the previous one, or to quickly compare two takes in the same section.
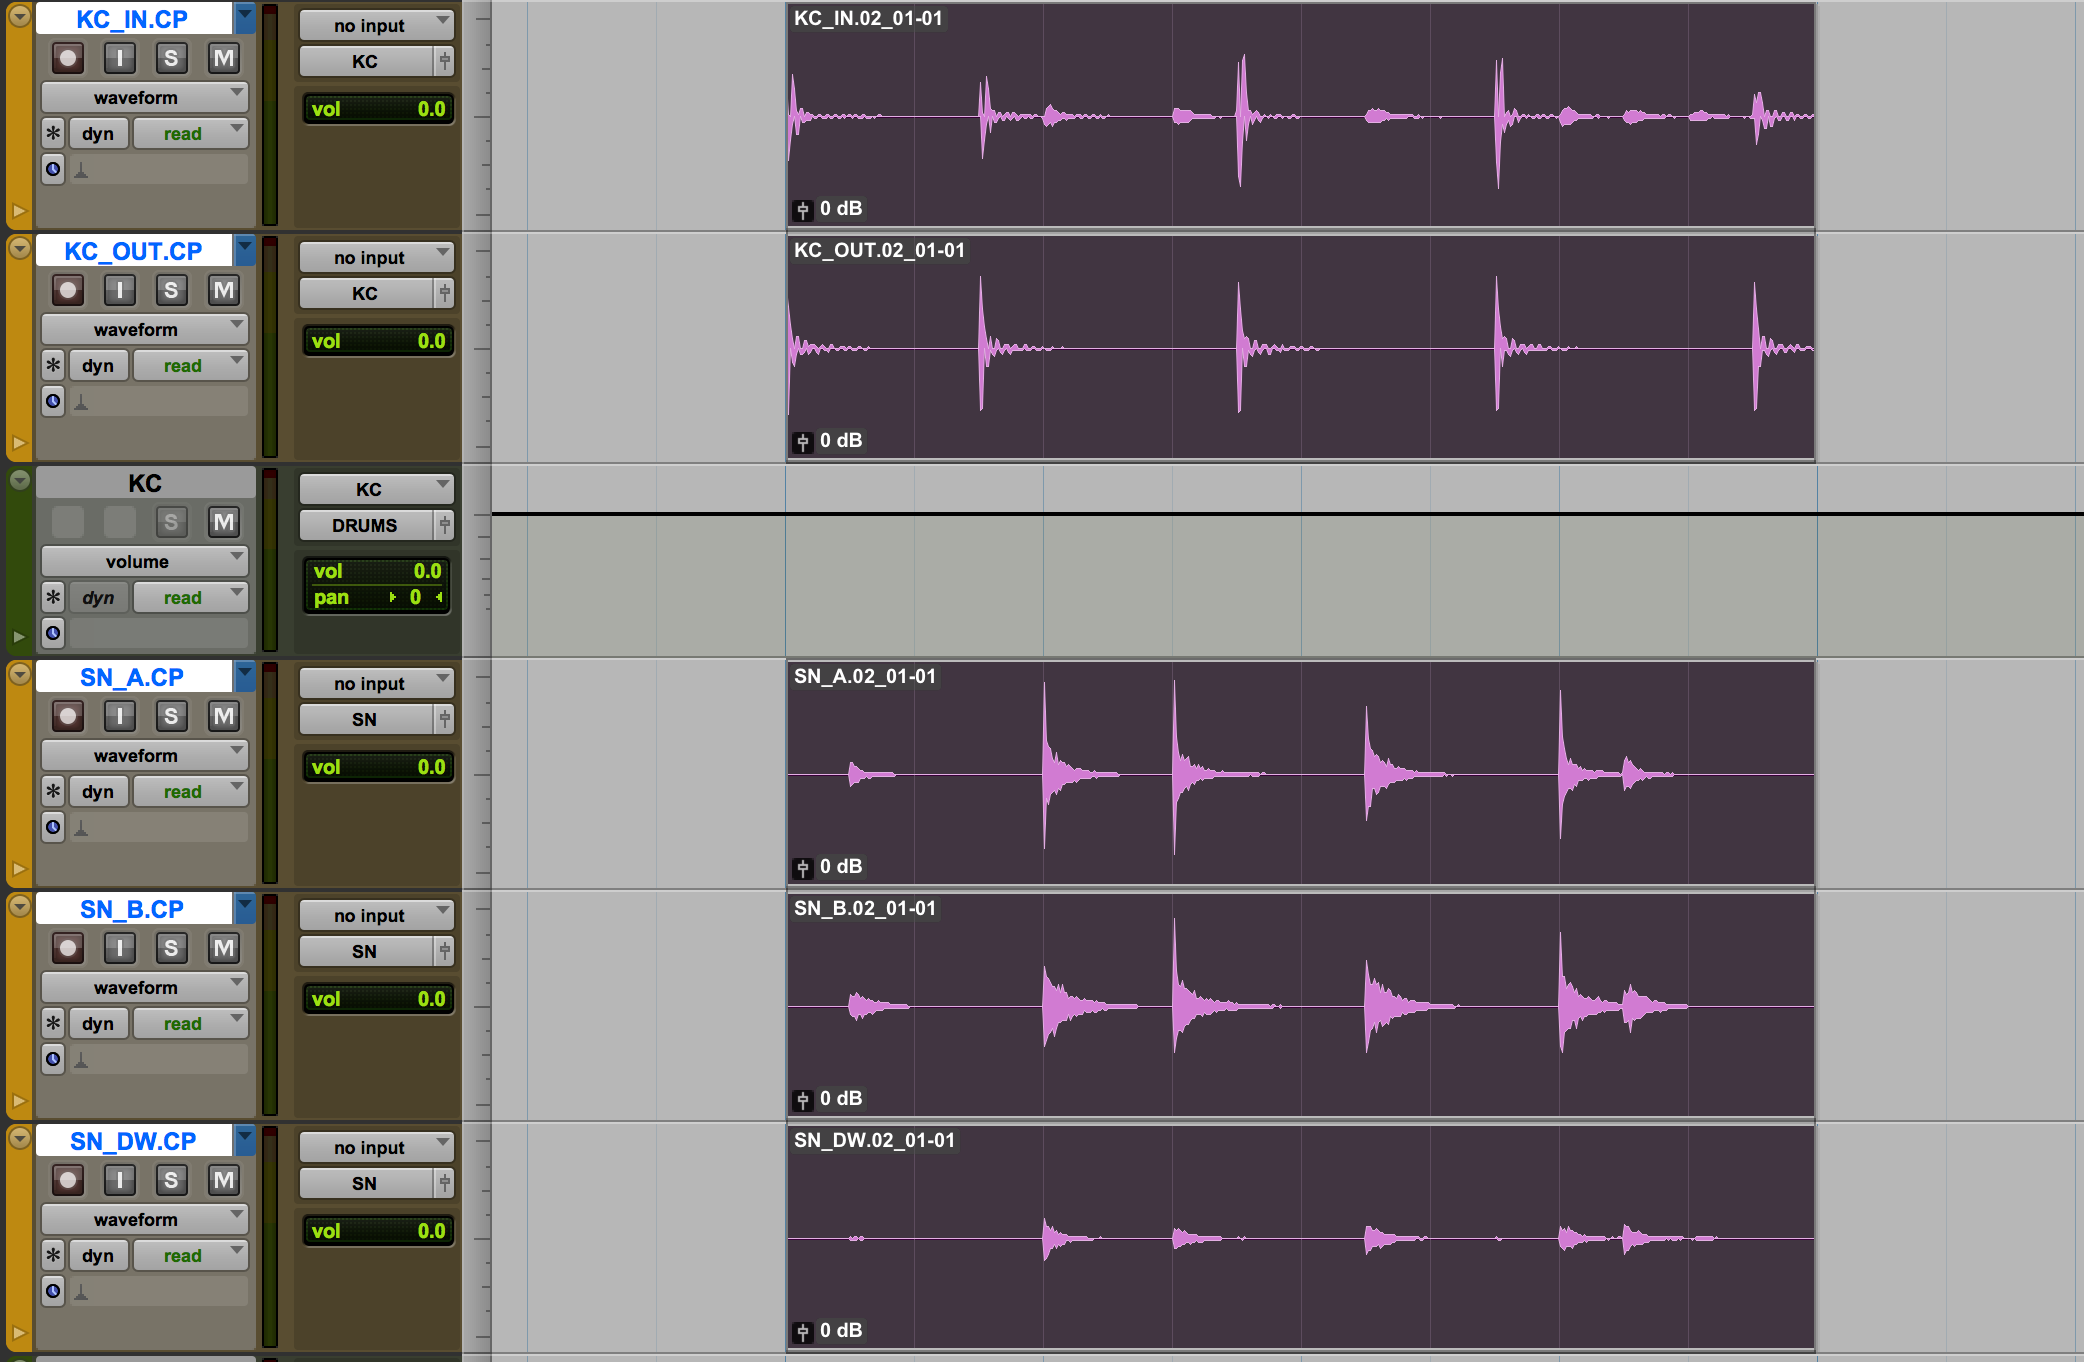
Quickly toggle to the master playlist or between recent playlists for quick comparisons while comping.
Another cool feature is the ability to automatically cycle audio within a selection. Let’s say you want to replace some of the hits we’ve copied to the target playlist. Just select them, and use Cmd+Shift+Up/Down to automatically bring audio from the other playlists.
All of these new shortcuts work while in playback. By activating Loop Playback and deselecting “Link Timeline and Edit Selection” (Shift+/) you can create a loop around the section you are comping through, while maintaining the exact beats you want to replace and listening to them in context.
When you cycle back to the original playlist, a “Home” icon will appear on top of the selection. If you stop there, all the edits will be undone and the clips healed.
All the edits are done on the fly, so you can stop cycling the moment you hear something you like and the edit will be ready. If you keep cycling and come back to the original playlist, a “home” icon will flash on top of the selection, and the original clips will remain unedited.
Note: You can also choose “Main Playlist” as the target playlist, and this means that whatever playlist that is shown will be the target playlist. But beware, if you go to another playlist, that will become the new target playlist, which can be confusing. (Although it can accommodate certain workflows.)
Retrospective Recording and MIDI editing
With Retrospective Recording, whenever a MIDI or instrument track is armed, Pro Tools will start recording immediately, even if you are in playback.
This way, if you get carried away and forget to actually press Cmd+Space or any of the other shortcuts to start recording, any stroke of inspiration will not be lost in time like tears in rain, but instead is just a shortcut away.
Press Shift+C and the MIDI clip will appear on the track. (You can also access it from the menu under Events —> Retrospective Record.)
Another long due function that has been delivered with Pro Tools 2018.1 is the option of moving MIDI notes using the arrows on the keyboard. Although Pro Tools 12.8.2 introduced the possibility of moving to the next/previous note with the left and right arrows, this workflow was still quite limited, and has now been expanded.
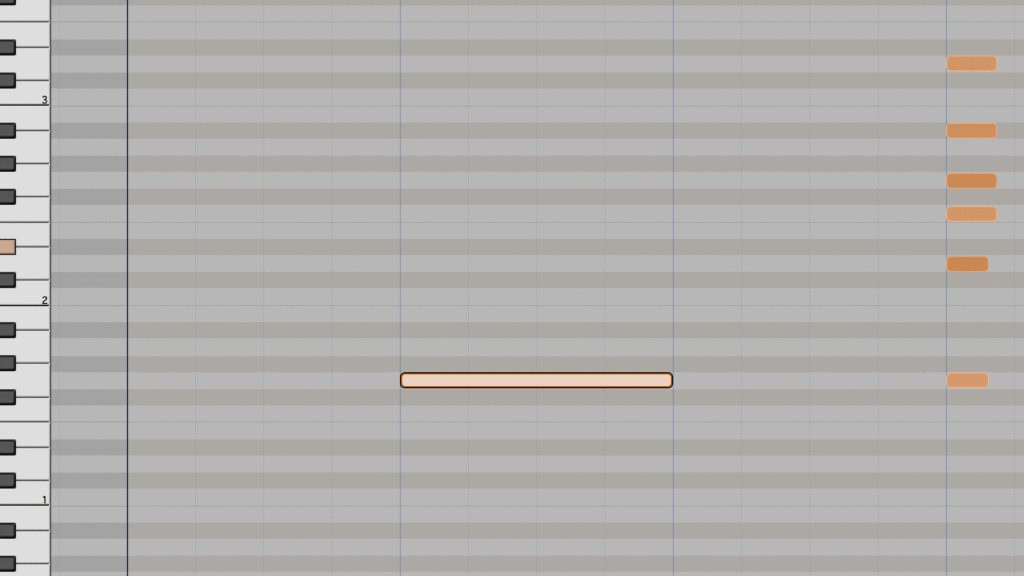
With a note selected, just press the Up and Down arrows to move it up or down by a semitone. By holding Ctrl while doing this, you’ll restrict the movement to the notes within the active key signature for that section of your arrangement.
As you would expect, if you press the Option key, you’ll be creating a copy of the note, so for quickly creating a triad you can just select the note, then press Ctrl+Option+Up to create a copy of that note, press Up again to move it up to the third, press Ctrl+Option+Up to create a copy of that third, and then press Up one more time to move the copy to the fifth. (It sounds much more complicated than it actually is.)
Using Shift in combination with the Up and Down arrows allows you to transpose the selected notes by octaves—a pretty standard behaviour across several DAWs.
If you need to further edit the note(s), you can change the starting point (note on) by one grid value by using Ctrl+Left/Right, and change the ending point (note off) with Alt/Option+Left/Right. (If you need to speed things up a little, adding Shift to the two previous keystrokes will move the start/end points by two grid values.)
MIDI Velocity is key in creating realistic-sounding programmed instruments, and it has received its own set of new shortcuts. Cmd+Up/Down will change the velocity in 5 unit increments, and adding Shift will increase the amount of change up to 15 units increments.
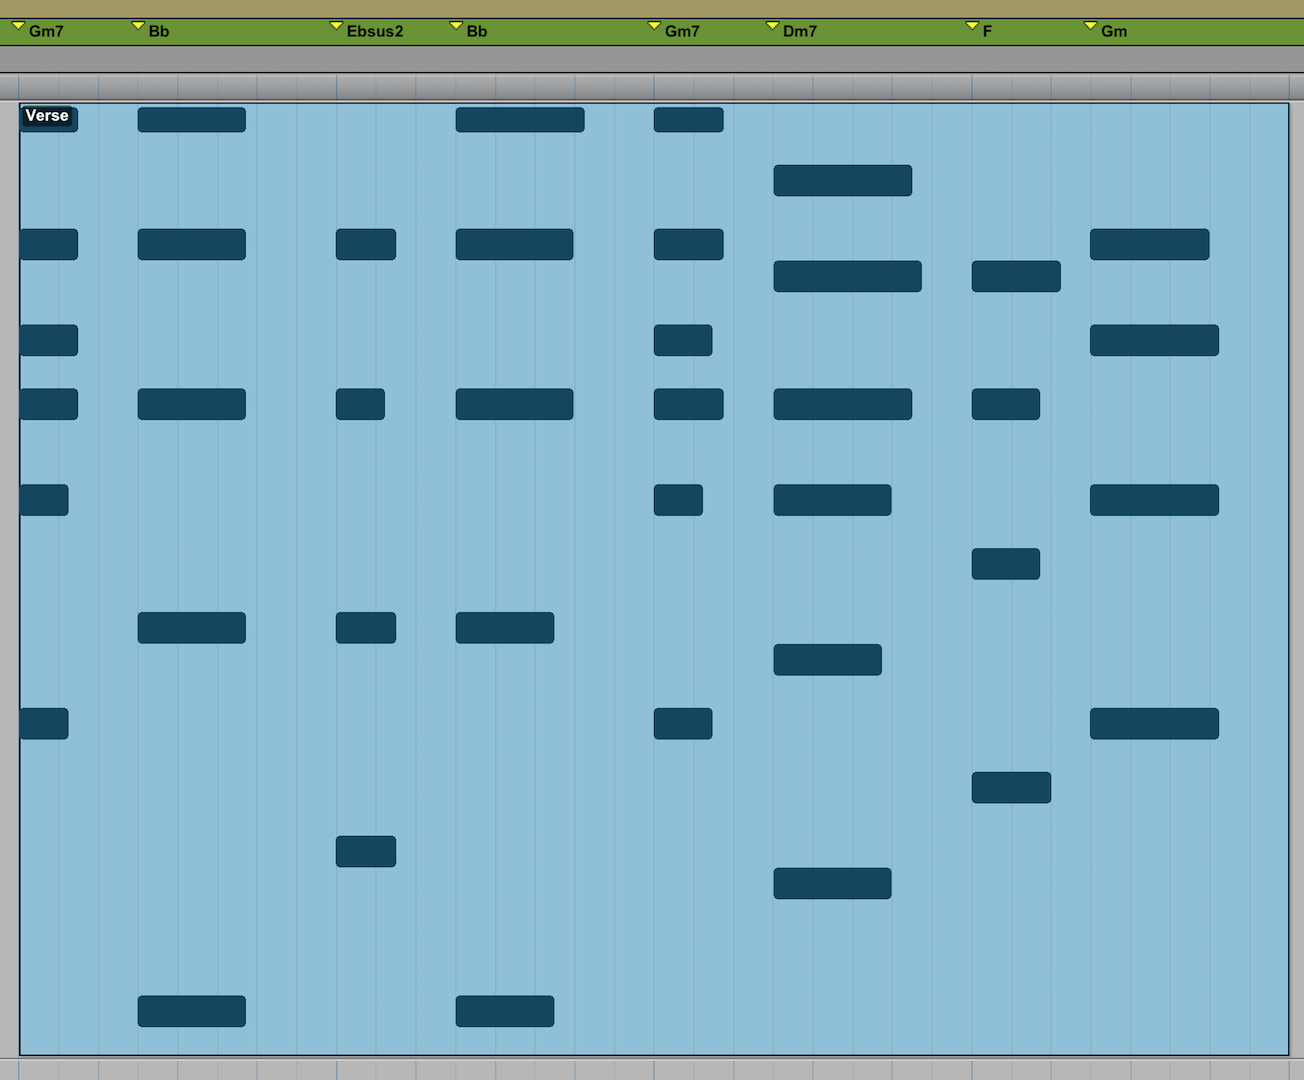
The last of the MIDI additions in this version is the option of extracting the chord changes from a given MIDI performance. Just select the clip(s) you want to analyze and go to Event —> Extract Chord Information. Pro Tools will identify the chords and place them in the Chord ruler.
Other small but useful improvements
As mentioned, the idea behind changing the version naming convention is to reflect the fact that Pro Tools will be receiving updates more often—potentiality even more than once a month.
This means some of the new features might not be super big and flashy with every iteration, but these kind of small improvements can be important nonetheless. You know, improve by 1% every day and you’ll be twice as good after 70 days, right?
There are several of these kinds of minor additions in Pro Tools 2018.1
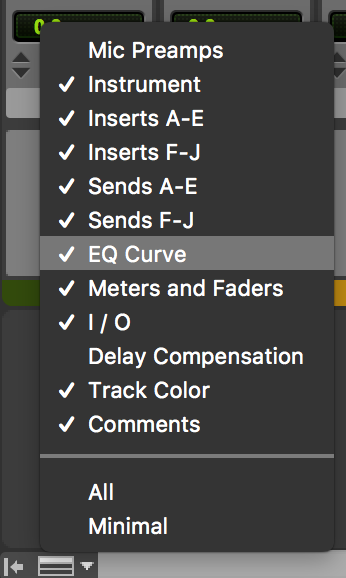
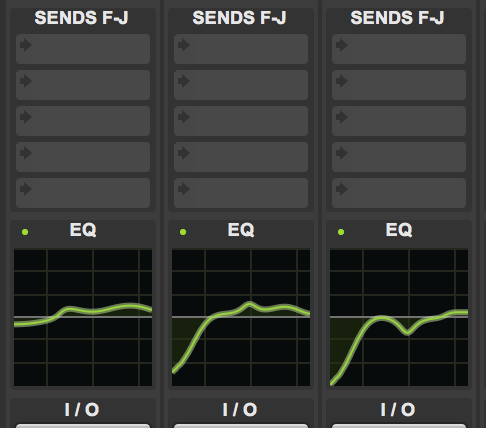
One of them is the inclusion of an EQ curve display in the Mix Window, that shows the total effect of any EQ plugins inserted on the channel. To activate it, just click on the bottom left menu of the Mix window and choose “EQ curve”.
This display works with third party plugin manufacturers too, but not all of them have this function implemented, so check out with your manufacturer in case of doubt.
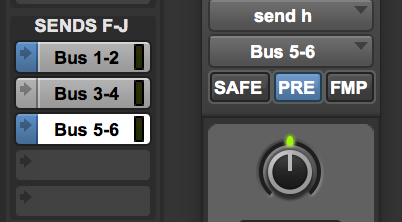
Another neat new function is that there is now a blue indicator to the left of any send set to prefader mode, so there’s no need to open the actual send to see which are in prefader and which are not.
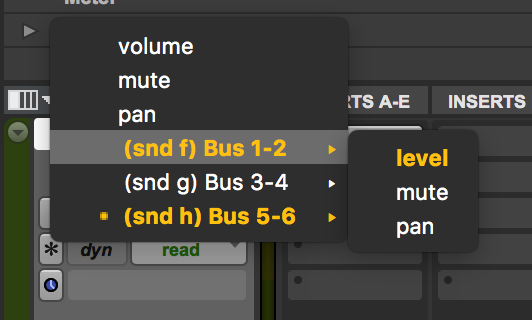
Another small improvement is that any lane that contains automation is now noted in orange, similar to the way buses are colored to denote they are being used.
And to end this summary of Pro Tools 2018.1, it’s worth mentioning that cloud integration has been increased: iLok Cloud is now supported, so you can run Pro Tools without an iLok key as long as the computer has access to the internet. And, you can now upload your current project to the cloud and set it up for collaborating using File —> Start Collaboration.
That’s all for now! What are your favorite additions for Pro Tools 2018.1? Are there any updates you’re eager to see in the next iteration? Please share them in the comments below!
Please note: When you buy products through links on this page, we may earn an affiliate commission.


