Everything You Need to Know About Audio Metering But Were Afraid to Ask
From the humble VU meter to the most advanced spectral analyzer, you can understand them all—once you have a good grasp of the fundamentals.
Once upon a time, I only used meters to make sure I wasn’t clipping. Not in the red? Okay, I’m good.
As my audio career progressed however, I started to see the benefits of using meters as a visual aid when you can’t always trust your ears.
While meters might not be the sexiest topic in audio that I can think to write about, it’s something every engineer can benefit from understanding. And what’s sexier than knowing more about audio and making great sounding records?
Meters 101
Let’s start with the basics: All audio meters are used to measure levels in some capacity or another.
Each type of meter has different “ballistics”, meaning just how fast the meter responds to the sound it’s measuring. Similar to a compressor, you can think of a meter as having an “attack time”—how quickly it responds to incoming signal. Meanwhile, the time it takes the indicator to return its resting position is it’s release time.
Each major type of meter has different ballistics determined by its type. For example, the ever popular and useful VU meter has an attack and release time of about 300 ms, which is designed to approximate the dynamic response of the human ear. LED meters are often faster, and modern digital meters often present a whole range of potential options and speeds.
The Decibel
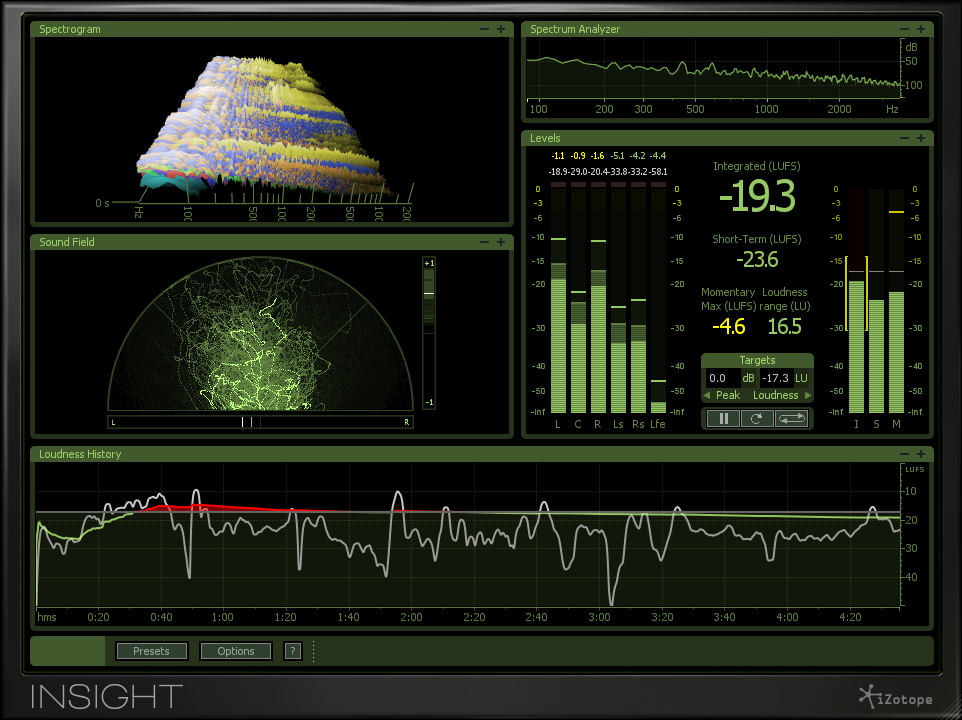
A complex metering suite like iZotope’s Insight becomes much less intimidating with a little knowledge about how metering really works.
You’ve probably heard of a decibel, right? But what is a decibel, really?
If you’re like most people in the field, you might think it has something to do with loudness. Not necessarily.
The decibel by itself doesn’t measure volume, loudness or level.
A decibel is really just a ratio that allows you to compare the value of one unit with another using a logarithmic scale.
Just what is a “logarithmic” scale? It’s a way of making huge numbers more manageable by compressing their range.
For instance, measured in pascals—a unit for determining physical sound pressure—the difference between the quietest sound you can hear and the very loudest sound you can hear is huge.
The very quietest sound you can hear is about .00002 pascals, while the loudest sound the average person can stand before saying ‘It hurts, turn it off!” is about 20 pascals. That’s a difference of 10,000,000 times.
It’s a lot easier if we just write this as “120 dB”, which is a much more easily digestible number. Similar ratios are at play in electrical circuits as well.
Types of dB
The decibel originates in telegraph and telephone industries of the early 1900s, where engineers needed a way to measure how much signal they would lose over a long line.
Back in 1924, Bell Telephone Laboratories came up with the “Transmission Unit” (TU) which was renamed the “decibel” in 1928. This name is derived from bel, a unit of measurement devised in honor of the great telecommunications pioneer Alexander Graham Bell. The “bel” is seldom used due to its large size, and so the deci-bel was the proposed working unit.
When you hear someone says “decibel” they could be referring to many different types. Since decibels are just a way of comparing units with a large difference in magnitude they can be applied in any way you can imagine.
The terms “decibel” doesn’t mean much until it’s tied to a specific absolute reference point. The trick is to determine what it is you are trying to measure, and then pick a value for “0dB” that makes sense.
(The table below is adapted from Audio Engineering Society Presents: Handbook for Sound Engineers by Glen Ballou)
dB SPL – As described above, dB SPL is a measure of sound pressure level in the air. 0 dB is normally defined as the quietest sound a person can hear. About 20 micropascals of sound pressure on their ear drum.
dBm – This was the original application of the decibel in audio. It is a power measurement where 0 dB references a 1 mW across a 600 ohm load. This is great for old telephone lines and old-timey motion picture equipment, not so great for modern pro audio circuits.
dBu – This is the norm in professional audio hardware. It’s a scale where 0 dB is equal to 0.775 Volts RMS in an unloaded or unterminated circuit. (Hence the “u”.) +4 dBu is the voltage reference level used by professional audio product, meaning that when your analog VU meters show “0”, you’ve got 4dB above .775 volts going through your 0 ohm circuit.
dBV – This is a similar idea, where 0dB represents a level of 1 Volt RMS. -10 dBV is the voltage reference level traditionally used by consumer audio products.
DIN Scale – This is a alternate version of the same theme, found mostly in Germany and Austria. This scale uses a +6 dBu reference level for the 0 dB mark.
dBFS – This measurement shows you your level in dB relative to digital full-scale, aka digital 0. You’ll find every DAW meter using dbFS. Unlike in analog equipment, 0 dbFS represents the maximum level before clipping occurs.
Engineers will often shoot for recording input and output levels of anywhere from a low of -22 dbFS to a high of -12dBFS. One of the more popular scales is to have -18 dbFS be equal to 0 on their analog VU meters. As discussed above, that’s usually going to mean a voltage of +4dBu.
Meters: Visualizing dB
Now that you’re familiar with decibels, let’s try looking at them more closely. Literally. That’s where meters come in.
The first attempt at creating standard meters came in the 1920s and 30s, when “copper oxide rectifier power level meters” were being used, but they were deemed inaccurate and not all that useful for monitoring program material.
Eventually, some of the biggest broadcasters in America at the time formed a collaboration to come up with a new standard. The Columbia Broadcasting Company, Bell Telephone Laboratories, and the National Broadcasting Company began searching for a better way to measure program material. They decided on a new type of meter and standard reference level.
In May of 1939, the electronics industry adopted a new reference level of 1 mW at 600 ohms for 0dB which is now the standard for dBm.
Enter the VU Meter
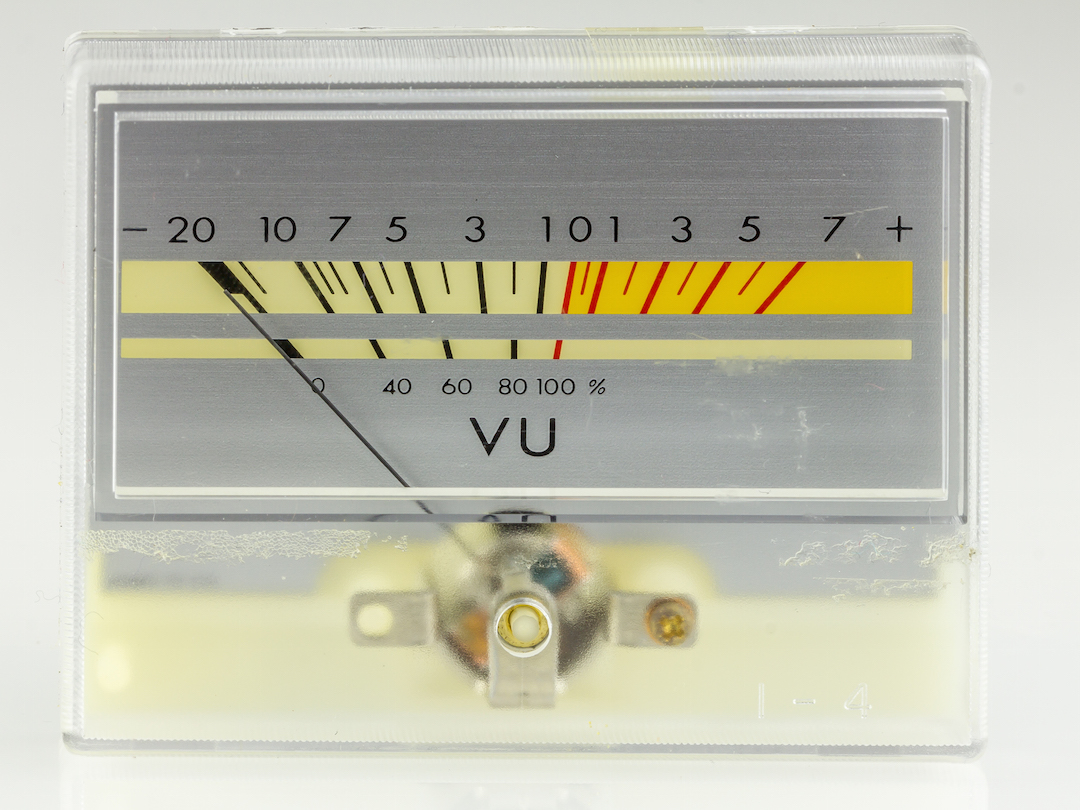
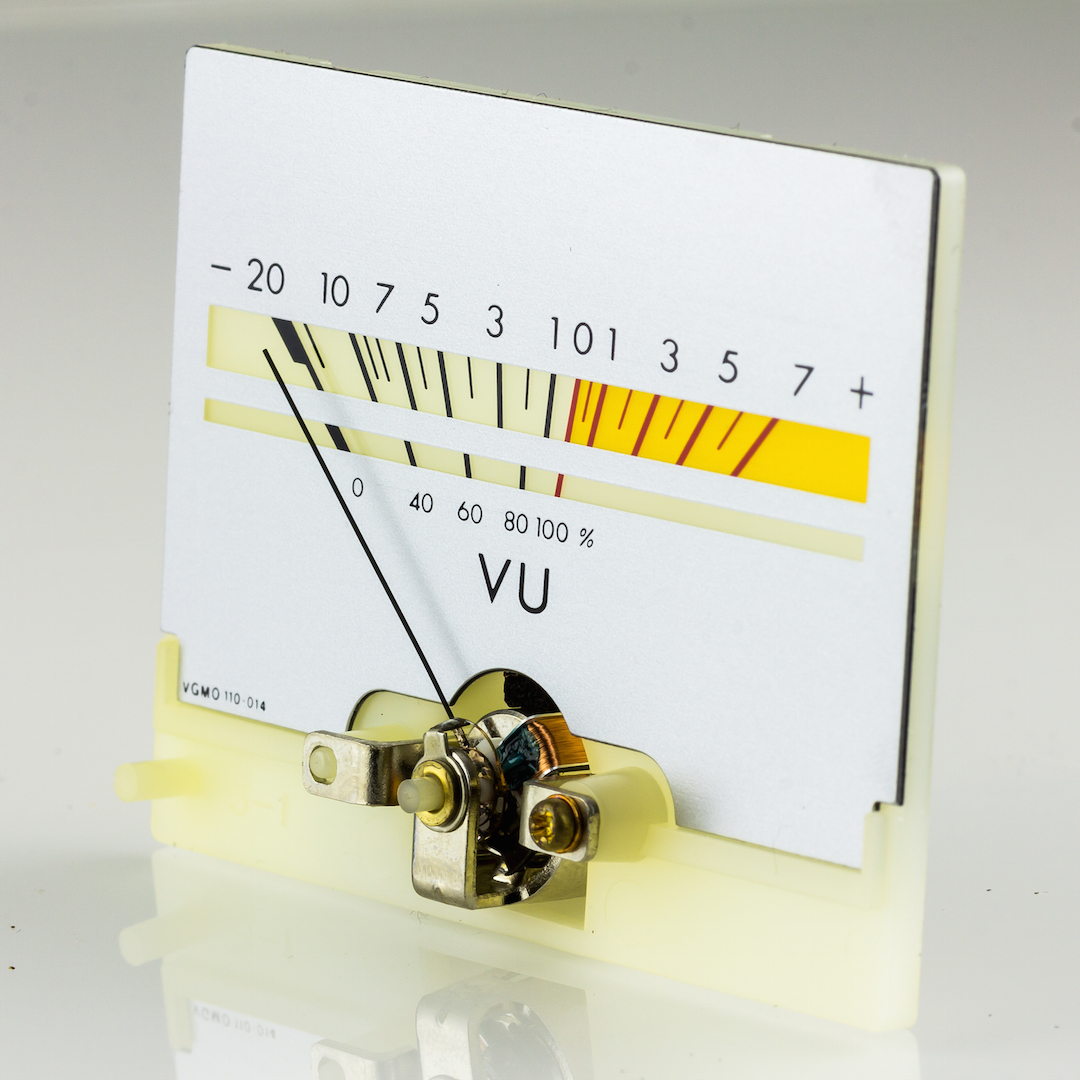
A volume unit or “VU” meter is a basic volt meter that takes a simple average of the signal and displays it with an attack and release time of around 300 ms.
The slower attack time allows the faster transients to get by before it registers the signal and gives a reading.
Because of these characteristics, the VU meter is fairly accurate when measuring overall level of your program material. It was originally designed as a kind of loudness meter, rather than as a peak meter, the latter of which are more often used to protect you from overages and help make sure you’re recording at appropriate levels.
As useful as they are, the problem with the slower attack and release times of VU meters is that transient-heavy material will not read accurately, while a sustained sound such as a bass or guitar will read much higher even, with the same peak voltage. Another issue is that psychoacoustics play a role in how loudness is perceived, which is not factored in to this kind of measurement. (More on this in a minute).
VU Meters (originally called the SVI for Standard Volume Indicator) became standardized by the Acoustical Society of America in 1942. Since the design of VU is fairly simple they were cheap and easy to implement in professional as well as consumer audio equipment.
Typical VU meters usually measure only the upper 23 db of the signal. This is fine for most scenarios, but there are some instances when you’ll want to monitor a larger range of more dynamic material. A Wide Range Meter displays program information over +60 db.
Peak Meters
VU meters are popular because the most common time an engineer is using a meter is when judging input and output levels. A meter showing the average level helps to make sure the signal is hitting a unit at the optimal level in order to achieve the best signal to noise ratio.
Peak meters only measure the highest value of the waveform which helps assure the signal being recorded is not clipping or distorting the medium. These meters by design respond to a signal instantaneously and catch all the fast transients, like those found in drums and percussion instruments.
Sudden peaks and transients are the most common culprits of clipping. Since VU meters slow reaction time won’t be able to give you an accurate measurement of these sources, peak meters become an important part of an engineers tool kit.
PPM Meters
Peak Program Meters are a bit more complex, even though their development actually started prior to the VU, back in 1932.
PPM meters have a much faster attack time, around 4-10ms, and by design are meant to ignore the fastest of transients, encouraging operators to keep levels louder and to ignore the highest peaks.
PPM meters couple this fast attack time with a very slow release, which gives the operator more time to see the peaks and helps reduces eye strain. Since the fast attack time ignores very sudden peaks, these are sometimes referred as “Quasi Peak Meters”.
It’s important to note however, that peak level tells us almost nothing about perceived loudness and so these types of meters are mostly used for protecting the medium you are recording to.
Dorrough Meters
When computers started to enter control rooms in the 1990’s, detailed peak meters became more common.
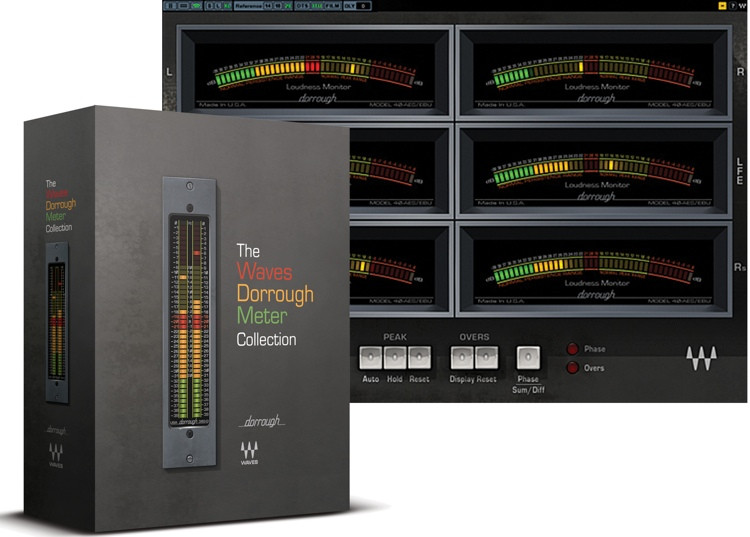
Dorrough Meters, an early alternative for effective loudness metering are now the basis for many DAW-based solutions.
Digital recording is a lot less unforgiving to sudden spikes in signal than analog tape machines so it paid to be able to watch them closely.
Unfortunately, peak meters don’t tell you a lot about loudness and average levels. This is when hybrid meters such as the now industry standard Dorrough meter started to become more popular.
Dorrough meters ballistics include a weighted type of VU meter and also show details about the peak levels. This allows you to monitor both RMS and peaks quickly and efficiently using a single meter.
Today, many companies have begun to take these kinds of hybrid meters into the DAW, and Waves makes a great plugin version of the original Dorrough.
K Meters
After years of using VU meters, peak meters, PPM meters and variations of them, a quest to find a solution to for standardizing loudness metering of all audio throughout all industries was undertaken. Enter mastering engineer Bob Katz and the K Metering System.
K Metering was developed by Katz as an integrated metering and monitoring system that discourages extreme loudness while promoting quality and consistency in recording and monitoring levels. It combines both a peak and an average meter together, along with guidelines for monitor calibration.
With a K-metering system, whenever your VU meters read “0” you can expect a consistent degree of loudness in the room, usually 83 dB SPL for a single channel, or 85 dB SPL for two channels.
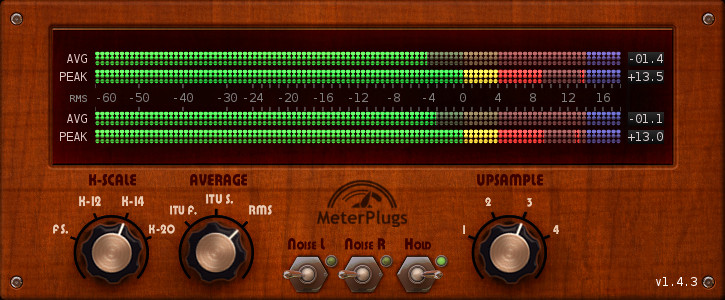
Several developers now make K-metering solutions, including the version by Meter Plugs, pictured here.
Because the engineer’s ear operates best at this range, these recommendations have proved to be very useful over the years and have been implemented into the modern day loudness measurements that takes psychoacoustics into account.
There are 3 main types of K-Metering scales, K-20, K-14, and K-12 which offer 20dB, 14dB and 12dB of headroom above 0 on the RMS meter, respectively. Each is best-suited to different levels of dynamic range and different types of program material.
The K-20 meter is for use with wide dynamic range material like a large theatre mixes or classical music. The K-14 meter is for the vast majority of productions for the home, home theatre, and modern music. And the K-12 meter is for productions to be dedicated for broadcast.
In each of these scales, the number refers to the dBFS level that should be considered the “0” point for the purpose of loudness metering, where your system will pump a consistent 85dB of SPL into the room.
If you’re interested in learning how to calibrate your speakers using a modified version of the K-Metering system recommendations, check out my article How to calibrate your studio monitors.
LUFS/LKSF
Ever since I can remember, commercials were always louder than the actual programs. I fondly remember my early childhood forays into rudimentary audio engineering when I jumped to the remote control to ratchet the volume down when a commercial blasted some cheesy music in between segments of one of my favorite shows. This obviously wasn’t by accident.
In 2010, after the FCC received over 28,000 complaints about overly loud commercials, the U.S. Congress passed the Commercial Advertisement Loudness Mitigation (CALM) Act and tasked the International Telecommunication Union (ITU) with the job of creating a method for measuring the loudness of audio broadcasts.
The “ITU BS.1770” is the current standard when it comes to measuring loudness.The ITU standard concerns Broadcast Loudness and “True-peak Level” measurement, and the loudness part of the equation is based on an “Leq” measurement employing K-weighting.
The measurement is a single number for an entire album or song and it is given in units “LKFS” which stands for “Loudness, K-weighted, relative to Full Scale, or “LUFS” for “Loudness Unit, relative to Full Scale”. LKFS and LUFS are the same, two names for the same type of measurement.
On December 13, 2011 the FCC began requiring commercials to have the same average volume as the programs they accompany. This measurement would have to be taken with a meter that used the current ITU BS.1770 standard.
Spectrum analyzers
Spectrum analyzers are effectively just a bunch of meters, each targeting a specific frequency band. They work great when you’re trying to get an overall visual image of what you’re hearing.
Even as I’m writing this, it sounds weird, because who cares what sound looks like? But ultimately, these are useful tools for telling you exactly what’s leaving the speakers without having to rely on your ears, and for helping you zero in to specific problem areas more quickly than you might be able to by ear alone.
Phase/Correlation Meters
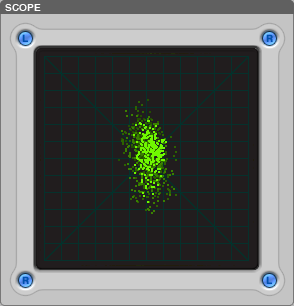
Phase correlation meters give a sense for the similarity and difference between the left and right channels.
The correlation meter is nothing new. It was used even in the vinyl cutting days to help ensure the out of phase signal wouldn’t cause the stylus to jump off the grove.
These measurement tools display the changing phase relationships between the left and right channels of a stereo signal. It indicates the degree of similarity between the two channels. +1 between completely correlated and -1 being completely exactly out of phase.
When the audio in the left and right channels is similar, the meter will read more towards the +1. The extreme case is when the left and right channels are exactly the same, in which case the correlation is exactly +1, which would be mean a completely mono signal.
When the meter is showing 0, it means you’re hearing a fully wide stereo image. Typical, well-mixed program material will generally display a reading that will fluctuate between +1 and 0, however there will usually be times when the meter may go below 0. When the left and right channels become increasingly different, the meters read more towards -1. The extreme case here would be for the left and right to be exactly out of phase, in which case the correlation is exactly -1.
Going below 0 is not necessarily bad (there are plenty of popular songs mixed that spend some time below 0_ although you probably don’t want to be there the whole time.
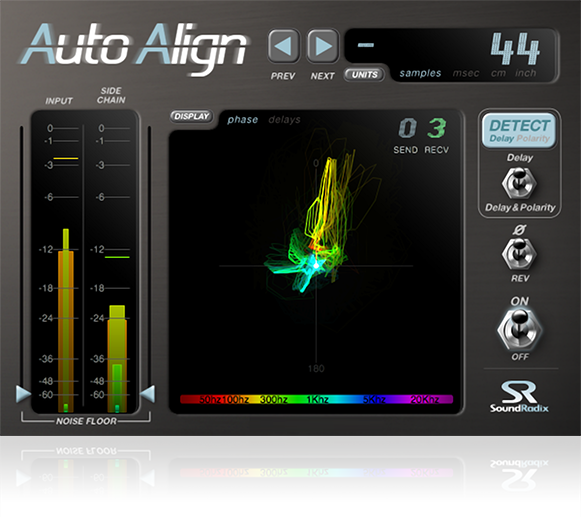
Auto Align is one solution for improving phase response that includes an integrated, frequency-specific correlation meter.
One example of a way to check phase using a correlation meter would be when tracking drums, If you’re interested in reading more about checking phase when recording drums you can read my article “How to properly check the phase when recording drums”
Power-Output Meters
Not really worth noting as these are only found on power amps, and for many of modern engineers, they are a thing of the past. However unlikely you are to need to use one, I thought I would mention it since you may have seen them on your Dad’s old stereo and thought it was a standard VU meter. The power output meters are usually calibrated in watts and/or dBm. These meters are test instruments and not used for monitoring program level.
Summing it Up
I was never the kind of engineer that loved getting into the little technical details of audio. I’d much prefer to concentrate on the artistic and creative aspects of recording and mixing than the scientific ones, but even I’ve realized that when it comes to metering, a little knowledge really goes a long way.
Metering may not be the most fun thing to spend time learning about, but it’s crucial to have a metering system you trust, and every tool that you know how to use effectively will only get you one step closer to getting great results.
David Silverstein is an audio engineer who works at Sabella Studios. You can find more of his writing on his blog, Audio Hertz.
Please note: When you buy products through links on this page, we may earn an affiliate commission.


