5 Ways To Get The Most Out Of Digital Drums
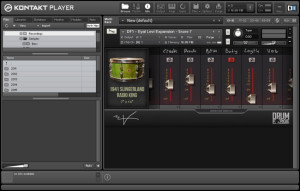
This is a guest post by producer/songwriter Eyal Levi [The Black Dahlia Murder, Chelsea Grin, The Contortionist, Daath]. He has recently collaborated with Drumforge to create an all-new sample library, compatible with Kontakt and Trigger.
#1: Think Like A Drummer
One of the telltale signs of an amateur drum programming job is the appearance of a character I like to call “Dr. Octopus.”
Dr. Octopus likes to write parts for 8-limbed drummers. Unfortunately, human drummers only have 4 limbs. This means that a hi hat, snare, floor tom, china, and crash can’t all be hit at the same time. It also means that if there’s a big distance between the drums, like say from an 8 inch tom all the way to a floor tom, that a real drummer will need time to cover that distance.
So get into the habit of air drumming the parts you write. If they seem physically impossible, they probably are. Avoid writing things that are inhuman. Your music will feel better, and your real-life drummer will thank you for it when you take your material to the stage.
#2: Learn to Write Like A Drummer
Have you ever heard a song and thought the drum parts were off the chain, only to find out that the producer programmed them? I know I’ve been fooled a few times.
On closer examination, what tricked me was the fact that the drum parts sounded so drummer-like. Real drummers have certain tendencies and stylistic quirks that they’ve developed over years of playing the instrument.
So how do you, a non-drummer, incorporate that into your virtual drum programming?
- Pick your ten favorite drum performances of all time.
- Load up your virtual drums in your DAW.
- Transcribe them into midi, hit for hit.
- I guarantee you that your drum writing will go to the next level.
#3: Pick The Right Samples
When recording real drums, there are many variables that go into getting a great sound: Sticks, microphones, drum choice, room placement, heads, preamps, temperature in the room, muffling, tuning, and the drummer himself, just to name a few.
In the physical world, if you don’t like how a drum sounds, you work on all of the variables until it’s right. Sometimes, no matter what you do, it will never be right and in those cases you choose a different drum altogether.
When working with virtual drums, you have far less variables to work with because the recorded drum sample has already been presented to you. However, you do have an advantage that people recording real drums don’t have: multiple samples to choose from!
If a sample isn’t right, keep going until you find a good one. There are so many to choose from that there’s no excuse for settling on the wrong one. And with that said, it’s shameless plug time! If you’re looking to expand your drum library, with some samples that give you a powerful, unique, and brand new way to manipulate their tonal options, look no further than my new Drumforge Expansion Pack.
#4: Velocities Are Life
Another fake drum dead giveaway is what I like to call “the coked-up typewriter”.
That’s the sound of the exact same hit over and over and over in rapid succession. It sounds annoying, and that’s not what real drums sound like.
In real life, every drum hit is its own special snowflake with a unique pitch, timbre, and volume. That’s because a human drummer, no matter how good they are, will hit the drum on a different spot, at a different volume, every single time.
Even if your drummer is super consistent, these minor variations in position and volume are what make all the difference in the world. Those variations are what help us perceive it as a real drummer playing a real drum.
With virtual drums, it’s on you to write in the velocities in a way that will make the performance feel and sound real. A very easy way to get started thinking about it is to set a velocity range for a style of hit. These are some arbitrary numbers because every sample has its own unique velocity sweet spot:
- Hard hits – 127
- Fills – 110-120
- Blast Beats – 95-110
- Ghost notes – 65-80
#5: Print And Check For Phase
There are a few reasons to print your drums rather than mix from a live virtual instrument.
- CPU usage.
- You lock the performance in.
- You can accurately check for and fix phase.
The CPU issue is self-explanatory, but I’ll explain the other two:
When using a multi-sample set, the samples that are selected by your virtual instrument are on what’s known as a “round robin”.
The short version is that it shoots out random samples every time you play it. That means that when the instrument is active, the drum performance will be different every single time you go through the song. What if you liked the performance in the first version of the mix? Too bad. You’ll never be able to get it exactly like that again.
The last reason to print your drums is so that you can check the phase. If you’re not layering multiple samples it’s not such a big deal, but if you’re bringing in multiple snares for instance, you want to do this.
Have you ever played a drum and thought it sounded huge, and then added more drums and it progressively sounded smaller and weirder? That’s probably because the samples are out of phase with each other.
It’s beyond the scope of this post on how to fix this, but I go into full detail in my CreativeLIVE Advanced Drum Production course. Fix the phase, and the drums will sound huge again.
Eyal Levi is a producer and songwriter who has worked with The Black Dahlia Murder, Chelsea Grin, The Contortionist and Daath. He has worked with CreativeLive on an advanced drum production course, and has recently collaborated with Drumforge to create an all-new sample library, compatible with Kontakt and Trigger.
Please note: When you buy products through links on this page, we may earn an affiliate commission.


