Keeping it Level: The Sonic Beauty of the Leveling Amplifier

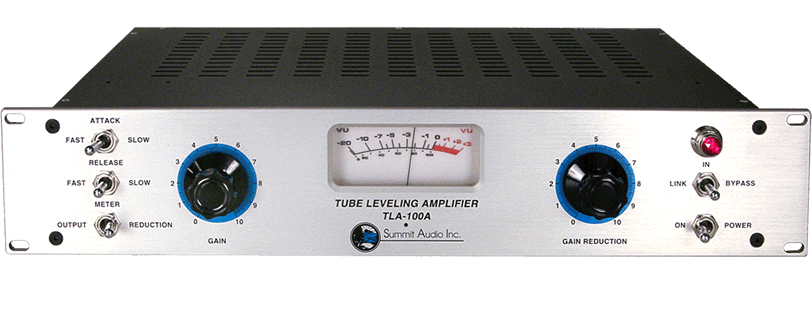
The Summit Audio TLA-100A is a modern take on classic mid-20th-century leveling amps like the LA-2A.
In my last post, I wrote about how I like to use compression to help mold the overall tone and envelope of a track.
This time, we’ll go a little deeper by looking more closely at “leveling amplifiers”, a slight variation on the theme, and a powerful set of tools that can help you bring tracks into greater focus and give them a more even feel—all without some of the obvious artifacts that can come from really pushing a conventional compressor.
The reason for this performance is in the design. Leveling amplifiers are “program dependent”, meaning their exact response varies based on the signals you send them, and they react to the totality of the input, rather than just the peaks in the signal.
Without much fuss or tweaking, they are continually increasing lower volumes as well as reducing peaks in the signal. To our ears, the leveling amp is often said to have the feel of “gluing” the sound together more than an ordinary compressor.
All this is achieved by employing an “electro-optical attenuating unit” to regulate the unit. In an analog leveling amp, the incoming electrical signal is effectively transformed into light energy that shines on this optical attenuator.

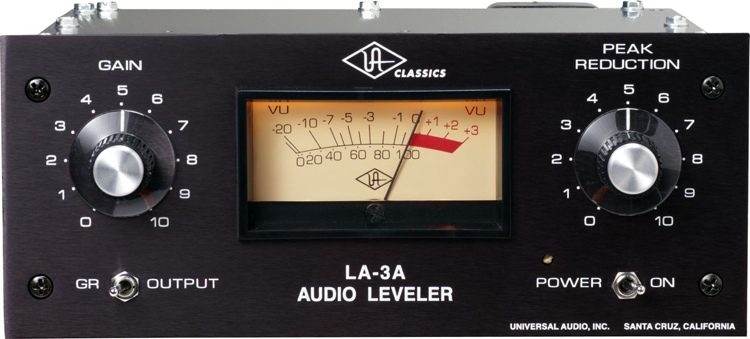
The solid state LA-3A allowed the “leveling amplifier” concept to come in a more compact package, with its own distinctive tone.
The response of this type of sensor is non-linear and the resulting sound is considered to be more natural and “musical” in the opinion of many users.
The most common opto-sensor in the audio world is probably the classic “T4”, which was used in the Teletronics LA-2A design. (There have been 3 variations of T4 units made: A, B, and C.)
While the iconic, mono, LA-2A is probably the most well-known implementation of this design, more modern versions have also been made, and you will find stereo versions of “opto” style compressors strapped across the mix bus by many mixers and mastering engineers to “glue” it all together.
Operation of leveling amps is simultaneously both simple and tricky. On most iterations, there are only two main controls available to the user: “gain” and “reduction”. All other parameters effecting the timing and envelope of the leveling amp are generally preset and heavily dependent on design.
(Though more modern takes on the leveling amp, like the Summit TLA-100A, add on some pretty simple “fast/medium/slow” switches to help tailor the response in a general kind of way.)
Depending on the program material and its intensity, the ratio of the classic LA-2A is often about 5:1, putting leveling amps like this one squarely between compression and limiting. Fortunately, the design characteristics of leveling amps tend not to create nearly as much of a pumping effect even with higher amounts of reduction.
The attack time on the LA-2A tends to be around 10ms, which as it turns out to be just about perfect on many sources for allowing the attack to come through before reacting. Release times are generally on the longer side, and this too adds to the smoothness of the sound and the usual lack of pumping side effects.
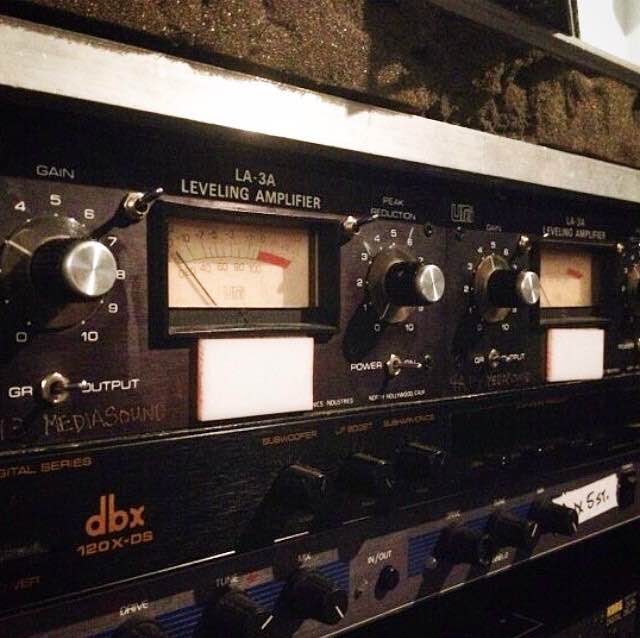
(The author’s own LA-3As have micro switches on either side of the meters which were retrofitted by the staff at Mediasound Studios, NYC.
One produces a 600ohm load, helpful for interfacing with vintage equipment units and/or consoles which expected to see that load at input. The other switch creates an easy way to access the “compressor/limiter” switch found on the back of the unit.)
So there are the nuts and bolts of the matter. But how does one apply “leveling” and when?
Many beginners assume that you want to start with the main gain and reduction knobs at the middle position, around “5”, but this is almost never the best place to start.
Early on, I was taught to start with the gain and reduction knobs both at 0. From there, you raise the gain so that output peaks around 0 on the VU meter, before dialing in the reduction to taste.
Because the gain control effects both how much the amplifier reacts and the overall output level, the trick is to balance your adjustments of the gain and reduction knobs, knowing that any increase in gain will increase the amount of reduction, and any decrease in gain reduce it.
In addition to adding “glue” to your sound, leveling amps are also great at smoothing out dynamics while bringing out nuances in tone and performance.
Vocals and acoustic guitars are natural choices for leveling amps—both when tracking and mixing. Very often when tracking drums, I will “mult” the snare (usually just the top mic) and send it to a leveling amp to be printed on its own track and brought back into the mix in parallel, adding “smack” and sustain to the snare drum without leaving it sounding over-processed.
Producers and musicians alike have often commented on how the drums have a “finished” quality to them at playback even on the tracking date thanks to this trick. This has the welcome side effect of making the rough mixes feel more exciting and inspiring to the musicians who are tracking and overdubbing.
(Today, you can quickly set up parallel compression in the DAW without creating a separate record track, but that’s how we rolled in the analog world.)
When you first start using leveling amps, try to set them up for one or two decibels of reduction. That’s often enough to add a nice sense of glue, dynamic control and tonal enhancement. Once you learn to balance your controls, you can be more aggressive, but either way, the key is to learn to feel the balance between these seemingly simple controls.
Rick Slater is a freelance audio professional, writer, and educator in the NYC Metropolitan area. You can reach him at http://audiobyrickslater.com
Please note: When you buy products through links on this page, we may earn an affiliate commission.


