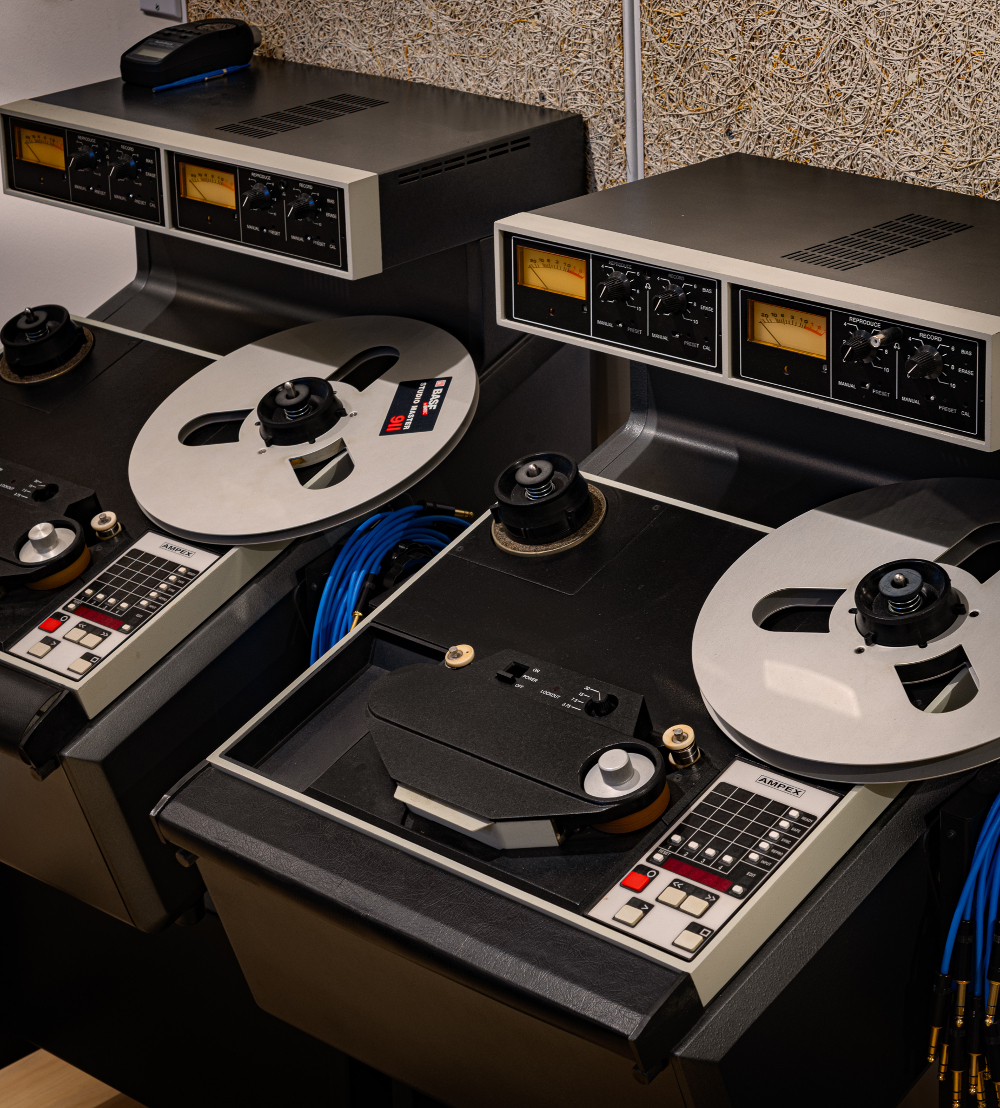
What it Takes to Restore an Analog Multitrack Tape Machine
In this guest post by Steve Puntolillo, founder of Mastercraft Recordings, you’ll learn the realities of restoring an analog tape machine to get years of service and joy, even out of a decades-old multitrack. You can read his post on buying an analog tape machine here.
So, you’ve bought a multitrack tape machine, and it has arrived in your studio. Now it’s time to make it fit for service. If you are planning to do any modifications or upgrades to your machine, don’t start them yet.
First, you should make all of the necessary repairs to get it running properly as it is. Why? If you make an improvement or modification to a fully operational machine and something stops working, you will know exactly where to start looking for the problem.

The arrival of the tape machine at your studio is just the beginning of an in-depth evaluation process.
Resist the temptation to turn the machine on until your tech arrives. It has been moved, so someone must go through it, find all of the plug-in components and re-seat them.
If this is not done before you apply power, you run the risk of anything from minor to catastrophic damage. If the machine has not been run in a long period of time, it might be best to “bring it up” the first time using a Variac – a device that allows you to ramp up the power gradually.
Dirt is an enemy. It clogs airflow, causing components to overheat, and it finds its way into electrical connections, causing transport malfunction, noisy controls, audio signal degradation or loss, etc.
So, you might want to do some cleaning. Pull the covers and remove as much dust and dirt from the inside of the machine as possible. Some techs say vacuuming pulls dirt into places you don’t want it. Some say compressed air blows dirt into places you don’t want it. Be mindful of this when choosing which to use. Clean or replace all air filters.
Contacts including edge connectors, plug-in connectors, switches, pots, and relays should be carefully cleaned. Heads, guides, and rollers need to be cleaned and demagnetized. There are correct ways to do these things. Do your research!
Once your tech has gone through the machine and gotten it running, here are some things you might want to do:
Recapping. There are a lot of opinions about recapping, varying from “replace anything over 10 years old” to “if it ain’t broke, don’t fix it”. My personal experience is, if the cap is non-polar, you can probably leave it alone. Some old tantalum capacitors should be replaced for reliability. There are some nice tantalum replacements being made today that are worth considering. Old electrolytic capacitors invariably dry out and become slow and weak. They should be replaced to restore the machine’s performance and sonic integrity. In some cases, changing an electrolytic or tantalum capacitor before it fails can also protect other circuits from damage.
It’s always safe to replace an electrolytic cap with one of the same specs. However, today’s caps can be significantly better performers than their older counterparts. Capacitors in older machines were sometimes chosen based on available space on the circuit board. Since newer capacitors take up less space and do the job better, you might be able to choose new caps with better specs and higher capacity. Sometimes, you may not be able to find a replacement that is the exact value of the original. Your tech should be able to tell you which current unit will be a safe or even beneficial substitute.
Bearing replacement. Multitrack machines are full of bearings. They are in reeling motors, capstan motors, roller guides, tension sensors, flutter idlers, and counters. Any bad bearing will cause malfunction, stoppage, or vibration which ultimately turns up in the signal as flutter.
Good bearings should be virtually noiseless. If you can put a very light finger touch to the top of any rolling part and feel vibration, chances are good it’s time to change the bearings. Bearings go by classes. Use the highest class replacement you can find and certainly no lower class than the stock unit.
Pinch roller replacement. If your multitrack uses a pinch roller, be sure it’s in good shape. It should never be sticky. The surface should not be excessively soft or hard. There should be no cracks, pincushioning, or bowing. Most old pinch rollers need to be replaced.
Capstan resurfacing. Different machines use different capstan surfaces. If your capstan is metal and has a shiny band where it touches the tape, it is probably getting slippery from wear. Have the surface bead blasted and it will look and perform like new. If your capstan is coated, replacement capstans are generally available.
Repainting. Computerized paint matching systems can be found in the better paint stores, departments of major home improvement centers, and body shops. If you’re just doing touch-ups, be sure to match the finish (flat, satin, gloss, etc.) as well as the color. It should look as great as it sounds, right? With a little patience and finesse, you can make remarkable improvements to the appearance of your machine.
Upgrading: Going Beyond Restoration
You’ve done your homework, selected and purchased your multitrack, and restored it to full working condition. Hang onto your wallet! We’re ready to get into upgrades.

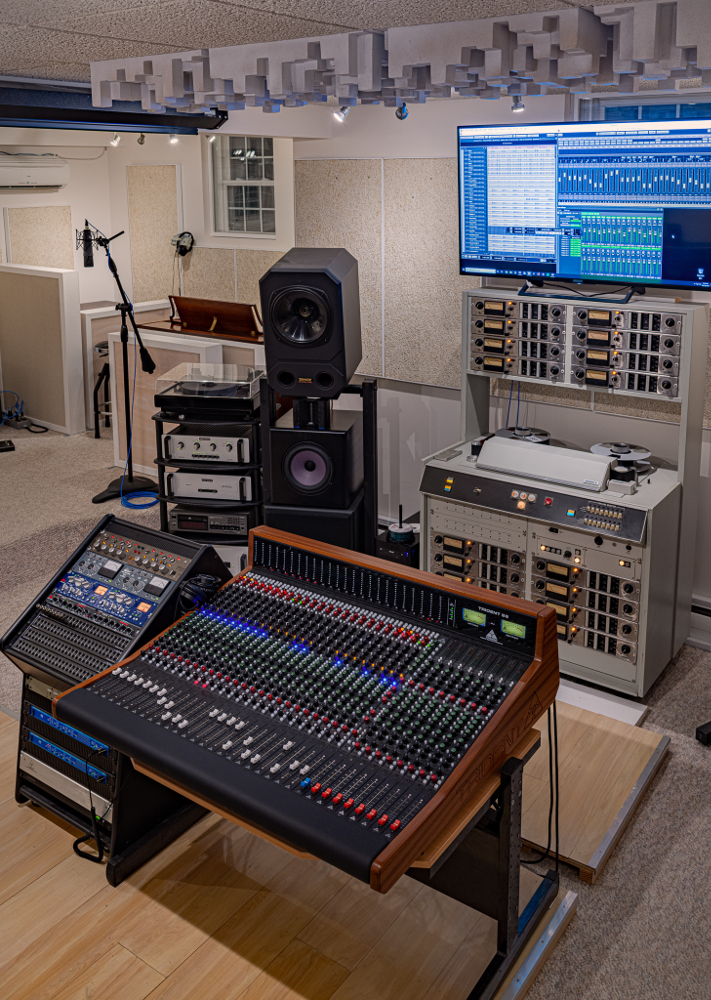
“Hang onto your wallet!” It’s time for the multitrack upgrades. A view of the sweet spot at Steve Puntolillo’s Mastercraft Recordings.
Working quietly in the background for the past two decades or more, analog diehards have been slowly but surely advancing the performance of analog tape recording. If you wish to squeak every bit of wonderfulness out of your multitrack, here are some areas you can explore to improve its performance:
Heads. No single component in your multitrack is more important. For some multitracks, there are replacement heads available that will improve performance, sometimes dramatically. Consult a head expert before purchasing or installing replacement heads.
If you can improve your erase head, you can potentially get deeper erasure and less crosstalk between channels. Double-gapped erase heads perform better than single-gapped erase heads. Erase head gaps that overlap each other in the guard band between tracks reduce crosstalk by erasing whatever signal bled out beyond the gap during recording.
Improving your machine’s record head can help you make a quieter and more accurate recording, but the biggest potential gain comes with improving the playback head. In almost any given analog recorder, record performance exceeds that of playback. There’s almost always more information going onto the tape than the machine is able to reproduce.
It’s like playing your favorite CD through a better monitoring system. You hear things you never heard before, but the recording hasn’t changed. The “improvement” was always there waiting to be revealed. Likewise, there is usually detail recorded onto the tape that your stock machine can’t reproduce. So, make better playback performance the initial focus of your improvements. In particular, the playback head is ultra-critical because whatever it fails to retrieve from the tape will never be heard in your mix.
Track Count: Another way to upgrade your multitrack is to increase your track width by lowering your track count. It’s pretty ironic to suggest that decreasing your track count might be an upgrade, but depending upon your priorities, it may be for you. This is because wider tracks sound and perform better.
Because the guard bands between tracks must be sufficient to prevent crosstalk, when track counts go up, track widths suffer more than you would expect. For instance, a lowly quarter-track consumer tape deck has tracks roughly the same width as a professional 2-inch 24-track machine. Both are only about half the track width of 2-inch 16-track. Increase your track width and you will hear a significant drop in tape noise and a healthy increase in punch. It’s not subtle.
Two easy and relatively inexpensive track conversions are to drop down from 2-inch 24-track to 2-inch 16-track, and from 1-inch 16-track to 1-inch 8-track. If you have a 2-inch machine and a bigger budget, you can look into 2-inch 8-track heads. Before you make a purchase, be sure your machine can handle the higher bias, record, and erase levels required to support these wider track heads. Also, since wider tracks increase your exposure to signal loss from misalignment, make sure your machine’s transport is capable of very precise tape handling.
How can you improve your mulitrack’s transport? Some transports are already either thoroughly optimized or don’t lend themselves to improvement. Other (usually older) transports are wide open for some very nice enhancements.
Scrape Flutter: An upgrade that decreases scrape flutter will actually provide an audible improvement in your mulitrack’s clarity of reproduction. Scrape flutter is the vibration of the tape caused by friction between the tape and the surface it is passing over. The frequency of this vibration is a function of tape speed (the higher the speed, the higher the resonance frequency) and the distance between the points that the tape is contacting (the longer the distance, the lower the frequency).
In general, upgrades that use precision rolling guides to replace static (non-rotating) guides in the tape path will tend to reduce scrape flutter with a resulting improvement in signal clarity. Some multitrack head assemblies are machined and ready for extra optional scrape flutter idlers (rollers). These “damp” the vibration of the tape and can be very helpful in reducing scrape flutter. Remember that any time you replace a static component in the tape path with one that rolls, you must be sure it is of ultra high quality and precision or it may add flutter instead of reducing it.
Tape Speed: How about a speed change? If your transport came equipped for 7.5/15 ips operation, you might want to outfit it for 15/30 ips operation instead. For 30 ips operation, your record and play heads, record and play equalizers, and capstan drive, must all be compatible. After the changeover, your transport tensions may require a complete readjustment.
Doubling the speed of the tape from 15 ips to 30 ips changes the frequency response of the machine, enhancing the high frequencies at the expense of the lowest frequencies. Find out if your multitrack supports one of the playback heads designed to extend and recover lost low frequency response at 30 ips so you can enjoy the best of both worlds.
Listen, Evaluate, and Take the Next Upgrade Steps
Sometimes, you can improve the sonic performance of your multitrack by updating or upgrading individual components. Some likely candidates for upgrades are capacitors, transistors, resistors, op amps, and other audio-related integrated circuits.

User your ears to hear how your analog multitrack tape machine is fitting in to your studio’s sound.
This gets controversial, so I’ll keep it simple. You want to track down devices that affect the audio signal path or cleanliness of the power delivered to them, and replace them with ones of higher quality.
Better specs don’t always equal better sounding, so make one change at a time and listen to the results. Don’t let your hopes or your imagination get the best of you. You must observe the rules of doing meaningful A/B comparisons and make your decisions based on them.
For record or playback electronics, try changing just two channels, record some music with lots of listening cues, and then listen critically to see if your improvement is both audible and desirable. If so, you can go ahead and do the rest of the channels. Remember, a lot of very small gains can eventually combine to make a significant overall improvement, especially when multiplied by many channels.
Be sure you’re delivering good, clean power to your machine before you tackle any in-depth critical listening tests. Your grounding system for both power and audio must be right. And, be sure to invest in a good grade of wiring with clean solid connections in and out.
Transfomers: Audio transformers are a subject that deserves particular attention. If your multitrack uses them, you may find them on mic inputs, line inputs, line outputs, or between the repro head and playback electronics. Depending upon how transformers are used in the circuit, they can sometimes be bypassed, replaced with active circuitry, upgraded to a more modern equivalent, or left in place for their unique sonic signature.
For a more vintage sound, you probably want vintage transformers. If you are looking for less coloration, you could find you have to upgrade or bypass them. Do some listening tests. You may discover you are a lover of the sound of a particular transformer or transformers in general, or you might be thrilled with the change you get by bypassing a transformer. The differences can be significant and it’s worth the effort to do what it takes to find out for yourself.
Tape Noise and Tape Speed: Some engineers love the sound of analog tape recording, but object to tape noise. Before you consider purchasing a noise reduction system, there are alternative ways of reducing noise that you should investigate.
Let’s talk first about tape speed and your machine’s record/ play EQ curve. If you plan to run at 30 ips (inches per second), you will likely be using the AES EQ curve. This is a decent curve and many engineers feel that if you combine 30 ips AES EQ with the best of the modern high output/low noise tapes—and some skill with setting record levels—you can operate very happily without noise reduction.
If you must operate at 15 ips, and your machine is set up and aligned for NAB EQ, you might want to consider a switch to the IEC1 (also called CCIR) curve. The 15 ips NAB curve was developed in the 1950s for very early tape formulations and does not take advantage of the improved performance of modern tapes. Neither AES or IEC1 curves are optimized for today’s tapes either, but, with regard to noise, they are both far better performers than the NAB curve.
You may or may not need to make some component changes in your EQ circuitry to change your machine’s 15 ips curve from NAB to IEC1. Again, try a pair of channels and make comparisons. Different curves sound different and you should take a listen first.
Another way to lower your noise floor without using noise reduction is to use a tape formulation that is inherently quieter and/or allows you to record at a higher level (thus improving signal to noise ratio). Note that different tape formulations also have different sonic characteristics, so be prepared to do some more comparisons to determine what you like best.
If you’ve chosen your combination of tape speed, EQ curve, and tape formulation, and still feel there is more noise than you can live with, perhaps you can try going to wider tracks to take you the rest of the way.
Noise Reduction: If not, you can always use a noise reduction system. There are four professional noise reduction systems to choose from: Dolby A, Dolby SR, dbx Type I, and Telcom C4. To a greater or lesser extent, they all reduce the noise added by the tape recorder, and each has its individual strengths and weaknesses.
The best way to evaluate noise reduction systems is to borrow or rent a two-channel unit of each type and conduct careful listening tests. Try some stereo program material as well as solo electric bass, solo piano, and a single tambourine or hi-hat to get a good handle on how effective each system is at reducing noise, how it changes the sound of your recordings, and what audible mishaps might occur from its use.
In Conclusion
So there you have it! You’re now prepared to tackle choosing, purchasing, restoring, and upgrading a professional analog multitrack recorder. I hope you enjoy each step on the way to your ultimate analog experience. May the music you record be as wonderful as your finished machine sounds.
Steve Puntolillo is the founder of Mastercraft Recordings. A music producer, musician, recording, mixing and mastering engineer, Steve used his decades of analog tape and digital audio production expertise to launch Sonicraft A2DX Lab.
Renowned in the professional audio industry as the “ultimate analog to digital transfer facility”, Sonicraft became essential to the lucrative world of musical reissues, winning over dozens of labels who entrusted it with analog tape recordings of some of the world’s most beloved artists. These include: Bruce Springsteen, Bob Dylan, Jimi Hendrix, Janis Joplin, Dire Straits, Grateful Dead, REM, and hundreds more. Learn more about Steve and Mastercraft here!
Please note: When you buy products through links on this page, we may earn an affiliate commission.


