How To Recover Flood-Damaged Audio Gear

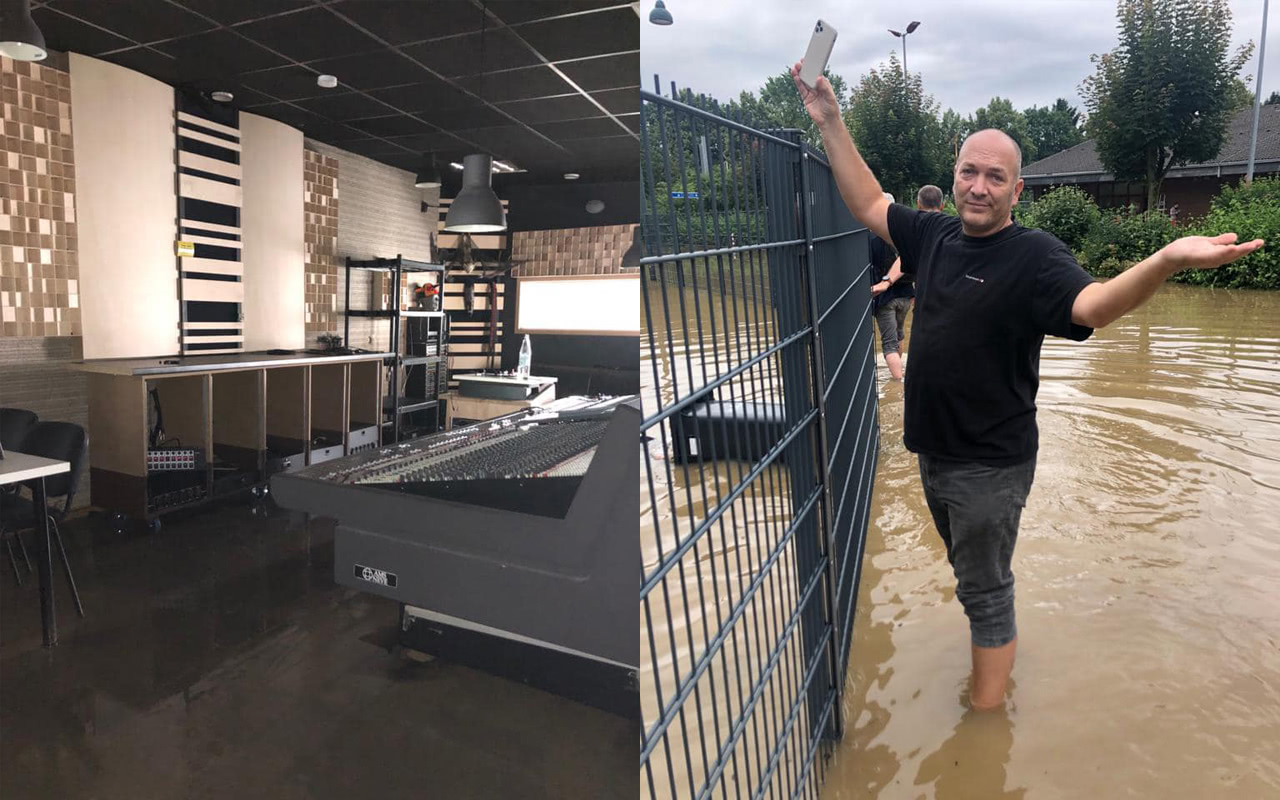
Dirk Ulrich of Plugin Alliance and Brainworx stands in shin-deep water at the site of the flood damage, which claimed his prized Neve console and his business’ headquarters.
This July, the headquarters of Plugin Alliance and Brainworx were ruined by unprecedented flooding in Germany.
Among the casualties were the entire first floor of their offices, and their music production studio, including Dirk Ulrich’s prized Neve VR console, which was the basis for the extremely popular bx_console N plugin.
This is not the first time flooding has affected a studio close to SonicScoop. In 2016, flooding in Baton Rouge destroyed the homes, studios and possessions of some who worked with audio gear maker PreSonus.
In 2012, hurricane Sandy completely destroyed the recently-opened South Sound in Gowanus Brooklyn. Earlier on, Joel Hamilton of Studio G Brooklyn found his old studios in the midwest destroyed by floodwater as well.
As dark as these times can be, there is a sliver of hope: It turns out that even audio gear that has been submerged completely by floodwaters can be recovered surprisingly often. But you have to take the right steps, and quickly.
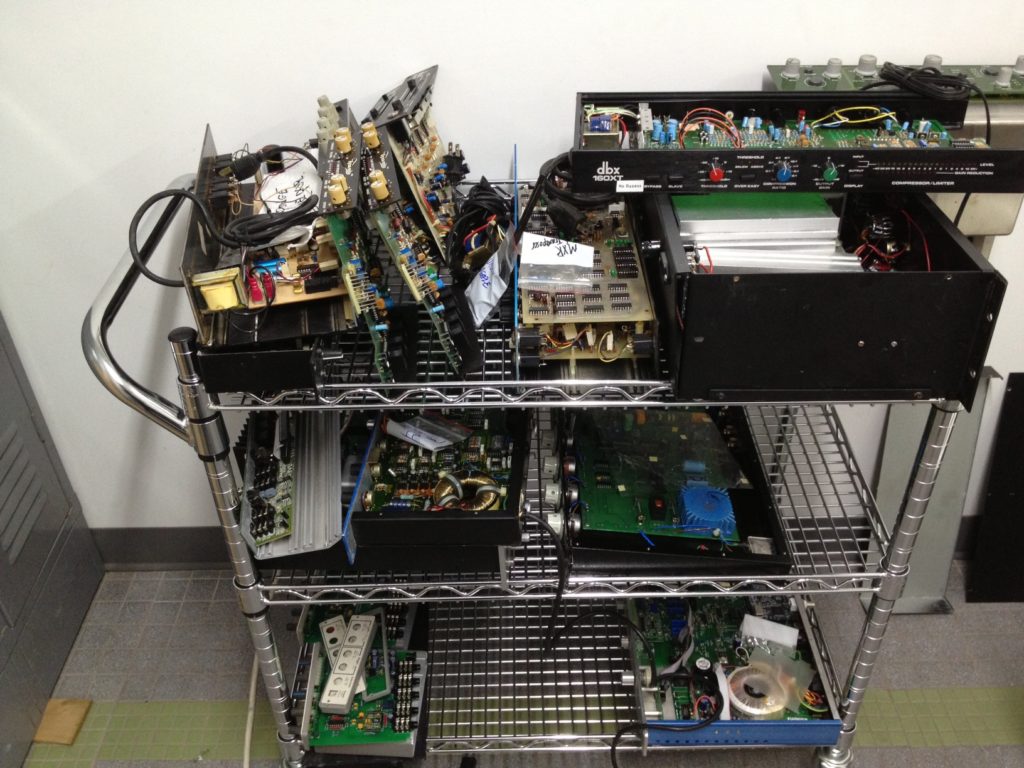
Joel Hamilton has done it at least twice, going through a painstaking process to recover a surprising amount of flood damaged gear from both his old studio in the midwest, and from the South Sound.
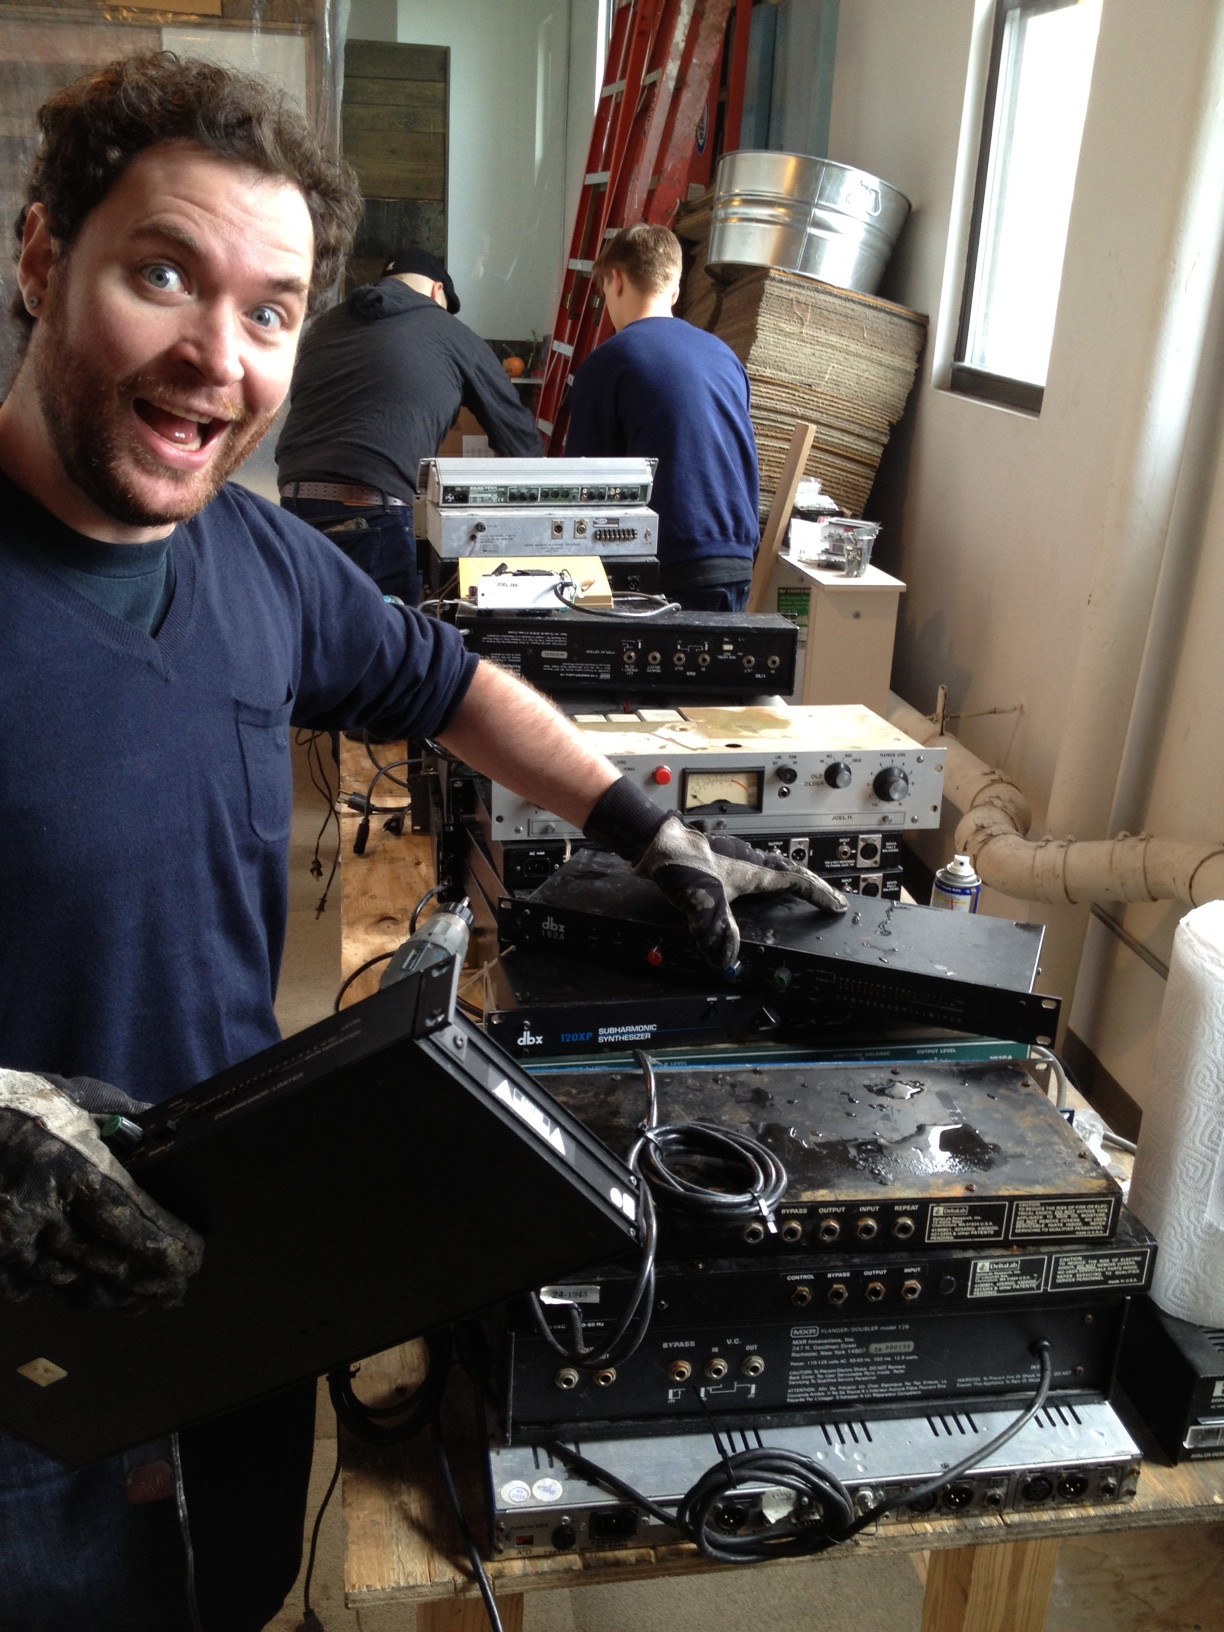
I was there in 2012 when he and his studio assistants and volunteers helped salvage some of South Sound’s flood damaged gear, and I learned the process first hand, trying my own hand at it as well. I was amazed to find that a good portion of that flood damaged gear could be brought back to life.
Today, I want to pass those techniques along to you, and anyone else who may need it some day. For posterity, here’s the full length article and “how to” I wrote on the subject back in 2012. It first appeared in my old blog, Trust Me I’m A Scientist. I hope you never need it. But if you do, I hope you find it in good health.
Recovering Flood Damaged Audio Gear
Originally published December 3, 2012.
Joel Hamilton was in his old studio in the American Midwest when the great floods of 1993 hit: “I watched, personally, with a flashlight in my teeth, as the meter bridge of my console went under water.”
“It was incredible. They were the kinds of floods that people read about in National Geographic. When the [Missouri river] overflowed, it backed up through the sewer system of Kansas City and all the low-lying areas were brought to the same level as the river.”
“Everything went under,” he says. “The water level was 7 feet over my head in the control room.”
Joel and his partners were able to run some of their equipment up to safety on the second floor, but despite their efforts, these flash flood rose in minutes, and almost everything of major value was submerged.
It was a scene not unlike that of hurricane Sandy, which ravaged the East Coast this October. The great floods in the Midwest cost billions, left scores dead and some towns reporting ongoing flood conditions for as long as 195 days. But as colossal of a tragedy as they were, the official costs and death toll of Sandy have been higher still.
When Hamilton and his crew were hit by flash floods in ’93, a local engineer named Mike Miller walked them through the process of recovering much of their water-damaged gear. This year, when studio owners in his new community of Brooklyn were hit hard by Sandy, he paid the favor forward, using what he learned from Miller to help his neighbors reverse some of the damage done to their gear.
It’s hard to imagine if you haven’t seen the results for yourself, but Hamilton claims studio owners who act fast may be able to recover 65%-85% of their equipment, even when that gear has essentially been sitting at the bottom of river full of silt and debris.
What follows is Joel’s own step-by-step guide on how, with a bit of work, large quantities of flood-damaged gear can be restored.
How To Bring Drowned Gear Back To Life
Step 1: Flood Out the Flood Water
“A flood is the absolute worst situation possible, because it puts water into your room with such amazing force and then it recedes incredibly gently and delicately,” Joel says.
“You’ve basically pressurized a piece of gear with toxic Gowanus saltwater or whatever it may be, but then that water slowly drains out, perfectly coating every single surface and component with corrosive salt and silt and pollution.”
According to Joel, the very first thing to do is to wash out that corrosive floodwater, and all of its residue, with clean freshwater – even if it’s just from a hose or a tap.
“First of all, don’t listen to neurotic Gearslutz-type techs who will freak out and say ‘you can’t use tap water because it will leave a residue!’ Clearly they’ve never seen someone who’s fallen into the Gowanus canal be rushed to the hospital, or seen what saltwater can do to a piece of metal.”
The steps that follow are for extreme conditions only. If you’re faced with a small spill on a single piece of gear, the best bet is to power it down, and get it to a qualified tech, fast.
“If you spill coffee in your console, obviously you don’t dip the whole thing in a pool. But when you’re dealing with flood damage of a whole studio worth of gear, you basically have to do a military-level triage where you get the dirt and polluted water out of the gear with any kind of clean, fresh water, which is generally going to be simple tap water. That first rinse can be in the shower or in the bath tub. It’s just got to run clean.”
“And keep it wet – The sooner you can get that thing soaked with fresh water, the better,” because as soon as it starts to dry, metal will start to corrode and dirt and residue will cake on tightly.
“But do not turn the pots,” Joel adds, “and do not flip any switches. Just leave them in the same state they were in when you removed it from the flooded area.”
Step 2: Pat Dry, Then Apply WD40 to Displace Water
The next step is to get the gear as dry as possible, as fast as possible, in order to discourage rust and corrosion.
First, pat your equipment dry, inside and out, using cloth or paper towels. Then “you’ve got to displace the remaining water with anything you can get.”
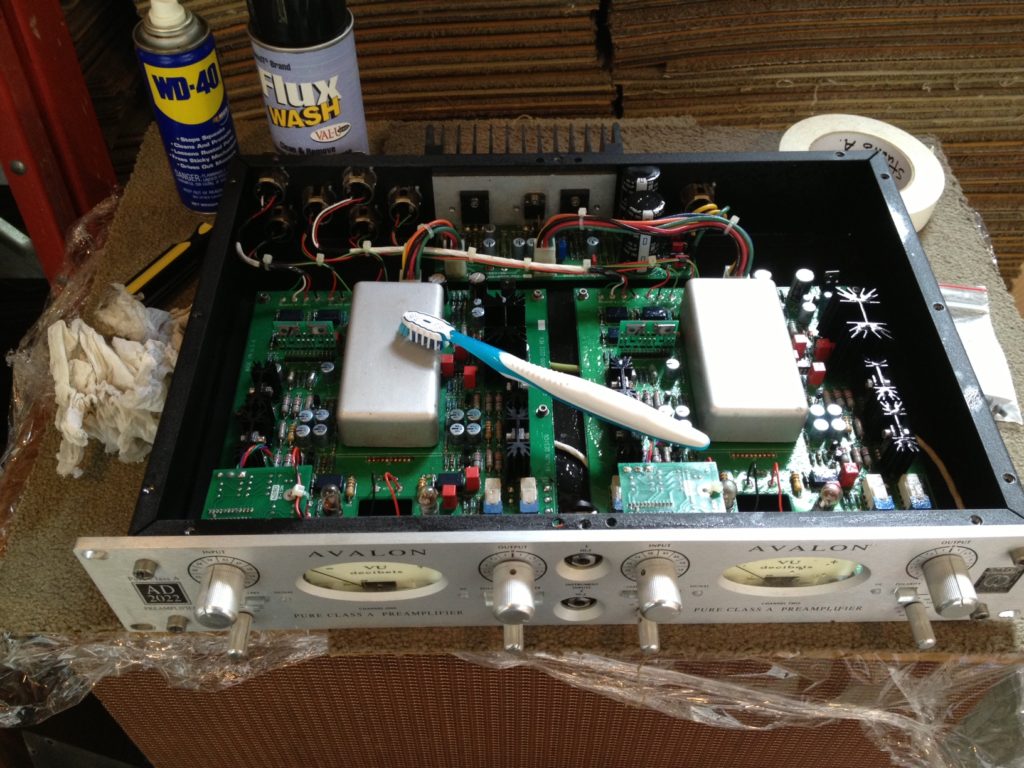
“It doesn’t have to be super-expensive – You can just dust the gear with WD40. Spray it all over, especially in the nooks and crannies, paying special attention to make sure it displaces the water that gets stuck in the PCB.”
“Also make sure to apply it to anything metal that you don’t want to corrode, even the screw heads and the rack eears.”
“You have to get this off later,” so it doesn’t form a gummy surface that traps dirt, “but at least it halts the process of the water corroding everything,” and buys you some time so you can still hose down the next piece of gear.
Step 3: Dry One Piece While You Wash Down The Next
“Turn on every single electrical heater and heat source that you have,” says Hamilton.
“People will say to use cold rooms to limit the corrosion, but when you’re doing a fast triage of an entire studio’s worth of stuff, the key is getting the stuff clean, displacing the water, and heat-drying it with good air circulation.”
“We had two dehumidifiers and a heater all blowing air on the baker’s racks that I normally use to store mics. And we set up one of the bathrooms as a sauna to cook the water out of things like power transformer windings, where it really gets trapped and it’s difficult to get the moisture out.”
Step 4: Flush With No-Residue Contact Cleaner
At some point, “the WD40 kind of bubbles up and beads on the surface of the PCB.”
Now it’s time to remove it using “Flux Wash or Big Bath or any kind of non-filmy contact cleaner that leaves no residue behind.” At this point, you do not want to use an oily contact cleaner like Deoxit, which leaves a lubricant behind when it cleans.
The primary goal of this step is to remove the WD40 and whatever water moisture may still be left. But you’ll also want to start flushing out the pots and switches with the no residue contact cleaner as well, being sure to exercise them as you do.
Note that you may need to open up pots and switches to get enough access to effectively clean off the wipers and rotary contacts. You can also apply a little squirt of lubricating contact cleaner to the post and switches, and then exercise them a bit more.
Step 5: More Drying
Once you’ve flushed all the WD40 away with contact-cleaner, you can cycle your gear again, putting one newly-cleaned piece onto the drying rack, and subjecting the next piece to a good hose-down with Flux Wash or Big Bath.
Step 6: Q-Tips and Alcohol
Now comes the detail work. You’ll need anhydrous alcohol – anything 91% alcohol content or higher, which will evaporate immediately. This is the kind of stuff you use to clean tape machine heads; not cheap rubbing alcohol, which will leave water residue and promote rusting and corrosion.
“Using Q-Tips, follow every trace inside the gear, and clean any place that looks chalky or like it’s starting to corrode. You won’t believe how quickly this will happen – within hours you’ll see white chalkiness or a rusty kind of tarnish on TRS jacks.”
At this point, Joel says that you’re “visually cleaning the insides.”
“The stuff has been immersed. It hasn’t been beat up, and nothing is ‘broken’ in the traditional sense, so you’re just cleaning it like you’d clean a lamp you got orange juice on or something. You’re not even thinking about the fact that you’re going to be putting electricity in it later. Just use your eyes and your brain, and if it
looks
super clean, it’s probably going to work.”
Step 7: The Moment of Truth.
The next and final step consists of two parts. Please note that you only want to do this bit yourself if you have some experience with electronics and can be certain you won’t fry yourself.
(Needless Reminder: Electricity is Dangerous. Use caution, and if you don’t know what you’re doing, ask for help from someone who does!)
First, you’ll want to isolate the gear’s power source and make sure it’s functioning properly. “Take a look at the power supply section by finding where the power comes into the piece of gear from the wall,” says Hamilton. “Then, find where that power section outputs DC current onto the PCB board.”
“You want to desolder the red and the black leads where the power supply feeds DC to the board. That way, you can test the power supply separately first without taking out any sensitive electronics if there’s a problem.”
“You [look at it with a voltmeter] and say “Oh, 15 volts plus and minus, that’s what this is spec’d for, so at least we’ve got the right amount power going to the rest of the expensive electronics. Then you reattach those wires and bring it up slowly back to 120 volts.”
“This is an important part,” says Joel.
And you’ll want to use a Variac to ensure that you don’t accidentally damage any gear that still has a chance of being saved.
“You want to bring up the Variac slowly, and you’ve got to measure current draw as you bring the voltage up with the Variac. If the piece of gear starts to draw like, a bazillion amps before you get up to 120 volts, it means the windings in the power transformer are probably shorting and you know to back off.”
Note that each piece of gear may need to dry overnight or longer for the heavy windings of a power transformer to dry out. “You’ll also want to listen carefully for what’s basically water boiling or power arcing inside the transformer.”
And if the power section seems to be working okay? “At that point, when the power supply works, in my experience, the piece of gear usually works too.”
It’s Alive
It may sound pretty incredible, but it all seems to check out. Hamilton himself claims that a success rate of 65%-85% can be achieved by staying calm, acting fast and following these steps.
Of course, your success rate depends a little bit on how you look at things. When Joel states a success rate this high, he also recognizes that you may need to replace a VU meter or a switch or a power supply here and there. But if the steps above can take even the hardest-hit gear from hopeless to salvageable, then it’s hard to argue with calling that a mission accomplished.
Joel says that it’s rare, “aside from the electro-mechanical bits,” like meters and speakers and diaphragms, “that you can’t salvage anything. This is plastic and copper and steel that we’re talking about.”
“Nines times out of ten, when there is a problem, it’s going to be with the power transformer,” he says. Some of them never come fully clean, or dry out properly. But if you can avoid hooking a bad power transformer up to the piece of gear it’s meant to power, you generally can avoid causing irreparable harm.
To add a little context, Joel remembers the restoration of his own vintage mixing desk. “I watched my Neve console go into a hydro-sonic cleaning tank filled with distilled water to vibrate for 24 hours.”
“It’s the same thing you would deliberately do to restore a Fairchild compressor that was found in a closet somewhere. But just because it’s a deliberate immersion in water, doesn’t mean it’s not an immersion.”
Clearly, gear can survive a bout with water, even if it does takes a lot of speed, time and effort. In the case of Sandy, Joel’s entire staff at Studio G pitched in to help local studio owners get some of their gear back on its feet, and much of the gear had to dry overnight or longer during steps 5 and 6, to ensure that power transformers were able to shed their moisture.
Although it is possible to insure recording equipment, be aware that not all plans will cover damage from floods – And even those that do may not cover floods when they come on the backs of hurricanes. Even if they do, “good luck convincing them that this old piece of thingie is worth $5000,” Joel adds.
“For me, or for anyone who has who has some rare, esoteric, or high-end gear, you form a personal relationship with these things. It’s not like the bumper of a car. And even if you do get what ever amount that weirdo compressor is worth, you can’t necessarily find a place to buy another one!”
His final words of advice when looking at a studio full of flooded gear?
“Don’t despair and treat the stuff like it’s broken gear. Don’t just throw it in a pile. If a friend got hit by a car, you don’t beat him – he’s still your friend! You get help. Just don’t treat it like junk until it’s determined to be junk.”
As for a timeline to get started? “Sooner is better,” Joel says, “and we’re talking hours and not days.”
The next time there’s a flood, I hope these words find you and the people you know, fast.
Justin Colletti is a mastering engineer and director of content for SonicScoop.
Please note: When you buy products through links on this page, we may earn an affiliate commission.


[…] Among the casualties were the entire first floor of their offices, and their music production studio, including Dirk Ulrich’s prized Neve VR console, which was the basis for the extremely popular bx_console N plugin. Read more… […]