Master Plan: Kevorkian Mastering – Greenpoint, Brooklyn
As you reach the elite end of mastering, you know that mastering engineers take their craft very, very seriously. Talking shop with Fred Kevorkian is a firm reminder of that fact.
His decades of experience have added up to a big discography, from the White Stripes to Beyonce, The Walkmen, and Billy Cobham, with countless major label and indie artists in between. Kevorkian’s audio career kicked off in France, then landed him in the US at Sear Sound in New York City, where he rose to chief recording engineer and collaborated with the inimitable Walter Sear on custom equipment design.
As often happens, Kevorkian’s recording adventures led him to mastering. His suites took him from Studio B at Sear Sound to eventually being a resident of the world famous Avatar Studios. After Avatar was sold and became Power Station at Berklee NYC, Kevorkian would embark on a challenging journey to find an ideal home.
You’ll see in this SonicScoop “Master Plan” that he’s landed at a happy place in Greenpoint, Brooklyn – one tailor made to his exacting ears and super standards. Kevorkian has an unabashedly analog approach, with only truly classic pieces making it into his mastering console. That said, plugins do have their place in his signal path – find out which ones. Plus, he’s rocking to his best monitoring system ever.
Extending his analog mastery, why does Fred Kevorkian have not one but three tape machines at the ready? Turns out there’s an important trend afoot in mastering, and he’s on top of it. Extra hint: One of these beauties is ready to roll with some SERIOUS low end.
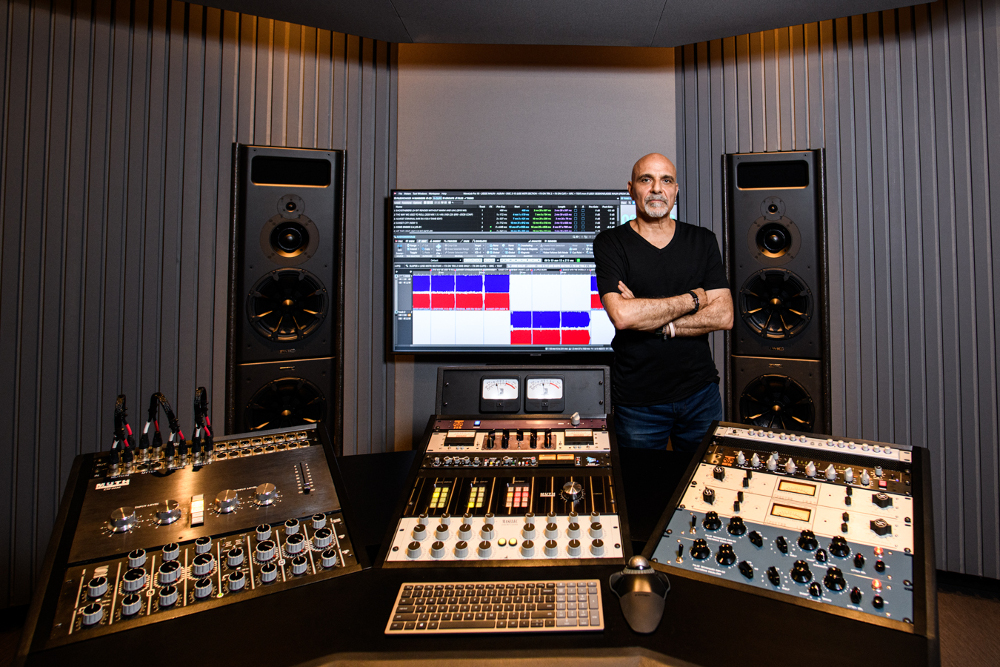
Fred Kevorkian is truly at home in his new room in Greenpoint, Brooklyn. (Photo credit: Dante Torrieri)
Facility Name: Kevorkian Mastering
Location: Greenpoint, Brooklyn, NY
Clients/Credits: The White Stripes, Iggy Pop, Dave Matthews Band, Maroon Five, Phish, Jerry Garcia Band, Beyonce, Billy Cobham…
How I Hear It: To me, each project is unique. There are too many variables involved to have one approach that will work for every job.
Of course, the type of music usually dictates the direction I would go for the mastering, but I always consider many other important facts that may influence the outcome. I’d like to ask some basic questions:
- Is this a returning client?
- If so, what was his/her goals during the previous sessions?
- How did the final master sound?
- Was loudness an important factor?
- Was it on the bright side?
- Hyped and over processed?
- Warm and natural? And so on…
All very useful information I’d like to gather before starting a session. Basically, I try to do my homework to facilitate the mastering process avoiding many revisions down the line.
On the other hand, if it is a first-time client, I would try to find out the goals and expectations for the project. You will be surprised how many producers would end up with a very different sound after the mastering of a similar track. This really highlights the importance of understanding the client: Being on the same page is not always easy but it’s the key part of the process. Getting the job done relies mostly on experience and common sense.
My favorite situation is when the client gives me carte blanche: “Do your thing, have fun with it!” I can really go for it and do exactly what I feel is right for the track! When it is approved after the first round, it’s the cherry on the cake!
From Berklee to Brooklyn – An Odyssey: Yes, I had to face many unexpected challenges moving studios from the former Avatar Studios to where I am now.
When it was time to leave Berklee/Power Station in January, 2019 I had already signed a 5-year lease in a commercial building in Brooklyn. A great space surrounded with a lot of artists, musicians, and recording studios. Francis Manzella (R.I.P.) designed the room and Jim Keller was the contractor in charge. We filed for all the necessary permits and six months later we finally got approved by the DOB and started the construction. In the meantime, I was able to work out of “The Workshop”, a few blocks away from my future studio, sharing a room with mastering engineer Alex Psaroudakis.
Shortly after we had a few walls up in the new space I was constructing, the Brooklyn commercial building’s board decided to hire a new management company to run the building. And this is when things started to get more and more complicated.
The new management had different ideas, and kept changing the requirements regarding the permits, insurance, etc… Every time we complied, and every time they came up with another set of rules. It seemed impossible to move forward. …And then Covid hit! Another layer of headaches. As you can imagine, with the pandemic it became even more difficult to get anything done.
In September 2021, I sadly decided to abandon the entire project. At that moment, my only viable option was to take over the shared space with Alex which was going to be available in a couple of months. I must say, it was a very hard decision to make but I am glad I did. I hired an attorney and got out of the lease! What a mess! I was just trying to build a control room, not a suspended bridge!
Setting Up The Studio: The room I took over was designed by acoustician John Brandt. It was built from scratch, so it has all the “golden ratios” proportions. It is a “front loaded” room which means that the engineer seats very close to the speakers.
The past few months I really enjoyed working in that room. I felt comfortable and like the experience of listening to a more direct and precise sound coming off the monitors. When I took over the space, I kept the same layout and all the in-wall acoustical treatment, membrane traps etc… Unfortunately, because of the size and depth of my PMC monitors we had to move the front wall by a few inches in order to mount the speakers perfectly flush. Not an easy task!
We also re-designed a new and very elaborate sound cloud as well. The rest of the finishing touches were a lot simpler, including the flooring, diffusers, and fabric. But I had one goal in mind: No wood color should show anywhere in the control room! I have been surrounded by wood tones in every studio I worked in. It was time to do something different.
The room came out great. Not only does it sound amazing, but looks really sharp too! I must say, it is a very accurate and pleasant environment to work in.
Key Personnel: Kevorkian Mastering is a small facility. Only Larry Lachmann and I are fulltime here. Larry’s background started as a booking agent for senior engineers at Sterling Sound. He then worked with Herb Powers and a few other studios, always in the mastering field. Larry is the studio manager, but he also has great ears and does mastering himself, for his own set of clients.
Analog Approach: The analog gear I own is very important because I have been using it in the same setup for over two decades. I know it so well that I rarely second guess anymore. I can predict how the gear will react before turning the knobs. Through the years, I was able to develop a very specific and efficient workflow that seemed to suit pretty much all my clients. They really appreciate getting results quickly and smoothly.
To me, the analog gear is the obvious choice for shaping the overall tone of a track, while the digital hardware and plugins are excellent for correcting specific issues.
Getting into the Gear – What’s the Common Thread? If I must give them a common description it will be: “Classic”.
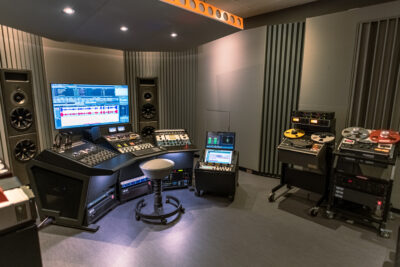
Another angle on Fred Kevorkian’s “front-loaded” room, designed by acoustician John Brandt. (Photo Credit: Dante Torrieri)
A while ago, I was lucky enough to be able to purchase a bunch of incredible pieces of gear at a very affordable price. They are all state-of-the-art equipment you can find in most reputable mastering suites. They have their fingerprints all over thousands of records mastered in the past few decades.
They are musical, precise, reliable, consistent, and mostly transparent when needed. They really work well in any situation. That’s what makes them “Classic”.
The centerpiece is the Muth CM-2020 transfer console – this is the prototype to all the Sterling Sound consoles still in use today.
As far as equalizers, we have a rare Sontec MES432c/6 that we use mostly as a front-end stereo EQ. In our M/S loop we use a very early model (serial# 005) of the Maselec MEA-2. We also have a Dangerous Bax EQ and two mastering Pultec’s EQM-1S3 to complete our collection. As you can imagine the Pultecs are great tools to set a specific tone with broad curves.
For compressors we have the choice between the Manley Vari-Mu (mastering version) and an API 2500, or of course a combination of both. For the Manley Compressor/Limiter, we own a very early model (Serial #002) that features the original 6386 input tubes instead of the 5670 implemented later.
I recently purchased a pair of Spectra Sonics Model 610 complimiters, mainly for its super fast limiting action. I am still in the process of modifying them to allow a constant unity gain for any threshold settings. They will be in line very soon.
Still in the analog domain, we also have a Maselec MDS-2 Dual Mono De-Esser. The monitoring and switching of the sources are done by another Chris Muth signature box, the CM-2040.
As far as digital hardware processing, I love my Weiss DS-1MK3 digital mastering compressor. Not sure if I could work without it? It’s worth every penny! I also own this unit as a plugin, but it’s not even close to the hardware in my opinion. And last in the chain, I sometimes like to use the Waves L2 hardware Ultramaximizer (unlinked) to catch certain peaks before capturing the processed file in the computer – it’s perfect to soften piano notes, or tom hits sticking out a bit too much.
The monitors are PMC MB2’s with XBD bass cabinets to enhance their headroom. They are powered by Bryston mono block amplifiers. In addition to the PMC’s, two 12” Velodyne subwoofers are providing the extended response below 30hz. This is by far the best monitoring system I ever used.
For converters we have Prism and Mytec for A/D’s and Lavry and Benchmark for D/A’s. I must say my older Prism AD124 is my favorite sounding D/A. I use it every time Hi Resolution files (88.2 or 96Khz) are not required. It has that great sound, especially when the input stage is pushed a bit harder. It perfectly fits most of the projects I work on.
As my main workstation I use Wavelab 10 Pro to do all my editing, final processing, rendering, and to run the master DDP’s. I have been using Wavelab platforms for over twenty years. My workflow depends on it.
Tape Trio! Having multiple tape machines wasn’t really a goal, it just happened though the years. When I started in mastering, more than half the projects were mixed to analog tapes. The rest were done on DAT’s or CD’s. Mixes as audio file formats were not available yet.
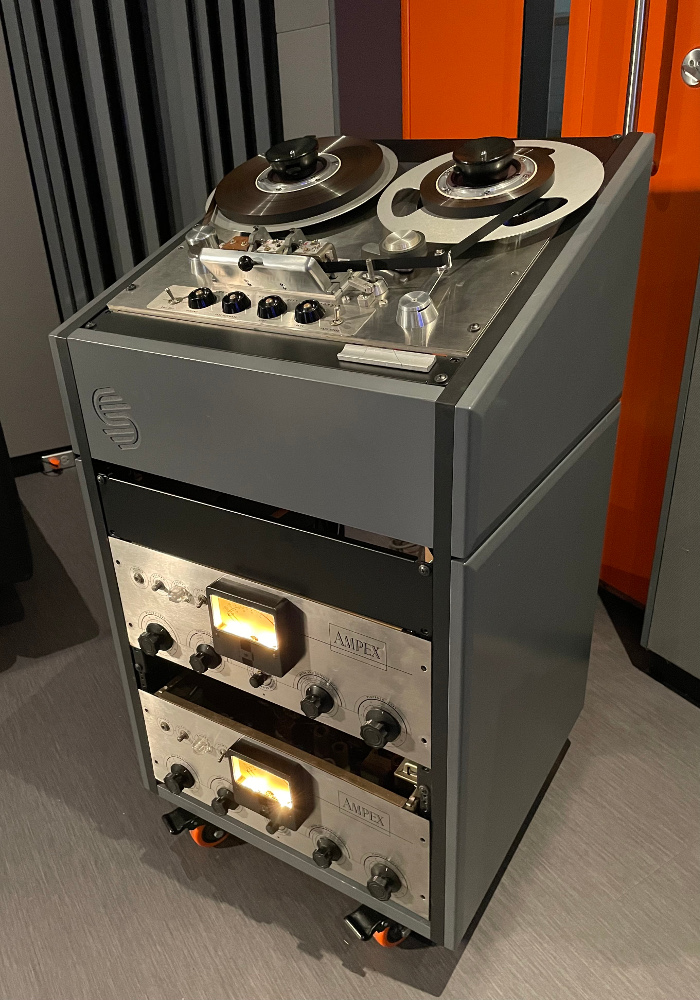
My main machine is an Ampex ATR 102, rebuilt by Jeff Gilman MDI Precision Motor Works. It can be configured as 1/2” or 1/4″ with 4 speed capability. Five or six years ago I got a Studer/Revox PR99 ¼”. It is not considered as a “classic” in the mastering world, but it provides an alternate transport to gently handle problematic, very old tapes. As a recorder, it is also a very good option for recreating the 15ips/¼” (inches per second) vibe from the ‘70’s that so many clients are looking for. The ratio noise floor/bandwidth is just right for this application.
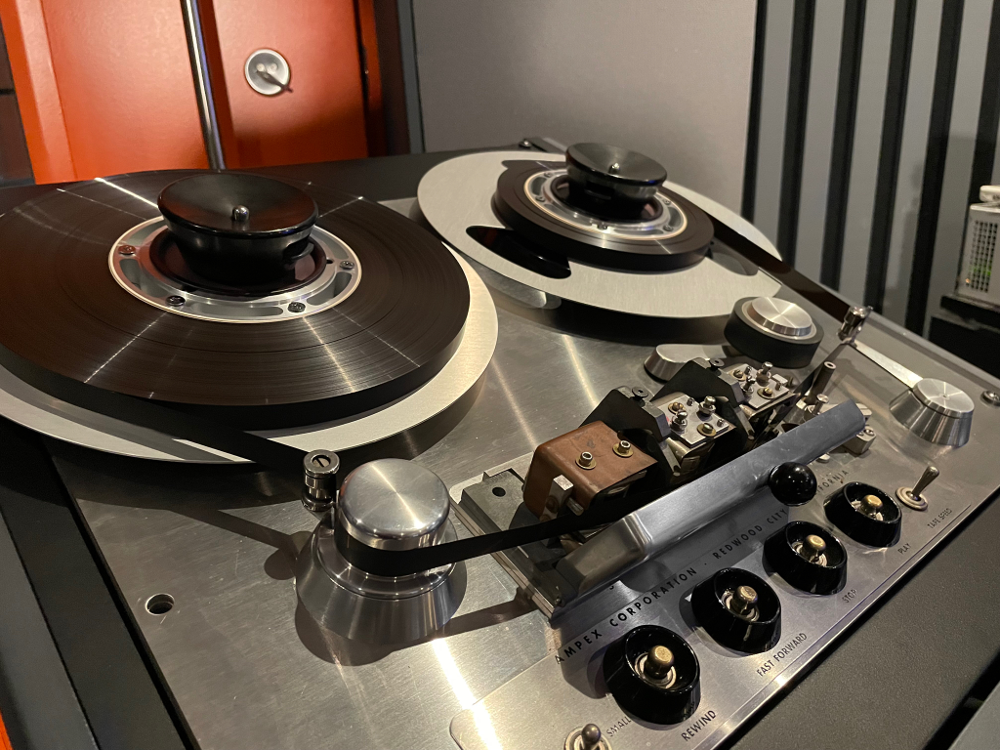
The latest machine is my new baby! It’s the result of my “Covid project” that I just finished, and the machine turned out great, even better than I envisioned it. The goal was to build a 1/2”-15ips Vacuum Tube recorder/player.
My intention wasn’t to design a brand-new machine from scratch, but instead to upgrade and improve an old classic: The Ampex 351 from the late 1950’s.
I am getting more and more requests from clients to transfer their mixes to tape before mastering. I believe this type of machine would be the perfect addition for the job.
I started out by purchasing two 351 tube electronics and later found a 1/4” transport fitted with mono full track heads. I completely rebuilt both channels of electronics using all high-quality resistors and capacitors with tighter tolerances. The result is a closer Left/Right match critical in mastering.
Keeping the original design as much as possible was important to me, as well as achieving better overall performances. There was a fine line and a good balance to be found between the two.
The motors were sent to Dave Dintenfass of Full Track Production to be overhauled with new bearings and refurbished breaks assemblies. Dave also provided the tension arm, pulley and guides necessary to convert the tape path format from 1/4” to 1/2”. Not to forget the brand-new rubber pinch roller to replace the old dried one.
The head stack was put together by John French of JRF Magnetics) with Hi-Z /Flux Magnetic heads. And lastly, to house the machine, I designed an old school cabinet custom built by Sterling Modular.
After about a year we finally had a functioning machine. Because “functioning” wasn’t good enough, it took another six months to make it sound just right. These old electronics and tape machines were not designed to have an even and extended frequency response comparable to modern equipment. For example, everything below 30 or 40Hz was considered noise… so unfortunately these frequencies were intentionally rolled off to clean up the signal.
Numerous efforts and lots of research were necessary to get satisfactory results and have a machine ready for the mastering world! Remember, it’s not just because a piece of equipment has tubes and transformers that it will sound fat!
This machine is not afraid of programs with massive low end! It is flat from 23Hz to 17kHz +/- 1dB, and it really sounds amazing now. We did many listening tests between a digital mix and the same mix recorded and played off the tape. Going from digital to tape, the difference wasn’t always drastic. But it became more apparent when switching back from tape to the original source. It was like something pleasant was missing. Not just the expected coloration but something more subtle. In other words, it looks like the tape was interacting with the reward center of our brain… Audio dopamine?
Used on the right project, and properly tweaked, this tape machine can really enhance a mix without heavy processing. I am extremely pleased with the result, and it was well worth all the efforts. Tape emulation plugins are cute, but this Ampex 351 is very unique and personal.
A Place for Plugins: Plugins, there is no way around them!
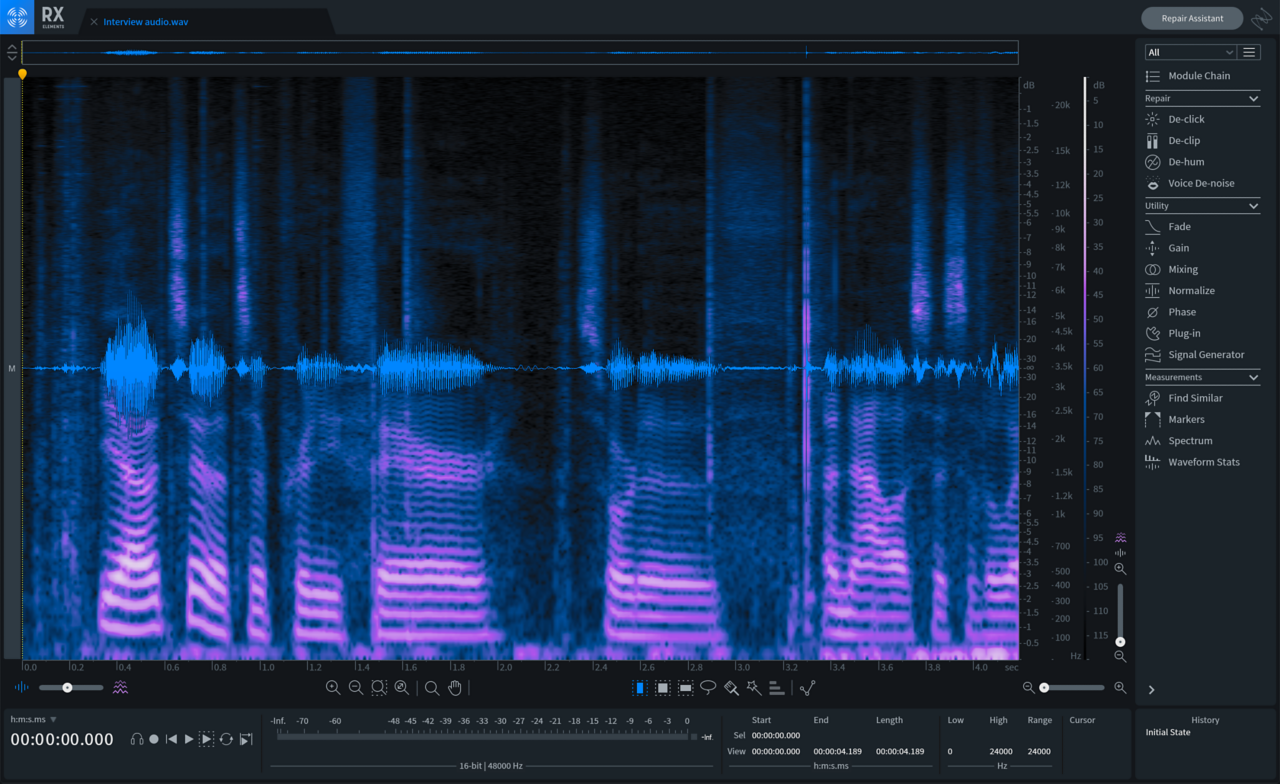
First of all they really have no competition in the restoration world. iZotope offers a wide range of tools helpful in many situations: I personally regularly use a handful of their plugins. The most common issues I must deal with are tics, hum, crackles, distortion, hiss, and buzzes. That covers pretty much all of them and iZotope has a tool for each one and many more. I sometimes use their Spectrogram (in RX) to edit out complex noises, microphone feedbacks etc… A Spectrogram is a graphic view of the audio signal represented by time, amplitude, and frequency. It’s Remarkable! It’s like having another dimension to visualize and to work with.
I also use “regular audio” plugins for equalization and dynamic processing. I love the FabFilter Dynamic EQ and the DMG Limiter. I also like the Eliptical filter from Brainworx and the Suppressor from Sonnox. None of my analog gear can do what these plugins are capable of, and the reverse is true too. So, no controversy here, I need both sets of tools to do my job.
Off Duty Listening: Between my busy schedule at the studio and my family life, I don’t really have much time to listen to music. I don’t like to wear earbuds so that’s a big limitation right there for listening casually. The car radio is probably my main source of music.
I try to keep up with the latest tracks and trends as well as listening to my old favorites from the ‘70’s and ‘80’s. I grew up mainly with rock, but I like all kinds of stuff as long it’s not music just made for musicians! For years when I had a long commute I enjoyed listening to classical music. It was refreshing and reminded me how effective dynamics are to convey emotions.
And I must say, I don’t mind quiet time now and then. Silence is hard to find…
Find Fred Kevorkian at kevorkianmastering.com
Please note: When you buy products through links on this page, we may earn an affiliate commission.


