Mix Analysis: How Stephen George Mixed “Banshee (Ghost Fame)” by letlive.
Don’t hesitate to judge this album by its opening track.
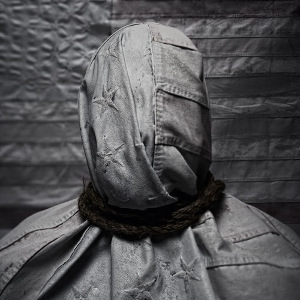
Stephen George’s mixing made an impact on “The Blackest Beautiful” by letlive, released this summer on Epitaph.
LA post-hardcore/soul punk/progressive band letlive. arrests listeners immediately with the extreme intensity of “Banshee (Ghost Fame)”, an enthralling rock performance that leads off their latest Epitaph release The Blackest Beautiful.
Give the lion’s share of the credit to the group itself, which has been mesmerizing audiences with their urgent, boundary-pushing approach for just over a decade. But recognition is also due to the album’s mixer, Stephen George, who poured his own deep expertise into making the most of letlive.’s compelling sound throughout The Blackest Beautiful.
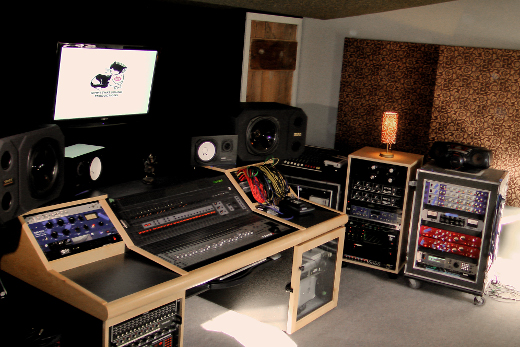
Renowned for founding industrial pioneers Ministry alongside Al Jourgensen, George has expanded his career constantly since that seminal band’s inception in 1980. Today he operates as a producer, mixer and engineer out of his well-equipped facility, Gimme That Sound Studios, in the Hudson Valley town of Stone Ridge, NY, just a little outside of Woodstock.
George used pure hustle to audition for the Blackest Beautiful mixing gig, but it was a powerful combination of experience, instincts, and technical excellence that ultimately won him the job. For all those who read his detailed Mix Analysis of “Banshee (Ghost Fame)” below, a veritable goldmine of mix tips awaits – from a tasty rock guitar bus recipe to EQ automation, vocal channel QC, a masterful mixdown method, and much more.
Mix Tool Kit
Monitors:
Large near fields: Tannoy System 1200’s driven by a Chevin a3000 amplifier
Small near fields: Yamaha NS-10M’s driven by a Hafler amplifier
Boom box: Sony CFD G50
DAW:
Pro Tools 10.3.5
Effects, Equalizers, and Compressors are a mix of analog gear and digital plug-ins.
Construction Materials
All of the 130 audio tracks were initially delivered on hard drive, as the mix of the album progressed more tracks were recorded and delivered via Dropbox, subsequently I recalled this mix each time a new part was added and mixed those new parts in. These additional tracks were mainly vocals that were being recorded while the band was out on the road. In fact through the whole mixing of the album the band was out playing all over the US and UK. The intro was the last piece to be added to the mix, I believe it was recorded at a rehearsal studio on a laptop; the whole intro is just one mono band track, one mono guitar and, a mono lead vocal track.
My first look at the delivered ProTools session gave me the impression that whoever was working on this project had an engineering background, however the labeling, and organization was a bit loose, therefore creating a chunk of work for me to prepare the song for mixing.
All was forgiven knowing that this project for the most part was self-produced and recorded, and that the band was extremely busy out on tour the whole time I was mixing. To be honest the song was so good I really had no problem putting in the extra effort, having never heard the band before it only took lead singer Jason Aalon Butler’s first SCREAM four bars into the song for me to become a huge fan of letlive.
At the end of the day I feel that my job is to bring life to the artist’s vision, so I really don’t agree with some engineers when they complain about how tracks are being delivered, the outcome is what I focus my energy on, creating a great mix is all that counts.
Initial Pass
This goes with any mix I do when the client is not present at the mixing session: On my first listen through I’ll always put all of the tracks up and I will have the latest or greatest rough mix running alongside the track so that I can go back and forth between the two.
Listening to the rough mix is very important because I want to feel what the band and the label were feeling when they decided that this track would go on the record. I learned a long time ago not to fight the rough mix, that is what the client loves, it’s my job to use that mix as my guide to balances and feel.
Then I’ll try different things to improve the mix after reaching that point. If somewhere along the way I decide that something doesn’t sound right, and I can definitely improve the sound by going in a different direction I’ll go for it. If I decide that I’m way past the direction of the rough but I’m really loving it, I’ll decide if I should give the artist two different mixes for consideration: one with my new ideas, and another leaning more towards the rough.
On the other hand, with the client present at the mix session, my first listen and balances stay the same: I’ll have the rough running alongside and A-B between the two matching my balances to the rough. The difference with the client present is that if I hear something different that I’d like to try out, I’ll do so straight away and get an immediate response from the artist or producer, therefore not having to worry about delivering two different mix versions. This approach has served me well; I’d have to say that I don’t remember a client ever not liking one of my mixes using this approach.
For clarification sake I’m not mirroring the rough mix: I am delivering a better sounding, brand new shiny mix, but with the feel and balance of the rough mix that everybody liked. When it comes to mixing, it’s all about the feel, that’s what counts, how the listener feels when they hear your mix. When the artist, producer, or label tells me that it still has the same feel but sounds even better, I’m done.
Moving back to “Banshee,” before I received the hard drive, Jeff Sahyoun one of the guitar players, and the recording engineer for the band gave me specific instructions over the phone as to what they wanted in the mix.
They wanted to sound completely unique, not like other bands in their “genre,” which share the same uniform sound of over-sampled drums, and everything quantized and overall tinny and synthetic sounding. letlive. wanted a dark and completely organic sound of their own, they also noted that they were fans of early RATM, and Deftones recordings (they were out on tour with the Deftones while I was mixing this LP).
Last thing: They did not want me to replace the sound of the drums with my own samples. With those instructions I was ready to go. First off, I’m a drummer and wouldn’t want some egomaniacal mixer changing my drum sound either, and I loved the way Rage and Deftones records sounded. Basically at this point I’m a happy camper and ready to go!
Mixing It!
OK, starting the mix I had all faders up and the rough mix running alongside. After getting instructions from the band,I knew what they wanted and how to get it.
The first thing I noticed was that I did not like the rough mix: It did not sound like what the band wanted. However, the Pro Tools session sounded much better than the rough. At this point I am listening to the session exactly how the band left it, with all of their bussing and plugins in place.
With that in mind I made a determination that when I re-route the mix into my set-up I’m going to leave all of the bands plugins active, and just mix from the perspective that the tracks were recorded with the plugins.
After all that’s the band’s sound: It’s like recording the guitar post-stomp boxes — it’s what makes that musician sound unique, therefore it’s not to be touched. Of course I do, however, have the option to lose the bands plugin’s if it’s not working towards the end result.
Drums:
Now that I’ve determined my approach I start re-routing the tracks into my set-up adding my plugin’s, post-band plugin’s.
For the drums the way I’m doing this is by sending their kick drum channels into my master kick mono aux channel, with my plugs and sends on it. The same thing for the snare — all of their channels into my master snare mono aux with my plugs and sends.
The kick channels consisted of Kick and Sub Kick. It sounded to me that the Kick track was a mic placed inside the kick drum and the Sub Kick channel sounded like a Yamaha Sub Kick placed outside of the drum. The snare channels consisted of Snare Top, “Snare Bottom”, and “Snare Side” (snare mic’d from the side).
I did take the liberty to add one kick sample and two snare samples. Yes, I know this was not in the instructions, but these samples came from my personal collection of thousands of drum sounds I’ve recorded over the years, I know these sounds intimately and they were used to support the bands sound only. Meaning that if you took away my sample, you would hear the band’s sound. By adding my samples in, you still hear the band’s sound but fuller-sounding, and when the whole track is in you are not losing the original sound of the drums, they are holding up against the track.
This is accomplished by tucking in the samples level under the original sounds. Then, my assistant Samuel O’Sullivan (who is also a drummer) or I draw in by hand the dynamics of these samples matching the dynamics of the original sound by either using clip gain or volume automation. I do this by hand because I’ve tried pretty much everything out on the market, but have still not found a product that can do this as well, and as quickly as I can by hand. The kick sample is routed to master kick aux channel and the snare samples are routed to the snare master aux channels. As a result, these samples now are supporting the original drum sound, as opposed to replacing them.
For the hat, toms, overhead, and room channels I once again added my plugs, post-band’s plugs. These channels along, with the master kick and snare aux channels were also routed via aux sends either pre- or post-fader to four different stereo aux channels with EQ and compression plugs inserted. These aux channels differed in sound from extreme compression and EQ to not-so-extreme compression and EQ.
I generally only run two of these parallel compression busses, however I added my two to the band’s one, and then threw in one more with an extreme squash setting. I then automated the sends to these busses to give the drums character from section to section of the song. I can also automate a send to one of these busses to accentuate a drum fill or run anything else in the mix through one of these busses if needed.
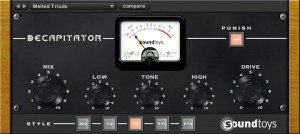
For heavy compression I always reach for BF-76, CLA 76, Kramer Pie, or Decapitator. Also on the drums I compressed the Snare Bottom track with a DBX 160XT from my rack.
For EQ I generally reach for the Avid Channel Strip Waves VEQ4, API550A, SSL, Softube Focusing EQ, Trident A Range or Avid EQ3 first, depending on the color I’m looking for. There are lots of great EQ plug’s out there. I also use the Focusrite D2 quite a bit, it has a really nice top end to it. I like it especially on stringed instruments. I used all of the above on this track.
On to the Bass:
The bass guitar was delivered with a mono amp track and a mono DI track which was muted in the mix.
The bass amp track had a really fat, unruly sound to it with loads of distortion and attitude. My only problem with it was that it sounded a bit hollow in the mid frequencies. I’m used to using a DI signal to get that midrange bite from an electric bass, so I decided to mix in the DI track.
The bass DI was recorded clean and needed some attitude to match the amp, so I inserted my go-to distortion plugin, a “SansAmp PSA-1” to the channel. I dialed up a nice distorted sound with lots of attitude in the mids, added a CLA-3A to smooth out the peaks just a touch, and finally inserted a VEQ4 to add a bit more mid.
While doing this I was listening to the bass amp track hot in the mix,while pushing the DI fader to find the sweet spot. I noticed the DI track was out of phase with the amp and needed to be inverted, which I did with the VEQ4. Finally both tracks were sent to a Roland Dimension D unit in my rack via aux send.
The Dimension D is a really smooth chorus unit from the eighties, I love using it on mono bass guitar tracks, when blended in sparingly. You don’t really hear the chorus that much, but what it does is widen out the sound of the bass, and adds clarity to the overall sound of the instrument. It also does wonders for a kick drum. The Dimension D was returned to a pair of faders.
Guitars:
Lots of guitar tracks on this one. Each guitar part was recorded with a room mic, ribbon mic, Sennheiser 421, and Shure SM57, leaving the final blend of mic’s up to the mixer.
This method of delivery is pretty commonplace in an unlimited track count, DAW world; you definitely would not be able to use this approach back in the day recording to tape. It does however leave lots of options open to the mixer, so I don’t mind it at all.
On this record I created my usual guitar bus that consists of a stereo aux channel with a pair of Focusrite ISA 110’s, a Manley Variable MU Limiter Compressor, and a Digi EQ3 plug in inserted on it. I routed all of the rhythm guitars into this guitar bus.
With this approach I’m using the ISA 110’s EQ section to sculpt the overall sound of the guitars into the mix. I also use the line amps on the 110’s to drive signal into the Manley, which I use for tube color much more than compression — I believe at most there might have been 1db of compression applied from the Vari MU. The end result is a much bigger three dimensional sound than what you would get in the box.
The EQ3 being the final insert on the guitar bus, it was used to make the final adjustment on the EQ curve of the guitars. This EQ setting was changed from song to song and sometimes I automated the EQ to change from section to section of each song. What stayed consistent on this EQ was a hi-pass shelf set at about 130hz, while the area being automated was a boost to the hi mid frequencies. Any melodic guitar overdubs I kept out of this bus and treated separately.
Finally there was a pair of acoustic guitars with Softube’s Tube Tech Cl1B, and Focusing Equalizer inserted on each track. The acoustic guitars only played at the middle bridge of the song, and were blended to support the electric guitars also playing in this section.
Vocals:
I’ve got to say that I loved mixing Jason’s vocals. He is truly a gifted vocalist and for creativity he kills it! I really had to be on top of my game mixing the barrage of vocal tracks that were delivered. The thing about it is that there was no fat, everything had a place and purpose — it was my job to give life to Jason’s creativity.
There were 63 vocal tracks on this song to start, with more on the way before we were done. The first thing I had to do was determine what was lead vocal, which I would route to my mono Lead Vocal (LV) bus; what was background, which I would route to my stereo Background Vocal (BGV) bus, and finally what was effected vocal, which would end up either in the LV bus, BGV bus, or no bus at all, routed direct to my master bus.
All effects, and compression were tracked to the vocal, so there were no plugins on any of the vocal channels. While going through the vocals I noticed that the amount of compression tracked was very heavy on some of the vocal tracks, so that was a big concern of mine to listen for pops, clicks and really loud breaths coming from those tracks. I needed to put all of that in perspective and I would do so using the clip gain function while making the final vocal rides at mix end.
My lead vocal bus is a mono aux channel with a Focusrite ISA 110, Professional Audio Works (PAW) optical limiter/compressor/gate, and a Tube Tech CL1B inserted from my rack in that order.
For plug-ins I had a Renaissance Vox inserted between the ISA 110 and the PAW, an Avid Channel Strip using the EQ section only inserted after the Tube Tech, and finally a Waves DeEsser inserted last. With the ISA 110 I sculpt the overall sound of the lead vocal, and I’ll also use the line amp on it to drive the signal.
The PAW is a fantastic unit my longtime friend and mentor Robert Lucas designed. When I met Robert he was working as the chief technical engineer at the home of UREI, Bill Putnam’s “Universal Studios” in Chicago. The PAW has a great sound to it and lots of options — it’s essentially a solid-state optical compressor/limiter with a gate circuit that’s completely separate from the compressor/limiter. The gate and compressor/limiter sections are patchable with a choice of transformer or transformer less inputs in both sections and a choice of transformer or transformer less outputs on both sections.
For this mix I only used the compressor/limiter section, transformer in, and transformer out. The compressor on the PAW is very transparent, I use it to smooth any initial peaks in the signal, and also use it for its huge transformer sound. The Tube Tech I have set at a 4:1 ratio. It’s not doing much compressing, maybe a couple of db’s at most — once again I’m using it for its sound.
Coupled with the PAW I get a really big and warm vocal sound. I generally don’t compress the vocals much, and on this track I didn’t have to seeing as the vocals were tracked with heavy compression for effect already. Finally, I take a long time automating all of the vocal faders in a mix, which makes the difference between a great mix and a so-so mix.
Vocal FX:
Considering the vocals were recorded with compression and distortion effects and that the song itself asked for a dry, in-your-face vocal sound, I didn’t do much in the way of effects. I used three short delays to create depth, with the BGV’s sending more to those delays.
Delays used were a Digidesign Mod Delay II, and a Waves H-Delay. I also had a short plate setting coming from the Waves IR-1 Convolution Reverb, and the lead vocal was sent sparingly to my Publison Inferno with a mono pitch shifting effect set on both machines of the unit. The band also had a distortion effect setup that I used, which was being fed by an aux bus so I was able to add more distortion to any of the vocals preLV Bus if needed. The distortion effect used was the A.I.R. Distortion and was being returned on its own fader.
Outro:
Jean Nascimento, who plays guitar, fender Rhodes and congas on the record is responsible for the dreamy outro of the song. It’s a great section, which to me feels like the quiet after the storm. I really loved the part and I wanted it to sound as big, and cinematic as possible. I wanted the listener to have the feeling that they are floating through space, destination unknown.
This section is comprised of electric guitar and Fender Rhodes, both played by Jean.
Outro Fender Rhodes:
The Fender Rhodes was recorded to three tracks, of which I only used two. I used the room track, and the copper mic track. I’m not sure how the Rhodes was recorded, but it sounded like it was amplified and not direct.
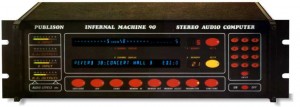
The copper mic track had a lo-fi vibe to it with not much low frequency information; the room sounded like the mic was 3 to 4 feet off the cabinet. I panned both tracks hard left they had no plug-ins inserted, however the copper mic track was sending to my Publison Infernal Machine 90 heavily via aux send.
The Publison is a vintage DSP from the Eighties with a very unique sound. It features two machines each with mono in, and stereo out processors. For this track I used the pitch shifting program on each machine. Machine A panned hard left 3 cents down, and machine B panned hard right 3 cents up. I have both machines being fed the same aux send with a Dolby A noise reduction unit in line set to encode.
Any mono signal you throw into this baby comes out wide and silky smooth with no noticeable delay unlike most analog pitch shifting units where you’ll hear a very short processing delay. This aided the wide cinematic effect I was going for.
Outro Guitars:
This consisted of two guitar parts; the main part was recorded with the same four mic’s as all of the other guitars, which allowed me to pan the part wide, but leaning somewhat heavy to the right. These tracks were bussed to the main guitar bus via their own aux channel which allowed me to eq all four mic’s with a VEQ4, then heavily send them to my Lexicon PCM 80 which had a very long, very wide, very cold reverb setting.
The down beat of this section features all of the rhythm guitars striking a chord at the same time, I automated all of them to send pre-fader into the Lexicon PCM 80, which sets up the outro very nicely with a pronounced cold, dark, spacious vibe.
The second set of guitars only had two tracks: one Shure 57 track and one room mic track. This guitar was effected heavily, and recorded with effect in-line through the amp. The effect sounded like a long pre-delayed reverb. The part was played more like the Rhodes part, so I panned this over to the left with the Rhodes and effected it like the Rhodes with the Publison.
Finally I treated the whole outro with a Digidesign D2 plug-in inserted across the master bus, and whose hi-pass filter was automated sweeping from 24hz to 400hz at the start of the arpeggiated picking part. This was done once more to give the listener a floating-through-space vibe. At the final chord the lugin was bypassed, allowing all frequencies through.
Mixdown
I mix to a stereo aux channel that becomes my master mix bus, which feeds my master stereo fader. This approach essentially gives me two buses to mix through. My master mix bus has EQ’s and compressors inserted; my master fader has no inserts.
I send to these busses either by the output of each individual channel or I may send to these busses via aux sends pre or post fader. Generally the routing would be the channel’s output going to the master bus and an aux send pre-fader sending to the master fader channel. This is used mainly to bypass processing if needed, meaning if an instrument or vocal is sounding too processed by my EQ’s or compressor’s inserted across the master bus I can send that channel’s output directly to the master fader in any given amount.
It would also be used to allow any instrument or vocal to stand out a bit more. This is something I would do if I were mixing on a console with multiple master stereo busses, like the SSL 6000, 9000J or K series.
For this mix I had inserted on the master aux bus a Waves SSL Compressor, and an API 560 EQ kept from the band’s original session, followed by my Focusrite Red 3 analog unit, then an EQIII, the Focusrite D2 (automated only for the outro), and finally a Maxim limiter with a setting of 1db of limiting at most.
I’ve always used the Focusrite Red 3 as my master bus compressor; it makes a huge difference in the overall sound of the mix, which I would describe as loads of glue, nice round bottom, and a creamy top end. I’ll usually go maximum 2.5 db’s of compression at peaks with the attack and release set with a fast attack and short-to-medium release, but for this song I had the auto function engaged.
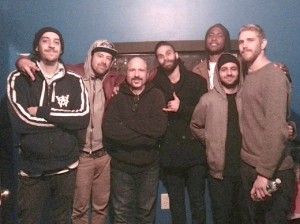
Banding together: (L-R) Samuel O’Sullivan (Mix Asst.), Christopher Crandall (drums letlive. (ex-member drummer featured on album.)), Stephen George, Jason Aalon Butler (vocals letlive.), Jean Francisco Nascimento (Guitar, keyboards letlive.), Jeff Sahyoun (Guitar, Recording Engineer letlive.), Ryan Jay Johnson (Bass letlive.).
Final Listen
Once each mix was finished I had my assistant Samuel O’Sullivan take a final, extremely close, “life depends on it” listen to make sure that there were no pops or clicks left in the mix coming from any of the compressed vocal tracks. I had done loads of clip gain rides to rid the mix of those pops and just wanted to make sure I hadn’t missed any.
Printing of Mixes
The mixes were printed back into Pro Tools with no sample rate conversion; the masters were delivered to Sterling Sound as 32 bit 48k WAV files.
I always deliver to my clients 7 mix passes; main pass, all vocals up 1 db, all vocals down 1 db, instrumental, acapella, TV track, and clean version. After all songs are mixed we’ll decide which mix passes will go to mastering.
Yes Master
Mastering was handled by Chris Gehringer of Sterling Sound. I’ve been using Chris on everything I’ve mixed since moving to New York City in 1999. The guy is amazing at what he does and always great to work with.
It All Adds Up
This mix of “Banshee (Ghost Fame)” has a really nice story to it for me. When I approached the band’s management company offering my mixing services, they told me that they were in the final process of picking a mixer for the album — and that they already had 10 different mixers do test mixes on this song but hadn’t settled on one yet.
They told me if I were willing to give it a go they would wait to hear what I would come up with. Well this was the first time I was ever asked to do a “test mix” but I was up for the challenge, and told them that I could get it to them in a few days because I still had another project to finish up with.
The project I had to finish took a bit longer than expected to complete, so when it was done I was feeling a bit pressured to kick this one out quickly. I started mixing on the day I told them I’d have it done, thankfully they understood and waited for me to finish.
I was working all alone at the time and it took one full day to prep the song into mix shape. The next day was a very long full day of mixing; I stayed very late wanting to finish. The third day it just didn’t sound quite there, it just needed a few more tweaks!
As I was making the final adjustments, I fell asleep in my chair!! Crap….
I somewhat woke up, the sun was up, but the mix still didn’t feel right! Next thing I remember I was reaching for the faders, making adjustments, it was all a blur. Then finally the mix sounded fucking amazing, I’m dancing around the studio just loving it. The sun was flooding my control room… I was done, it felt amazing!!
I looked at the time and it was noon, I sent the mp3 to the band and started packing up.
On the way home I stopped for breakfast, and got home at about 2pm, my phone rings and it’s my manager telling me they love the mix. letlive. wants me to mix their whole album.
A few days later I get an email from Jeff Sahyoun who tells me how much the band loves the mix and that it sounded “magical”, my response was “Bro, you don’t know how true that is.”
It’s all about FEEL!!
— Stephen George, stephengeorgeaudio.com
Please note: When you buy products through links on this page, we may earn an affiliate commission.




headphonomenon
September 28, 2013 at 5:42 am (12 years ago)great mix and thanks for the detailed article. I find it interesting that you worked with the band’s plug-ins as a starting point. It sounds like you take the time and effort to understand the band and the material instead of just putting your ego on it!
I have a question: what do you mean with a ‘TV track’ under your list of deliverables.
Do you mean level-adjusted for broadcast? Or 30/60 second versions?
Thanks again for sharing!!