New Gear Review: Sonarworks Reference 4 Studio Edition

Sonarworks Reference 4 Studio Edition is a comprehensive three-part solution that remedies the imperfections in all kinds of unique listening environments.
I was a bit skeptical when I first heard about Sonarworks, as what they purport their products are capable of sounded a little too good to be true.
I’ve always been under the impression that tuning a room is the province of a trained acoustician, and yet here’s this magic software claiming to do the same job at a surprisingly attractive price. Just how effective could it be?
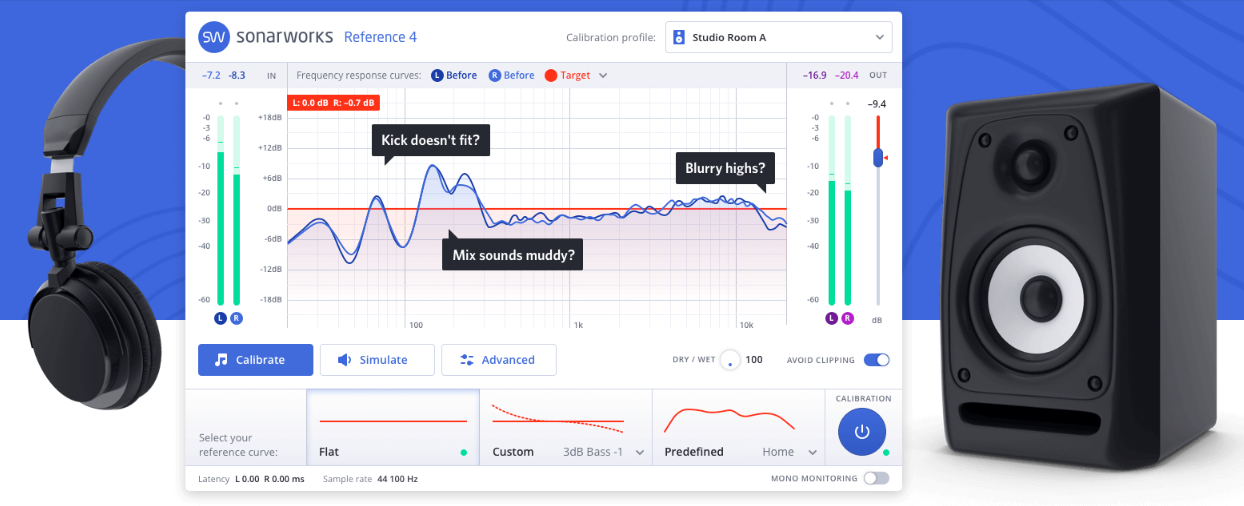
The latest iteration of their flagship offering, Reference 4 Studio Edition, is a convolution-based EQ designed to circumvent acoustical problems and other monitoring issues in your studio by making compensating adjustments to the signal that comes out of your monitors. It has three software components: The plugin itself (VST, AAX, AU and RTAS compatible), Systemwide—an application for both Mac OS and Windows, and finally Reference 4 Measure, which by the use of the included measurement mic, does exactly what its name implies.
Reference 4 Studio comes in a small box with download instructions for the software, along with the XREF 20 measurement microphone. The mic has the serial number right on the side, which is important because along with downloading the installation software, you also need to input that serial number on the Sonarworks website. From here, you can download the measurements for that specific microphone to take into account as you tune your room. That amount of attention to detail gave me great hope that all this isn’t just snake oil.
Many of us who work in rooms that haven’t been built and tuned by a professional face the issue of skewed playback to some degree, whether we know it or not. So how does Reference 4 hold up in real world applications?
Features and Use

The included measurement mic helps Reference 4 learn the one-of-a-kind sonic characteristics of your listening space.
The Reference 4 Measure Application:
Once the software is downloaded, you install Reference 4 Measure and connect the XREF microphone to your interface.
If you are using an outboard preamp, I suggest something neutral as to not color the measurement. For my tests, I used a DIYRE CP5, which I’ve previously reviewed here on SonicScoop.
When you open the measurement application, the initial screen will prompt you to activate your license or trial key, after which you can begin your calibration. Load a new microphone calibration profile, select your mic input and monitor outputs, and you’re ready to get started.
Place the mic in your listening position and Measure will start a couple exercises to ensure proper gain staging for measurement and playback. This includes measuring the distance from your sweet spot to the monitors, and the distance between the monitors themselves. Double checking the software measurements with a measuring tape proved them to be quite accurate.
With these measurements, the software is ready to calibrate based on corrections needed at your listening position. You’ll take a total of 24(!) measurements in and around your sweet spot to provide an accurate profile that isn’t skewed by odd resonances or room nodes. Measure will show you where to place the mic for each measurement, impressively locating the mic and telling you if adjustments are needed—even within a few inches! (You don’t need a mic stand; holding the mic by hand away from your body will suffice.)
The accuracy of this mic location feature, along with the previous measuring of the distance between your speakers and sweet spot, starts to shed light on just how accurate the Sonarworks system is. Once these 24 measurements are complete, Measure generates a calibration profile of your room that can now be loaded into the Reference 4 plugin and Systemwide app.
Sonarworks notes that there is a version 4.1 update due out in May which features major improvements to the Measure software, upping the total reference point count to 37 and improving accuracy up to 30%.

The Reference 4 plugin itself is where the corrections from the measurement application are implemented; typically, this will be the last plugin on your mix bus.
The Plugin:
If you haven’t yet, install the plugin in your preferred format. The Reference 4 plugin is intended to be the last plugin on your mix bus, so in that way, everything you do in your mix will be played back through the room correction; you simply have to turn off the plugin when you print your mix.
(If you happen to be a Steinberg Cubase user like me, and if you utilize the Control Room feature, you can place the plugin on that output instead, and never have to worry about turning it off; it will only affect your monitor outs and not the mix bus itself!)
Upon opening the plugin, the next step is to load the calibration profile you’ve just generated, and Reference 4 begins compensating for those anomalies. There are additional tweaks that can be made with the use of the Calibrate or Simulate options.
In Calibrate, the default setting is “Flat”, in which the software fully compensates, however via the “Custom” option, you can adjust the bass and high end response. The “Predefined” option offers other curves, such as simulations of consumer and hi-fi playback systems. There is also a Wet/Dry control if the correction is too much, but Sonorworks’ intention is the Flat setting, as it is the most accurate.
The Systemwide App:
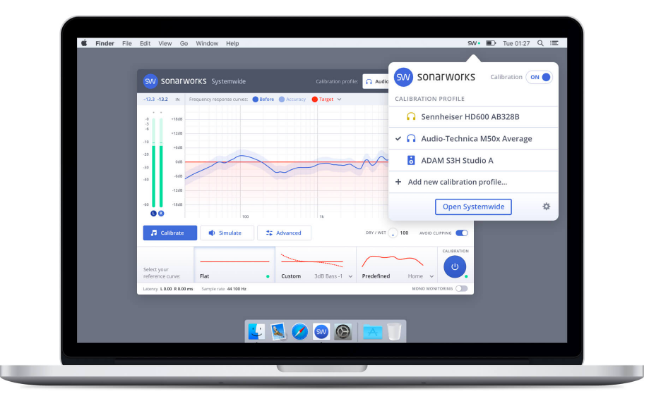
This works very much like the plugin: Load the calibration profile and adjust if necessary.
The difference, as the name suggests, is that it works on an operating system level. This will not affect your DAW, but rather other audio your computer generates (for example, from iTunes, web browsers, etc).
This is a very handy tool because while it’s great to have your DAW calibrated, listening to anything else from your computer would be uncalibrated, and thus likely disappointing or disorienting.
Results
So after all this setup and loading profiles, how does it sound? Honestly, it blew me away. Since the software is based on compensating for problem frequencies as opposed to just hyping the speakers, the results were a smoother and more balanced sonic image. Gone was the low mid hump that I’d been battling, and I was hearing details in records that I simply hadn’t heard before.
It may take a bit to adjust to the new sound of your room, but some initial A/B tests left me marveling at all the issues I had been working through or around before. Now, after having the system for a while, I can honestly say I couldn’t go back. When I bypassed it shortly before completing this review, I was a bit shocked at the conditions under which I used to work.
Most importantly, my mixes are now translating better than ever. Since I trust what I’m hearing from my monitors, I’m more confident in the choices I make in my mixes… and it shows in the results, according to my clients!
To Be Critical
Critiquing anything in Reference 4 would be a stretch, quite honestly. The system has reframed how I see and hear my workspace, and the results are consistently palpable when referencing my mixes outside the studio. I suppose the fact that the system does utilize some processing power can create some logistical hurdles in a dense, high-CPU mix scenario, but that is to be expected—and I’ve yet to actually encounter that. All in all, it’s clear that the benefits of Reference 4 far outweigh any drawbacks that may come along with its use.
Summing it Up
Room treatment is a critical part of studio design, but doing it right is not always feasible or affordable. Many people with home studios are renters, and as such are likely limited in treatment options. Costs for treating your room properly can also add up rather quickly, but at $249, Sonarworks’ Reference 4 Studio offers an excellent alternative or complementary solution, and does so at a fantastic price.
Please note: When you buy products through links on this page, we may earn an affiliate commission.


