Review: PreSonus StudioLive 16.0.2 Performance/Recording Digital Mixer, by Gabriel Lamorie
When thinking about our next investment into the gear we use, what is it that influences our decision to stick with a core system?
Obviously we want the equipment to work well and when it comes to recording, we want the components of the system to work well together. Perfect harmony might not be the case right away with the overwhelming amounts of gear and software combinations available to us today but with the StudioLive 16.0.2 mixer and software solution you just may find yourself singing praise.
The minds at PreSonus are at it again with a product built to exceed expectation for musician and audio engineer alike. The 16-channel StudioLive 16.0.2 is the third installment in their series of StudioLive digital mixers, consisting of the 24.4.2 and the 16.4.2. This version offers the four things that any artist or audio engineer on the go is looking for: Compact Design, Ease of Use, Quality and Value.
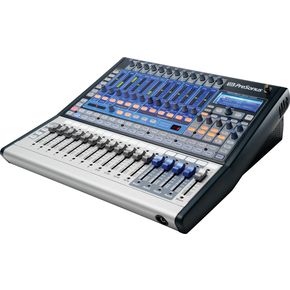
Why Does This board Look Different? – The Layout
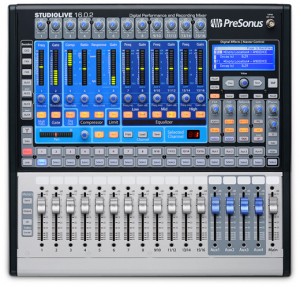
There are several sections that compose the easy-to-navigate interface of the 16.0.2:
At the top, we have the Trims – 12 total, each controlling the award-winning XMAX preamps, which are Class A pres and have an excellent amount of headroom.
In the middle, from left to right, we have the Encoder Modes – This is the section that determines what will be monitored on the LED Meters and what can be adjusted by the multi-function encoders located in the middle of the mixer. These choices consist of the following: The Graphic EQ, FX Send levels for each channel, and the four Aux Sends for each channel. This section alone ix-nays about 74 potentiometers from cluttering up your phalanges – not including the 31-band GEQ.
The Fat Channel – Allowing for dynamics processing for all 16 inputs, four auxes, both FX buses, and the mains (four of which are stereo-linked as 9/10, 11/12, 13/14, and 15/16 for the purpose of dynamics, time-based processing, and semi-parametric EQ on left and right channels).
The Internal Effects and Level Assignments – Here you can set the level of each of the two internal stereo effects – FXA and FXB and also choose to assign them to Aux 1-4 or your main output. You can also choose to send your effect to the Fat Channel to apply dynamics processing and 3-band semi-parametric EQ to it.
The Talkback section – Simple level and assignments options to Aux1-2 or Aux3-4 with a latching “TALK” button…make sure to unlatch… The actual TB mic is used with a Class A pre amp located on the back of the mixer, and can even be used to send crowd ambience to your artist(s) if they prefer.
The Solo Bus section – Consists of 3 modes – AFL (after fader listen – default), PFL (pre-fader listen) and SIP (solo in place – destructive to the mains). This section is great for listening in on individual sources, including headphone mixes, without interrupting a live show or recording. Just solo your channels with the “Solo” MultiMode button and listen to any source or aux.
The Monitor Bus section – Decide what you want to listen to – fed simultaneously to your phones or Monitors. Choose between your Firewire Returns from your DAW, anything you have soloed, or your main outs without interrupting the mix.
At the bottom of the mixer we have the MultiMode Controls – This section consists of four modes that determine what the Multimode Button (‘1-15/16’) will function as. The Mute’ mode will cause the multimode buttons to mute their selected channel, and the “Solo” button will cause the multimode button to solo their selected channel. The “Firewire Return” button allows any outgoing tracks of a computer to show up as an input on a channel to be sent to the PA. This is useful for those who use pre-recorded tracks as part of their live set, or to listen back to your mix that you just recorded in your DAW, as well as for overdubbing so you can hear the recorded tracks.
Lastly, the “Link” mode will basically nondestructively link individual odd and even sources to become a stereo source – copying over the digital settings of the selected source to its partner. This could be a useful method for A/B-ing dynamics settings to a similar source or to just create a stereo source for microphones. This also goes for the Aux buses – allowing for four mono auxes, two stereo auxes or any combination of the two.
Below that is the last section, the Metering Controls – Made up of four metering options that will display in the LED Meters of the Fat Channel. These metering options are “Input” – pre-fader trim level for all sources, “Output” – post-dynamics level for main output and aux 1-4, “GR” – amount of gain reduction from the compressor in the Fat Channel, and “(Faders)Locate” – allows you to visually match up each fader via it’s corresponding LED Meter when recalling a scene from a previous store(save). Move the fader up or down until only the center LED is illuminated.
Eyes On
When I first laid my eyes on the 16.0.2 I immediately noticed the beautiful big blue section oozing with encoders and LED meters – the almighty Fat Channel, a standard feature that the StudioLive mixers are iconic for. The blue multi-tasking section on the 16.0.2 basically makes it possible to take a console twice or more the 16.0.2’s actual size, and shrink it down to a miniature powerhouse less than two square feet. This gives it the capability to perform variable dynamic and time-based processing on each and every input and output, including the four auxiliary buses and main outputs. More on the Fat Channel section later!
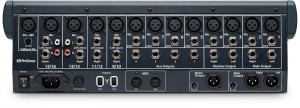
MIDI I/O – Another feature I noticed right away was the MIDI I/O located on the back of the mixer. MIDI I/O is unique to the 16.0.2 in the StudioLive family and gives the audio engineer or artist the ability to recall scenes, control main output volume, mute effects and even continuously control the effects output level between songs using MIDI program changes.
While an audio engineer may find this convenient, the real fans of the MIDI I/O are going to be the artists that want control of how their shows sound – only disadvantage is that they will have no one to point at when they can’t hear themselves! The rest of the I/O is fairly standard with everything easily accessible on the rear of the mixer. In addition, the mixer can accept MIDI via FireWire so users can automate from a DAW. Lastly, the MIDI interface serves as a regular computer MIDI interface, so users can attach a MIDI control surface, synth keyboard, etc…
Hands On
The first thing I touched was the soft gel-like buttons on the mixer which was a relief, considering that some other mixers out there only offer hard plastic buttons that…just do not feel good! Not only are these buttons gentle to the touch, but they also illuminate fully and beautifully – some multiple colors depending on its current function or mode.
The 60mm faders on the 16.0.2 run smooth and are very easy to control considering its 100mm counterparts found on the 24.4.2 and 16.4.2 models. Everything about the 16.0.2 is solid and sturdy from the rotary encoders and buttons to the faders and metal chassis.
Live Use – In my own personal experiences with the 16.0.2, the mixer holds up very well and performs excellently in a variety of situations, especially when being faced with quick setup scenarios and split-second adjustments without getting into too much detail. The portability of the mixer also makes it easy to lug around to any type of show.
Working with bands consecutively was also something I looked forward to. A few of the bands I worked with usually stuck to similarly sized venues so setup was as easy as recalling their Scene I had created previously. If they did happen to be in a different venue all I had to do was recall everything except for the Graphic EQ and just adjust it accordingly. Even with my Battle Of The Bands experiment (with a lot of bands I had never worked with before) setup was as easy as recalling a few presets for kick, snare, bass, guitar, whatever – and making adjustments on the fly!
Recording/Studio Use– As far as actually sitting down with a band/artist to do some recordings in a controlled environment, the mixer once again did wonderfully. Thankfully, I was able to connect the 16.0.2 to my Mac effortlessly using Pro Tools 9 so I didn’t have to go through the trouble of learning a new DAW to get some work done – This also worked great with my Macbook Pro so recording a live show was no problem at all. Playback is also as easy as engaging the ‘Firewire Return‘ button and directing the return to an Aux if it hasn’t already been. I never did run into any situations where more than four mono or two stereo personalized headphone mixes were required but either way splitting a mix would have been an easy option.
Another awesome feature is the ability to use internal effects such as reverb to send to headphone mixes or even to slap on any source to liven up a room up. This same principle is applied to all other internal effects including compression or any of the other dynamics processors.
This particular mixer is well suited for any type of live situation as long as you have no more than the given amount of sources to feed the PA. The mixer isn’t exactly compatible with outboard gear due to the lack of direct-outs leaving the 16.0.2 best suited for a home studio environment. Still, the mixer has more than enough room to comfortably work at a fast pace – even with the massive amount of included features.
How Fat Is Your Channel?
The Fat Channel offers a variety of dynamic processing options that can be turned on or off, all in the following order of signal flow: Phase Reverse –> High Pass Filter –> Noise Gate –> Compressor –> 3-band Semi-Parametric EQ –> Limiter. Aside from these, the other standard features found in the Fat Channel are digital pan with an easy-to-see LED meter and phantom power. All of the settings can be easily changed from channel to channel with the push of a button.
Now some unique features found in the Fat Channel that only the digital domain can offer is the ability to Copy, Load and Save entire Fat Channel settings. These functions are a necessity when working with the same client or live act multiple times as well as loading your favorite snare drum preset. While creating user presets is easy enough, manufacture presets are also available for those not familiar with dynamics processing to experiment with getting a better sound.
Another unique feature is the “Dig Out” button (digital out). ‘Dig Out’ actually toggles on/off the option to send processed or unprocessed audio to your computer when you are recording via Firewire. This feature is great when you want to mix the raw audio later in a DAW while still getting a professional sound sent out to the PA, resulting in a satisfied crowd and fewer drunk people telling you that they can’t hear the guitar.
What Else Is the 16.0.2 Packing?
Two Internal Effects Processors– A sonic effects buffet, that’s what! Aside from using the Fat Channel to sculpt your audio, the 16.0.2 also offers two stereo 32-bit floating-point effects engines, packing 49 reverb, delay and time-based effects presets (possible to overwrite) into the mixer as well as 50 available user slots. Each of which have completely customizable parameters so you can get your favorite sound right into the board – all topped off with a good-sized tap button so your effects can stay on tempo at all times. FX-A and FX-B can be sent to any channel or aux as well as the main output. All send levels (including gain reduction, input and output) can be viewed in real time on the LED meters located in the Fat Channel section so you can easily see in a dark club without any pesky goose necks cramping your style – although it still supports one if you prefer.
Complete Store and Recall – Ah, the pleasantries of digital mixers. The Store and Recall on the 16.0.2 basically allow you to save “Scenes” that take a snapshot of all of the information on your board, except a few things like trim levels and phantom power. This is excellent for when you work with the same band in multiple live situations or if you have to record the same artist/band the next day, week or month. Literally everything else can be recalled or even chosen not to be recalled in specific groups like “Pots” (FXA, FXB, Solo Bus Output, Phones, and Monitor knobs) or “GEQ” for example.
Thinking of recalled faders, one might assume motorized faders are involved, but in this case there are none. Instead, when recalling on the 16.0.2, Fader Locate is automatically engaged as soon as any fader is moved, making recall a painless process by simply moving the fader up or down until only the center LED is illuminated. PreSonus also thought ahead and actually included a “Zero Out” Scene that is located in the first Scene slot, so zeroing out all of your digital settings is a snap. It is also good to note that a feature called “AutoStore” can be engaged to save your current settings every 10 seconds or until an adjustment is made. Neat!
Graphic EQ – If that still weren’t enough to quench your lust for feature-rich mixers, they also threw in a full 31-band Graphic EQ that you can slap over the main output. The GEQ is navigated and tweaked through the LED meters and encoders of the Fat Channel section with just the push of a button (the GEQ one!).
Surprises in the Manual – In the user manual of the 16.0.2 you will find golden nuggets of information that PreSonus refers to as a “Power User Tip.” These tips are meant for the more advanced user, and describe in detail how to maximize particular features of the mixer including SIP (solo in place) to Firewire Return Mode.
Not only does PreSonus offer great advice through the Power User Tips that are generously sprinkled in but they also have a massive Tutorials section which — and I cannot stress this enough — is absolutely ESSENTIAL and extremely useful for beginners and intermediate users alike. It is basically a refresher course covering starting points of compressor and EQ settings for vocals, fretted instruments, etc…, to standard microphone know-how and placement techniques. The Tutorials section literally covers everything as far as what the board has to offer, explains why these parameters exist and why we use them.
After all of that reading, our appetite for knowledge was indeed replaced by an appetite for a succulent feast. Lucky for us, PreSonus knew this and provided us with an “Added Bonus” – their previously top-secret recipe for Jambalaya…would love to share…but can’t…busy salivating and consuming.
The Other Half of the ‘Complete Hardware and Software’ Package
What is this “Complete Hardware and Software Package” I speak of? Well aside from the product being advertised as such, I am referring to the included software. You really get the best of both worlds with the three included software products bundled with the PreSonus StudioLive 16.0.2. Lets take a look shall we?
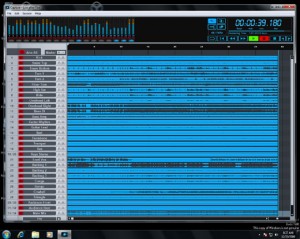
Capture – Aside from offering 24-bit recording with the 16.0.2, Capture offers a quick and simple solution to record right away with a spot of DAW editing capabilities. After achieving your sound with the onboard mixing goodies, we can now record that entire performance straight to Capture by a simple arm and record process. The included nondestructive editing features are great for adding markers and titles as well as simple edits with the Eraser, Splice and Range Tools.
Virtual Studio Live (VSL) – VSL allows the user to control every single parameter of the mixer straight from any Mac or PC through firewire. All parameters on the mixer have a one-to-one relationship with the VSL software, meaning that anything done on the mixer will be done in VSL and vise-versa. VSL also functions as a librarian software for all of your Scenes, Effects presets and Fat Channel presets – employing a drag-and-drop function that makes visual work flow through VSL even quicker.
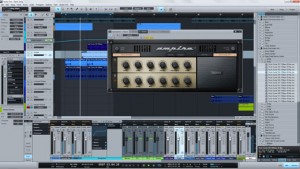
Studio One Artist – Studio One, the premier DAW from PreSonus, is included in its artist edition, meaning it is the least beefed up version of the actual Studio One DAW. The reason it works well as a temporary software package until you decide to upgrade is that projects captured in…Capture…will open in Studio One Artist with all markers, names, and edits that were done onsite in the Capture software. Although it may not be everything you need to mix, Studio One Artist still comes equipped with plenty of features and instruments to get your grove on.
Controlling Your Venue’s Sound With An iPad and StudioLive Remote App
The Virtual Studio Live (VSL) software that you can use to control your StudioLive mixer from a Mac or PC also has the option to be controlled by PreSonus’s free iPad app – StudioLive Remote. StudioLive Remote gives you the option to quickly and easily navigate your mixer to adjust channel and aux levels, effects sends, and even the graphic EQ! Literally any console setting that is appropriate for remote control is at your fingertips from anywhere in the venue.
When using it in action, the StudioLive Remote app operated flawlessly. The biggest advantage that I realized immediately was that creating a mix from anywhere in the venue is a feature that I simply cannot live without! This takes the “guess and check” out of the equation – a huge advantage for those of us who haven’t memorized all of their frequencies by heart. And what about the musician who has a different opinion about his mix? Not a problem! StudioLive Remote can equip multiple iPads so that your artists can adjust their mixes in real time — comfortably and accurately. No more drumsticks to the head!
Is Anything Missing?
No motorized faders – Seeing as how PreSonus offers the 16.0.2 with complete store and recall capabilities, the faders will not jump attention when the ‘Recall’ button is selected. However, we can still match levels from a recalled scene with the ‘Fader Locate’ button, which is still a bonus.
No fader sync with your DAW to perform automation or adjust levels – you will still have to resort to the wrist-crippling mouse.
No input metering without the press of a button – this is a feature that is typically found on all mixers but is no big deal once you get used to the workflow of the 16.0.2.
No insert jacks on any of the channels — but with all of the digital effects available to you on the console itself, this is hardly a problem unless there is an effects unit that you cannot live without…
No direct outs – Not that this is a terrible thing but the only way to get each channels audio out is through the 16×16 firewire port, so say night-night to the thought of using external converters for use in the recording environment. (The StudioLive 16.4.2, big brother to the 16.0.2, does offer inserts and direct outs, however.)
And aside from these few small deficiencies, that is about it!
Conclusion
The PreSonus StudioLive 16.0.2 retails for $1,599 MSRP and can be found for around $1,300. With that being mentioned, the thought always comes to mind – do you get what you pay for? Well if you had the guts to read everything mentioned in this review, then you know as well as I do that this mixer is indeed a great buy. Great preamps, solid construction and the inclusion of all of the features on the digital side makes just the convenience of hauling only a few pieces of gear around worth while.
PreSonus’s goal of building professional and affordable music production tools for musicians and audio engineers alike absolutely exceeds expectation with the StudioLive 16.0.2. Where some features may be lacking, the 16.0.2 is absolutely makes up for it by how much is packed into the guts of this glorious cornucopia of wholesome sonic goodness. Not only will the 16.0.2 provide you with everything you need right out of the box, but its build quality will last for many gigs to come. The addition of the StudioLive Remote app is absolutely addictive. Once you go wireless you just can’t settle for less!
— Gabriel Lamorie
Gabriel Lamorie is an artist and audio engineer who got his start attending the Conservatory of Recording Arts and Sciences in Tempe, Arizona. He has dealt with all levels of live sound shows and venues as well as assisting and running his own recording sessions right here in New York City. Gabriel currently runs his own online audio business, Roots Audio Development. See what he’s up to, and get an inside look at what local artists and audio engineers from around the country are doing to get their work heard, by visiting the Home Grown page of his website.
Please note: When you buy products through links on this page, we may earn an affiliate commission.


Ziani4life
December 19, 2011 at 5:31 pm (13 years ago)very good
Djalcon1
April 22, 2012 at 2:04 am (13 years ago)no comprendo como asignar efectos a cada canal por separado, ya tengo todo el dia