Best New Plugins of 2023: Our Top Picks for Your Library
The year is almost over, which means the season of holiday purchases is already in full swing. It’s time to throw caution to the wind and offset that tax burden! That’s why we put together this list of the best new plugins of 2023.
But hang on a second… You’re a savvy plug-in buyer; the last thing you want is a plugin menu filled with missed opportunities. That’s why we’re rounding up the very best new plugins of 2023.
Kick back in your chair, put on your headphones, and enjoy the following list. I know you’ll find something that suits your needs.
So What are We Covering, Anyway?
For starters, no virtual instruments will be covered. Instead we’re going straight for the mixing and mastering angle. You’ll find great plugins for mixing music, mastering program material, performing audio restoration, crafting sound design textures, and executing post production projects to meet deadlines.
You can rest assured you’re in good hands. The author of this piece is well-versed in all of these disciplines. Any plugin I recommend gets daily use around here.
What’s Eligible for Inclusion in the Best Plugins of 2023?
We’ll cover plugins released between the holiday season of 2022 through today, which gives us a full calendar year of ground to cover.
Three plugins on this roundup first came to market before 2022. But they received significant updates in 2023, which makes them eligible for inclusion in my book. (Besides, they’re too good not to include.)
Finally, we will have a TON of audio examples in this one. To follow along more easily, click here to load a playlist featuring all of them.
Let’s get to it!
Top Tools for Audio Repair
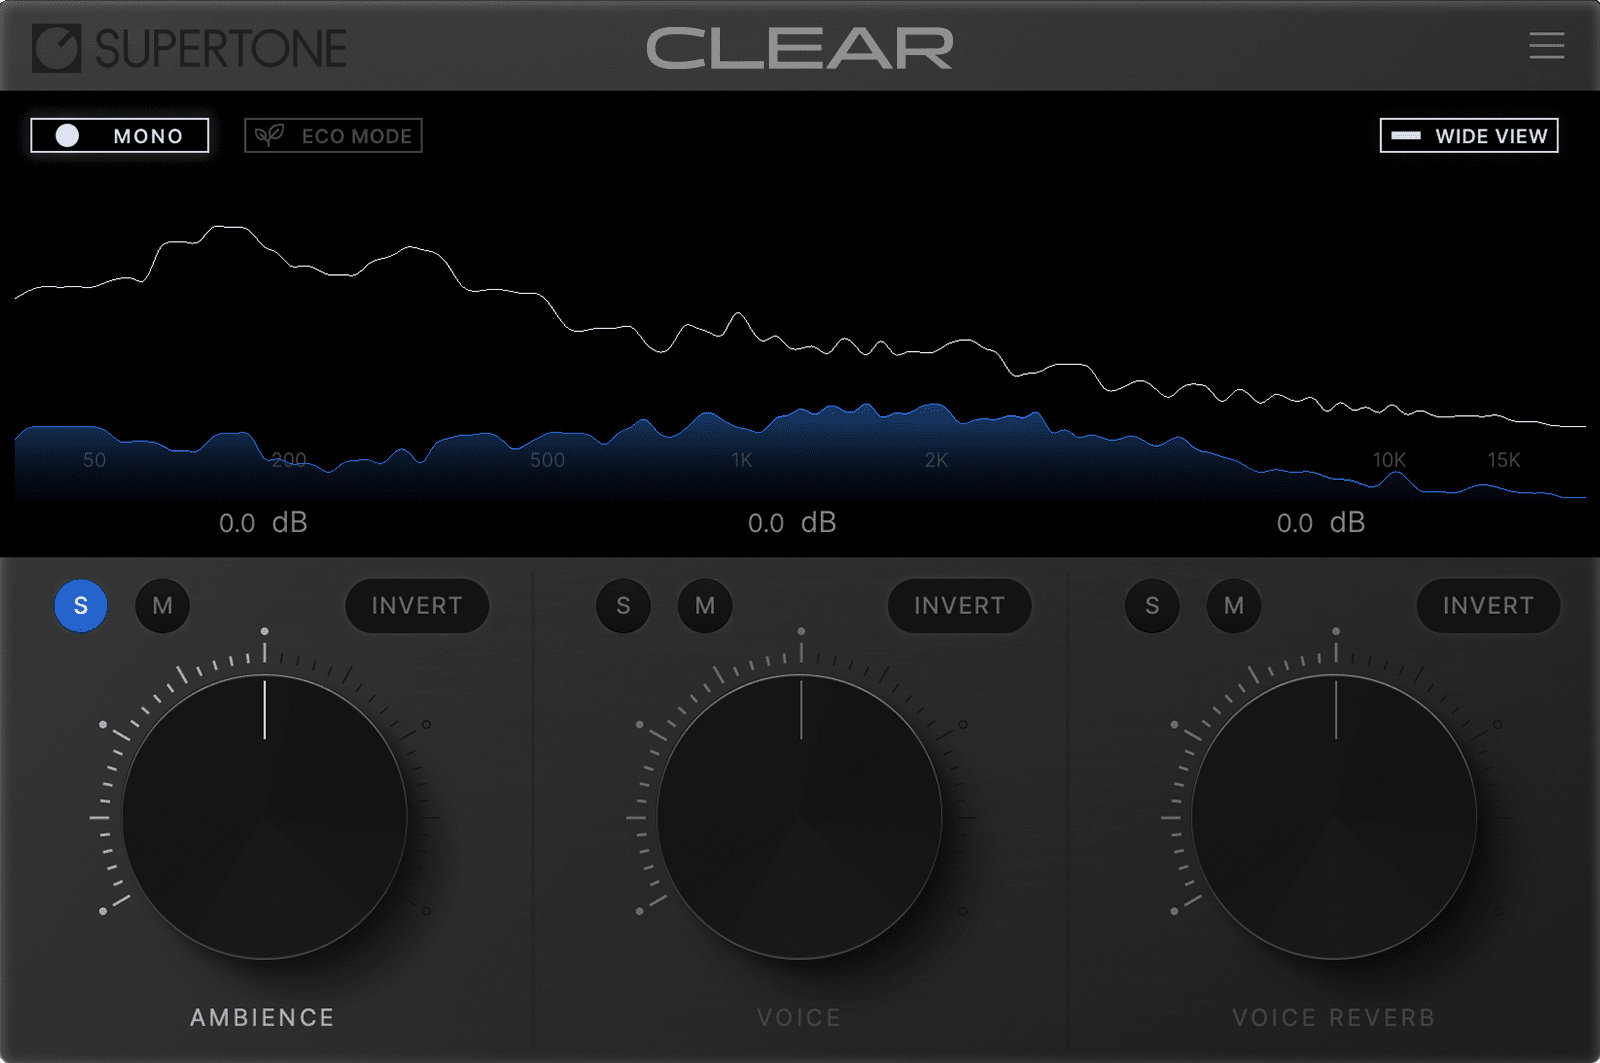
Supertone Clear
AI might prove a threat to humanity as a whole, but so far it’s been great for post-production engineers. Some of these new algorithms are fantastic for de-noising or de-rooming audio. And Supertone Clear, which is possibly the cheapest of the new AI crop, could just be the best.
You might already know this plugin by its beta. For about a year, Supertone called this piece of kit “Goyo,” and post-production engineers the world over sang its praises on various forums. The beta is now closed, but the released plugin is dirt cheap at present, especially when you consider how good it is.
Observe this before-and-after:
Example 2 – Supertone Clear on Noisy Vocal
Sound Radix Auto-Align 2
Soundradix Auto Align 2
Buy it new on Thomann
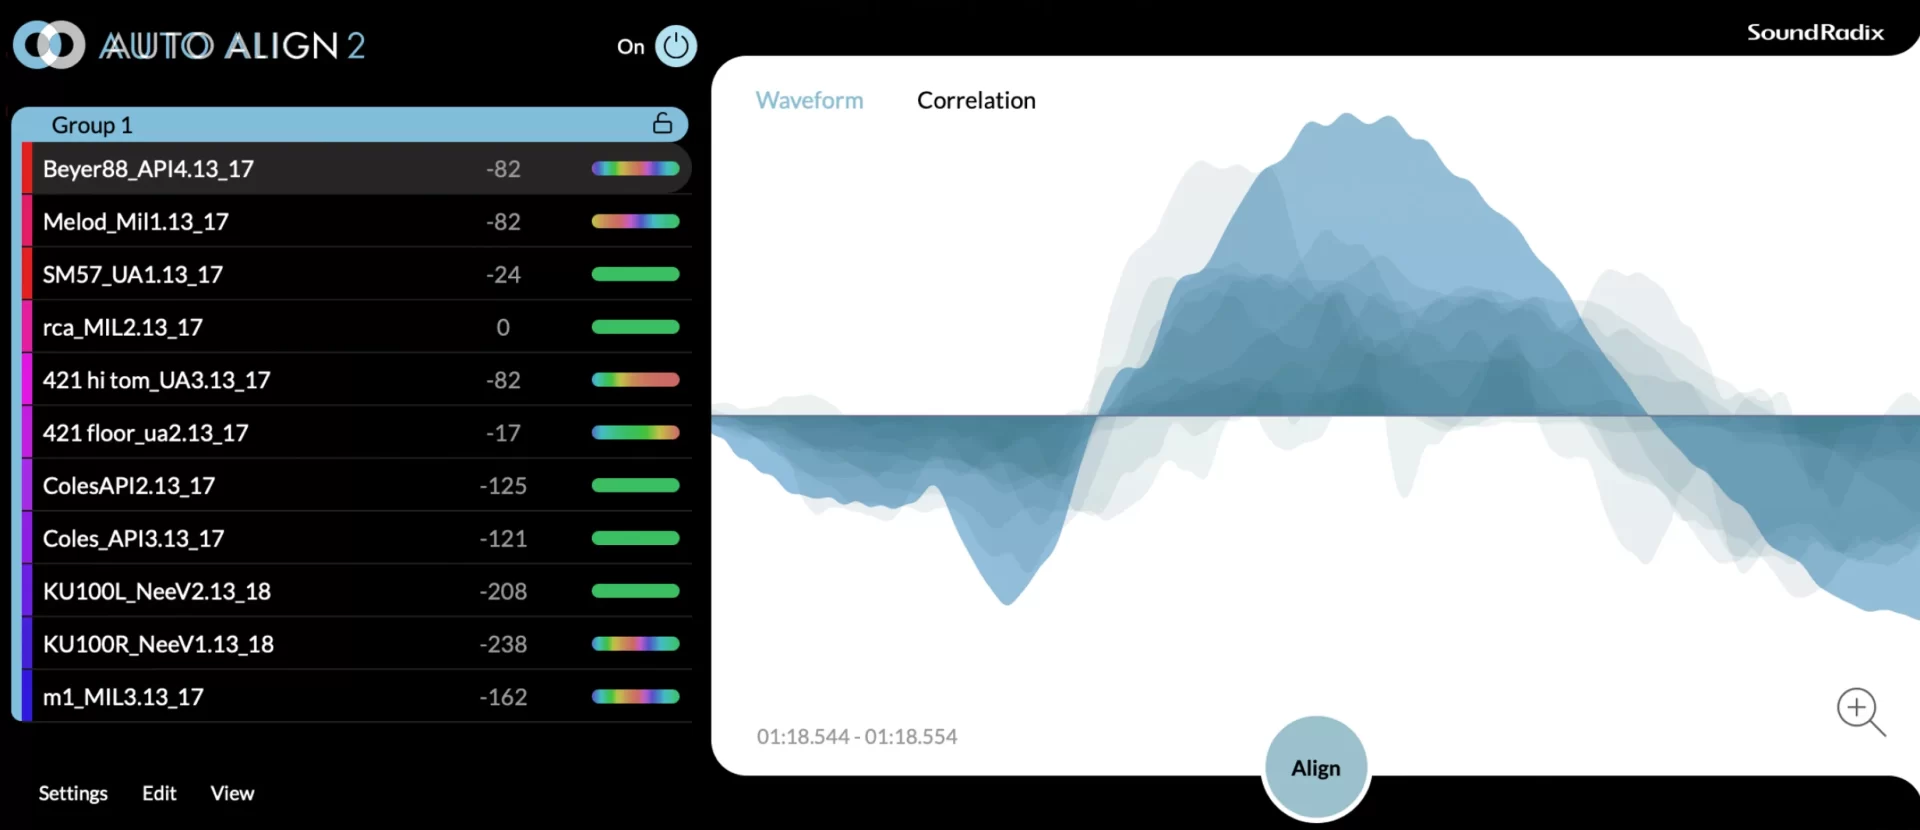
Designed to align multiple microphones capturing the same source, Auto-Align 2 made waves when it came out this spring. Some engineers raved about its speed and sound, especially compared to the first version. Others scoffed, claiming it killed the innate character of a multi-miced drum kit.
I see both sides. Yes, Auto-Align 2 can rip the personality right out of a multi-miced recording. A good tracking engineer spends their whole career in the service of achieving depth in front of the microphone, and this plugin defeats that depth, making everything feel upfront and in your face.
But ultimately, workflow wins — at least when it comes to rescue jobs on a budget. These days, a lot of people don’t know what they’re doing with a microphone. Factor in the proliferation of home studios, and bad drum sounds have now become the rule rather than the exception. Many atrocious recordings require deeper fixes than a pan knob or a polarity flip can provide.
That’s where Auto-Align 2 shines. It takes salvage jobs that previously required hours of work and handles the problem in a matter of seconds, making it easier to move on to creative endeavors.
By way of example, here are some drums I got from a band.
Example 3 – drums that need auto aligning
It’s great drumming, but everything sounds thin and far away. The kick and the snare are especially papery.
Here’s what Auto-Align 2 did for that set:
Example 4 – auto-aligned drums
It still isn’t good, but at least the transients are solid. I now have a framework on which I can sculpt, hang, or paste a better drum sound:
That mix was achieved in about ten minutes. Without the plugin, it would’ve taken way longer. I don’t use it on everything, but when needed it makes my life so much easier.
Tone Projects Basslane Pro
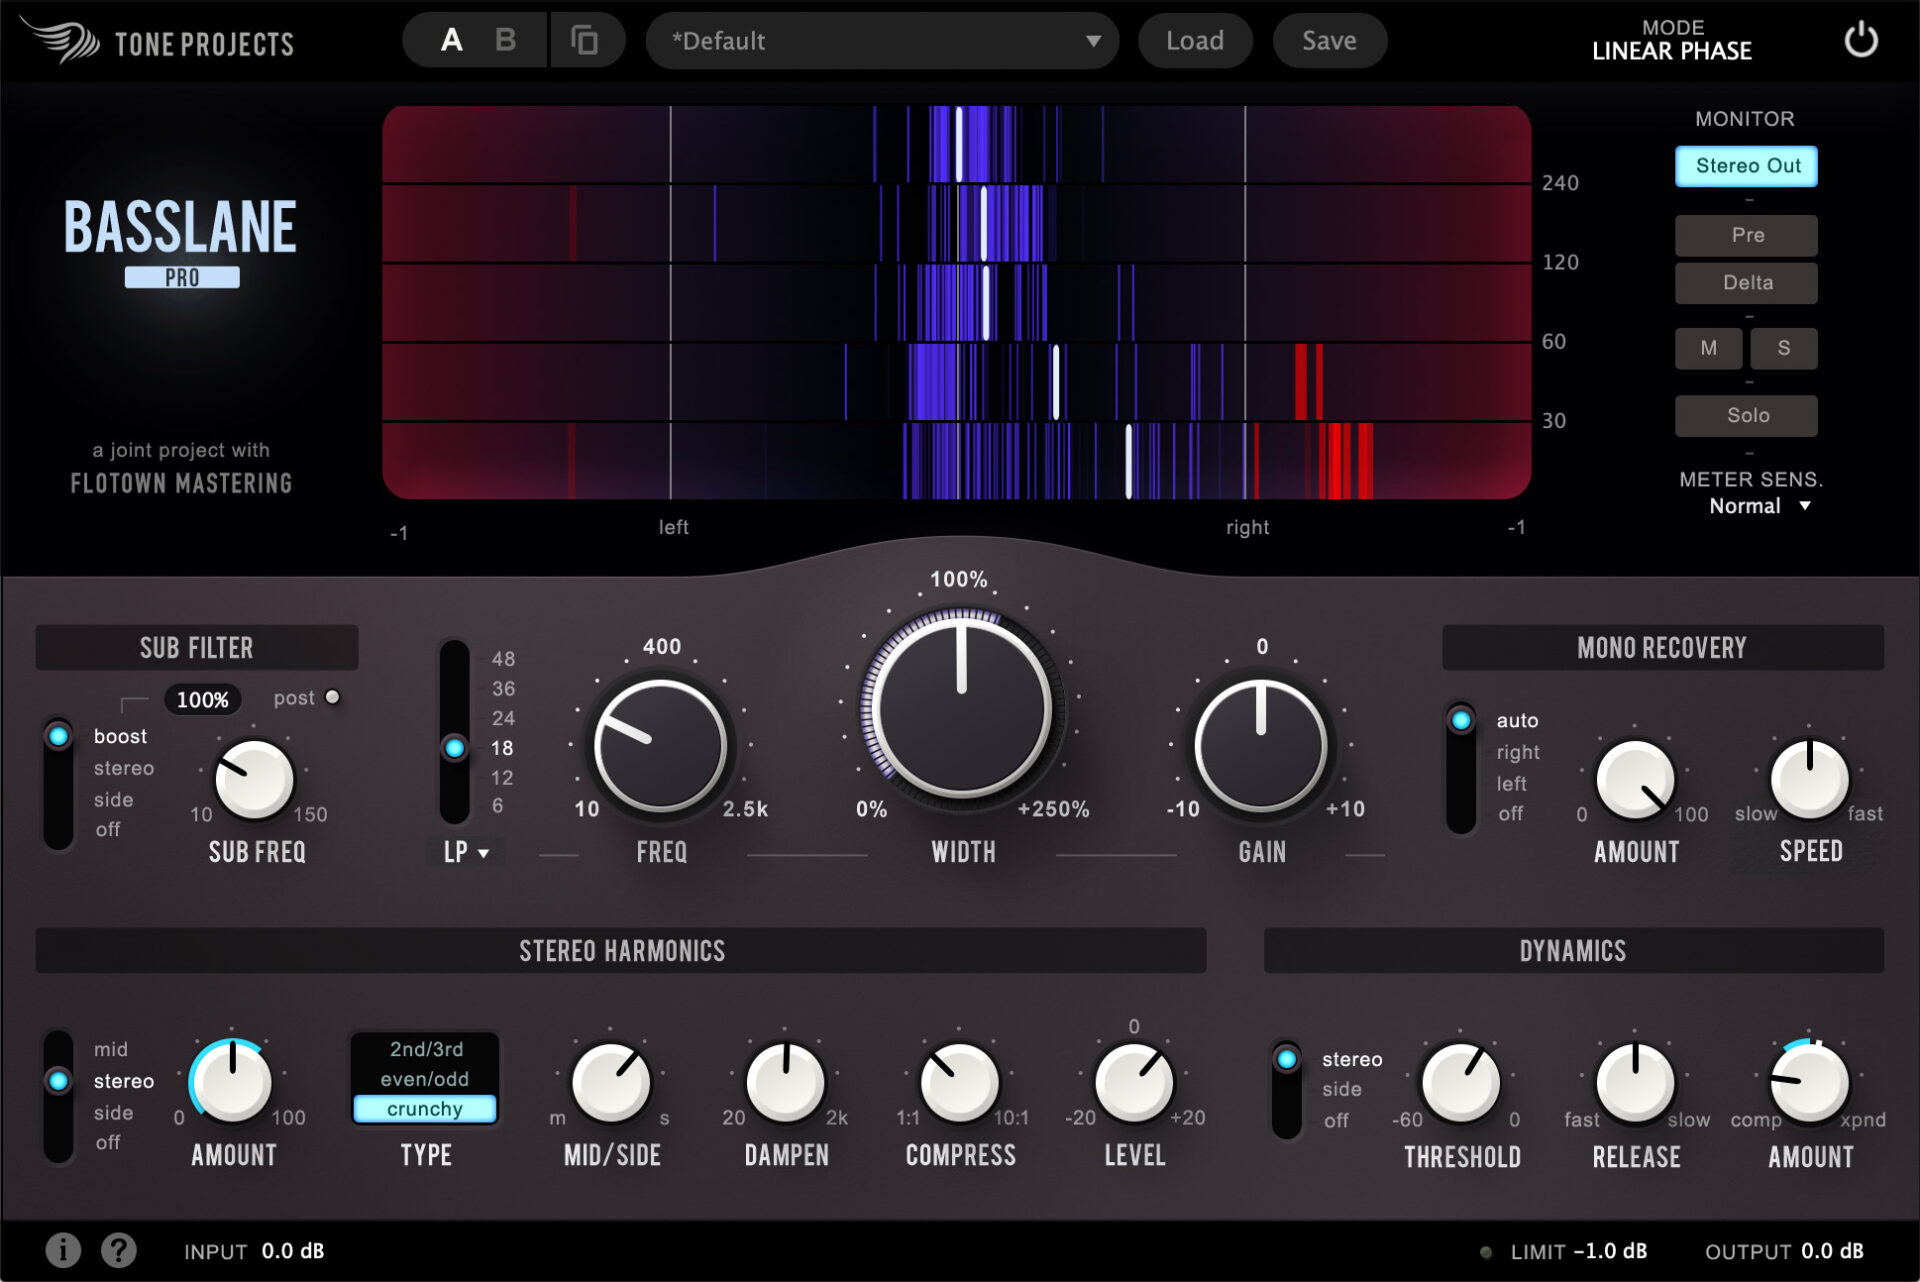
When Basslane Pro first came out, it was an instabuy for many mastering engineers. The company had two impressive hits with Unisum and Kelvin, but they went in a different direction with Basslane. It offers multiple solutions for handling common low-frequency issues in stereo tracks.
Need to sculpt the sides out of the lows? Basslane can do that with one of the most transparent filters on the market. Need to narrow or widen a specific frequency range in a whole mix? Basslane can do that with pleasing results. Want to make out-of-phase low-end information correlate with ease? Basslane can do that too. It can even generate harmonics from bass information, giving you the illusion of power without the negative headroom results.
All these tasks are secured with maximum elegance and minimal artifacts. Here I’ve made a problematic mix using Apple Loops:
Example 6 – Stereo loop with phase issues
Now I’ll slap on Basslane to iron out the low end for mono compatibility and widen the high-midrange, all while adding harmonics to the low end side information.
Example 7 – Stereo loop with Basslane pro
Not bad for one plugin!
Noisebud Leaky 3
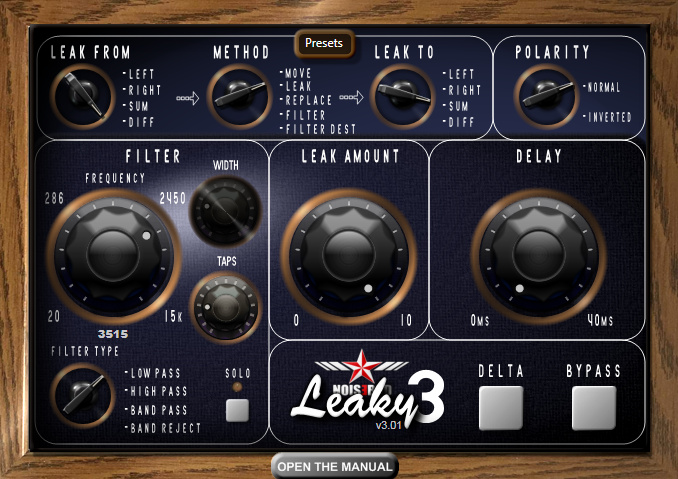
The brainchild of Mastering Engineer Johannes Ahlberg, Noisebud is an indie outfit operating on a Patreon model. And Leaky 3 is Ahlberg’s take on fixing phase issues in a mastering context.
Leaky can handle anti-phase issues all over the frequency spectrum. And unlike other stereo repair tools, Leaky has an almost scary ability to pinpoint issues and fix them without detriment to the mix, provided you know what you’re doing.
That’s not to say tools like Ozone or DrMS aren’t helpful. They are precision assassins in their own right when it comes to handling stereo issues. But sometimes even precision assassins need a little help, as Pulp Fiction teaches us. Think of Leaky 3 as Mr. Wolf, getting Jules and Vincent out of a tight spot.
Leaky 3 lets you take any portion of the left, right, sum, or difference signal and inject it elsewhere in your mix. Have a phase issue between 110 and 170 Hz? Is nothing else working? Try using Leaky to grab that isolated frequency range from the left channel, flip the polarity, and mix it in with the right channel.
It doesn’t have to be left to right though, it can be left to difference, or right to sum. And it doesn’t have to be a band-pass filter. You could use a high-pass filter instead. You can also forsake polarity flipping for introducing millisecond delays. All of this and more is possible with Leaky, making it a powerful tool for those who know how to use it.
Example 6 – Stereo loop with phase issues (again)
Example 8 – Stereo Loop with Leaky 3
Leaky can also do wonders on individual low-end stems. I routinely use it to retain width without going into anti-phase. It’s gotten a lot of use around here in mixing and mastering contexts alike.
The original Leaky was not released this year, but version 3 was redesigned from the ground up with linear-phase filters in 2023, making it eligible for inclusion. Be aware though, Noisebud does not offer support for Pro Tools, so you’ll have to use a wrapper if you, like me, need to pay your yearly “so you want to be an engineer” tax to Avid.
Immersive Audio Tools
THX Spatial Creator
I took a deep dive into immersive audio this year, as one of my post-production clients wanted to execute binaural files that could translate to two channel stereo systems. Diving into everything from Atmos (via the binaural renderer) to obscure academic plug-ins designed by graduate students, I learned a lot. Namely that cost is no guarantee of quality, and that front-to-back panning is much easier to achieve than height.
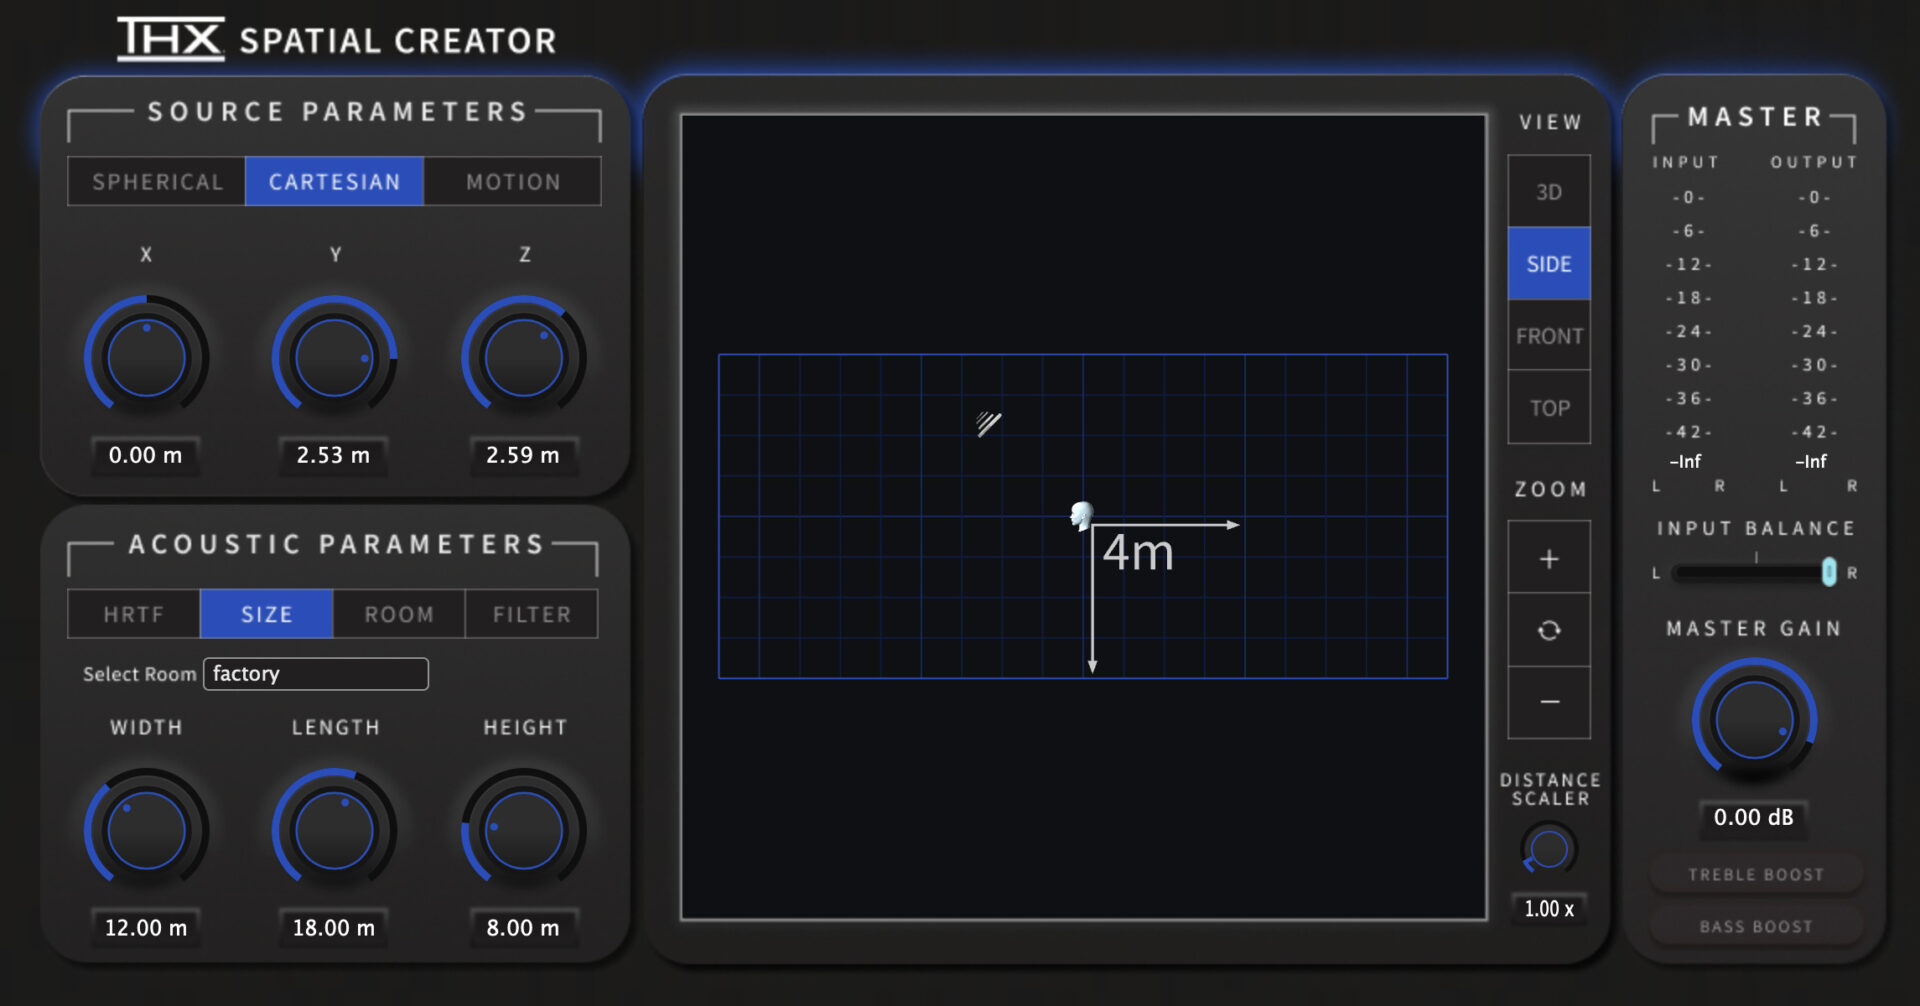
Indeed, Atmos was the best at handling the height dimension in a binaural render, though the workflow was cumbersome for stereo projects. But THX Spatial Creator entered the scene a few weeks ago, and my prayers have finally been answered. We finally have a plugin that does height reasonably well without being insanely onerous or buggy.
THX Spatial Creator may look like its Plug-in Alliance cousin DearVR Pro, but it’s not. Here’s a little scene I slapped together, with two people talking against an ambient background track:
Let’s run it through Dear VR Pro to make one character sound like she’s positioned above the other:
This doesn’t sound very real to me. Nor does it sound good. Now, check out THX Spatial Creator:
Example 11 – THX Spatial Creator
THX Spatial Creator is the first tool I’ve seen in a stereo environment that makes me feel like we’re on our way to a truly 3D world. It doesn’t sound thin or terrible on speakers, if handled well.
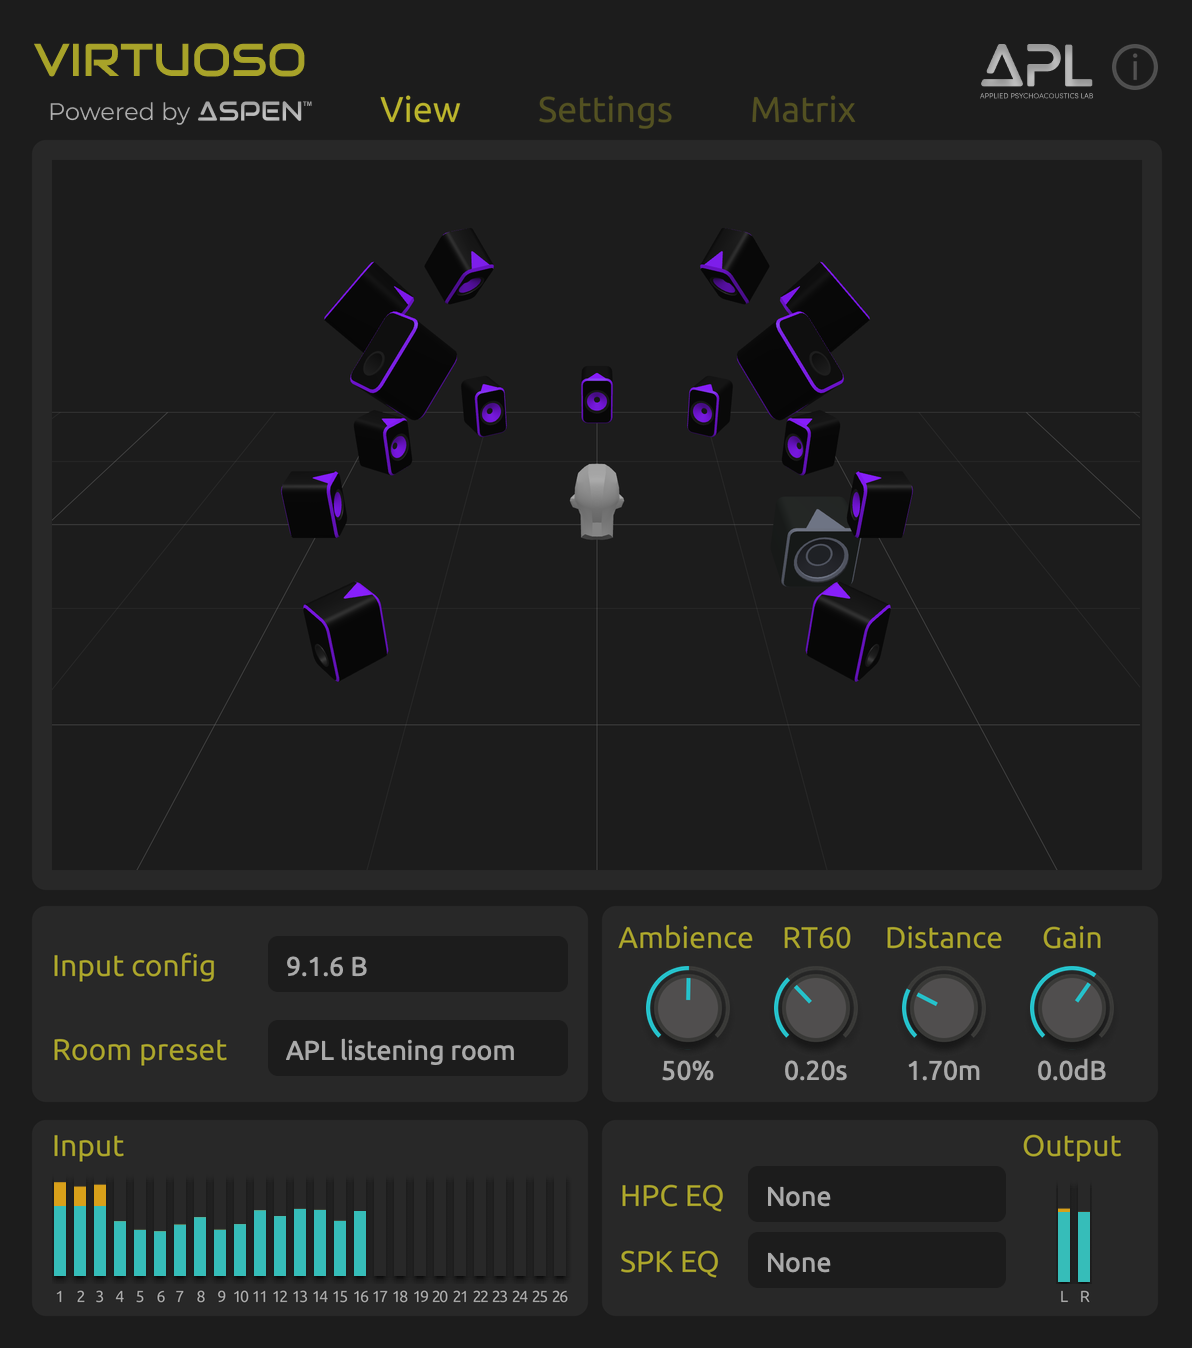
APL Virtuoso
Steven Slate already released credible room-modeling software with VSX. Waves and Acustica Audio have their own variants as well. Do we need another plugin that models a room in headphones as Virtuoso does?
It helps when someone does a fantastic job of it, all without requiring a bespoke set of cans. Virtuoso really steps up to the plate here. Observe our stereo loop in a modeled environment. Here it is, as a refresher:
Example 12 – Stereo loop with phase issues
It’s been level-matched to hang with the following example, as Virtuoso does bring the level down to keep from peaking:
Example 13 – Stereo loop over Virtuoso
You can also tailor Virtuoso to an insane degree. Say you’re using Audio-Technica ATH-m50x headphones and you want to experience something like Barefoot MM45 monitors in a studio-quality control room. Here you go:
Example 14 – Virtuoso, ATHM50x, Barefoots, control room
Oh sorry, did you say you were using Audeze LCD-X headphones, and that you wanted the sound of two Dutch and Dutch 8cs in a living room? No problem:
Example 15 – Virtuoso, lcd-x, d&d8s
But really, Virtuoso distinguishes itself in its ability to capture the feeling of monitoring multi-channel setups on headphones. If you’re trying to make an Atmos mix work and all you have are cans, you’d do well to check your work on Virtuoso. It helps you create mixes that translate better to both binaural renders and actual Atmos systems.
I don’t mix in Atmos as a rule, so I don’t have my own examples lying around. Luckily Logic Pro X has a spatial audio demo, replete with panning automation, that shows off what Atmos can do. Here’s Montero, provided by Apple, with a bounce taken off the Atmos Renderer set to “spatial audio” settings:
Example 16 – Spatial Audio bounce
And this is what it would sound like monitoring it through a 7.4.1 emulation in Virtuoso:
Example 17 – virtuoso atmos bounce
Spend some time with it, as it could be jarring at first. One sounds like a conventional spatial audio mix, while the other localizes things into a virtual space. But getting to know this virtual space can reap dividends if you’re trying to make mixes translate to formats you don’t have the time, money, or inclination to pursue full time.
Top EQs and Saturators
A quick note: we’re grouping these together, as all my favorite saturators this year had an EQ component to them.
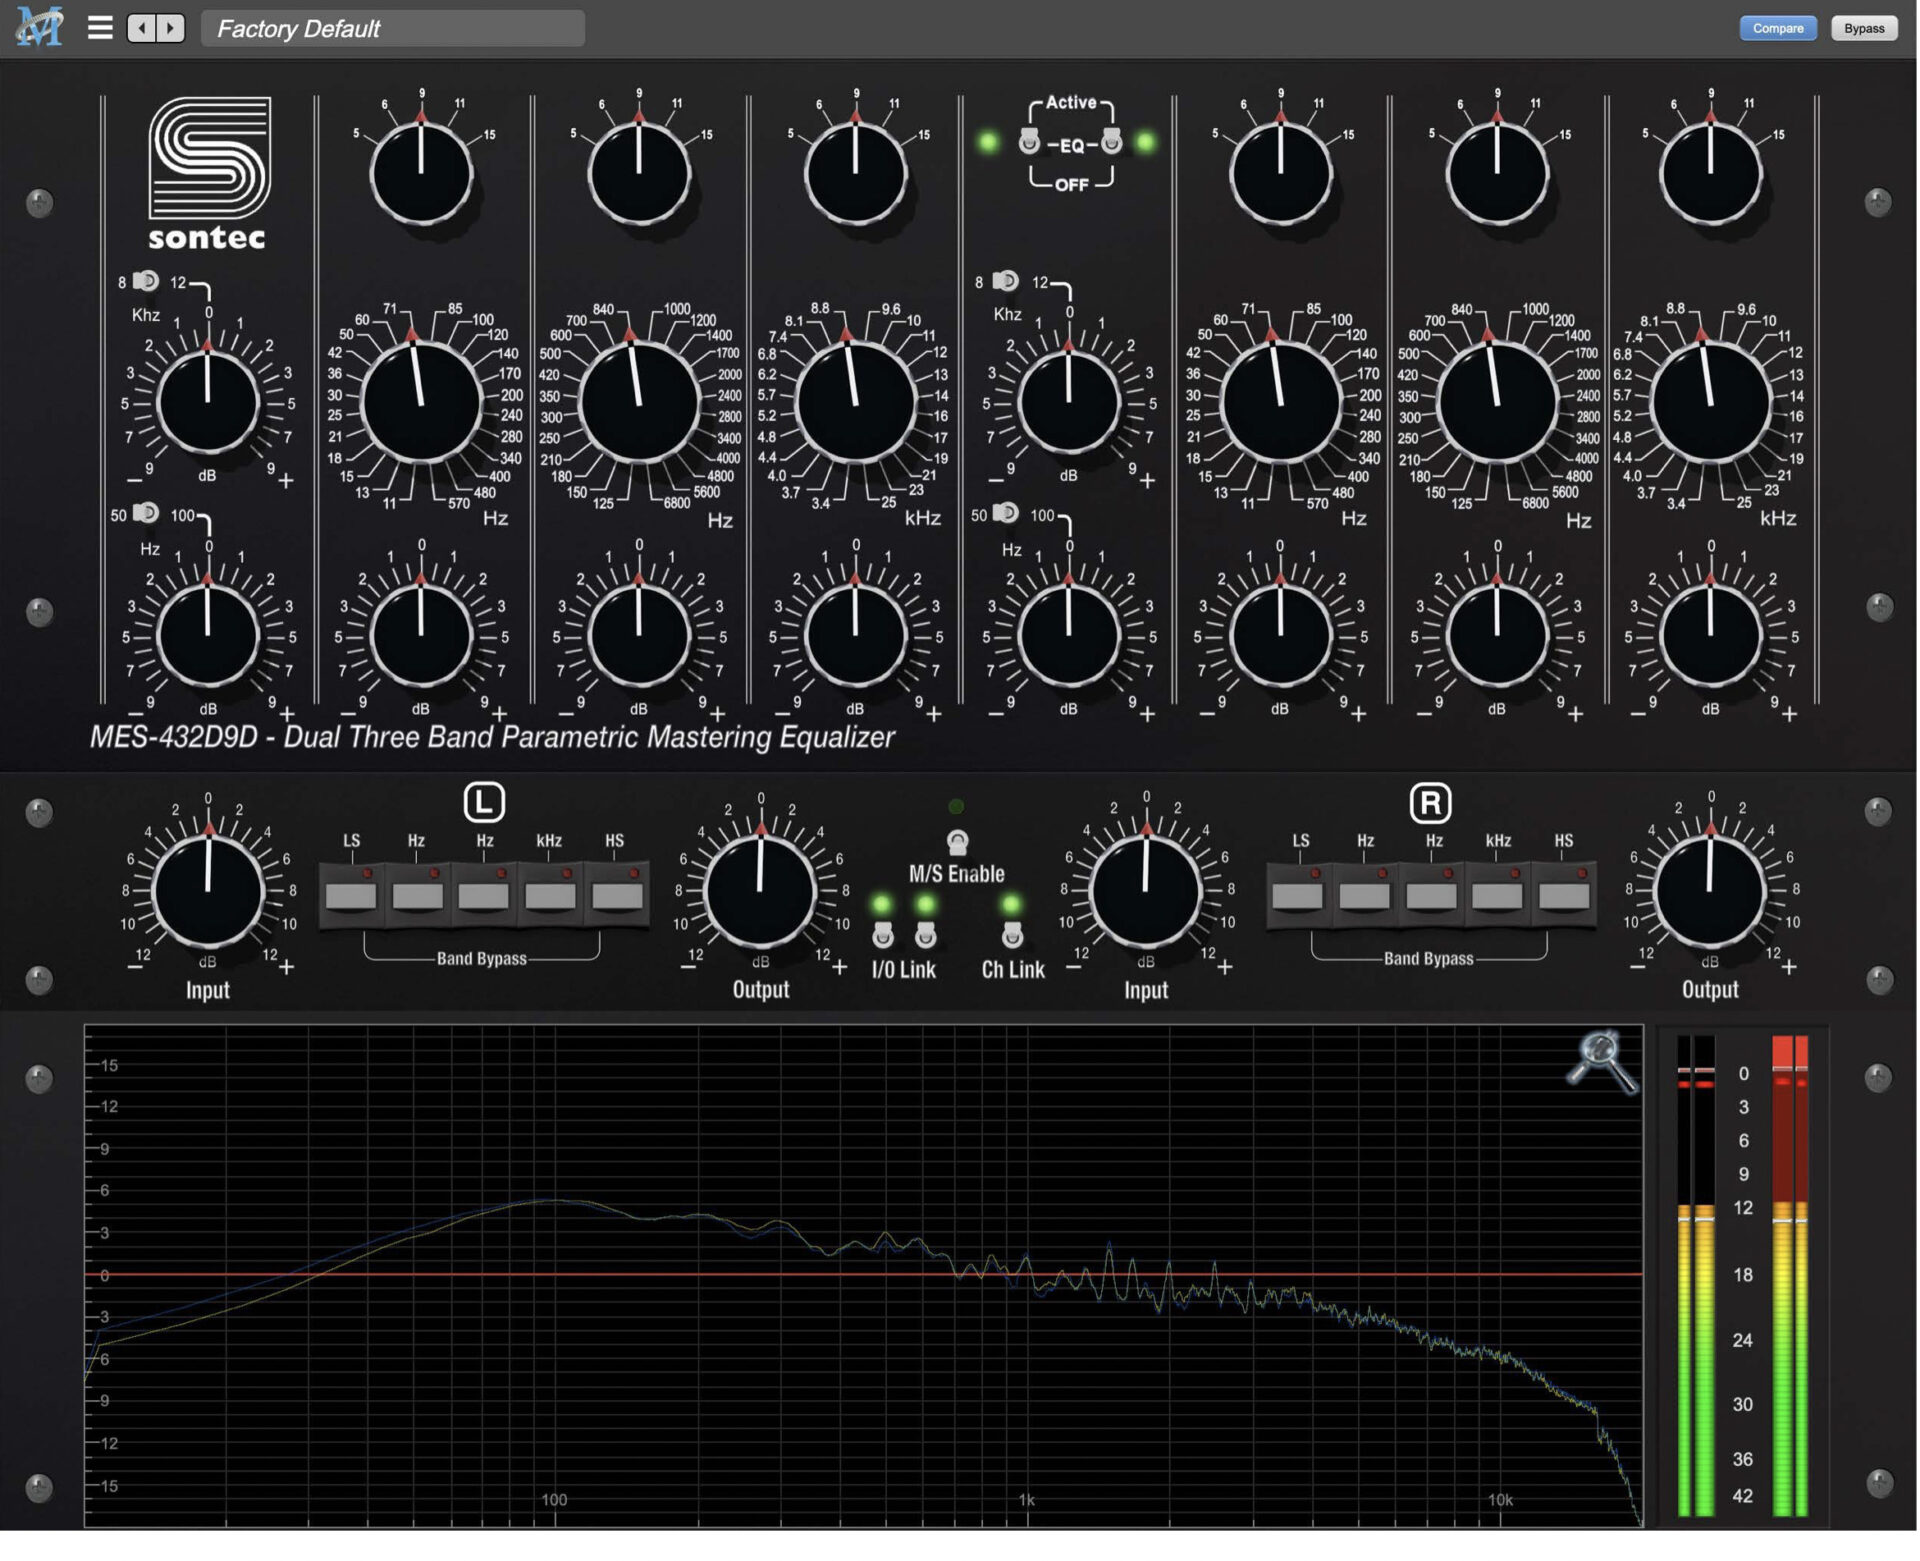
Make Believe Studio Sontec 432D9D
When it comes to transparent digital EQs, it’s hard to see how anything will ever improve upon FabFilter Pro-Q 3 for ease of use, or DMG Equilibrium for sonics. Both plugins came out long before 2023, so they can’t be mentioned here other than in passing.
Still, I’m very excited to tell you about the Sontec MES-432D9D, by way of Metric Halo, Make Believe Studios, and Burgess Macneal. First offered during the holidays in 2022, this plugin was recently updated, finally making its way to VST3 formats and Windows systems.
Will you get an easy-to-use drag-and-drop EQ? No. It’s a mouse-over-knob experience.
But who cares, when this EQ sounds as good as it does. The lows are sweet, the highs are never harsh, and it brings a gloss to projects that rivals even the most expensive hardware EQs (I’ve tested it against my own).
I know that’s a lofty claim. I didn’t want it to be true. I wanted it to be snake oil, so I could justify my choices to invest in gear rather than home ownership. But it really is that good. Even its box-tone is as euphonic as any hardware I’ve got, giving you an extra sheen you simply can’t get by slapping on Pro-Q3.
If you take a track of pink noise, run it through the Sontec at default settings, and flip the polarity against the original. You’ll hear it doesn’t null. The difference is subtle and certainly low level (I never claimed it was colorful) but it’s there. Judging by running real music through this thing, these tiny discrepancies make a huge difference.
Let’s take a mix and show you just what it can do. Here’s an acoustic folk rock mix that’s too chunky for its own good.
Here’s the Sontec cleaning it up:
Example 19 – chunky mix w sontec
Here are its curves modeled in plugin doctor and applied to Equilibrium in parallel mode, to mimic the topology of the Sontec.
Example 20 – chunky mix w dmg equilibrium
Now flip between the Sontec and the Equilibrium. One definitely feels more alive than the other. That’s not to say DMG Equilibrium isn’t fantastic, but it isn’t Sontec.
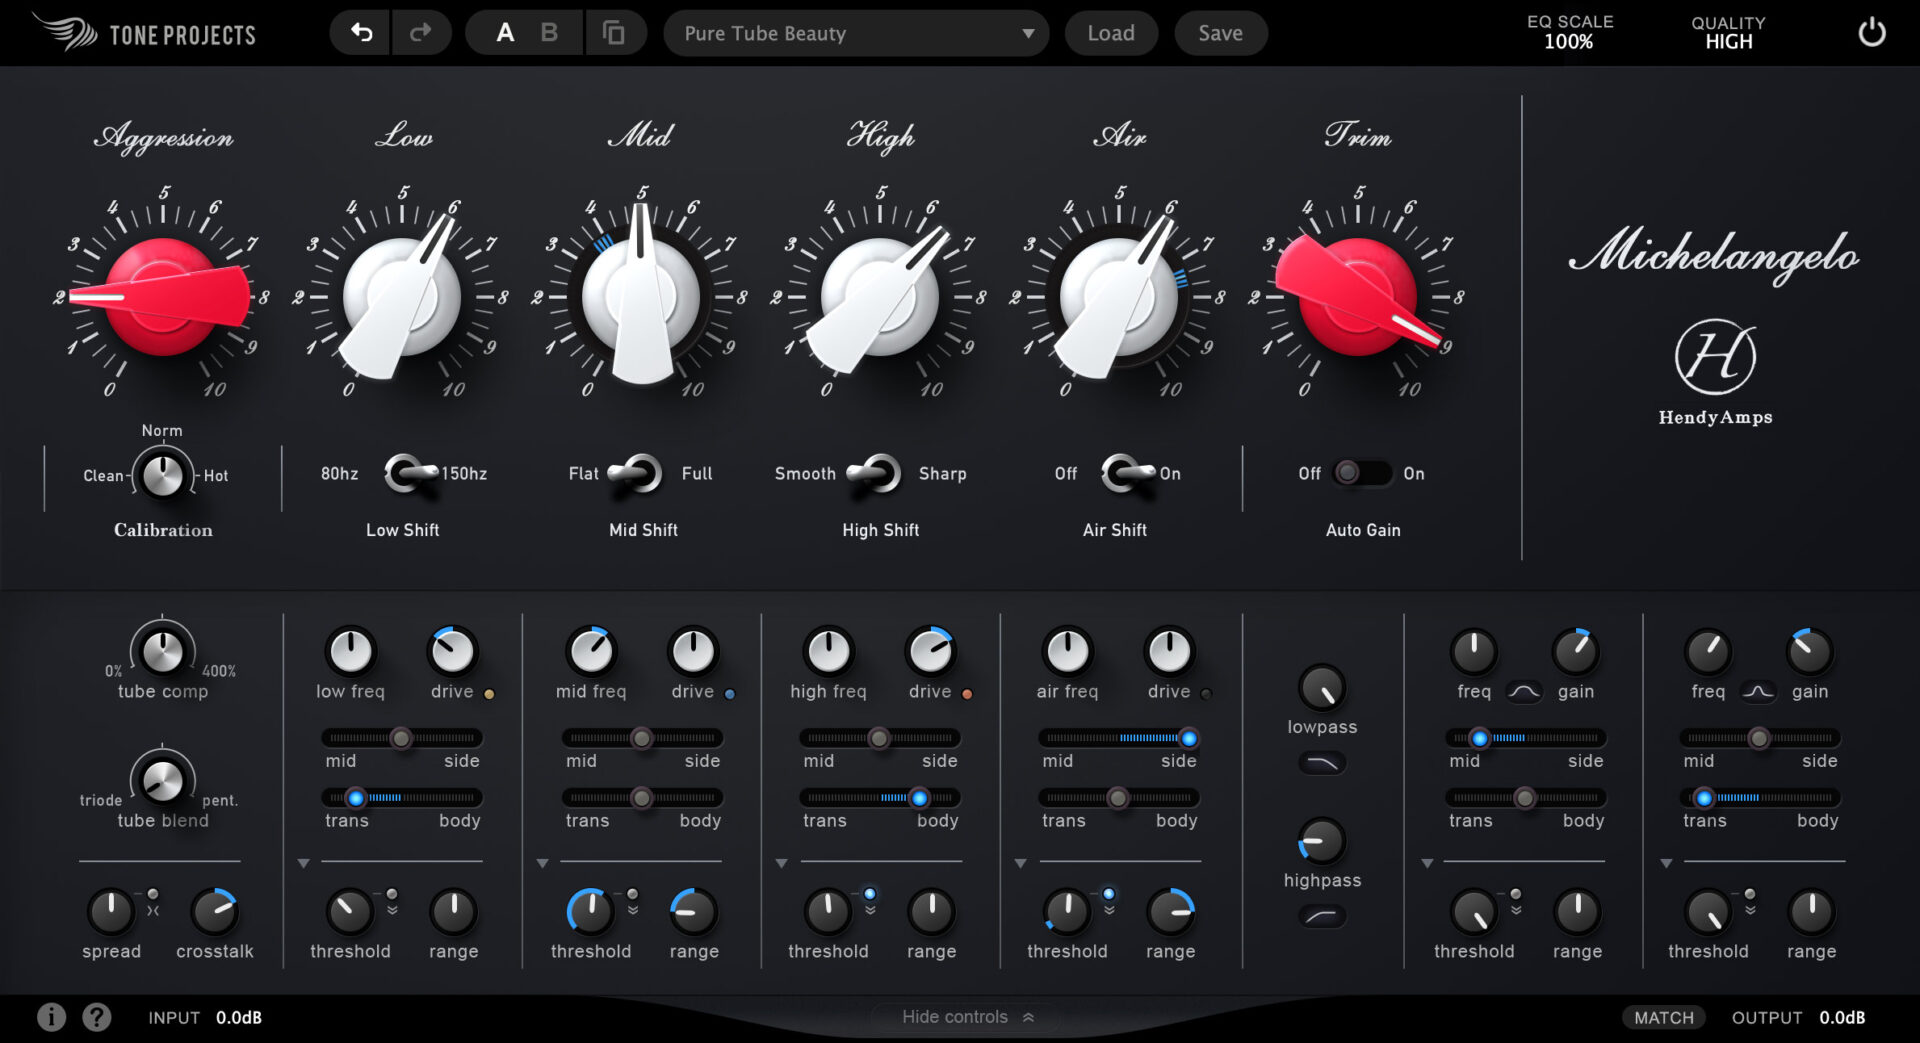
Tone Projects Michelangelo
Tone Projects already appeared on this list with Basslane Pro, and here they are again with Michelangelo, released only a little while ago.
This plugin is based on a prized piece of hardware from Hendyamps that’s tough to describe. It’s an equalizer and saturator in one unit, a unique beast meant to enliven signals.
So what makes this one of the best plugins of 2023, especially in a market filled with EQs and saturators?
It’s not just the audio quality, which is exactly what you’d come to expect from Tone Projects (yes, the distortion feels scarily close to analog; yes the highs don’t get grating or harsh; yes the lows carry tremendous weight).
What truly distinguishes this product is its deep, yet intuitive feature set. Unisum is a beast to get around. Michelangelo has a much easier learning curve, even though it offers dynamic EQ, transient-shaping equalization, and variable mid/side controls.
Let’s take a mix I did earlier this year for Americana artist Pete Mancini and show you what Michelangelo can do with it:
It has that bounce you get when driving tubes ever so slightly, and some of the hard edges are rounded off; that’s all the top five bands of the unit. However, I’m also using the dynamic EQ to handle some sibilance around 4kHz on the transient side of things, and another EQ band is pushing some saturation into the sides around the Byrd-like guitars.
All in all, it’s very pleasant.
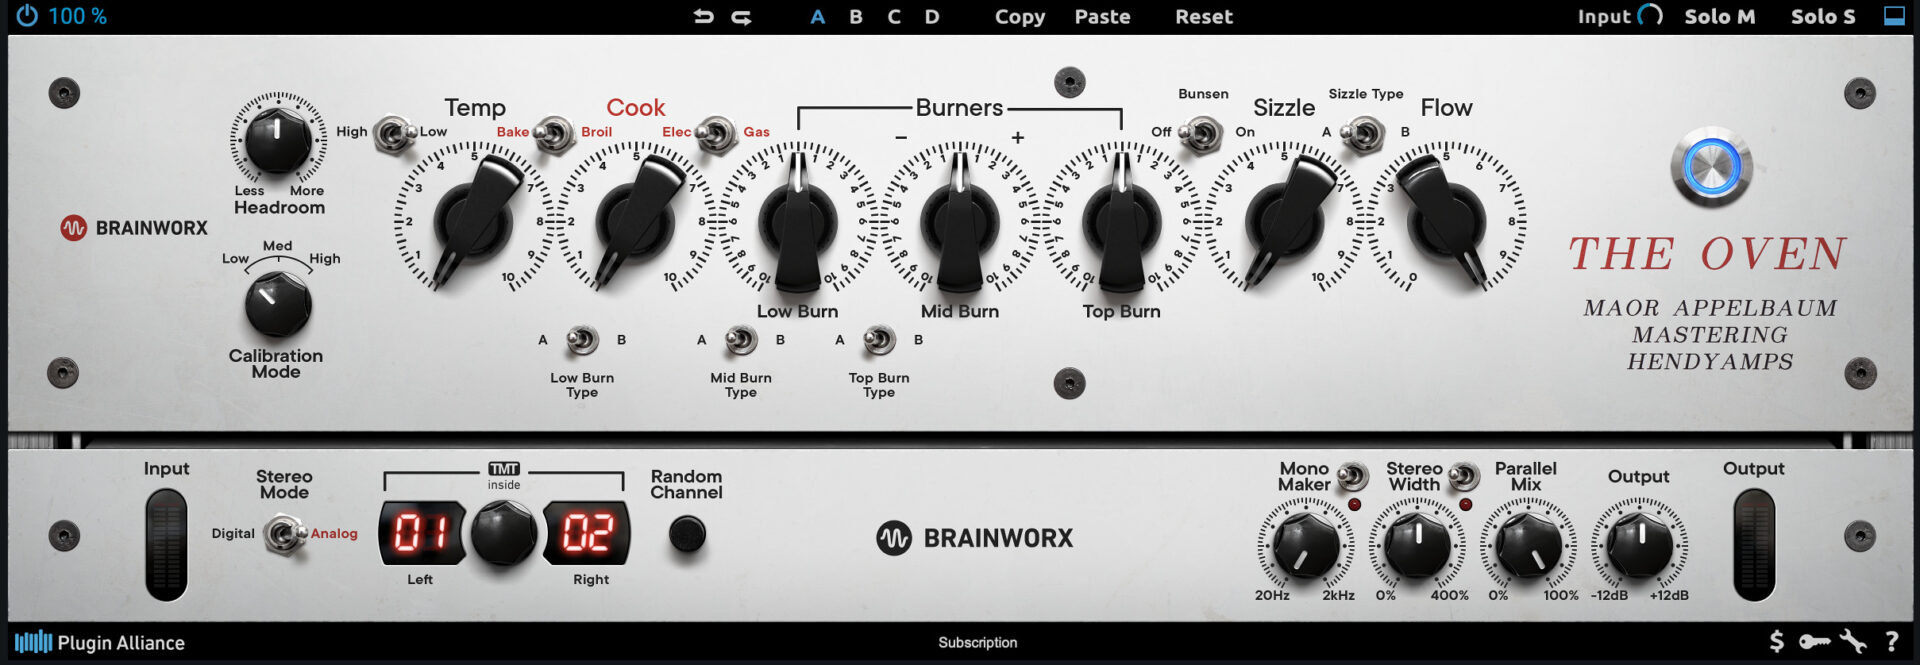
Hendy Amps The Oven
For those of us who’d prefer to not spend a premium price and don’t mind sacrificing some specificity in controls, here’s another Hendyamps emulation that sounds fantastic: The Oven, made in conjunction with Maor Applebaum. Yes, it lists at $349. But c’mon, it’s Plugin Alliance. There’s always a deal.
This saturator/EQ combo is a little less upfront about what it does, with controls named “Temp” and “Mid Burn,” but it does have a beautiful sound all its own, and it can enliven tracks quite well.
Again, we can tame the harshness and add sparkle, as well as give the mix some more density. Those familiar brainworx controls are on hand for stereo spread and mono compatibility. It might not “bounce” like Michelangelo, but it has its own weight to it.
2023’s Ultimate Swiss Army Knife
As much as I love new gear, only one plugin on this list has made itself indispensable to every project I do, from mixing music to delivering films. And here it is:
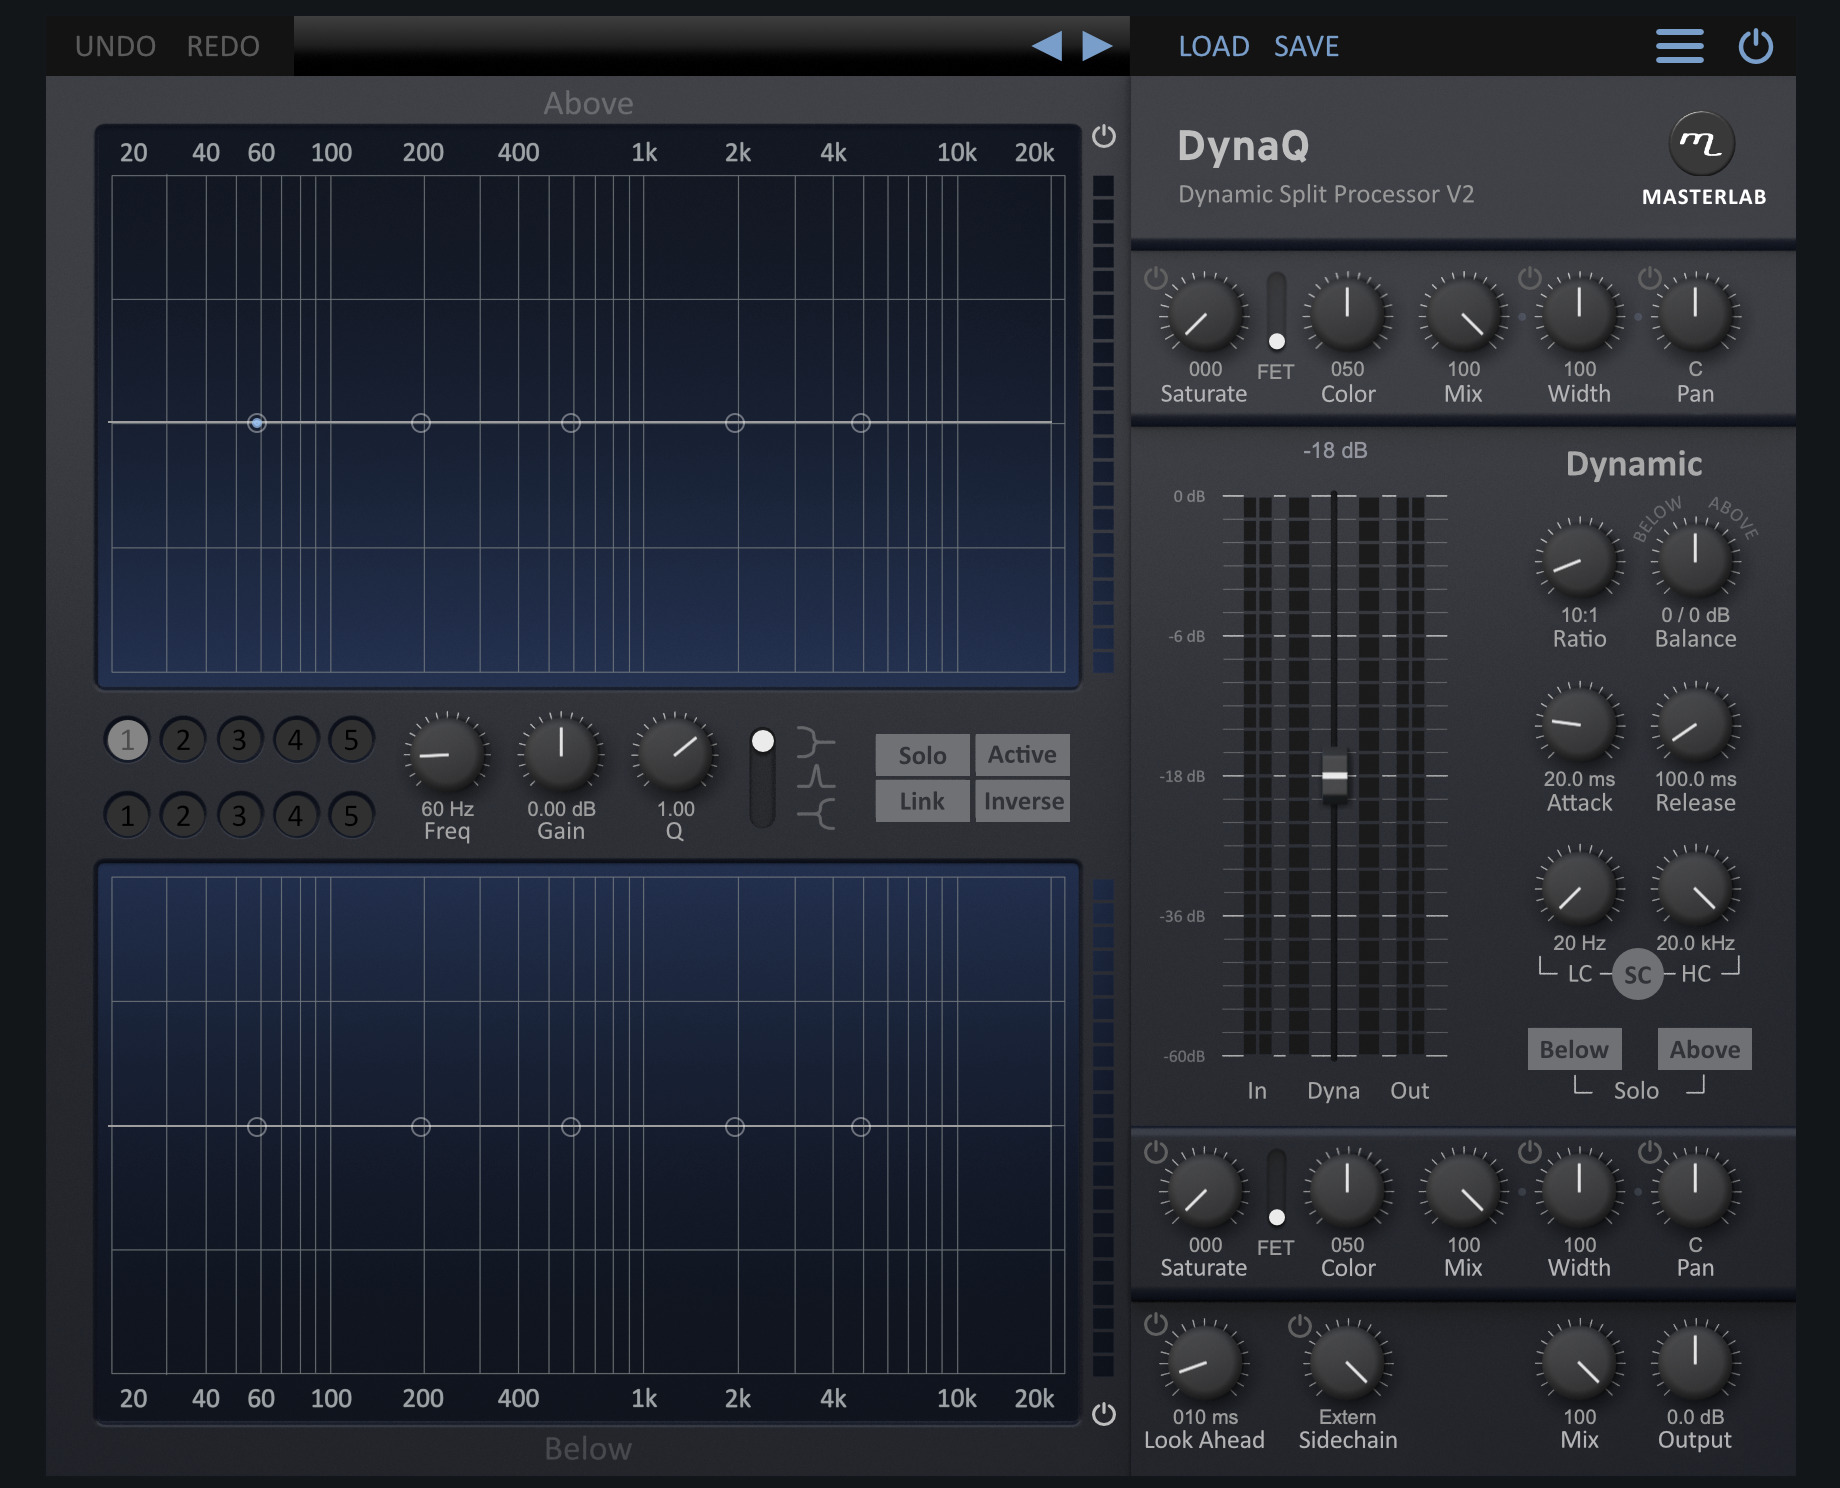
Masterlab Audio DynaQ 2.5
DynaQ has been around for a while, but it received an overhaul this year with tasty new distortion algorithms, a lookahead circuit, some GUI enhancements, and better ergonomics. So I’m considering it eligible, which is your gain, because this is pound for pound the best plugin on this list. I could not imagine working without it.
DynaQ is a problem-solver that could only exist in the digital world. It’s a transient shaper, a resonance controller, and a whole lot more. It handles all of its tasks with remarkable transparency.
The plugin uses the familiar controls of a compressor, but not to restrict dynamic range. Instead, all signal pushed above the threshold gets diverted into its own audio path, while audio below the threshold routes into another. Once the audio is separated, you can EQ, distort, pan, and widen each independent signal however you choose.
“Oh,” you’re probably saying, “like SplitEQ?” Yes and no. Using ultra-fast attack and release speeds, you can set up DynaQ to EQ transients and sustained material independently. You can even apply a different curve to both sets of signals (to my knowledge, you’re somewhat constricted in this regard by Split EQ).
But here’s the thing, DynaQ trounces Eventide’s offering when it comes to minimizing artifacts, which I can illustrate with the following comparison. Here’s a drum loop:
Example 24 – drum loop
I’ll solo the transients with Split EQ and stem them out. I’ll do the same for the “tonal” material. Then, I’ll polarity flip the results against the original loop. The audio should null, right? Transients plus sustained material should equal the original.
But no:
Example 25 – Split EQ Null Against Original
Those are what we commonly call “space monkeys” in the business, digital detritus that sounds god awful.
Now I’ll do the same thing with DynaQ. I’ll stem out transient material and tonal material, and do the null test with the original loop.
Example 26 – DynaQ Null Against Original
This is silence, as you can hear.
Regular users of SplitEQ ought to ask themselves a question. If this plugin adds artifacts just by splitting the audio, what kind of horrible space monkeys is it adding to your overall sound? Maybe these artifacts can add something sometimes. I’ve been known to favor it on occasion. That has to be the exception, not the rule.
But enough of that. Let’s move on to what DynaQ can do past transient processing:
With DynaQ, you can effortlessly “de-room” a vocal in post production, complementing a tool like Supertone Clear. You can grab a sung vocal within a full mix and de-resonate it or de-ess it. You can make drums pop out of a full mix without adding artifacts.
You can actually tamp down the distorted artifacts from steep filters, resulting in smoother phone-vocal effects and less aggressive synth sounds. You can move lingering kick resonances out of the bass’s way without resorting to multi-band compression.
You can literally grab the snare within an entire mix and EQ it differently from the rest of the song. You can automate all of these operations, making it perfect for sound design, mixing, and mastering applications.
And, most importantly, you can do this all without conjuring the dreaded space monkeys.
I can’t recommend DynaQ enough.
Now a bit of obligatory disclosure. While I do not have anything to do with DynaQ’s development or editorial content, I was on the v2.5 beta, and I did supply a bunch of presets. But that was only out of enthusiasm. No money changed hands, I did it for the love of the game.
Best Console Emulation
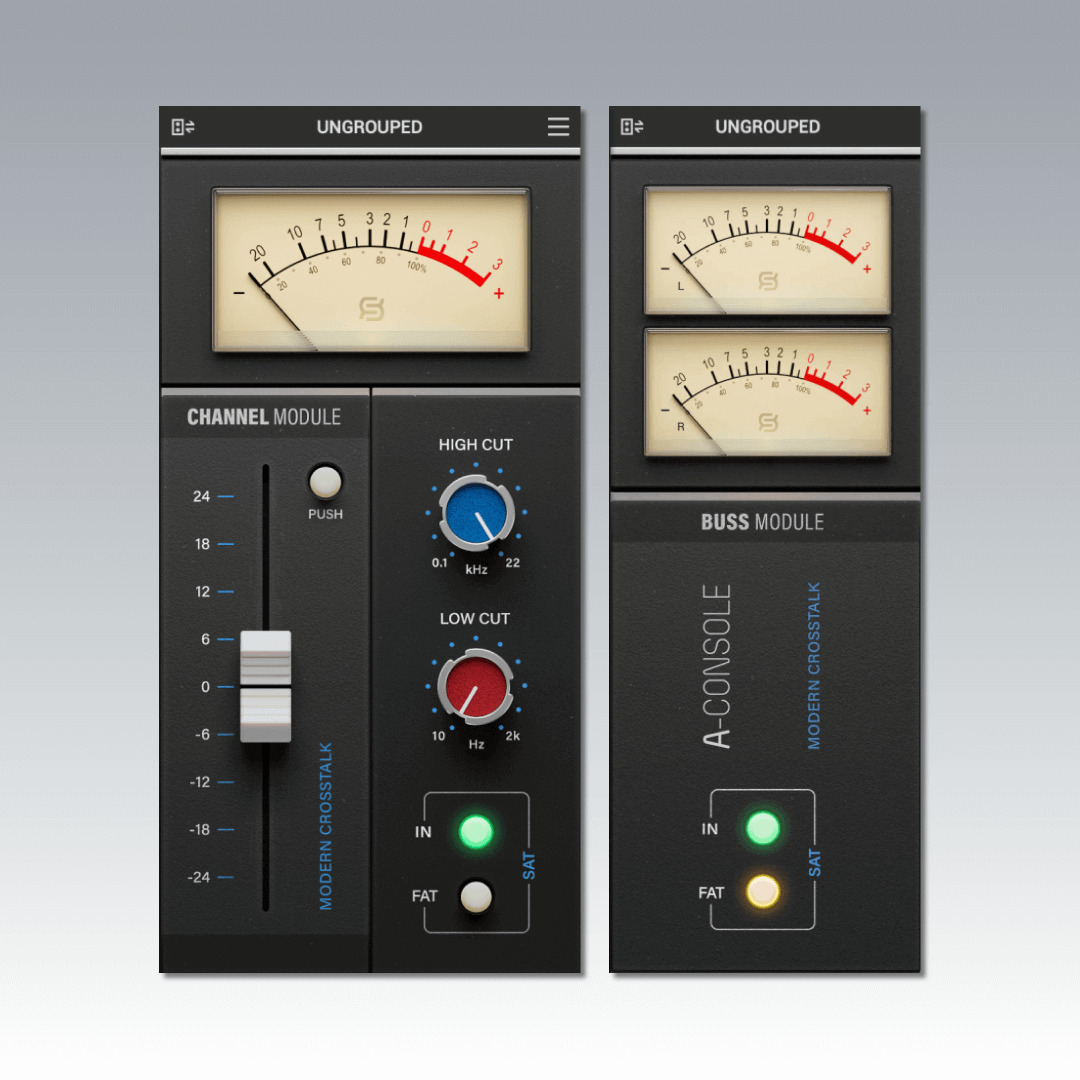
Sonimus A-Console
Sonimus was one of the first companies to bring console emulations to the mainstream, but unfortunately they got eclipsed by bigger names like Slate Digital and Waves.
This year they released A-Console, modeled on an API desk. And just like that, I finally found my in-the-box solution for achieving the API behavior I always wanted in a digital mix. When you run the A-Console system correctly, it gives you that fast, weighty, punchy feeling only API can deliver.
For reference, here’s a static mix I got from a client:
Here it is using Lindell’s take on API buss architecture on all the tracks and the mix buss.
Here’s Slate’s VCC in American mode.
And finally, here’s A-Console
Example 31 – Mix with A-Console
I find it much more alive—and much more like my favorite API boards—than the others.
Top Compressors
Kazrog Avalon VT-747SP
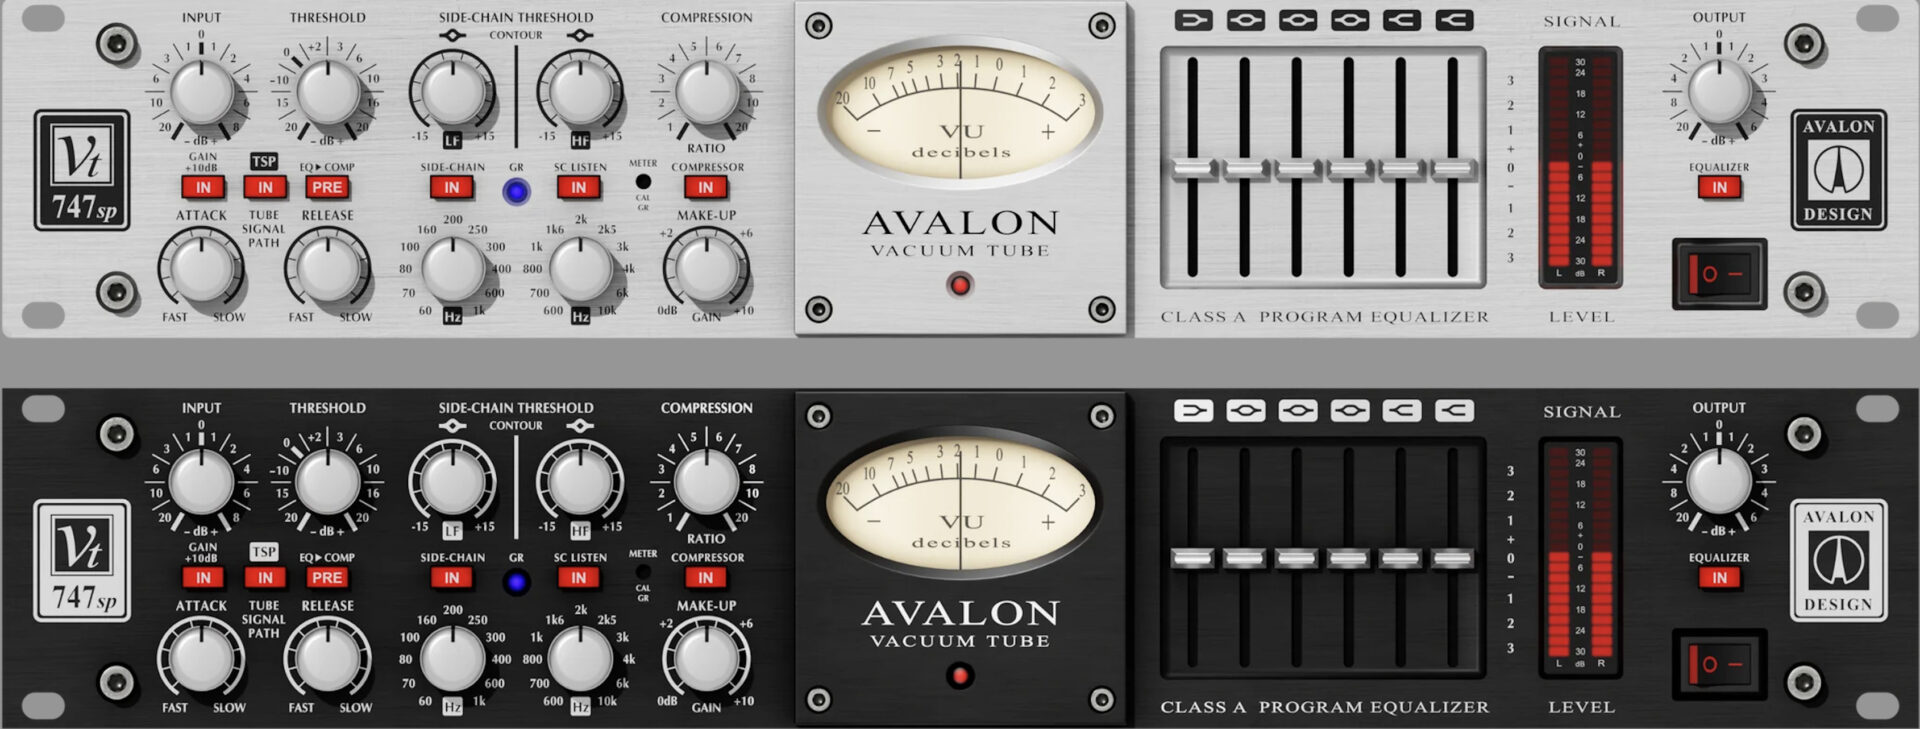
The Avalon 747 is a secret-weapon. It’s an optical compressor/EQ combo often used on basses, vocals, and even mix busses. It was finally modeled by Kazrog this year, and I find it lives up to the original. Observe a straight A/B comparison between an analog 747 (supplied by my pal James Crawford) and the digital equivalent at the same settings.
Example 32 – Kazrog 747 Through the Same AD/DA Loop
These have been sent through the same conversion loop. Honestly, I think the results speak for themselves. Like most digital emulations, the illusion tends to falter at faster time constants, which you can hear on the following example:
The stereo buss example, with its more conservative speeds, is something to behold. And you can’t beat that Avalon high end.
Pulsar Modular P11 Abyss
Pulsar Modular regards themselves very highly. Their plugins are almost prohibitively expensive. They refer to their software as “masterpieces” on their website, and they claim their applications go pound-for-pound with top-notch hardware compressors.
Some people are put off by their marketing. Others have fallen in love. The community around Pulsar Modular isn’t as problematic as, say, Acustica Audio. They give early adopters extensive opportunities to beta test their plugins, and they welcome and incorporate feedback from their user base.
None of this would matter if their plugins didn’t deliver. And unfortunately, the Pulsar Modular P11 is fantastic. I say “unfortunately” because this is one of the more expensive plugins on the list, and it’s hardly ever on sale.
For those who are looking to invest in one compressor to mimic every circuit, this is 2023’s tool to beat. It does transparency and mojo alike. The P11 behaves as though Unison teamed up with Universal Audio and let Acustica write their marketing copy.
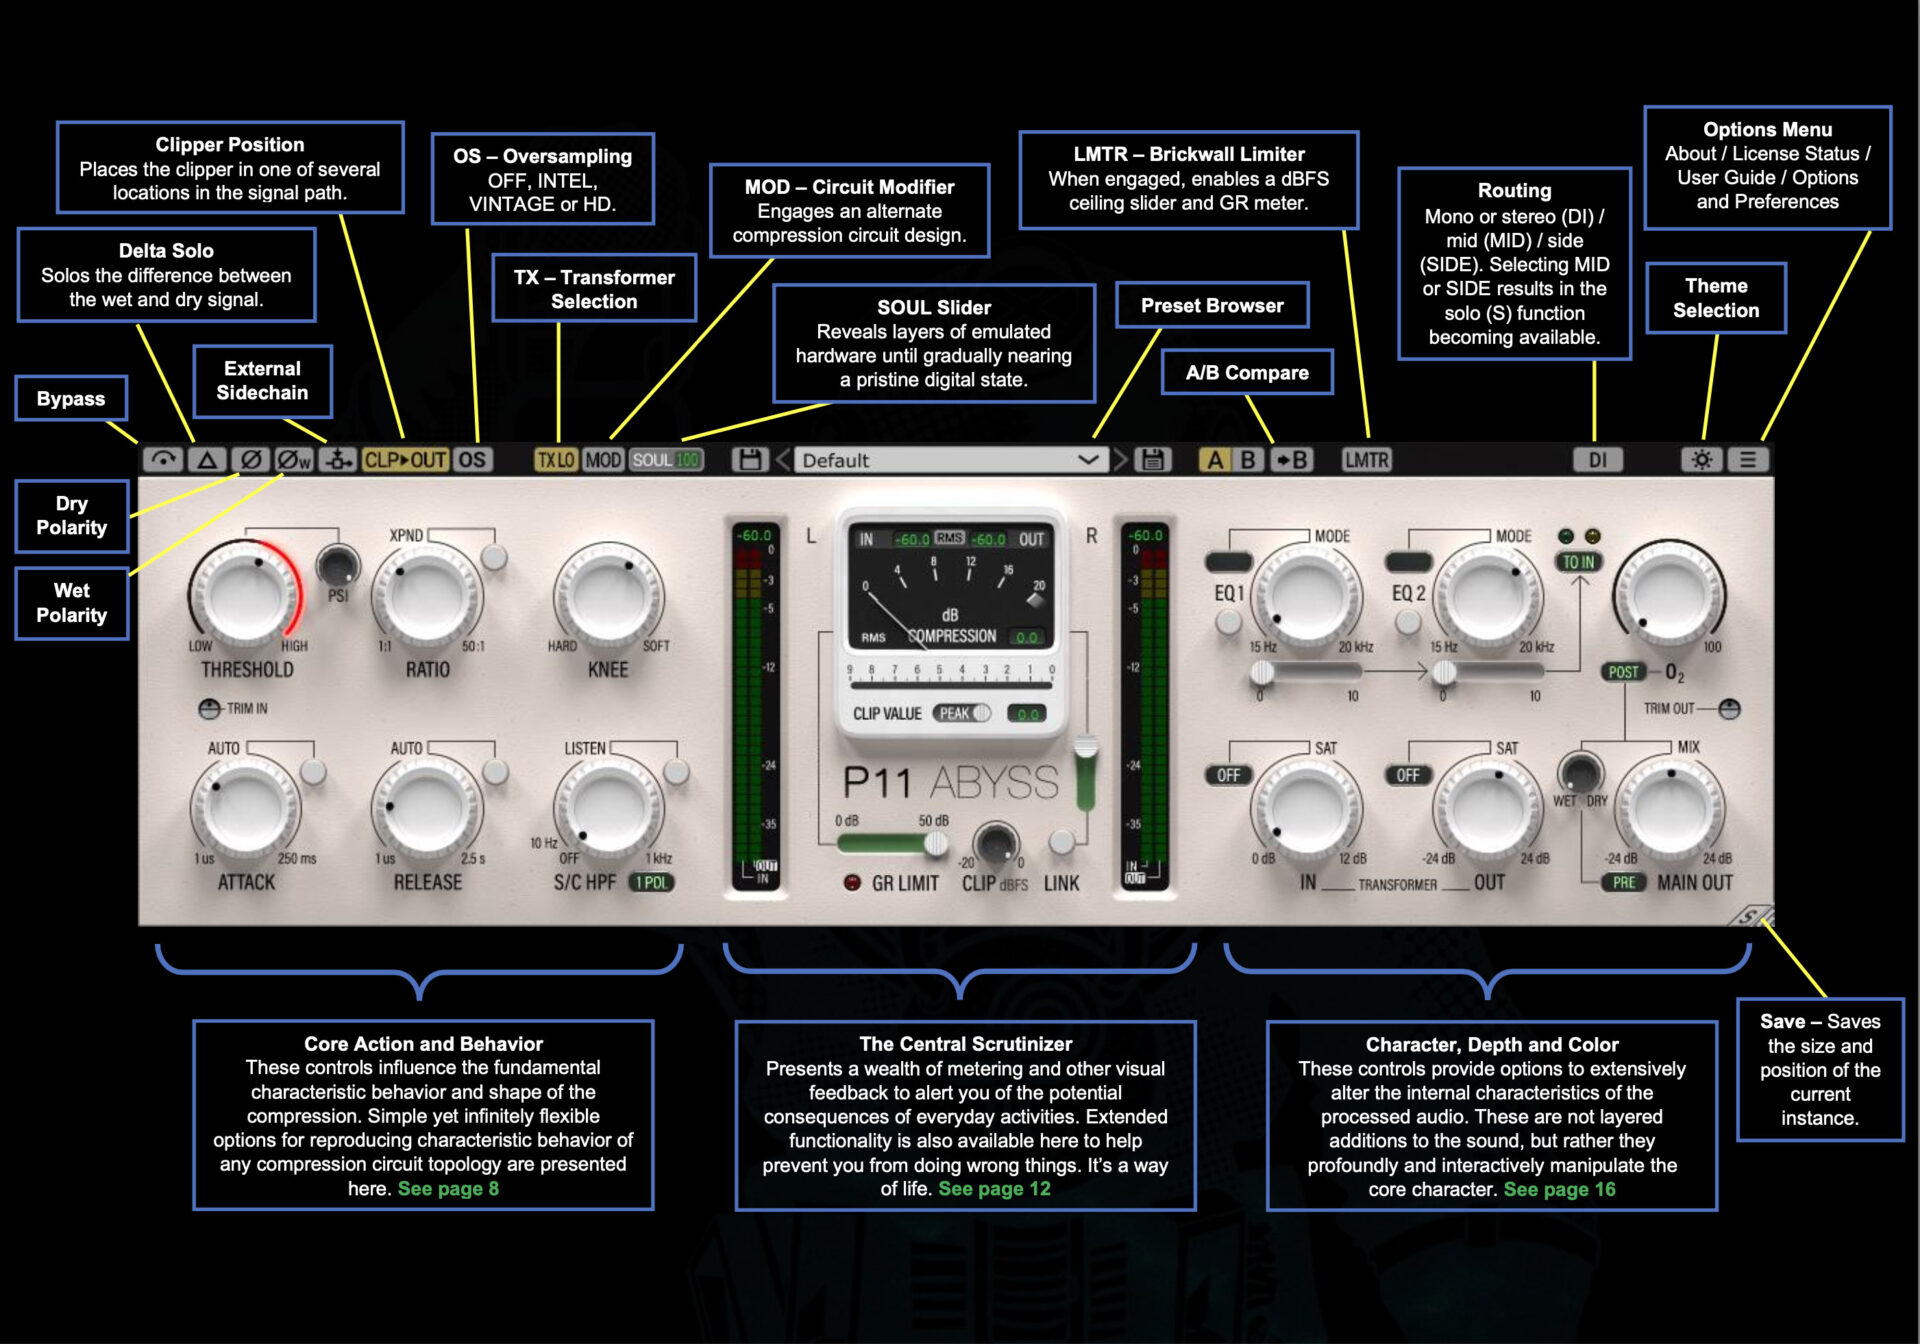
As you can see from the above image (taken from their manual), this compressor has a steep learning curve, as well as a deep set of controls that require time and patience. For instance, you can apply clipping to the side-chain signal, which is strangely handy. Some of its parameters aren’t intuitive at first glance. The knob that changes the compressor’s innate behavior is called PSI; the parameter that adds subtle harmonics is called SOUL, and the dial labeled “02” remains a mystery.
Even so, once you get the hang of it, P11 can accomplish a vast range of compression effects on any sound source, doing so with a small CPU hit, and adding as little or as much color as you’d like. With classy transformer emulations, a sweet sounding EQ, and extensive side-chain controls, it’s one of those units that rewards the investment. It’s hard to imagine any single band compression behavior you can’t get out of this thing.
No one audio example can really do this thing justice, as it is exceedingly tweakable. Videos are a better medium for watching how it can adapt to sounds. Luckily, Pulsar Modular have a few videos showcasing the compressor on their YouTube channel.
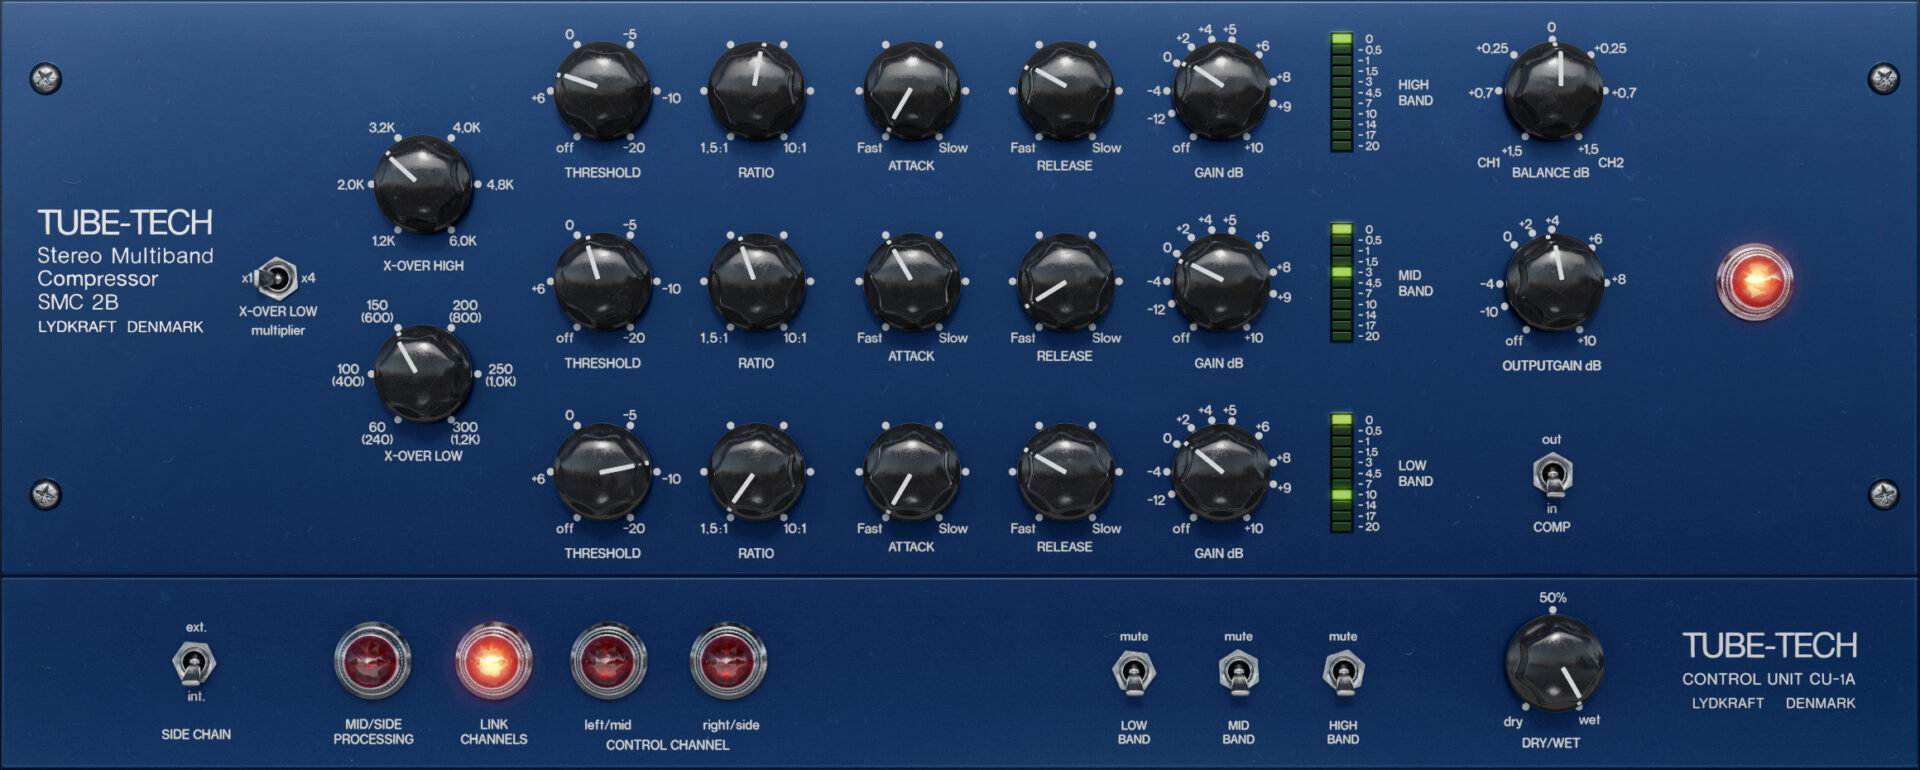
Softube Tube-Tech SMC-2B
The Tube-Tech SMC-2B is a multi-band compressor with a sound all its own. People use it on vocals and acoustic guitars, as well as the mix buss. It’s perfect for Laurel Canyon-style rock, or any genre that benefits from light, glassy compression.
I love this box so much that I’ve been trolling Softube for years to make this plugin. And now that they have, It’s a win for me and my family. I get the essence of a favorite hardware piece, and my son gets a college fund safe from my thieving hands (for now anyway).
Previous to the SMC-2B, the only quasi-emulation was Acustica Audio’s Titanium, which is as finicky as any Acustica Audio product.
Here’s the default setting I had dialed in for Titanium on my buss template, applied to Pete’s mix we’ve been listening to for the last few examples.
And here’s the SMC-2B, achieving the same gain reduction across the same time constants and crossover points:
One clearly has more life to it than the other. I’m happy to finally take the Acustica plugin off my computer.
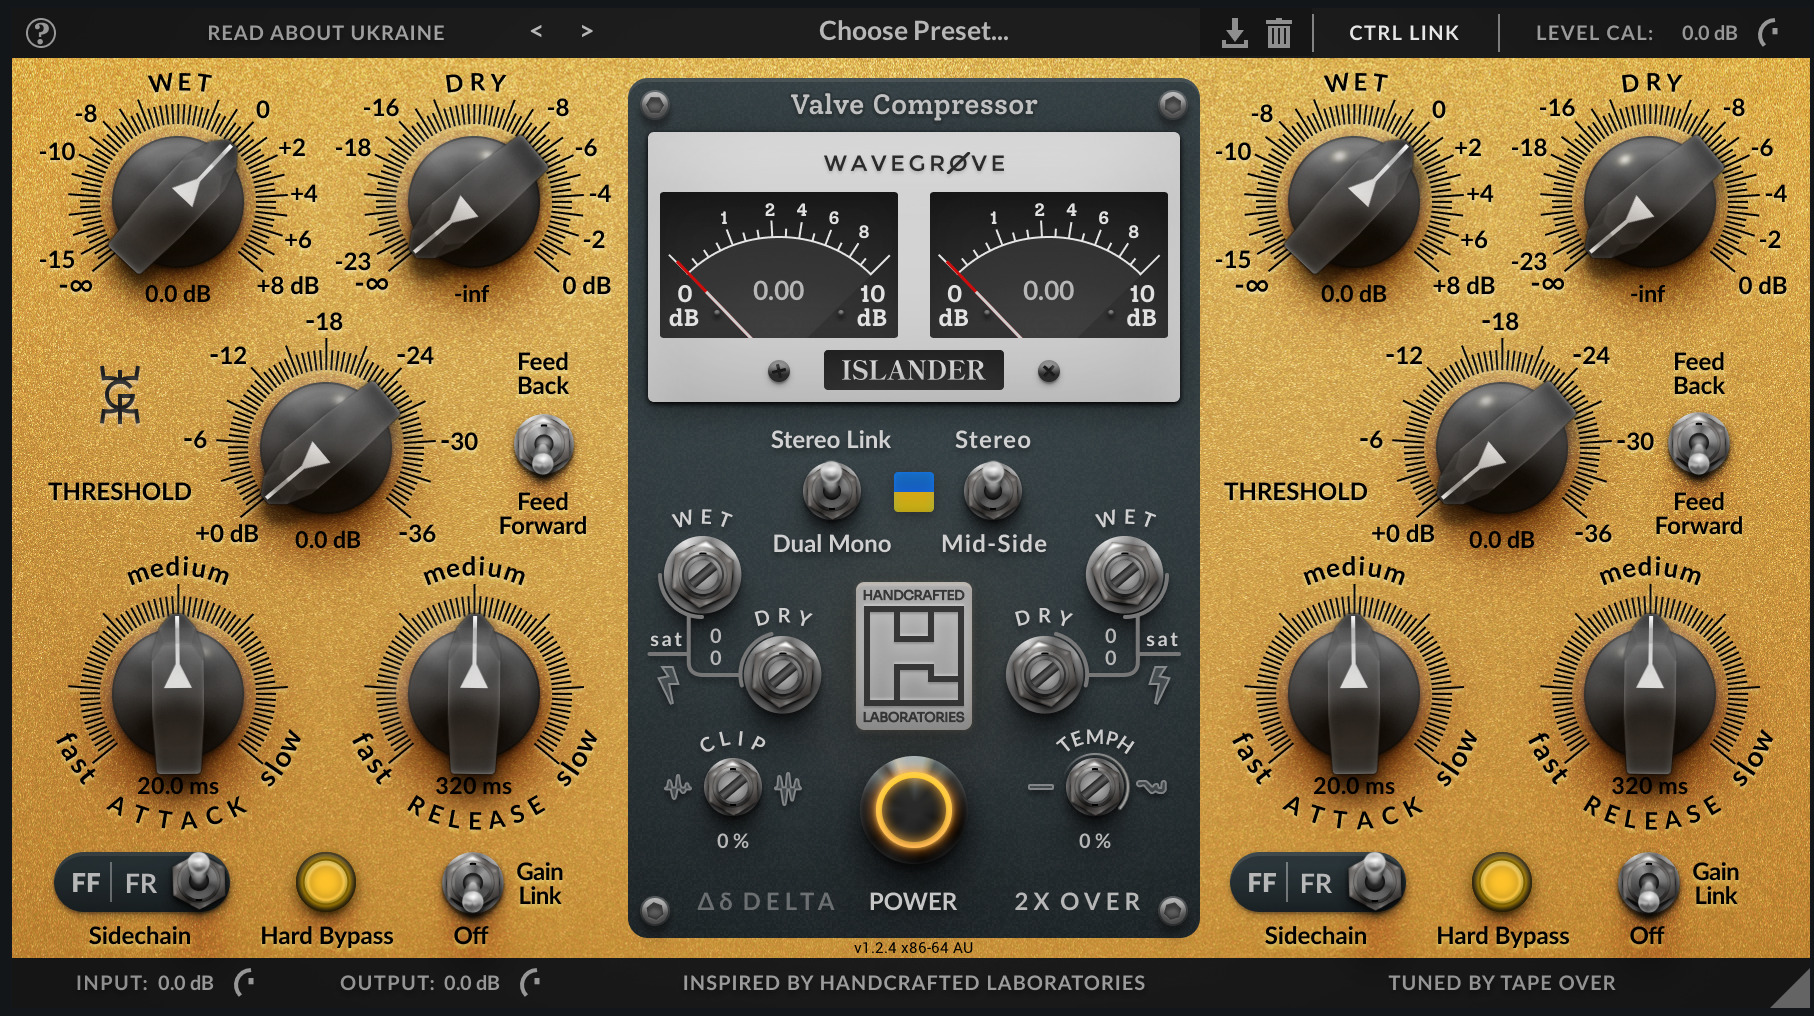
Wavegrove HCL Islander
This plugin comes by way of two software companies and one Ukrainian hardware manufacturer. It’s awfully clean as a compressor, handling parallel duties to boost apparent loudness quite well. It also has a clipper that sounds fantastic. All of it combines seamlessly into a compressor worth using every day.
Here’s a real world example of how I’ve used it. HCL Islander was a huge part of how I achieved otherworldly explosions hitting around the -6 LUFS short term on the award-winning podcast “The Foxes of Hydesville,” rattling bones without causing unwanted distortion.
Observe the moment some ghosts announce themselves during the following seance, two minutes into the podcast. That jump in volume is made possible by parallel compression and a little of the HCL’s clipping circuit.
Speaking of which:
The Clippers of the Crop
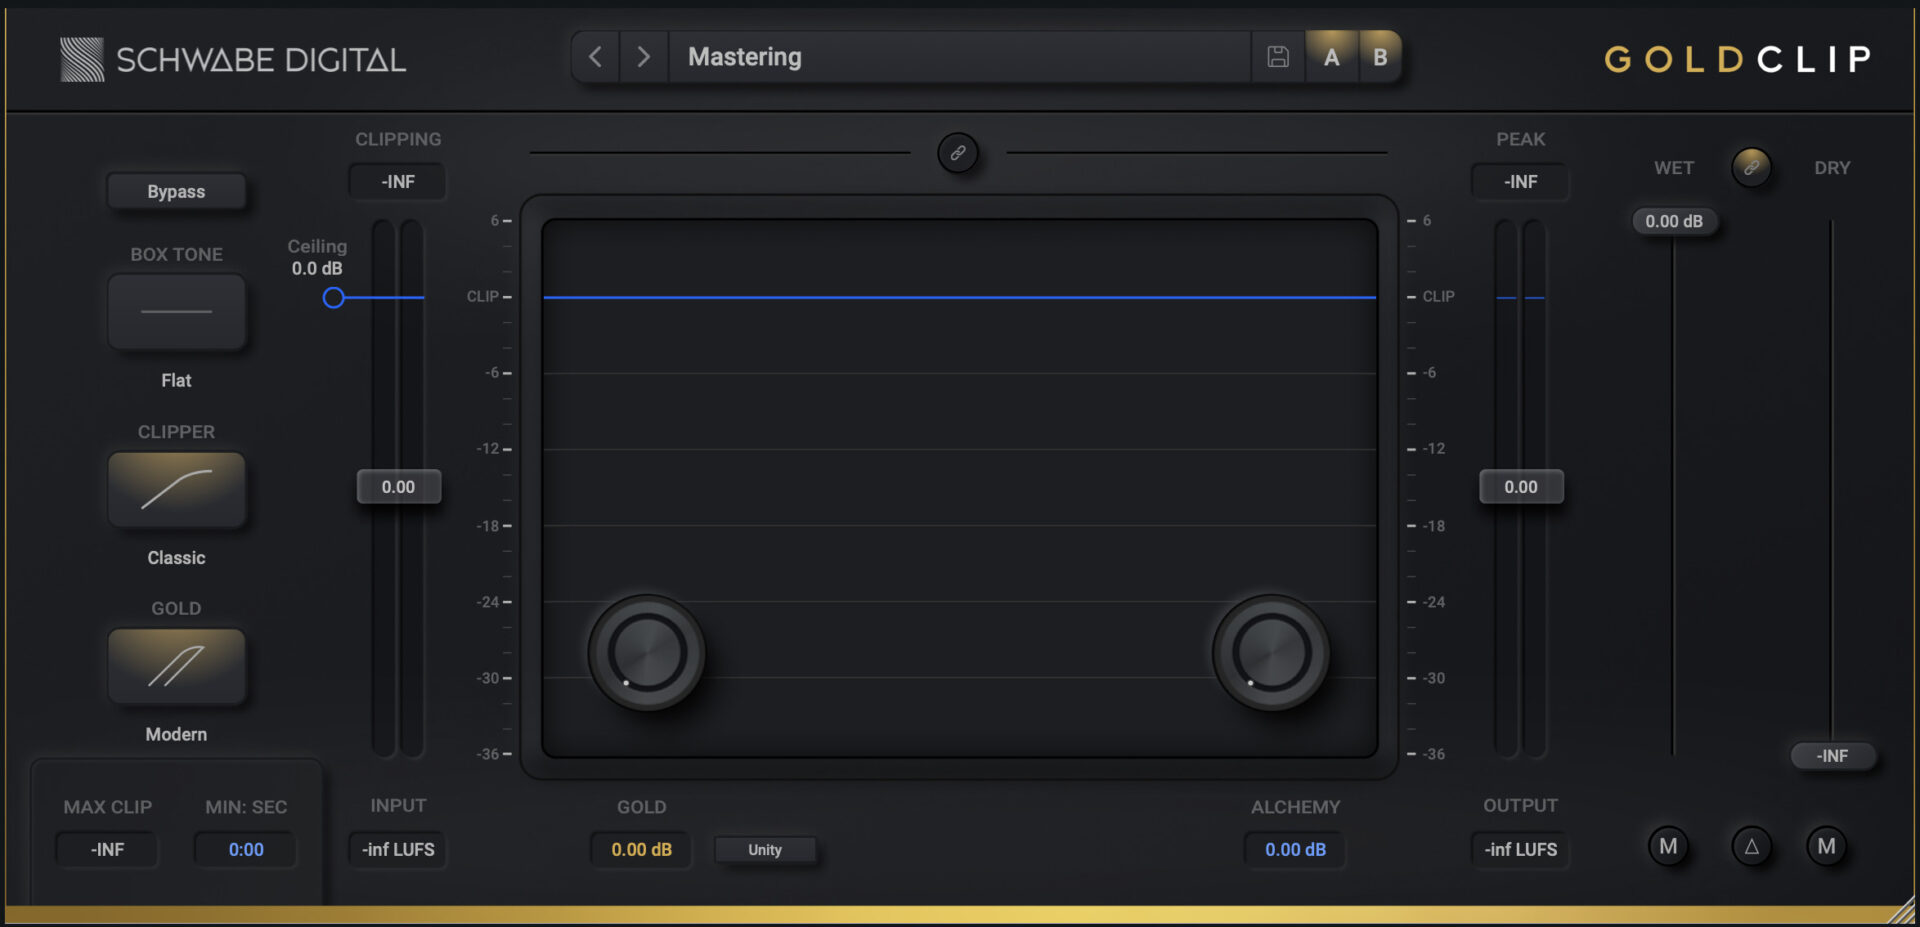
Schwabe Digital Gold Clip
A clipper is a clipper is a clipper, right? Not when it models a classic AD converter to an unbelievably faithful degree.
This year, Gold Clip came out, and veteran mastering engineers took notice. It has a specific sound, one made famous in the pre-streaming days. Let’s clip Pete’s song up to -9.4 LUFS short term with SIR Standard clip, a fantastic clipper in its own right.
Here’s how we can achieve a similar level in Gold Clip
It has more weight to it and a more recognizable gloss, thanks to the modeling of this classic Lavry Gold converter. Indeed, one could emulate a credible, early 2000-style mastering chain out of Metric Halo Sontec, an oversampled Waves L2, and Gold Clip right after it:
Example 39 – 90s Style Mastering Chain
Keep in mind that we’re using digital tools here to get to a level far too loud for this mix. And yet, it ain’t bad! It could certainly sit next to a Train record.
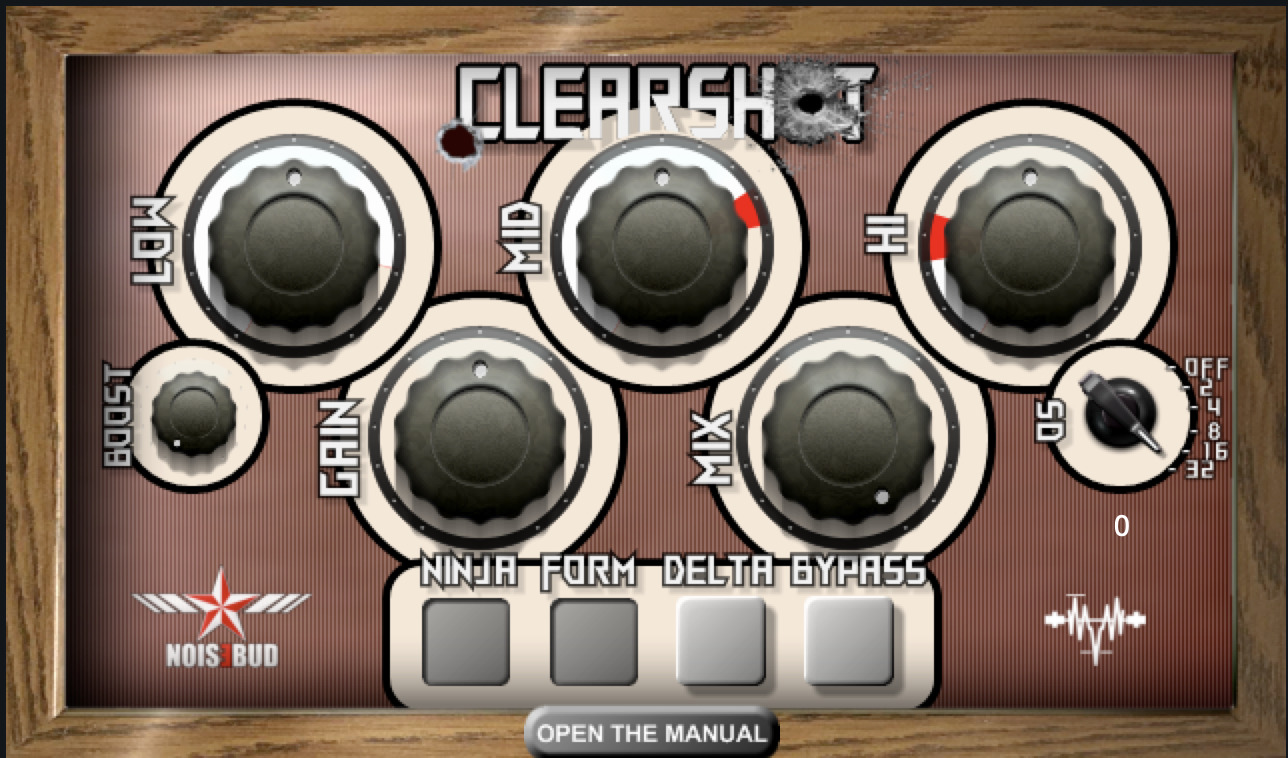
Noisebud Clearshot
Making their second appearance on this list, Noisebud released Clearshot in July of this year and it’s another winner that few people know about.
Clearshot is a 3-band clipper designed to help you get louder EDM masters with minimal sacrifices. Sit it behind your limiter or clipper of choice and you’ll find you’ve got a better shot at preserving dynamics as you achieve louder levels.
Let’s take that last track and sit Clearshot right behind the L2:
Example 40 – Clearshot to get +1dB of Level Reasonably
That chorus now comes in at -6.9 LUFS short term and -8.3 integrated. It doesn’t sound horrible. That’s a feat for soft rock like this.
2023’s Best Reverb
Is it going to be Soundtoys SuperPlate? It’s going to be SuperPlate, right?
Airwindows kPlates
Nope. Don’t get me wrong, SuperPlate sounds fantastic. But this plugin has a fun story behind it.
Who can forget the great Waves Debacle of 2023, when the company decided to switch to a subscription model, invoking the ire of the Internet in the process? During this scandal, on a quiet corner of the internet, an indie plugin developer had a coding breakthrough. Chris Johnson of Airwindows finally hacked his way into the complex reverbs he always dreamed of.
You probably don’t know Airwindows, and if you do, you might have written them off due to their quirky aesthetic. Chris Johnson codes roughly one plugin a week and releases it as is. Like Noisebud, he offers no native Pro Tools support; and he falls into rabbit holes where he’ll deliver like four dithers in a month.
Sometimes his offerings are quirky, sometimes they are broken. But never do they have anything approaching a GUI, as he relies on the DAW to compile the interface. All you get are some sliders that usually go from 0 to 1.
What does this have to do with Waves? During the Great Waves Debacle of 2023, Chris figured out a way to make plate reverbs similar to those of a famous English studio, one that partnered with Waves in releasing a fantastic plate verb.
Airwindows’ take on this reverb is called the kPlate series, and there are four of them at present: kPlateA, kPlateB, kPlateC, and kPlateD. Each of them sounds fantastic.
Here’s Waves’ Abbey Road Plates on a lead vocal I’m mixing for a holiday single:
And here’s kPlateC, in comparison
Example 42 – Airwindows kPlate
Do they sound the same? No, of course not. But they both sound professional as hell, and only one of them is 100% pay what you will, even if “pay what you will” is nothing.
Airwindows get almost no attention from outlets such as the one you’re currently reading. Let’s change that, shall we? Do yourself a favor and fall down the Airwindows rabbit hole. There are some fantastic tools here, from dithers to modulators to reverbs to complete console emulations.
Best All-Around Bang for Your Buck
I bet you thought delays or modulations would go here, and truth be told that’s how it started. I wanted to showcase my favorite delay plugin of the year. But quickly I changed tacks, as my favorite delay plugin and my favorite modulation plugin are one in the same.
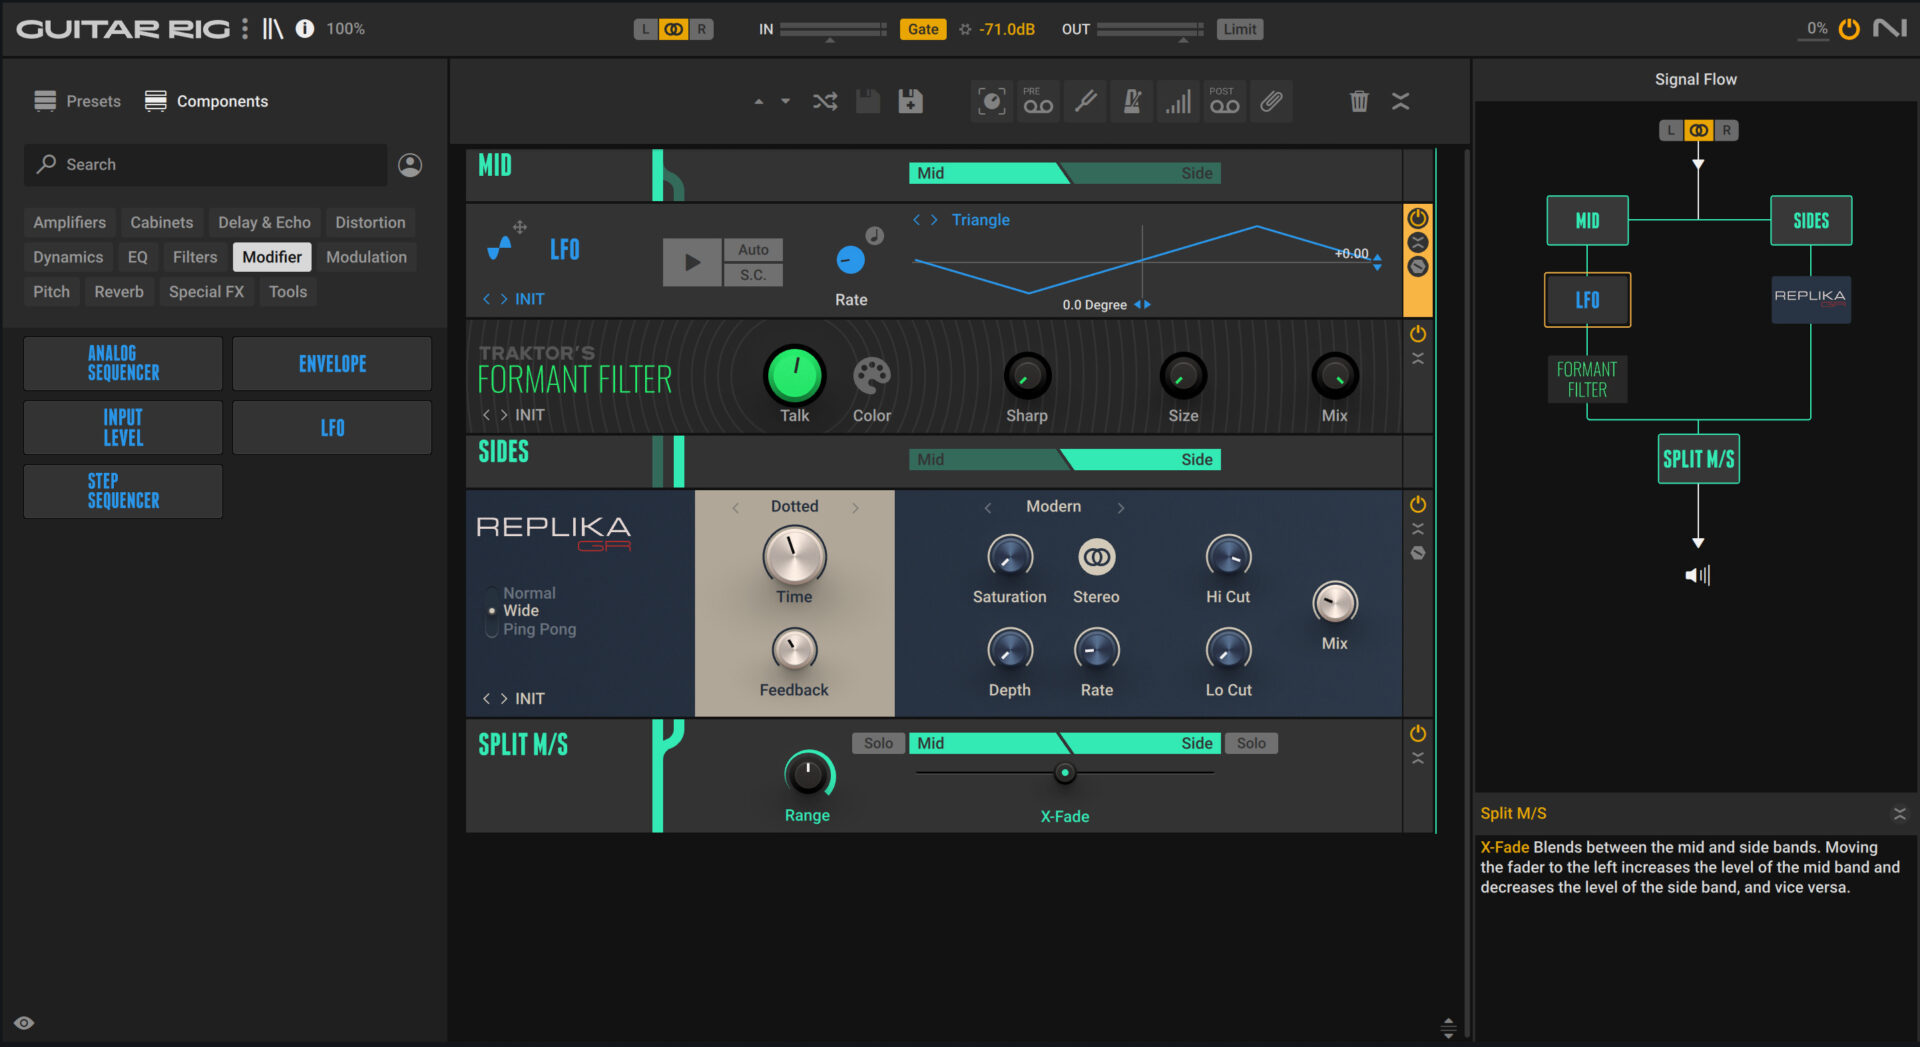
In fact, this plugin houses excellent modules for reverb, modulation, distortion, compression, filtering effects, sequencers, LFOs, amp emulations, and more.
Yet I don’t think it’s ever really gotten its due. Even though it’s seven versions deep at this point (the newest version being released in 2023), I find I’m always the one to bring it up in conversation with my peers rather than the other way around. So let me hip you to one of my favorite all-around plug-ins of the year:
Guitar Rig Pro 7
Guitar Rig Pro 7
Buy it new on B&H, Thomann, or Sweetwater
Let me get this disclaimer out the way first. Yes, I frequently write for iZotope. Yes, iZotope is a Native Instruments company. Yes, Native Instruments also makes Guitar Rig Pro 7.
So you could think I’m shilling at this point.
Here’s the thing. Absolutely I’m shilling, but only because I love the product. My devotion to guitar Guitar Rig dates back to version 3, long before I went pro, or before any tech company knew my name. It’s that good, and it’s only gotten better
We’ll start with delays and go from there. Here’s a lead synth:
Here’s each of Guitar Rig’s delays applied to that synth
Example 44 – Tape Delay
Example 45 – Delay Man
Example 46 – Replika
Example 47 – Psych Delay
Example 48 – Traktor S Delay
Example 49 – Quad Delay
Example 50 – Twin Delay
There are 115 effects in Guitar Rig, divided into 13 categories and they’re all as solid, vibey, and useful as these delays. You could do an entire mix (bus included) with Guitar Rig Pro 7, and it would not sound like you’re using one plug-in over and over again.
Conclusion
That list didn’t go where you thought it would, did it? It was a wild ride, filled with left turns you didn’t expect, and a couple of real heavy hitters that make me proud to work in 2023. For this was truly a banner year in plug-in development; if 2024 is half as good, we’ll still be lucky!
What were your favorite plug-ins of the year? Be sure to let us know in the comments.
Please note: When you buy products through links on this page, we may earn an affiliate commission.


