Ableton Live 12 Review: Is it Worth The Upgrade?
Ableton Live 12 is coming!
The Berlin-based software company’s flagship product, simply known as Live, was the first of its kind to allow users the ability to sort musical ideas in two ways – on a traditional timeline view and as a series of clips that can be launched at will. This gives electronic music the ability to truly be played live, as the name implies.
But over the years, this clip-based workflow has been adopted by other pieces of software, most notably Apple’s Logic Pro X a few years ago and in a new version of Pro Tools that was just announced this year.
The evolution of Ableton Live since its inception in 2001 has been so slow and gradual that you’d be forgiven for barely noticing the small but important updates that the program has implemented.
While many DAWs have redesigned their UIs from scratch and implemented dozens of new instruments and effects per update, Live has been content to keep the same basic UI premise. The aforementioned Session view for rows and columns of clips, launchable at a quantization amount set by the user (or a on a per clip basis) and an Arrangement page that is more like the timeline of a traditional DAW that even veteran users have been able to get excited about.
However, with the announcement of Ableton Live 12, currently available as a Beta for a select range of users but soon to be available to the general public in three forms (Intro, Standard, and Suite), Ableton seeks to put the ball back in its court with a series of small but important workflow changes and new instruments that are going to excite novices and veterans alike.
So what’s new? Let’s dive in.
Features
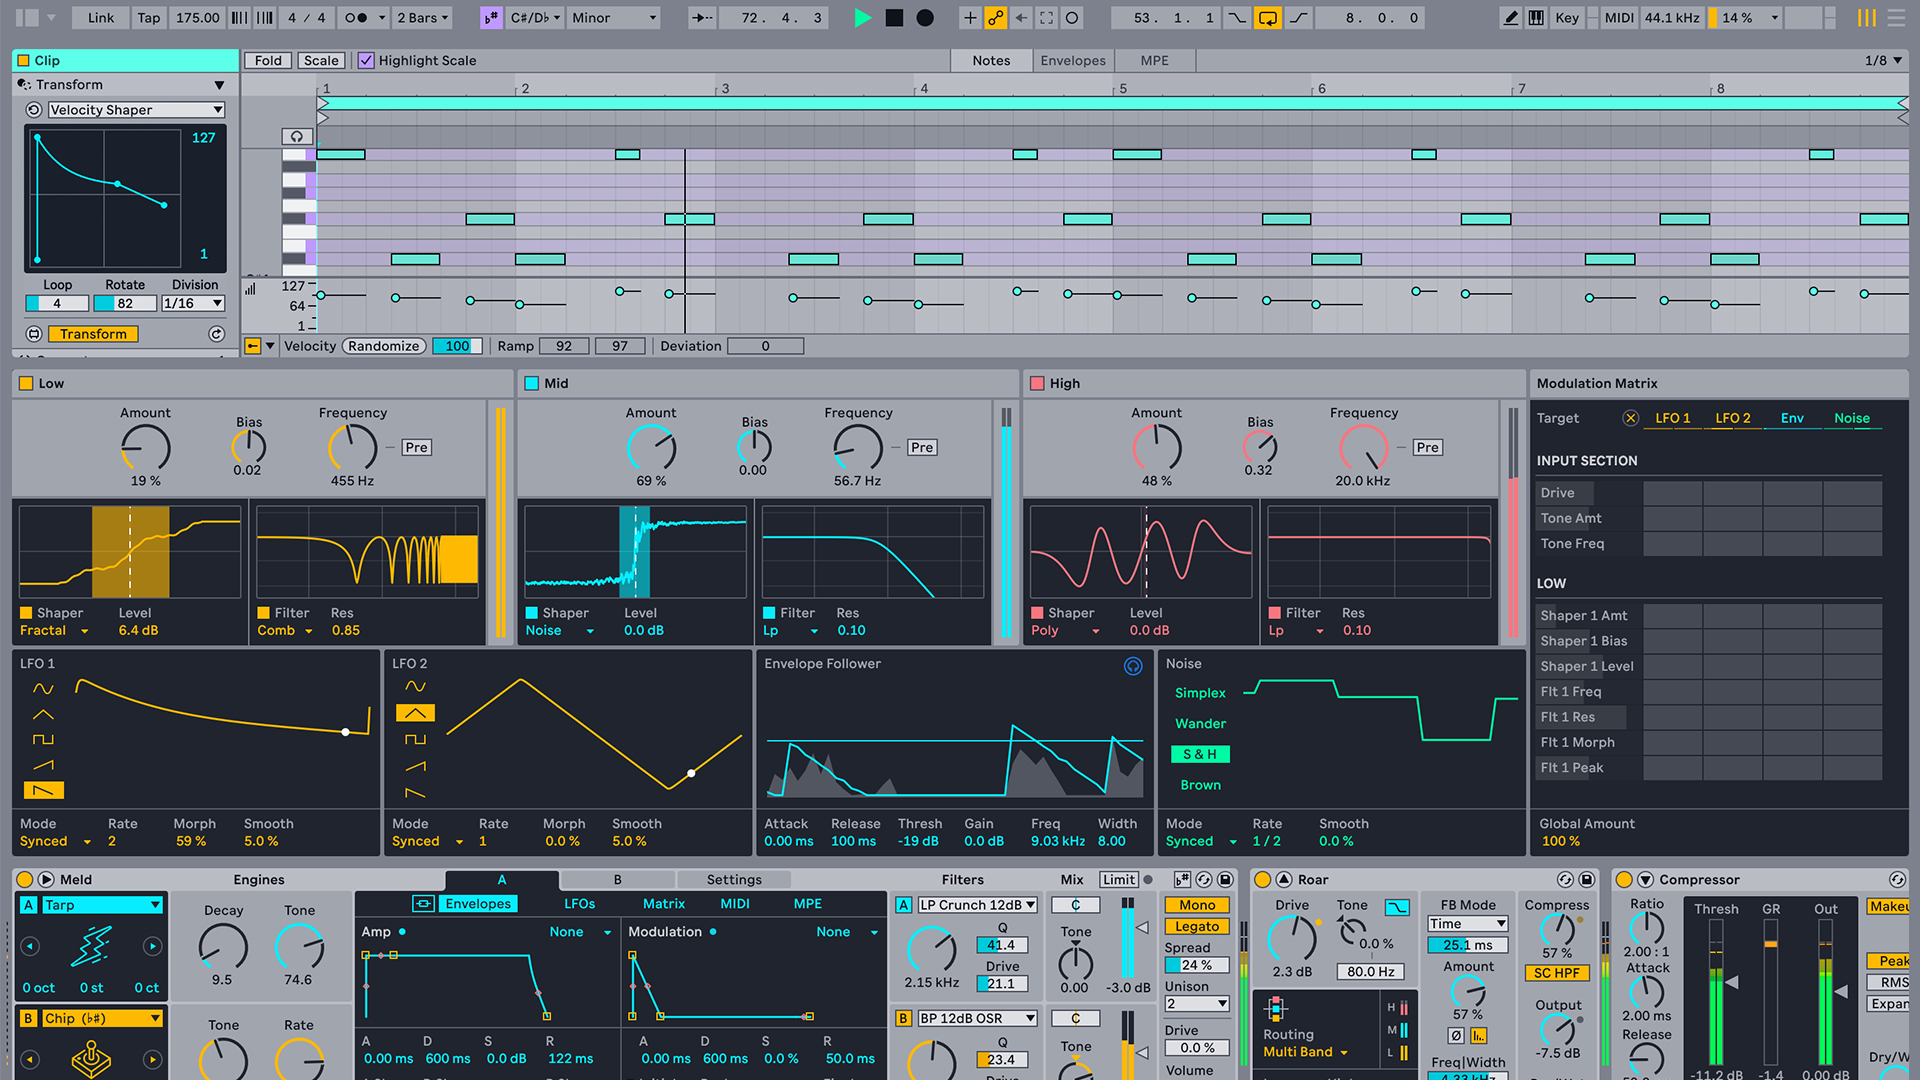
There have been many updates to Ableton Live 12, but two of the biggest features are completely brand new. Roar is a bespoke distortion effect that combines many distortion types with a flexible modulation matrix. While it’s not the first distortion / saturation plugin Ableton offers (there are in fact six ‘distortion’ plugins total), it makes the other options seem incredibly tame in comparison.
Roar features a number of routing options that goes far beyond what you’d expect in a normal distortion device. These include Single, Serial, Parallel, Multi-band, Mid/Side, and a very interesting Feedback mode that allows users to independently shape the direct signal and the result Feedback, each with their own filters, amounts, and bias levels.
The modulation section of Roar is an area to get lost in, as there are two LFO’s, an envelope, and even a Noise source that can all be set as modulation devices in the handy Modulation Matrix.
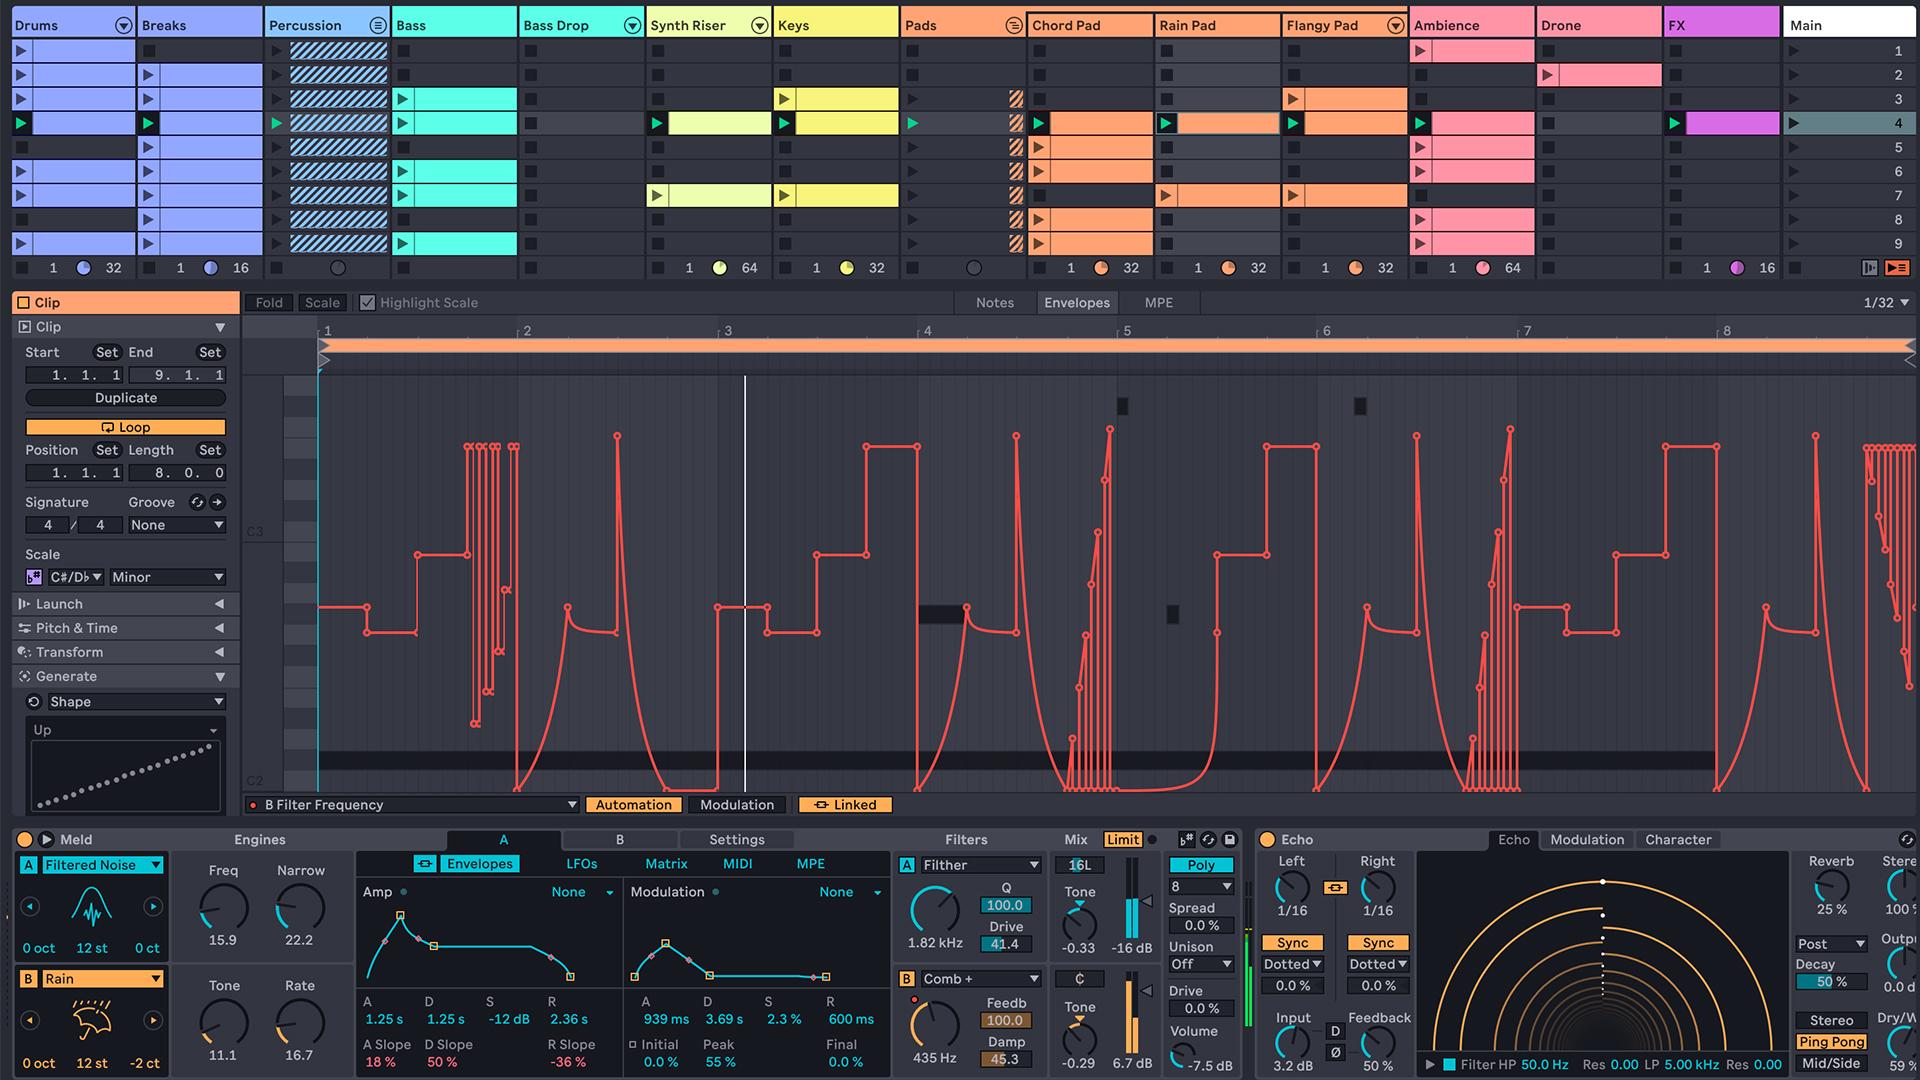
Another brand new device is an instrument called Meld, a dual-oscillator synth that combines many of the best features of other Ableton instruments into one flexible new package. While Live has never been short on built-in instruments, especially if you opt for the full Suite edition, Meld stands apart as the most flexible instrument Ableton has ever built, and just scrolling through the available presets shows the sonic power hidden within. There is everything from gnarly kicks, belly rattling basses, cavity-inducing strings, and much more.
Meld can operate anywhere from mono to a twelve voice poly-synth. A built-in limiter keeps those nasty peaks in check when applied. Each oscillator has its choice of source waveform, but many of the included options go far beyond what you’d expect from a polysynth.
Some of these are incredibly unique sound design starting points, such as Fold FM, Tarp, Shepard’s Pi, and Rain (!!). To say that there’s enough to explore for a few lifetimes is an understatement.
The built-in modulation matrix of Meld is similar to Wavetable, introduced in Live 11, and is just as easy to use and understand. Hovering over one of the blocks in the matrix allows you to drag left or right to apply negative or positive modulation, allowing you to quickly transform a sound from something vanilla into something spectacular.
There have been some very important updates to the Browser window as well. Most consequential of these is a new “Find Similar” button that sorts similar sounds and instrument presets to the one you have selected, which makes it very easy to find an alternative to the sound you are looking for.
Similarly, there are now filters that can be applied to your list of sounds, plugins and any other list of items in the Browser. This allows you to quickly sort for exactly the type of sound or effect you’re looking for.
The Browser also now functions more like a traditional browser window in that search history is saved, allowing you to navigate backwards and forwards to previous pages you were just on. This greatly expedites using the many browser pages as well.
MIDI clips have arguably seen the most improvement in Ableton Live 12, as there are now many new features that allow MIDI clips to be edited, transformed and even generated in ways that weren’t possible in old versions of Live.
These are sorted in two new tabs to the left of your chosen MIDI clip and are quite huge workflow assets to those who don’t want to do the manual work of clicking and dragging in your own notes and ideas.
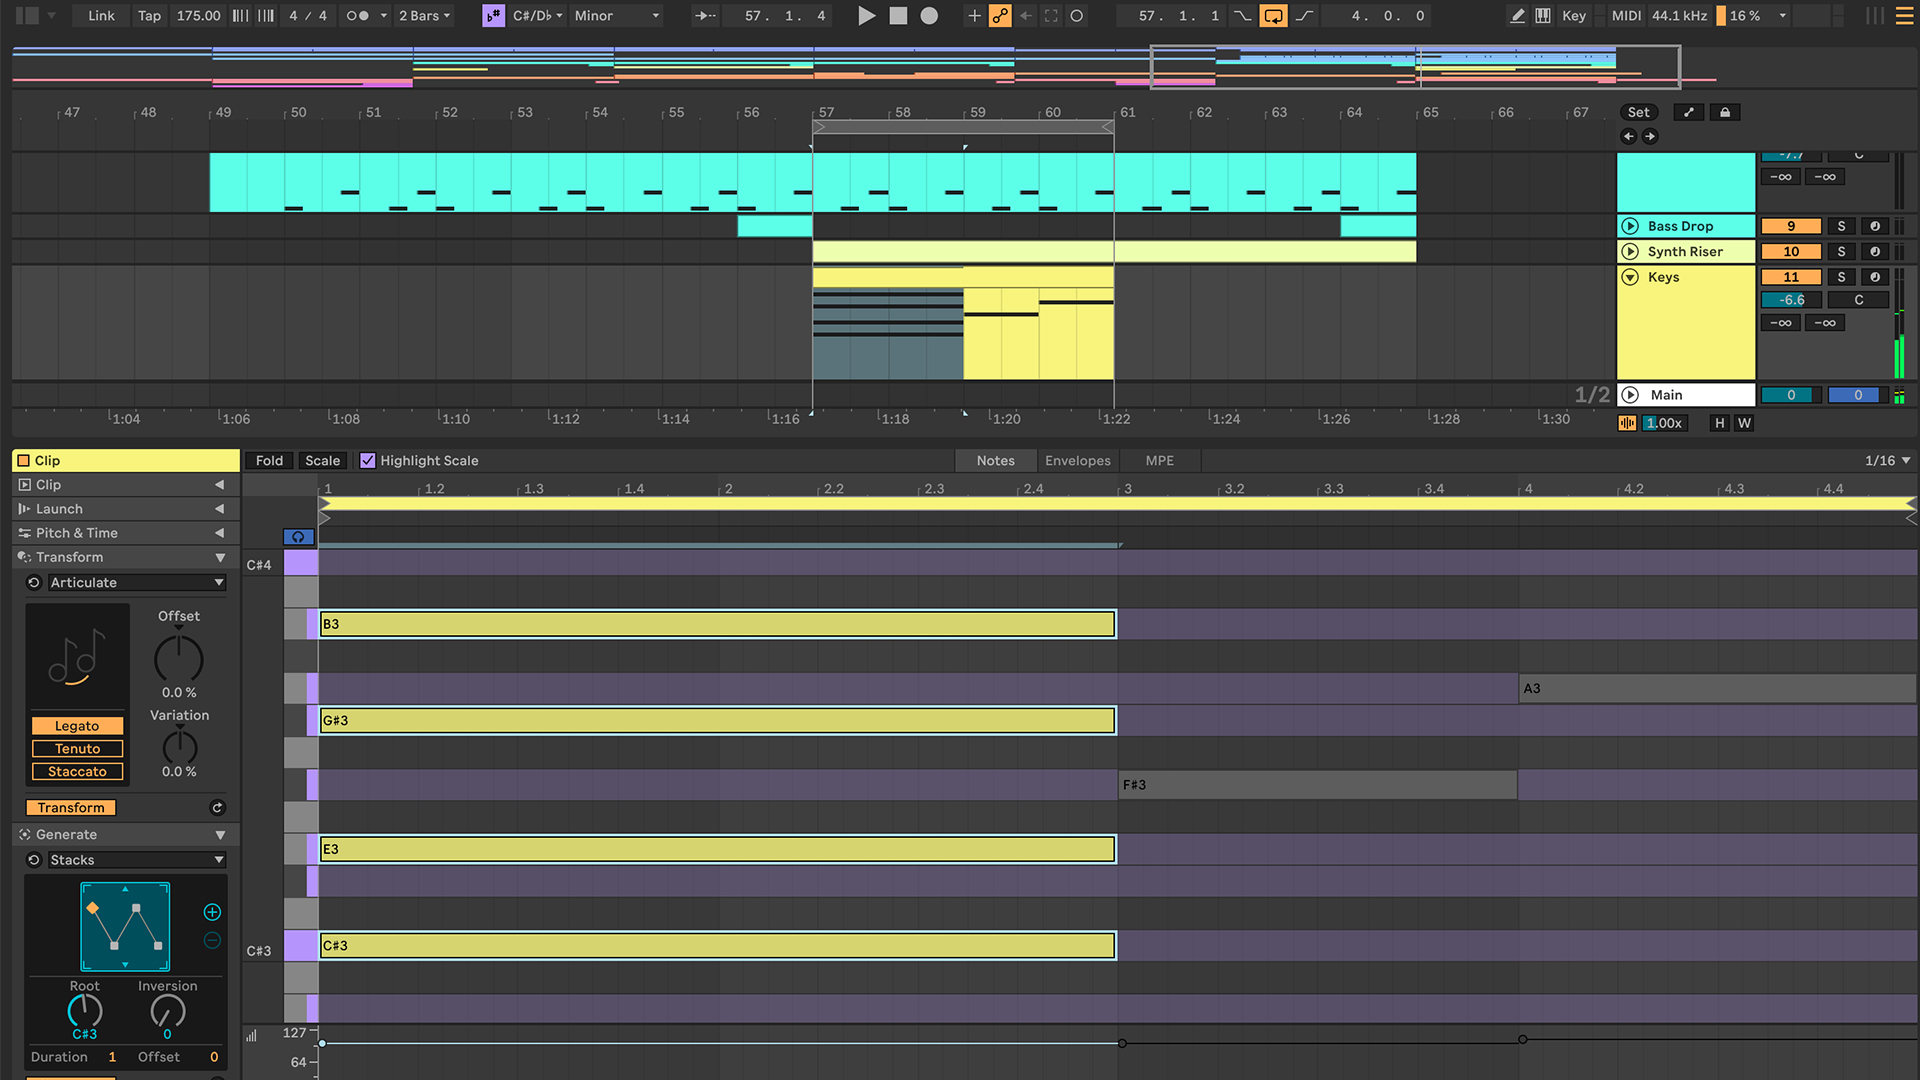
Generate has four areas to choose from, one dedicated to Rhythmic ideas and then Seed, Shape, and Stacks.
Seed generates notes based set ranges in pitch, duration, and velocity, with the ability to choose how many voices are included as well as density.
Shape is a bit more straight-forward though still a lot of fun to explore, as it allows you to literally draw in a shape that you’d like your melodic content to follow, again with certain parameters that provide chosen restrictions.
Stacks is a quick way to generate chordal ideas, where each chord is represented by a visual diagram with root and inversion values changeable per chord. The Transform tab has a similar amount of new variability, allowing you to quickly take a part that Live just generated for you and apply any number of changes to the MIDI data, from arpeggiation, strumming emulations, quantization and much more.
In Use
Using the new features of Ableton Live 12 is only part of what makes this new version of Live exciting. There are many quality of life improvements in the UI that may seem like small changes but add up to a faster workflow that is sure to enhance how you use Ableton Live 12 compared to previous versions.
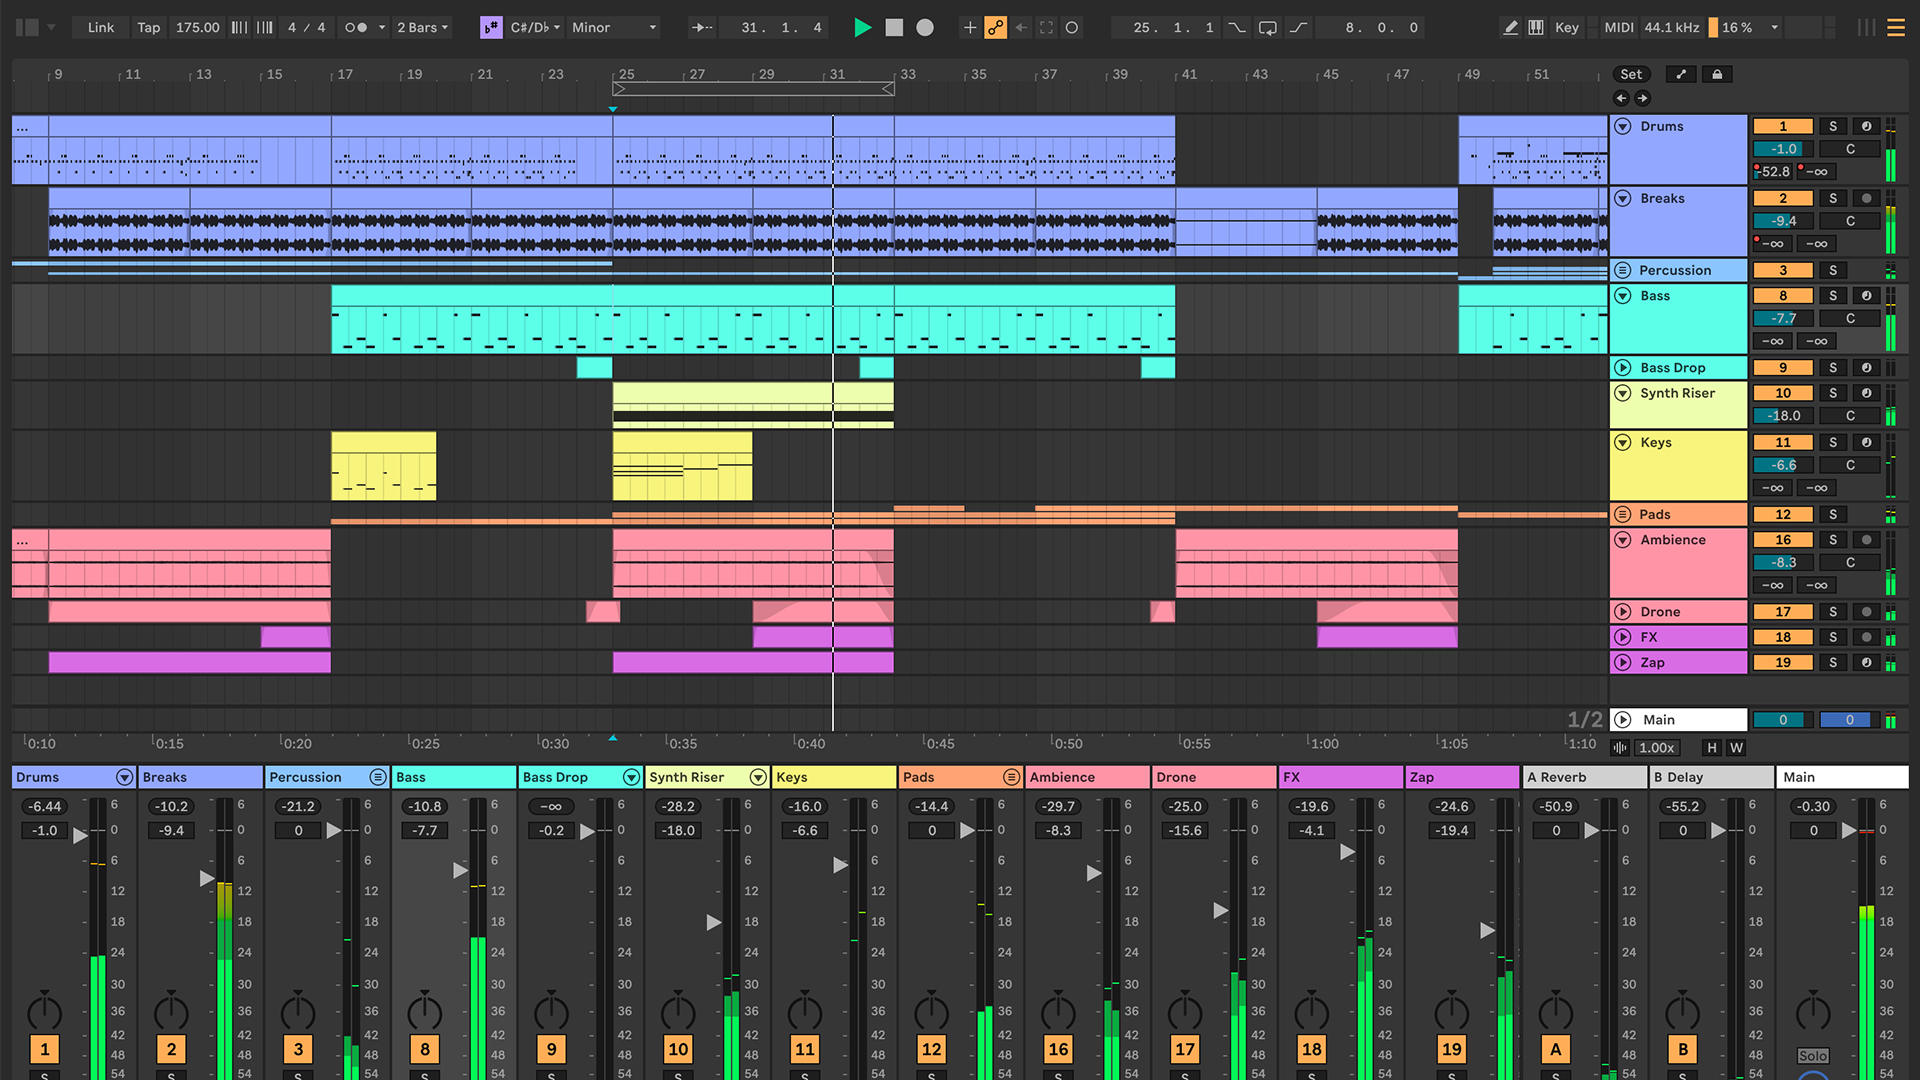
The one that is going to be the most exciting to most users is the ability to view the mixer page in either Arrangement or Session view, a long requested feature that is sure to make many happy.
Previously, it was only possible to view the mixer window while in Session view, which made for a lot of tabbing back and forth between the views unless you were using a second monitor. Speaking of a second monitor, it’s now possible to have separate Zoom amounts for each window, another small but important tweak that allows users to customize how they use Live.
There are many other improvements to the UI as well, including the fact that track colors are now displayed at the bottom of tracks as well (instead of just on top).
One of the most useful features of Ableton Live 12 is the ability to keep all MIDI clips in a key of your choice, selectable on a per clip and global level with a new toggle button at the top of the screen.
While it had been previously possible to add a MIDI effect to lock a MIDI track to a certain key / scale, this was only available on a per-track basis as opposed to globally, making changing key on all your tracks a much more tedious affair especially when using Live on stage.
To Be Critical
There’s little to be critical about with Ableton Live 12, especially given the fact that the things we’ve had space to mention here are only a subset of all the new changes.
There is also a brand new Tunings functionality, a new version of the famed Granulator Max for Live device, expanded velocity management editing, and much much more.
Many of the new features are integrated quite seamlessly, allowing previous users of Ableton Live to continue their existing workflows without missing a beat.
There are really only a few clunky executions of some of these new features in Ableton Live 12. While I enjoyed the new Browser features, I found myself missing the fact that plugins were automatically sorted by AU, VST, and VST3 categories in Live 11.
While it’s possible to sort your plugins by these categories in Ableton Live 12 by simply clicking on the relevant buttons above your plugin list, I found this to be an extra step and wished it was possible to auto-sort your effects like previous versions.
Lastly, there is still no way to transfer and save MIDI mappings between sessions in Live. This has been a long-requested feature and would have been greatly welcomed in Ableton Live 12.
Summing Up Ableton Live 12
Ableton Live 12 is an exciting step forward for the flagship software. There is enough new here to warrant the upgrade cost, even if you’re just excited about Roar, Meld, and the updated MIDI clip editing and generative tools.
But look beyond those and the many small updates to workflow make Live 12 another big leap forward from the previous iteration of this long beloved program. Ableton has managed to keep Live in that precious middle ground of being user friendly for beginners but deep enough that veteran users will have plenty to dig into.
While I’ve loved using Live 11 as my daily workhorse DAW, I can already see a myriad of ways that Ableton Live 12 is going to step up my own producing skills in the studio and I can’t wait to put it to use.
Leo Maymind is a producer, DJ, and writer living in Los Angeles, CA. He is obsessed with sound, and you can reach him at lmaymind@gmail.com.
Please note: When you buy products through links on this page, we may earn an affiliate commission.


