DIY Acoustics: Building Your Own Tube Traps
Why I heart tube traps, and you should too.
If you’re already fortunate enough that you enjoy what you do for a living, you can consider yourself even more fortunate whenever you discover something that makes your job easier and better at the same time. In my world this distinction belongs to the venerable Tube Trap.
I learned about ASC‘s TubeTraps back in the early 90s, when they had only been around for a handful of years. At the time, my attention was starting to turn toward acoustics and I felt that improving the acoustic performance of the studio might be the missing link in my stagnating recording style.
We had already improved the studio in several measurable ways, with equipment upgrades and a modified console, but my recordings didn’t seem to make a jump forward that was proportionate to the cost. The more I read about the benefits of an acoustically well-treated space, the more it seemed like the way to go.
I remember reading some brochures about Tube Traps (this was the pre-internet era when product information came on paper, by mail) and all of the explanations made sense. Plus, there was technical data to support just how effective these devices were, and the client testimonials seemed to be speaking to me directly as happy users recounted their difficulties with the very same acoustical problems that I had been encountering.
I was certain that buying some of these things would help reduce the acoustical issues in the studio. There was only one problem: They were not cheap.
I ran a small room at the time, Rosewood Studio in El Paso, TX, and we had a somewhat limited budget for further upgrades. And the fact that these upgrades wouldn’t be as shiny or showy as a new EQ or compressor made it even harder to justify that this would be money well spent.
Did I honestly believe that Tube Traps could make as big a difference? And if they could, was it worth spending that much money for something that I would notice but prospective clients might not? The expense did not seem warranted, so we waited.
Fast forward to several years later and suddenly the internet had become a viable place to do research and I found a website that described how to make DIY Tube Traps for a fraction of the cost of the originals made by ASC.
While the performance was not quite the same as the ASC version, they were similar enough that it seemed worth the effort and money to build some and see how it went.
The actual Tube Traps that are built by ASC are of the highest quality in terms of manufacturing and performance, and the company is constantly improving the design and experimenting with materials to offer something extraordinary to their customers.
While I certainly don’t want to imply that what you can build yourself is the same as what you can get from inventor Art Noxon and his crew at ASC, I’ve tried the DIY approach for myself and have been blown away by the performance compared to the cost.
The Build
I have shared this recipe with other friends and colleagues in the recording business many times over the years so why not do it again? I found the plans for DIY tube traps at Teres Audio, a small company run by the Brady family of Broomfield, CO, who must have found themselves in the same boat as I, but with more smarts and more handy disposition.
[Editors Note, 2024: The Teres Audio link is now dead. Try here for a newer YouTube video of the assembly process. Or, catch the original in the Wayback Machine here. I’ve even uploaded a PDF version to our site here!]
The plans are simple with just 7 steps, and a small number of materials: Some compressed fiberglass pipe wrap, some particle board, some 2-3mm plastic wrap, some fabric and some adhesives, along with a dose of patience and some elbow grease.
The short version is that your compressed fiberglass pipe wrap does most of the job all by itself. The rest is mostly finishing: You cut yourself some round caps out of particle board to cap the top and bottom of the fiberglass tube, and use some fabric wrap to cover it up and make it look pretty.
By first adding some plastic wrap to one side—which reflects the high frequencies— you can create custom tube traps with a live side/dead side setup for even more flexibility. Earlier versions of the build (like mine) only used the kraft paper facing for the high frequency reflection side, but the plastic works much better and is more similar in performance to the real ASC Tube Traps.
Some variations on these plans take this design even further by adding a few tall strips of rigid fiberglass insulation inside, or bulkhead discs that break up the cylinder into smaller compartments. Either method increases the absorption further still.
Following the instructions from this website, we built 16 tubes for Rosewood Studio in two different diameters—14” and 16” if I remember correctly. They were relatively easy to build and ended up looking pretty good too (though not quite like the real deal.) Certainly good enough that I could leave them in the live room and not be embarrassed by our handiwork at all.
In Use
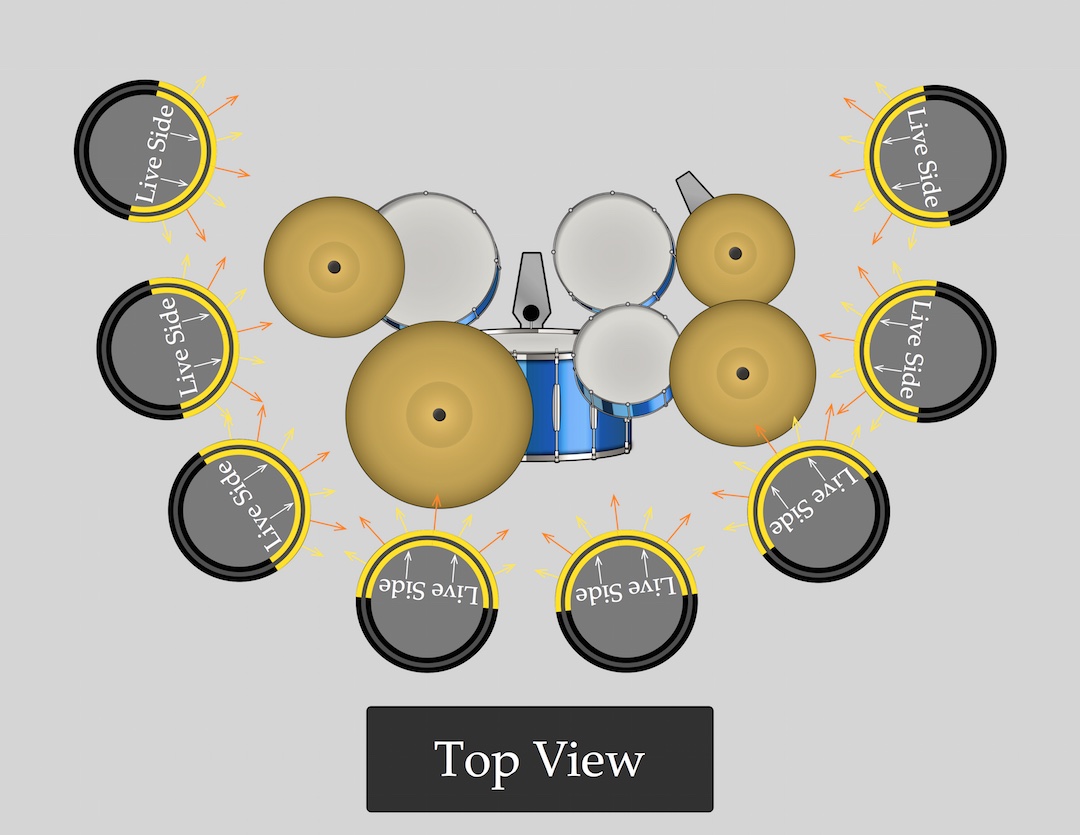
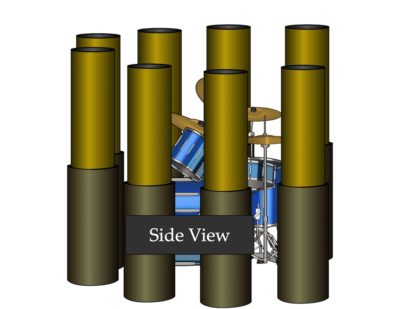
The first time I used our DIY tube traps, I was shocked! I placed them around the drum kit and the improvement in the sound of the room—and the drum track—was enormous. They were exactly what I had been looking for, even though I didn’t know that I had been looking for them. They were arranged something like this:
To appreciate how they could have so much impact, it helps to understand how tube traps work in the first place.
A tube trap is both a diffuser and a sound absorber. The cylindrical shape makes it a very good diffuser across a range of frequencies, but it also absorbs sound waves as they enter and pass through the tube, so it effectively removes some of the sound energy from the room. They also do a good job of removing excessive low frequency energy, which is never easy.
This type of tube trap has a “bright” side and a “dark” side, with respect to their diffusion. The bright side has a thin limp-mass membrane (plastic wrap) across half of the tube that diffuses high frequencies, while the dark side skips this layer, absorbing the high frequencies instead of scattering them back into the room.
This feature allows you to change the sound of the space inside and outside of a tube trap array: If you want more life and presence, then you aim the bright or “live” side toward the source. If you want more high frequency control, then you aim the dark, absorptive side toward the source.

Sectioning off a drum kit with the live side of a custom tube trap pointing inward can add clarity, definition and coherence to the tone of the drums, soaking up problem frequencies without muffling the tone of the kit.
When I record drums, I tend to prefer the live side facing inwards, toward the kit.
I am always surprised at how much more lively and exciting the drum kit is when positioned inside the Tube Trap array like this.
Plus, the additional absorption of the bass and mid frequencies makes the kit sound cleaner, clearer, and tighter.
This also has the effect of making the close mics and OHs sound more “close” and acoustically neutral, while leaving the liveliness of the room mics relatively untouched—or even slightly enhanced. It’s a similar effect to using baffles or gobos, but without the unwelcome boundary effects of placing a large flat piece of wood and fiberglass right next to the kit.
With this configuration, the mics require less EQ, the overheads become more balanced, and in some ways, it removes the coloration of the room in the close mics.
These could be especially useful in very live rooms or in tiny-sounding booths (which are awful for recording drums) to create a neutral, live subspace within a larger, more colored space.
I use similar arrays when recording vocals, acoustic guitars, percussion or any other acoustic instruments where I prefer to leave some space between the mic and the source but don’t want to color the sound with too much room ambience. Tube traps are one of those products that change the way you approach recording once you have a chance to use them.

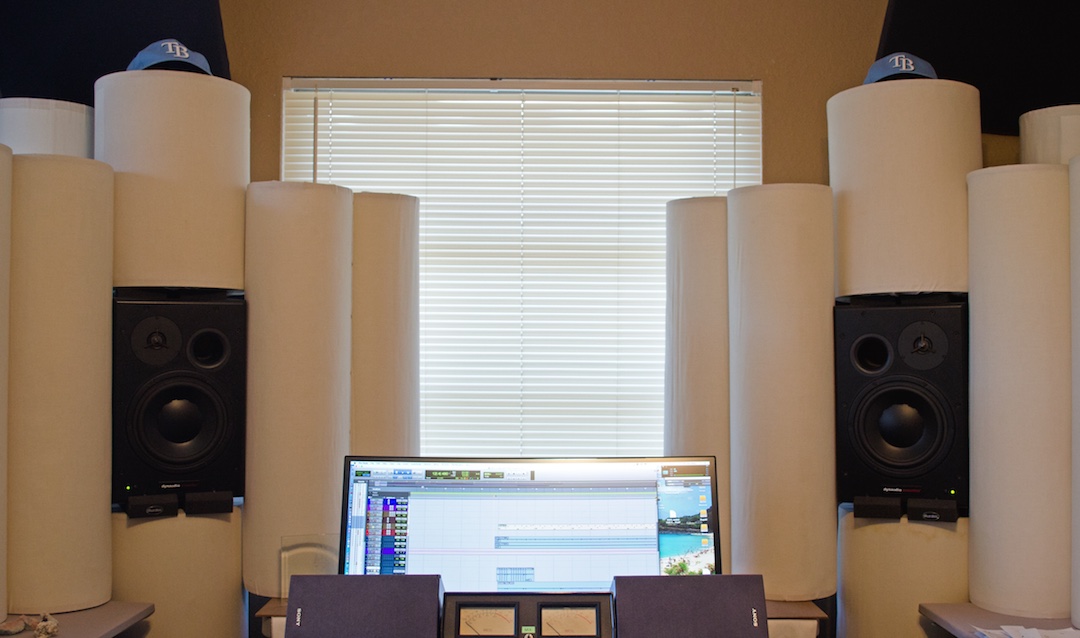
The author’s own custom-built cylinder traps, pictured here, are a mobile and cost-effective way of drastically improving low-frequency response, clarity and imaging of a mix room.
Cylindrical traps like these are also a wonderful way to create a very accurate, comfortable, and portable listening environment for a control room without doing construction or mounting panels to the walls.
My current mix studio is based around this concept that ASC calls the “The Attack Wall” and it makes any room I call “home” sound practically the same. It’s balanced and even, the imaging is solid, and the low end is predictable and believable.
Considering that all of my decisions are made according to what I hear through my monitors, it has been well worth the effort it took to build them. Plus, since they’re portable, I can move the setup whenever and wherever I need to.
While there are so many other products and approaches to fixing the myriad of acoustic problems that people encounter in studios or at home, I think tube traps, whether the real thing, or DIY alternatives, are the best overall solution I’ve found, so therefore, I heart them. You should too.
Mike Major is a Mixer/Producer/Recording and Mastering engineer from Dunedin, FL.
He has worked with At The Drive-In, Coheed and Cambria, Sparta, Gone is Gone, As Tall as Lions, and hundreds of other artists over the last 30 years.
Major is the author of the book Recording Drums: The Complete Guide.
Please note: When you buy products through links on this page, we may earn an affiliate commission.


charlie
February 16, 2017 at 2:02 pm (8 years ago)Great article! Your attack wall came out great. The hats are a nice touch, even if they are for the ‘wrong’ team. https://uploads.disquscdn.com/images/54dc74884ef9ed46dbfd4b54f3cccb2d1dbf2e664685336f967a9341241d356f.png
Mike Major
February 16, 2017 at 5:49 pm (8 years ago)Thanks, glad you enjoyed it. The “wrong” team? I beg to differ!! Should be another interesting year in the AL East, no?
charlie
February 16, 2017 at 6:12 pm (8 years ago)Haha, yeah, this in not their year. They’ll come around though. In the meantime, go Blackhawks!
Mike Major
February 18, 2017 at 11:58 am (8 years ago)Uh…go Lightning, you mean?
Neil McTavish
July 29, 2017 at 6:50 pm (8 years ago)Hi! Great article. If I got duct insulation with foil on the outside, could I just take off half of it instead of taking off all of it and covering half with the 2 mil plastic? What’s the reflection diff between the foil and 2 mil plastic?