New Software Review: Cubase 10 by Steinberg
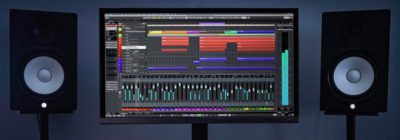
Cubase has long been one of the most well-rounded and complete DAWs on the marketplace. It boasts excellent audio quality and editing capabilities, and its programming and MIDI functionality are top-notch, whether you’re producing trap music in a project studio or scoring films in a huge facility.
As the line between producer and engineer becomes further and further blurred in the modern audio world, Steinberg continues to equip Cubase with loads of professional tools to cover any role in the studio. From producing to songwriting, to tracking, editing, and mixing, Cubase offers solutions for all.
I have covered the previous few versions of Cubase here in the pages of SonicScoop, so let’s dive right into the new features on offer in Cubase 10.
Features and Use
Auto-Align: In a world of heavily stacked hooks and razor-sharp Pop production, vocal editing is a task critical to a finished sounding record. It’s paramount those vocal layers are properly aligned, and in the Pop production world, speed is just as critical.
For some time, VocAlign has been the premier tool for automatically aligning vocals, but frankly the way it has worked in Cubase has been a bit slow and clunky. One would put an instance on VocAlign on the track they wanted to align, send to its sidechain input from the guide track, play back that section in real time, and then align. That is still much faster than going syllable by syllable through each vocal track, but compared to how Pro Tools handles VocAlign via Audio Suite, it’s rather slow.
Cubase 10 has introduced Auto-Align, and not only does it cover all the bases VocAlign does, it goes above and beyond, and does it offline in a fraction of the time. Simply select the region that is your timing guide, select the region (or multiple) that you want to process, and hit the button. Being able to process multiple targets at a time makes editing that huge stacked hook with all its layers and harmonies a 15 second task instead of a 15 minute one. There are options for improving word matching and shifting audio in time (rather than stretching), and if you prefer a looser vibe for your vocals, there is a variable precision control.
Also, Hip-Hop producers rejoice! One of my major gripes with VocAlign is while it’s great for vocal phrases that have exactly the same word content (like an exact doubling of a verse or hook) it couldn’t handle tracks that double some but not all of the words—like your standard Rap dub track where only certain words or lines are doubled for emphasis. This meant either going dub by dub and VocAligning each one, or doing them by hand which puts us back at square one.
Auto-Align is smart enough to ignore silent passages and align only where the guide and target regions both have content. This honestly answers a prayer I’ve had for years now, and if you’re a previous Cubase user considering the upgrade, this alone is worth the cost. (The upgrade fee is significantly lower than the cost of a VocAlign license.)
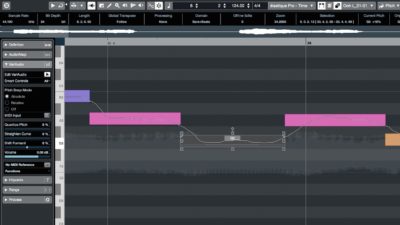
Vari-Audio 3: Steinberg has clearly set out to end the need for third party editing software. The Vari-Audio pitch correction system has been in Cubase for quite some time, but with the major improvements in version 3, the need for a third party solution like Melodyne is a thing of the past.
The most noticeable update to Vari-Audio 3 is the introduction of a multi-tool. In previous iterations, there was a lot more mousing around; you’d select a note, then mouse to the left side of the screen to adjust pitch quantization or straightness, then back to the next note. This doesn’t seem like a huge inconvenience, but over the course of tuning many vocal tracks word by word, the time really adds up.
Hovering over a note previously revealed handles for a few additional things like tilt and time stretch, but now there are handles for not only the aforementioned quantization and straightness, but also volume, formant shift, and control of where the tilt occurs. You can now also designate the range of what is tuned; you can exclude the beginning or end of a note that slides into another, ensuring smooth transitions in legato lines and avoiding robot-voice (unless that’s what you want!).
Speed is everything in modern record making, and the multi-tool is a huge boost in this area… because let’s face it—who wants to spend more time tuning than they have to?
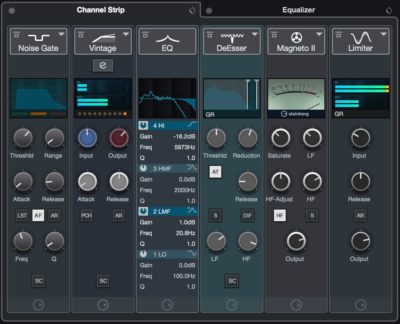
Channel Strip: The built in channel strip on every track has long been a powerful feature in Cubase, providing good sounding functional tools without the need for third party plugins. This has been given a boost in version 10 as well.
You can easily drag and drop the modules in the channel strip to re-order them, and now clicking the “e” icon on the compressor tab opens expanded controls for each of the three compressor options available: Standard, Tube, and Vintage. (I’d like to take a moment to note I really like the Vintage Compressor option; it’s very punchy and full sounding, and great on kicks and snares, among other things.)
The new channel strip GUI not only looks better, but also includes improved metering for each module, making it more functional and powerful than ever before.
Snapshots: The Snapshot feature is another key new addition to the MixConsole, making it easy to create alternate mix versions and compare instantly. Simply click the Snapshot button to save the current mixer settings (up to 10 Snapshots per project), then feel free to go off on any audio tangent you like, knowing you have a safety net to return to. You can recall the entire mix, or only selected channels, and you can even only recall certain sections of the mixer, like EQs, pans, sends, etc. Time stamps and a notes section will help you keep this very powerful feature organized.
A couple other small but significant additions have been made to the MixConsole. Creating and sending to sidechain inputs has been streamlined and can be done solely from the target plugin window, and you also can now display the plugin latency on each track with the Latency Monitor.
New Sounds and Samples: As usual, Steinberg upgraded the production tools along with the technical side, including 5GB of new sounds and loops from producers such as The Beat Butcha, Florian Meindl, and Allen Morgan. This now raises the number of included sample packs to 18(!)—all easily browsable via the MediaBay or the handy Media Tab in your Project Window.
There are a wide range of sounds from Boom Bap Hip-Hop drums to Ambient pads to Pop/Rock guitars and basses—plenty to cover all your multi-genre needs. Groove Agent 5 SE brings even more new sounds to the table, along with an updated GUI, and a new acoustic drum kit called “The Kit.”
To Be Critical
With each subsequent update, Cubase becomes more and more complete, and there is honestly rather little to complain about. I do however have a few items on my wish list that I thought I’d mention.
Updating the External FX functionality would be a welcome addition. Hybrid mix rigs that combine DAWs with analog outboard gear have become very common, and one of the most underrated features of Cubase has long been how it handles external hardware FX. Using the I/O of your interface, you can insert your hardware like any plugin. Each External FX plugin has input and output gain controls and a ping feature to compensate for delay caused by the I/O conversion. This system works great, but hasn’t seen much attention in any recent updates.
The real world knobs on external hardware are outside of Cubase’s control, but some basic automation for bypass and gain control would also be a welcome addition. Being able to use stereo hardware as dual mono inserts would be handy too. Currently, an external effect must either be created as stereo or two mono effects that require additional routing to be used as linked stereo.
I also think Cubase can benefit from making marker tracks visible in the Sample Editor. I’m no software engineer by any means, but I imagine this wish might be on the simpler side. A few revisions back, Cubase began allowing multiple marker tracks per project—a great way to keep track of multiple things on your timeline. You could have song form on one marker track, drum edits to do on another, pending vocal edits on a third, and so on. An amazing addition (especially for single monitor users) would be making any or all of those marker tracks visible in the Sample Editor window, because at the moment, one must switch back to the Project Window to see these.
Summing it Up
In the arena of music software design, it can be hard for your product to stand out, even for veterans of the game such as Steinberg. But Cubase has retained a solid foothold with reliable and great sounding features, and version 10 is no different. Steinberg has paid attention to not only tools that are important to modern music professionals, but also to the speed and efficiency with which they must be used.
If you are new to Cubase, the $559.99 price tag is still a bargain for this amount of functionality, and if you are cross-grading from another software platform, the cost is even lower. If you’re a previous Cubase user, the upgrade cost is even further reduced to the point of being a true no-brainer, at least to this longtime user.
Quality, speed, and flexibility are paramount in music production, and Cubase 10 delivers on all fronts.
Please note: When you buy products through links on this page, we may earn an affiliate commission.


